✅ Introduction – Why iPhone Accessibility Features Aren’t Just for Accessibility
🔓 Unlock the Hidden Power of iOS You Never Knew You Had
When most people hear the word “accessibility,” they immediately think of features designed exclusively for users with disabilities.
But what many iPhone users don’t realize is that Apple’s accessibility tools aren’t just about inclusivity—they’re also secret productivity hacks that can totally revolutionize how you use your device daily.
Whether you’re a multitasking pro, a busy entrepreneur, or just someone who wants to get more done with fewer taps, these iPhone accessibility tips can truly elevate your iOS experience.
With each new iOS update, Apple continues to roll out hidden gems and underutilized features that remain buried deep within your Settings menu.
These aren’t gimmicks—they’re practical, time-saving solutions that can streamline your daily habits, enhance usability, and help you interact with your iPhone in new, intuitive ways.
💡 From voice commands and screen readers to automation and tap shortcuts, there’s a suite of iOS hidden tools waiting for you to explore.
Let’s be honest—you probably aren’t using your iPhone to its full potential.
Most users only scratch the surface of what their device is capable of.
But with a little bit of guidance (and the right settings toggled on), you can transform your iPhone into a personalized powerhouse.
🎯 Why You Should Pay Attention to iPhone Accessibility Tools
These tools are not just optional extras—they can be game-changers for:
- 🔁 Faster navigation when your hands are full
- 🔊 Hands-free usage during workouts or cooking
- 🔍 Better visibility in low-light or small-text environments
- 🧠 Cognitive support for those with focus or reading challenges
- 📲 Touch-free interactions when buttons are unresponsive
- 🔔 Smart alerts for critical environmental sounds
Whether you want to boost efficiency, customize your interface, or discover new ways to interact with your iPhone, these iOS hidden tools give you the flexibility to design your smartphone experience around your needs—not the other way around.
📈 Boost Performance & Productivity with Built-In Apple Features
Many iPhone power users already use tools like Shortcuts and Siri automation.
But did you know you can trigger a screenshot by double-tapping the back of your phone?
Or make your iPhone read aloud your screen content automatically?
Or even get an alert when your baby cries or a doorbell rings—without touching your phone at all?
These aren’t third-party apps or advanced hacks.
They’re native iOS features that are already installed on your device—you just haven’t unlocked them yet.
And that’s what this guide is all about.
✅ What You’ll Learn in This Blog Post:
By the end of this article, you’ll discover:
- 🔎 The 7 most powerful and underrated iPhone accessibility features
- 📋 How to activate and customize each tool
- ⚡ Practical examples for real-life use
- 💡 Bonus hacks that combine multiple features for maximum efficiency
We’ll cover everything from Back Tap shortcuts to Sound Recognition alerts, and we’ll break it down in clear, easy-to-follow steps.
So whether you’re tech-savvy or just getting started, this is your opportunity to take full control of your device.
🔥 Don’t Settle for a Basic iPhone Experience – Level Up Now
You spent a lot of money on your iPhone—isn’t it time you used it like a pro?
✨ Explore the tools Apple quietly included that most users overlook.
Stay ahead of the curve, simplify your life, and boost your productivity starting today.
👉 Keep reading as we reveal the 7 hidden iOS tools that will completely change the way you use your iPhone.
Ready to unlock your iPhone’s full power? Let’s dive in! 🚀
✅ 1. Back Tap – Your iPhone’s Secret Shortcut Button
👆 Tap the Back of Your iPhone to Unlock Hidden Power
Imagine double-tapping the back of your iPhone and instantly taking a screenshot, launching your favorite app, or toggling on Do Not Disturb mode—without even touching the screen.
Welcome to Back Tap, one of the most underrated and powerful iPhone accessibility tips that turns the back of your phone into a smart shortcut button.
This feature is especially helpful if you want quicker access to essential actions, improve one-handed use, or simply reduce the number of taps needed to get things done.
And best of all—it’s completely customizable.

✅ What is Back Tap in iOS?
Back Tap is part of Apple’s AssistiveTouch suite, introduced in iOS 14 and available in all later versions.
It allows you to trigger actions by double-tapping or triple-tapping the back of your iPhone.
You can assign these taps to perform tasks like:
- 📸 Take a screenshot
- 🧭 Open Control Center
- 🔦 Turn on flashlight
- 🛑 Launch Shortcuts
- 🗣️ Activate Siri
- 🧩 Run custom automation sequences
- 📱 Open specific apps (like your favorite productivity app)
- ✍️ Start Voice Memos
Back Tap works using the built-in accelerometer and gyroscope sensors that detect physical taps on your device—even through a case.
It’s one of the most innovative iOS hidden tools that makes using your iPhone faster, smarter, and easier.
🛠️ How to Enable Back Tap on iPhone (Step-by-Step)
Here’s how to turn on Back Tap and make your iPhone more responsive to your needs:
- Go to: Settings
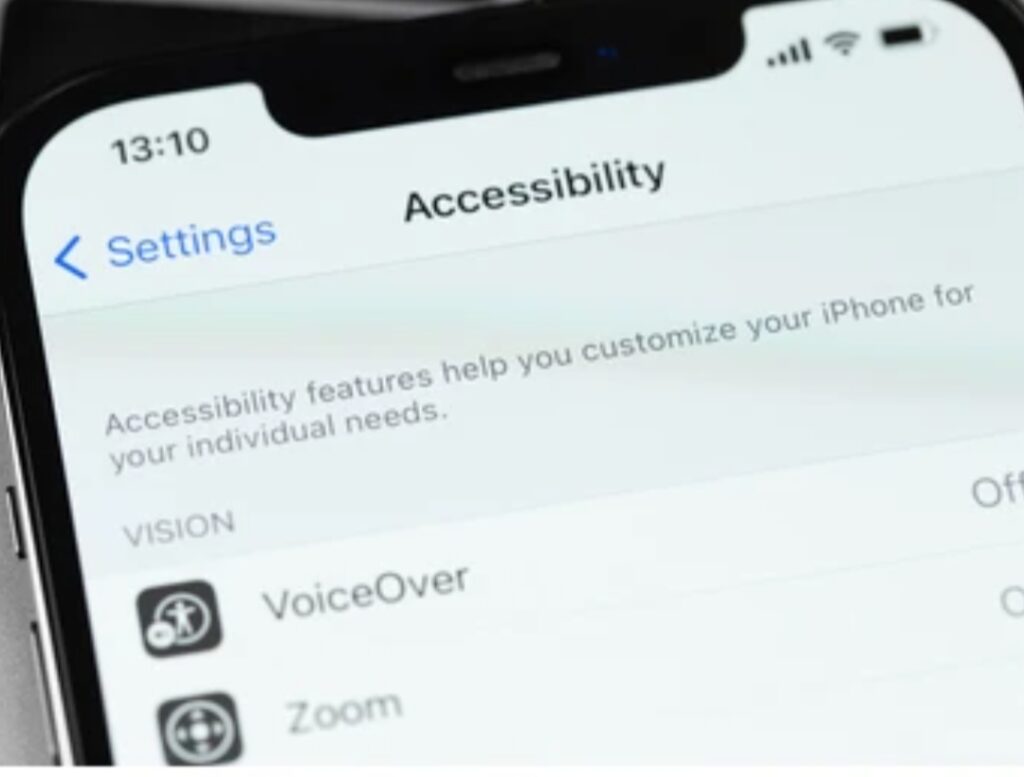
- Tap on Accessibility
- Under Physical and Motor, tap Touch
- Scroll down and select Back Tap
- Choose between:
- Double Tap
- Triple Tap
- Double Tap
- Assign your preferred action from the list of available system options or Shortcuts
💡 Pro Tip: Want to open your camera instantly without fumbling with buttons? Assign “Open Camera” to Double Tap. Perfect for capturing moments quickly!
🎯 Why Back Tap Is a Must-Use for Every iPhone User
Back Tap goes beyond accessibility—it’s a full-fledged productivity enhancer.
Whether you’re on the move, juggling tasks, or trying to streamline your digital routine, Back Tap can help you:
- ✅ Perform routine actions faster
- ✅ Reduce strain from repetitive gestures
- ✅ Navigate your iPhone more efficiently
- ✅ Use one hand or no hands at all
- ✅ Replace broken hardware buttons temporarily
- ✅ Trigger custom automations using the Shortcuts app
This feature is especially valuable for users who want to access features without waking the screen or navigating through multiple menus.
It’s also perfect for those with limited mobility or motor impairments, making it one of the smartest additions to Apple’s Accessibility suite.
📌 Bonus: Combine Back Tap with the Shortcuts App
Want to take things to the next level?
Pair Back Tap with the Shortcuts app and create your own powerful automations.
For example:
- 💤 Set a Double Tap to launch a “Sleep Mode” shortcut: Enables Do Not Disturb, dims brightness, and plays calming music.
- 🚗 Use Triple Tap to trigger a “Driving Mode” shortcut: Starts GPS, sends ETA, opens Spotify.
- ☕ Triple Tap for a “Morning Routine”: Launch calendar, weather app, and reminders.
The possibilities are endless—and fully customizable to suit your lifestyle.
🔓 Unlock Efficiency with Just a Tap
Back Tap is not just a cool trick—it’s a game-changing iOS hidden tool that empowers you to personalize your iPhone experience like never before.
If you’re looking to simplify your routine and take control of your device, this is one setting you absolutely need to activate.
👉 Try assigning a Back Tap shortcut today and see how much smoother your iPhone usage becomes.
💡 You’ll wonder how you ever lived without it.
✅ 2. Voice Control – Hands-Free Navigation Like a Pro
🗣️ Take Command of Your iPhone Using Only Your Voice
What if you could use your iPhone without touching it—scroll, swipe, tap, open apps, or even type—using only your voice?
That’s exactly what Voice Control allows you to do.
This underrated gem in the iPhone accessibility tips arsenal turns your device into a fully voice-activated assistant that gives you total hands-free control over almost every action.
Whether you’re cooking, driving, exercising, or just want to reduce screen time, Voice Control offers a powerful, efficient way to operate your iPhone without lifting a finger.
And it’s not Siri—it’s smarter and far more flexible.

✅ What Is Voice Control on iPhone?
Voice Control is an advanced iOS hidden tool designed for users who need or prefer a touch-free interface.
Introduced in iOS 13 and refined in newer iOS versions, this feature lets you use spoken commands to control nearly everything on your screen.
Unlike Siri, which handles simple queries and tasks, Voice Control is a full input method that recognizes precise commands for:
- 📲 Opening and closing apps
- ⌨️ Typing and dictation
- 🎯 Tapping buttons and links
- 🔁 Swiping, scrolling, zooming
- 🧠 Custom gestures
- ✍️ Editing text (e.g., “Replace hello with hi”, “Select previous word”)
You can even use numbered labels to interact with screen elements visually, making it incredibly intuitive—even for beginners.
🛠️ How to Turn On Voice Control on Your iPhone
Here’s how to enable this powerful iPhone hands-free feature:
- Open: Settings
- Tap Accessibility
- Select Voice Control under “Physical and Motor”
- Tap Set Up Voice Control (only needed the first time)
- Toggle Voice Control ON
💡 Once enabled, you’ll see a blue microphone icon in the top-left corner of your screen when it’s listening.
From here, just say what you want your iPhone to do.
Try basic commands like:
- “Open Safari”
- “Swipe down”
- “Tap Photos”
- “Scroll up”
- “Go home”
- “Take screenshot”
- “Tap 3” (if using numbered labels)
🎯 Who Should Use Voice Control?
Voice Control isn’t just for users with physical impairments—it’s an excellent productivity tool for:
- 🔁 Multitaskers who need hands-free iPhone control
- 🏃 People on the move (e.g., running, commuting, driving)
- 🧘 Users with RSI or finger fatigue
- 👓 Visually impaired users needing screen assistance
- 👩💻 Power users looking for advanced automation and control
If you’ve ever tried to use your iPhone while cooking, cleaning, or holding something—you already know how helpful this feature can be.
🧠 Pro Tips to Maximize Voice Control Usage
To get the most out of this iOS hidden gem, try the following:
- ⚙️ Customize Commands: Create your own voice phrases to perform tasks
- 🧩 Integrate with Shortcuts: Launch complex routines with a single command
- 🔢 Use Numbered Overlays: Navigate unfamiliar apps with screen numbers
- 🌐 Switch Languages: Use Voice Control in multiple supported languages
- 🗒️ Text Dictation: Replace typing with accurate real-time voice input
✨ For example: Say “Dictate” then start speaking your message—your iPhone will type every word.
And yes, Voice Control works offline, meaning you can use it anytime, anywhere—even without an internet connection.
💬 Voice Control Is Like Having a Personal Assistant in Your Pocket
It’s time to go beyond Siri and unlock the real power of voice navigation.
Once you activate Voice Control, your iPhone becomes a tool that adapts to you, not the other way around.
👉 Try turning it on for a day—you’ll be amazed at how much more productive and efficient your smartphone experience becomes.
No swipes. No taps. Just your voice. 🎙️
✅ 3. Magnifier – Your Built-In Digital Magnifying Glass
🔍 Zoom In on Life’s Smallest Details with iPhone’s Hidden Magnifier Tool
Have you ever struggled to read the fine print on a document, product label, or menu in dim lighting?
If so, you’re not alone.
But here’s the good news: your iPhone already comes with a built-in digital magnifying glass that most people don’t even know exists.
This powerful iOS hidden tool, called Magnifier, can turn your phone’s camera into a high-powered zoom lens, letting you see the tiniest text and objects with crystal clarity.
Whether you’re reading prescription labels, scanning serial numbers, or examining product details, Magnifier is a must-have feature that makes your iPhone even smarter.

✅ What Is the Magnifier Feature on iPhone?
Magnifier is an advanced iPhone accessibility tool designed to help users enlarge objects or text using the iPhone’s camera and on-screen controls.
It’s like having a portable magnifying glass in your pocket—with brightness adjustment, contrast filters, freeze frame, flashlight, and even people detection features for visually impaired users.
Unlike simply zooming in with the Camera app, Magnifier offers far more control and precision, making it perfect for both daily convenience and accessibility needs.
🛠️ How to Turn On and Use the iPhone’s Magnifier
Follow these simple steps to activate and use Magnifier on your iPhone:
- Go to: Settings
- Tap Accessibility
- Tap Magnifier
- Toggle the Magnifier switch ON
- Once enabled, you can:
- Access Magnifier quickly by triple-clicking the side button, or
- Add it to your Control Center for faster access
- Access Magnifier quickly by triple-clicking the side button, or
To add it to Control Center:
- Go to Settings > Control Center
- Tap the green plus icon next to “Magnifier”
- Swipe down from the top-right of your screen and tap the magnifying glass icon to launch
Once it’s open, you can:
- Zoom in/out using the slider
- Toggle flashlight for better lighting
- Freeze frame to analyze an image
- Apply filters for color blindness or visual clarity
- Save or share the magnified image if needed
👁️ Who Should Use Magnifier?
Magnifier is one of those iPhone accessibility tips that’s useful for literally everyone.
Here’s who can benefit from it the most:
- 🧓 Older adults needing help reading fine print
- 👁️ Visually impaired users requiring object enlargement
- 🧾 Students reading detailed diagrams or documents
- 🛠️ DIYers and technicians checking wires, screws, or labels
- 🛒 Shoppers reading expiration dates or ingredients
- 👨💻 Office workers scanning barcodes or labels
It’s also extremely helpful for emergency use—like reading instructions on medicine bottles or checking details in low light.
🧠 Pro Tips to Get More from the Magnifier Tool
Here’s how to maximize the value of this hidden iOS feature:
- 🌗 Use color filters to increase contrast for easier reading
- 🔦 Turn on flashlight in dark environments for better clarity
- 📸 Freeze frames to take your time examining without needing to hold the phone still
- 📥 Save magnified images for reference or sharing
- 🚶 Use People Detection (for iPhones with LiDAR): helps visually impaired users sense when someone is nearby
💡 Did you know? You can assign Magnifier to Back Tap for instant access—double-tap the back of your phone and open the Magnifier in seconds.
📌 Magnifier Is More Than Accessibility—It’s Pure Convenience
The best part? You don’t need a third-party app or additional tools.
Magnifier is already baked into your iPhone—and once you start using it, you’ll wonder how you lived without it.
Whether you’re solving daily inconveniences or supporting vision challenges, this simple tool delivers instant visual assistance at your fingertips.
✅ 4. Spoken Content – Let Your iPhone Read to You
🗣️📱 Turn Text into Speech and Let Your iPhone Do the Reading for You
Imagine sitting back while your iPhone reads out loud your emails, text messages, news articles, or even an entire ebook—all without lifting a finger.
That’s exactly what the Spoken Content feature delivers.
This highly underrated part of Apple’s iPhone accessibility tips is designed to help users who struggle with reading, visual fatigue, or simply want to absorb content hands-free.
It’s more than just a tool—it’s a smart reading assistant built into every iPhone running iOS 13 or later.
And guess what? You don’t need any third-party apps to use it.

✅ What Is Spoken Content on iPhone?
Spoken Content is a built-in iOS hidden tool that enables your iPhone to read aloud on-screen text using natural-sounding voices.
Whether you’re reading a website, PDF, Notes, or a lengthy email, this tool can narrate the content in real time, giving your eyes a break while keeping you productive.
It includes powerful features like:
- 🔊 Speak Selection – Highlight and tap to hear text spoken aloud
- 📄 Speak Screen – Swipe down with two fingers to read the entire screen
- 🎙️ Typing Feedback – Hear letters, words, or predictions as you type
- 🎧 Voices & Speeds – Choose from multiple voices and adjust reading speed
📌 It’s incredibly helpful for students, researchers, professionals, and multitaskers who prefer audio-based learning or need visual relief.
🛠️ How to Turn On and Customize Spoken Content
To activate Spoken Content on your iPhone:
- Open Settings
- Tap Accessibility
- Scroll to Spoken Content
- Toggle on the following options:
- ✅ Speak Selection
- ✅ Speak Screen
- ✅ Typing Feedback (optional)
- ✅ Speech Controller (optional for on-screen control)
- ✅ Speak Selection
From here, you can:
- Adjust voice and speaking rate
- Enable highlighting to follow along as text is read
- Turn on Auto Speak for auto-reading content
To activate Speak Screen quickly:
👉 Just swipe down with two fingers from the top of the screen, and your iPhone will instantly start reading everything visible.
🎯 Who Benefits Most from Spoken Content?
Spoken Content is one of the most versatile iPhone accessibility tips, useful for:
- 👩🎓 Students needing audio narration for studying
- 👀 People with low vision or visual fatigue
- 🧠 Users with learning disabilities or dyslexia
- 🏃♂️ Multitaskers who want to consume information on the go
- 📖 Avid readers who want to convert ebooks to audiobooks
- 🧘 Mindful users looking to reduce screen time and eye strain
Whether you’re commuting, cooking, relaxing, or exercising—this tool gives your eyes a break while still letting your brain work.
🧠 Pro Tips to Supercharge Your Spoken Content Experience
To get the most out of this iOS hidden tool, try these expert tips:
- 🎧 Use earbuds or AirPods for private, high-quality narration
- 🌐 Read web pages hands-free while multitasking
- 📝 Proofread your writing aloud using Speak Selection
- 🗣️ Change voices to British, Australian, or custom dialects for variety
- 🕹️ Use Voice Control in combo with Speak Screen for full automation
💡 Combine this with Back Tap to trigger Speak Screen by double-tapping the back of your iPhone—no swiping required!
📚 Turn Your iPhone into an Instant Audiobook Reader
Why strain your eyes or read manually when your iPhone can do it for you?
With Spoken Content, you gain the freedom to listen to anything—from work documents to bedtime stories—anytime, anywhere.
👉 Try enabling Speak Screen today and let your iPhone start reading your world aloud.
🗣️ Once you start using this feature, you’ll wonder why you didn’t try it sooner.
✅ 5. Sound Recognition – Your iPhone Can Hear for You
👂🔔 Let Your iPhone Listen for Important Sounds – Even When You Can’t
Imagine your iPhone alerting you when it hears a doorbell ring, a baby crying, or even a fire alarm going off—all without you having to listen yourself.
That’s the magic behind Sound Recognition, one of the smartest and most underutilized iPhone accessibility tips available today.
Originally developed to assist users who are deaf or hard of hearing, this feature is now used by millions of iOS users who want their devices to detect and notify them of important sounds in their environment.
Whether you’re wearing headphones, in a noisy area, or simply want peace of mind, Sound Recognition transforms your iPhone into a proactive listening device—a silent guardian for your surroundings.

✅ What Is Sound Recognition on iPhone?
Sound Recognition is an advanced iOS hidden tool that enables your iPhone to continuously listen for specific sounds in the background and send you instant alerts when those sounds are detected.
It works entirely on-device (no internet connection required), and can recognize over 15 different sound types, including:
- 🚨 Fire and smoke alarms
- 🚪 Doorbell rings
- 🍼 Baby crying
- 🐶 Dog barking
- 🗣️ Shouting or loud voices
- 🧱 Glass breaking
- 🚿 Running water
- 🔔 Appliance beeps
- 🚗 Car horn
Once enabled, your iPhone will display a notification alert—vibrating and lighting up the screen when a sound is detected.
🔒 Privacy Note: All processing happens locally. Apple does not record or store any audio, ensuring your privacy and security remain intact.
🛠️ How to Enable Sound Recognition on iPhone
Here’s how to turn this game-changing feature on:
- Open Settings
- Tap Accessibility
- Tap Sound Recognition
- Toggle Sound Recognition ON
- Tap Sounds and select the sound types you want your iPhone to listen for
You’ll now receive real-time alerts when the selected sounds are detected—whether your phone is locked or in use.
💡 For faster access, you can also add Sound Recognition to Control Center by going to:
Settings > Control Center > Add “Sound Recognition”
🎯 Who Should Use Sound Recognition?
This feature is a must-use iPhone accessibility tip for:
- 👂 Hearing-impaired users who need visual/vibrating alerts
- 👶 Parents monitoring babies or toddlers
- 🎧 Headphone users who may miss environmental sounds
- 💻 Remote workers who want alerts while focused
- 🏠 Home alone users looking for added peace of mind
- 😴 Heavy sleepers who don’t hear alarms
Even if you’re not hearing-impaired, Sound Recognition can be a life-enhancing safety tool, especially if you often wear noise-canceling headphones or work in busy spaces.
🧠 Expert Tips to Make the Most of Sound Recognition
Make this feature even more powerful by combining it with other iOS tools:
- ✅ Pair with Flash Alerts: Use LED Flash alongside Sound Recognition for double visual cues
- ✅ Use Focus Mode: Stay in the zone while still getting notified of critical sounds
- ✅ Trigger Automations: Use Shortcuts to perform tasks when specific sounds are heard (for advanced users)
- ✅ Use with Apple Watch: Get tap alerts on your wrist for instant awareness
- ✅ Set Custom Sounds (in beta with future iOS): Stay tuned for user-defined triggers
✨ Example use case: You’re working with headphones on and don’t hear your front doorbell—but your iPhone vibrates and shows a “Doorbell Sound Detected” alert. You never miss a delivery again.
🧠 It’s Like Giving Your iPhone Super Hearing
Sound Recognition is one of the most powerful iOS hidden tools, and yet many users still overlook it.
Whether for accessibility, productivity, or safety, it transforms your iPhone into a silent listener that helps protect and inform you in real time.
👉 Enable this feature today and discover just how much more your iPhone can do—without you even asking.
🛡️ Stay aware. Stay safe. Let your iPhone do the listening.
✅ 6. AssistiveTouch – Use iPhone Without Pressing Buttons
🤖📲 Control Your iPhone With a Floating Button – No More Physical Pressing Needed
Have you ever wished for an easier way to control your iPhone—without constantly pressing physical buttons or struggling with awkward gestures?
With AssistiveTouch, you can do exactly that.
This powerful and widely loved tool is one of the most essential iPhone accessibility tips—but surprisingly, many users still don’t know it exists.
AssistiveTouch adds a customizable on-screen button that lets you perform nearly every function your iPhone can do—without pressing a single physical button.
Whether you’re dealing with a damaged Home button, want to protect your power button, or need faster shortcuts for everyday tasks, AssistiveTouch is your go-to iOS hidden tool.

✅ What Is AssistiveTouch on iPhone?
AssistiveTouch is a virtual touch interface that adds an on-screen floating button to your iPhone, giving you easy access to:
- 🏠 Home button
- 🔄 App Switcher
- 🔈 Volume controls
- 🔒 Lock screen
- 📸 Screenshot
- 📱 Control Center
- 🛠️ Custom gestures
- 🎯 Shortcuts and automations
Once enabled, you’ll see a circular floating button on your screen that stays accessible across all apps and screens.
It’s perfect for users with physical challenges, devices with broken buttons, or those who want more efficient and ergonomic control of their iPhone.
🛠️ How to Enable AssistiveTouch on iPhone
Activating this feature is simple:
- Go to Settings
- Tap Accessibility
- Tap Touch
- Tap AssistiveTouch
- Toggle AssistiveTouch ON
Once it’s active, a floating button will appear on your screen.
Tap it to open a menu of commands that you can fully customize based on your preferences.
Want to take a screenshot with one tap?
Launch Siri?
Adjust volume without using side buttons?
You can do it all here.
🧩 Customizing Your AssistiveTouch Menu
This is where AssistiveTouch really shines.
You can:
- ✏️ Add or remove actions
- ⚡ Rearrange buttons in the menu
- 🧠 Assign custom gestures (like pinch, swipe, etc.)
- 🚀 Integrate Siri Shortcuts and automations
- 📲 Create a custom Top-Level Menu with up to 8 icons
Want a single-tap shortcut to enable Dark Mode or open your favorite app instantly?
Just add that action to your AssistiveTouch menu—no extra tools or apps needed.
💡 You can even adjust the idle opacity and placement of the button to make it less intrusive on your screen.
🎯 Who Should Use AssistiveTouch?
This iOS hidden tool is a game-changer for:
- 🔁 Users with limited mobility or motor skill challenges
- 📵 People with broken or unresponsive buttons
- 🧘 Minimalists who want fewer physical interactions
- ⚙️ Tech-savvy users looking to customize interactions
- 🔋 Battery savers avoiding hardware wear & tear
Whether you want to simplify your navigation, protect your hardware, or just love having more control, AssistiveTouch delivers smooth, customizable convenience.
🧠 Pro Tips to Maximize AssistiveTouch’s Potential
- ✨ Create a “Quick Actions” menu for common tasks like Lock Screen, Screenshot, and App Switcher
- 📥 Use AssistiveTouch in combination with Back Tap (e.g., double tap to open the AssistiveTouch menu)
- 💬 Trigger Siri or custom Shortcuts directly from the AssistiveTouch menu
- 🧩 Pair with Guided Access or Focus Mode for kids or productivity sessions
- 🖐️ Set up custom gestures like multi-finger swipes or custom taps
🎮 Take Full Control Without Lifting a Finger
AssistiveTouch isn’t just an accessibility setting—it’s an upgrade to how you experience your iPhone.
Once enabled and personalized, you’ll wonder why you didn’t activate it sooner.
👉 Enable AssistiveTouch now and discover a smarter, touch-free way to control your iPhone—right from the screen.
Save time. Reduce effort. Tap into total control. 💡
✅ 7. Reduce Motion and Transparency – Speed Up Your iPhone
⚡📱 Make Your iPhone Feel Faster, Cleaner, and Easier on the Eyes
Ever noticed a slight delay when switching between apps or opening menus?
That swooping animation might look nice, but it also adds lag, drains battery, and can even cause motion sickness for some users.
Thankfully, there’s a hidden feature in iOS that can solve this instantly—Reduce Motion and Transparency.
These lesser-known iPhone accessibility tips can dramatically improve performance, reduce distractions, and even save battery life.
Whether you’re using an older device or just want snappier, cleaner transitions, turning off unnecessary animations and blur effects will help your iPhone run smoother.
✅ What Are “Reduce Motion” and “Reduce Transparency” in iOS?
These two iOS hidden tools are part of the Accessibility > Display settings that let you tone down visual effects:
- 🌀 Reduce Motion minimizes screen animations like parallax, zooming, and bounce effects
- 💎 Reduce Transparency removes background blurs in menus and Control Center, replacing them with solid colors for improved legibility
Together, they create a more minimalist and performance-focused interface—especially useful if you value speed, clarity, or have visual sensitivity.
💡 You’re not disabling any core functions—just streamlining the visual transitions for a faster, cleaner user experience.
🛠️ How to Enable Reduce Motion and Transparency
To activate these performance-boosting tools:
- Open Settings
- Tap Accessibility
- Go to Motion
- Toggle Reduce Motion ON
Next:
- Return to Accessibility
- Tap Display & Text Size
- Scroll down and toggle Reduce Transparency ON
That’s it!
Your iPhone will now feel more direct, snappy, and responsive—especially on older models.
🎯 Who Should Use Reduce Motion & Transparency?
These settings are incredibly useful for:
- ⚡ Users with older iPhones looking to improve speed
- 📉 Anyone with battery performance concerns
- 🧠 People prone to motion sickness or vertigo
- 👀 Users with visual sensitivities or migraines
- 🎯 Productivity lovers who want minimal distractions
- 🔋 Power users aiming for longer battery life and smoother performance
🧠 Expert Tips to Boost Your iPhone with These Tools
- 🧩 Combine with Low Power Mode for extended battery performance
- 🚀 Pair with AssistiveTouch or Back Tap to access faster navigation
- 👁️ Enable Bold Text + Increase Contrast for sharper on-screen visibility
- 📲 Use in Focus Mode to create a distraction-free environment
- 📵 Disable Background App Refresh for additional speed gains
⚠️ Pro Tip: If you experience motion sickness from app animations, Reduce Motion is a must—especially in apps like Messages, where bubble animations can trigger discomfort.
🚀 Instantly Speed Up and Simplify Your iPhone Experience
By enabling Reduce Motion and Transparency, you’re not just tweaking settings—you’re creating a smoother, more focused environment that enhances both performance and comfort.
These aren’t just cosmetic changes—they’re hidden iPhone performance hacks that many pros swear by.
👉 Turn them on now and experience the speed boost for yourself.
Less motion. More momentum. Faster results. 🔧⚡
✅ FAQs – Your Questions About iPhone Accessibility Answered
💬 Have questions about iPhone accessibility tools? You’re not alone.
Below are quick, clear, and helpful answers to some of the most frequently asked questions from users who want to make the most of their iOS hidden tools and iPhone accessibility tips.
❓ What are iPhone accessibility features used for?
iPhone accessibility features are designed to help users with vision, hearing, mobility, and cognitive challenges interact with their devices more easily.
However, many of these tools—like Back Tap, Voice Control, and Sound Recognition—are now used by all types of users to enhance convenience, productivity, and personalization.
❓ Is AssistiveTouch only for disabled users?
No.
While AssistiveTouch is a fantastic feature for users with limited motor control, it’s also widely used by everyday iPhone users to:
- Replace broken buttons
- Save wear on physical keys
- Create one-tap shortcuts
- Make navigation faster and more ergonomic
❓ How do I make my iPhone easier to use?
You can make your iPhone easier to use by enabling tools like:
- ✅ Back Tap for quick actions
- ✅ Voice Control for hands-free navigation
- ✅ Spoken Content to read screen text aloud
- ✅ AssistiveTouch for one-tap controls
- ✅ Reduce Motion & Transparency to speed things up
Head to Settings > Accessibility to explore these options.
❓ Can I use iPhone accessibility features to save battery?
Yes.
Some accessibility features—like Reduce Motion, Reduce Transparency, and limiting background animations—can help preserve battery life by simplifying system graphics and reducing power use.
These settings are often recommended for older iPhones or users looking for extra efficiency.
❓ Is Sound Recognition available offline?
Yes.
Sound Recognition works 100% offline.
It uses your iPhone’s built-in neural engine to detect specific sounds—like alarms, dog barks, or doorbells—and sends you alerts instantly without needing Wi-Fi or mobile data.
❓ Can I customize what my iPhone reads aloud?
Absolutely.
Under Settings > Accessibility > Spoken Content, you can choose:
- What text is spoken
- Which voice is used
- Reading speed
- Highlighting style
- Feedback when typing
You can even swipe down with two fingers to make your iPhone read an entire screen aloud—a feature many users love.
❓ Will enabling accessibility features slow down my phone?
No.
In fact, some features—like Reduce Motion and Reduce Transparency—can actually make your iPhone feel faster by eliminating unnecessary animations.
They’re great for boosting responsiveness, especially on older devices.
❓ Can I use multiple accessibility features at the same time?
Yes.
Most accessibility tools are designed to work together.
For example, you can use Back Tap to launch Magnifier, or combine Voice Control with Spoken Content for a fully hands-free experience.
Feel free to experiment with combinations that suit your workflow and needs.
👉 Still have questions?
Drop them in the comments or visit Apple’s official Accessibility Hub for more insights.
Your iPhone is packed with powerful tools—you just have to know where to look.
✅ Conclusion – Unlocking the Hidden Power of Your iPhone
📱💡 Your iPhone is more than just a smartphone—it’s a highly customizable, assistive, and powerful digital assistant hiding in plain sight.
Most users never scratch the surface of what their iPhone can really do.
But now that you’ve discovered these 7 incredibly useful iPhone accessibility features, you’re equipped to unlock new levels of convenience, efficiency, and control in your daily digital life.
From hands-free navigation with Voice Control to instant audio alerts with Sound Recognition, these tools aren’t just for users with disabilities—they’re for everyone who wants to work smarter, not harder.
✨ Here’s a Quick Recap of the iPhone Accessibility Tools You Should Be Using:
- ✅ Back Tap – Launch shortcuts with a double or triple tap
- ✅ Voice Control – Navigate your iPhone with voice-only commands
- ✅ Magnifier – Turn your camera into a digital zoom lens
- ✅ Spoken Content – Let your iPhone read screen text aloud
- ✅ Sound Recognition – Get alerts when your iPhone hears important sounds
- ✅ AssistiveTouch – Use your iPhone without pressing buttons
- ✅ Reduce Motion & Transparency – Speed up performance and reduce visual clutter
Each of these features is easy to set up, highly customizable, and capable of transforming your iPhone into a more powerful, more personal tool.
🔥 Ready to Level Up Your iPhone Experience?
Don’t just read about these tips—try them out right now.
👉 Go to Settings > Accessibility and begin enabling the features that match your lifestyle.
You’ll be amazed at how much faster, simpler, and smarter your iPhone becomes.
🛠️ Want More Smart iPhone Hacks?
➡️ Check out our full library of iOS tricks and hidden features here
➡️ Download our free guide: 25 Productivity Hacks Every iPhone User Should Know
➡️ Explore the best iPhone accessories to enhance your setup
💬 Final Thoughts
Apple’s commitment to accessibility has created tools that benefit everyone—from power users to casual texters.
So why not take advantage?
These iPhone accessibility tips and iOS hidden tools are sitting right there in your settings—just waiting to be activated.
✨ You don’t need to buy a new iPhone to get a better experience. You just need to unlock the features your iPhone already has.
🚀 Take the Next Step Now
Boldly explore your Accessibility settings. Customize. Optimize. Personalize.
Because the more you understand your iPhone, the more powerful it becomes in your hands.
✅ Try at least one feature today—and experience the difference for yourself!
You might also like :