Introduction to Google Photos
In today’s digital era, we capture countless photos and videos to preserve precious moments.
However, without proper organization and backup, these memories can easily get lost, scattered across multiple devices, or even deleted accidentally.
This is where Google Photos comes in—a powerful cloud-based photo storage and organization tool designed to help users seamlessly manage, store, and retrieve their digital memories.
Whether you’re using a smartphone, tablet, or computer, Google Photos offers a secure, smart, and AI-powered solution to store your images while keeping them easily accessible across devices.
If you’ve ever wondered how to use Google Photos effectively, this guide will walk you through everything you need to know—from setting up your account to organizing, backing up, and securing your media.
By the end of this article, you’ll be able to maximize Google Photos’ features and ensure that your cherished moments are always safe and well-organized.
Why Google Photos Is the Best Tool for Managing Your Digital Memories
Managing thousands of photos can be overwhelming, but Google Photos simplifies the entire process with automatic backups, AI-powered organization, and seamless sharing options.
Here’s why Google Photos is the ultimate solution for organizing and backing up your digital memories:
1. Unlimited Cloud Storage (With Certain Conditions)
- Google Photos previously offered free unlimited storage for “High Quality” images, but this changed in June 2021 when the 15GB free storage limit was introduced.
- While original quality photos count toward your Google Drive storage, you can still purchase extra storage through Google One for more space.
2. AI-Powered Organization for Easy Searching
- Google Photos automatically categorizes your pictures using facial recognition, location data, and object detection.
- You can search for photos using simple terms like “beach vacation,” “dog,” or even specific dates.
- It also groups similar faces, so you can easily find all pictures of a particular person without manual sorting.
3. Automatic Backups to Prevent Data Loss
- If you’ve ever lost a phone or had a hard drive crash, you know how painful losing precious photos can be.
- Google Photos ensures your memories are never lost by automatically backing up your images to the cloud.
- Even if your device is damaged or stolen, your photos remain safe and accessible from any device.
4. Seamless Cross-Device Access
- Access your photos from any device—whether it’s a smartphone, tablet, or computer—simply by logging into your Google account.
- Google Photos also syncs across devices, ensuring that any changes you make (like edits or deletions) are updated everywhere instantly.
5. Built-In Editing Tools to Enhance Photos
- You don’t need third-party apps to adjust brightness, contrast, or apply filters.
- With Google Photos’ AI-powered Magic Editor and Magic Eraser, you can enhance your images and remove unwanted objects effortlessly.
6. Smart Sharing & Collaboration Features
- Easily share photos and albums with friends and family without needing to send large file attachments.
- Google Photos also lets you collaborate on shared albums, allowing multiple people to upload and view photos in one place.
How Google Photos Stands Out from Other Cloud Storage Services
There are many cloud storage options available, including Apple iCloud, Amazon Photos, and OneDrive.
However, Google Photos remains the top choice for many users due to its AI-powered features, smart organization, and deep integration with Google services.
Here’s how it compares to other cloud storage solutions:
| Feature | Google Photos | Apple iCloud | Amazon Photos | OneDrive |
| Free Storage | 15GB (shared with Google Drive & Gmail) | 5GB | 5GB | 5GB |
| AI-Based Search | ✅ Yes | ❌ No | ❌ No | ❌ No |
| Face Recognition | ✅ Yes | ✅ Yes | ❌ No | ❌ No |
| Automatic Backup | ✅ Yes | ✅ Yes | ✅ Yes | ✅ Yes |
| Built-in Editing Tools | ✅ Yes | ❌ No | ✅ Yes | ❌ No |
| Easy Sharing & Collaboration | ✅ Yes | ❌ No | ✅ Yes | ✅ Yes |
🔹 Google Photos outshines its competitors by providing more free storage, advanced AI organization, and seamless sharing options.
If you want to ensure your photos are backed up, easily searchable, and always accessible, then learning how to use Google Photos is a must.
Who Should Use Google Photos?
Google Photos is perfect for:
✔ Casual users who want a hassle-free way to store and organize their digital memories.
✔ Professional photographers looking for an AI-driven tool to sort through thousands of images.
✔ Families and friends who loe sharing albums and collaborating on shared collections.
✔ Business owners who need a reliable cloud storage solution for product photography or marketing content.
Whether you take photos for personal use or professional purposes, mastering how to use Google Photos will help you stay organized and never lose a single memory.

Why You Should Start Using Google Photos Today
If you’re still relying on traditional hard drives or multiple SD cards to store your pictures, it’s time to switch to Google Photos.
This powerful cloud storage solution ensures your memories are always backed up, organized, and easily accessible from anywhere.
With AI-powered search, facial recognition, and automatic backup features, Google Photos makes it effortless to store, manage, and relive your favorite moments.
🔥 Ready to organize your digital memories effortlessly?
➡️ Start Using Google Photos Today and Never Lose a Memory Again!
Getting Started with Google Photos
Google Photos is one of the most user-friendly and powerful cloud-based storage platforms, but to make the most of it, you first need to set it up correctly.
This section will walk you through how to use Google Photos by setting it up on your device, configuring backup options, and ensuring your photos and videos are stored safely.
Setting Up Google Photos on Your Device
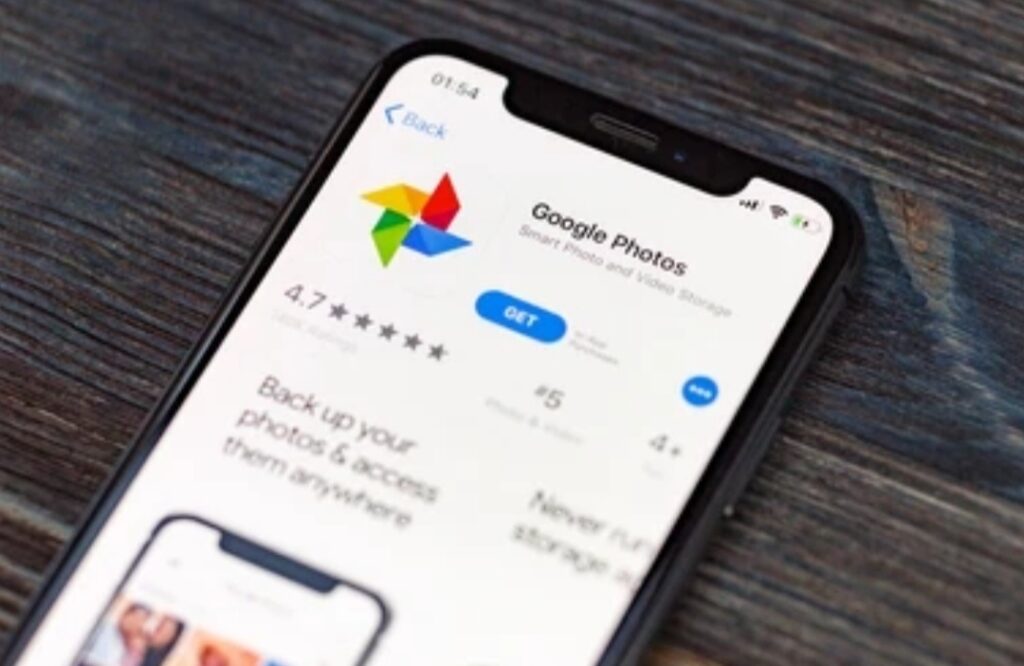
Before you can start using Google Photos, you’ll need to download, install, and set it up on your smartphone or tablet.
The setup process varies slightly depending on whether you’re using an Android or iOS device.
How to Install Google Photos on Android
If you’re using an Android phone or tablet, chances are Google Photos is pre-installed on your device.
However, if you don’t see the app, you can easily download it from the Google Play Store.
Step-by-Step Guide to Install and Set Up Google Photos on Android
1️⃣ Download the App:
- Open the Google Play Store.
- Search for “Google Photos” and select the app from Google LLC.
- Tap Install and wait for the installation to complete.
2️⃣ Open the App and Sign In:
- Launch Google Photos from your app drawer.
- Tap “Get Started” and sign in with your Google Account.
- If you have multiple accounts, choose the one where you want to back up your photos.
3️⃣ Grant Necessary Permissions:
- Google Photos will ask for access to your photos, media, and files.
- Tap “Allow” to grant permission for seamless backups.
4️⃣ Enable Backup & Sync (Recommended):
- You’ll be prompted to turn on Backup & Sync to automatically upload your photos and videos.
- Tap “Turn On” to start syncing your media to Google Photos.
How to Install Google Photos on iPhone or iPad
For iOS users, Google Photos is available on the App Store, and the setup process is just as simple.
Step-by-Step Guide to Install and Set Up Google Photos on iOS
1️⃣ Download the App:
- Open the App Store on your iPhone or iPad.
- Search for “Google Photos” and tap Download.
2️⃣ Sign in with Your Google Account:
- Open the app and tap “Get Started”.
- Sign in with your Google Account (or create one if you don’t have it).
3️⃣ Enable Permissions:
- Google Photos will ask for permission to access your photo library.
- Tap “Allow Access to All Photos” to enable seamless backups.
4️⃣ Turn on Backup & Sync:
- You’ll see a prompt asking if you want to automatically back up your photos.
- Tap “Turn On” to activate this feature and ensure your images are safely stored in the cloud.
✅ Once you’ve completed these steps, Google Photos will be ready to use!
Your pictures and videos will begin syncing, and you’ll have access to them from any device with your Google account.
Configuring Backup and Sync Settings
One of the most powerful features of Google Photos is automatic backup and sync, which ensures your pictures and videos are securely stored in the cloud and accessible from anywhere.
However, configuring the right settings is essential to optimize storage space and control data usage.
How to Enable Backup & Sync in Google Photos
1️⃣ Open Google Photos on your device.
2️⃣ Tap your profile icon in the top-right corner.
3️⃣ Select “Photos settings” from the dropdown menu.
4️⃣ Tap “Backup & Sync” and switch the toggle ON.
Once enabled, Google Photos will automatically upload new photos and videos to your Google account, ensuring they are protected from accidental loss.
Choosing the Right Upload Quality for Your Photos and Videos
Google Photos provides two upload quality options, and choosing the right one depends on your storage needs and image quality preferences.
1️⃣ High-Quality (Storage Saver Mode) – Best for Unlimited Storage
✅ Pros:
✔ Saves storage space by slightly compressing photos and videos.
✔ Ideal for everyday users who want free, unlimited uploads.
✔ Retains good image quality while reducing file sizes.
❌ Cons:
✖ Slight compression may lead to minor quality loss, especially in professional photography.
✖ Videos above 1080p resolution may be downscaled.
Best for users who want to maximize free storage without worrying about image size.
2️⃣ Original Quality – Best for Professional Use
✅ Pros:
✔ Stores photos in full resolution without compression.
✔ Keeps EXIF data (camera settings, metadata, and location details) intact.
✔ Ideal for photographers, designers, or professionals who need high-quality images.
❌ Cons:
✖ Consumes Google Drive storage (counts toward your 15GB free limit).
✖ Large files take longer to upload and may require more data.
Best for users who prioritize quality over storage space and are willing to purchase additional Google One storage if needed.
Managing Your Storage in Google Photos
If you’re worried about running out of space, you can monitor and manage your storage directly from Google Photos.
1️⃣ Open Google Photos and tap your profile picture.
2️⃣ Select “Photos settings” > “Backup & Sync”.
3️⃣ Tap “Manage Storage” to see a breakdown of your storage usage.
4️⃣ If you’re nearing the limit, consider:
- Deleting duplicate photos or unwanted screenshots.
- Clearing blurry images that Google Photos identifies automatically.
- Upgrading to Google One for extra storage.
💡 Pro Tip: You can check your remaining storage space at photos.google.com/storage.
Why Backup & Sync is Essential
✅ Never lose your photos – Automatic backups ensure your memories are safe, even if you lose your device.
✅ Access from anywhere – View, edit, and share your pictures from any device with your Google account.
✅ Save phone storage – Free up space on your device while keeping all your photos stored in the cloud.
🔥 Want to make sure your memories are safe forever?
➡️ Set Up Google Photos Backup & Sync Now!
Organizing Your Photo Library
Once you’ve uploaded your pictures and videos to Google Photos, organizing them efficiently is the key to managing your growing collection.
With features like albums, face grouping, search functionality, and duplicate management, Google Photos makes it easier than ever to categorize, locate, and declutter your images.
In this section, we’ll explore how to use Google Photos effectively to keep your photo library well-organized.
Utilizing Albums for Better Organization
Creating albums in Google Photos is one of the best ways to categorize and organize your images.
Albums help you group photos based on events, people, locations, or themes, making it easier to find and share them later.
How to Create an Album in Google Photos
1️⃣ Open the Google Photos app on your device.
2️⃣ Tap the Library tab at the bottom.
3️⃣ Tap “New album” and enter a name for your album.
4️⃣ Select the photos you want to add and tap “Done.”
💡 Pro Tip: You can create albums for vacations, birthdays, special moments, or work-related photos to keep your library structured.
Automatically Adding Photos to Albums
Manually adding photos to albums can be time-consuming, but Google Photos offers an automatic sorting feature to make things easier.
✅ How to Automatically Add Photos to an Album:
1️⃣ While creating or editing an album, tap “Select people & pets.”
2️⃣ Choose the faces you want to be added automatically.
3️⃣ Google Photos will detect and add new photos of those people to the album.
🚀 Why This is Useful:
✔ Saves time by automatically grouping similar photos.
✔ Ensures albums are always updated with new images.
✔ Perfect for organizing photos of family, friends, or pets.
Leveraging Face Grouping and Labels
Google Photos uses advanced AI technology to recognize faces in your pictures and group them together.
This feature makes it effortless to find photos of a specific person without manually searching through thousands of images.
How to Enable Face Grouping in Google Photos
1️⃣ Open Google Photos and tap your profile picture in the top-right corner.
2️⃣ Go to Photos settings > Group similar faces.
3️⃣ Toggle Face Grouping ON to enable automatic recognition.
💡 Bonus: You can also enable “Show pet faces” to let Google Photos identify and group your pet’s photos!
Assigning Labels for Easier Searching
Once face grouping is enabled, you can label each person’s face to make searching even easier.
✅ How to Assign a Name to a Face Group:
1️⃣ Tap on a face group under the “People & Pets” section.
2️⃣ Tap “Add a name” and enter the person’s name.
3️⃣ Google Photos will now recognize and categorize all past and future photos of this person.
🛠 Why This is Powerful:
✔ Allows quick searches for specific people.
✔ Helps in creating personalized albums.
✔ Works across multiple devices with the same Google account.
Exploring the Search Functionality
One of Google Photos’ most underrated but powerful features is its search tool.
Unlike traditional photo galleries, Google Photos lets you search for images using keywords, locations, and even objects detected in the photo.
How to Search for Photos in Google Photos
1️⃣ Open Google Photos and tap the Search bar at the top.
2️⃣ Type in a keyword related to the photo you’re looking for.
3️⃣ Google Photos will instantly display results based on:
- People & Pets (if face grouping is enabled).
- Places (if location tracking is turned on).
- Objects & Activities (e.g., “beach,” “birthday,” “sunset”)
4️⃣ Tap on a result to view all related images.
💡 Examples of What You Can Search For:
- “Paris” to find all photos taken in Paris.
- “Cake” to locate images with birthday cakes.
- “Hiking” to bring up pictures from outdoor trips.
🚀 Why Google Photos Search is Better Than Traditional Galleries:
✔ Uses AI-powered recognition to detect objects, people, and places.
✔ Works even if photos don’t have manual tags.
✔ Helps find old memories instantly without scrolling endlessly.
Managing Duplicates and Similar Photos
Over time, your photo library can become cluttered with duplicate or similar photos, consuming unnecessary storage space.
Thankfully, Google Photos offers several ways to identify and remove duplicates, keeping your library clean and organized.
Using the “Free Up Space” Feature to Remove Duplicates
If your phone storage is running low, Google Photos can automatically delete local copies of images that have already been backed up.
✅ How to Use Free Up Space:
1️⃣ Open Google Photos and tap your profile icon.
2️⃣ Select “Free up space” from the menu.
3️⃣ Google Photos will scan your library and suggest removable copies.
4️⃣ Tap “Delete” to remove them from your device while keeping them safely stored in the cloud.
Manually Identifying and Deleting Duplicates
Sometimes, Google Photos may not catch all duplicates, so a manual review can help.
✅ Steps to Find and Remove Similar Photos:
1️⃣ Open Google Photos and go to the Search bar.
2️⃣ Type “Screenshots” or “Similar photos” to find repeated images.
3️⃣ Select unnecessary photos and tap the trash icon to delete them.
💡 Pro Tip: Use the Google Photos “Memories” feature to quickly scan through your collection and remove redundant images.
Why Organizing Your Google Photos Library is Essential
✅ Find Photos Instantly – No more endless scrolling through thousands of images.
✅ Save Storage Space – Remove duplicates and organize your library efficiently.
✅ Easier Sharing – Well-organized albums make it simple to share moments with friends and family.
🔥 Want to unlock the full potential of Google Photos?
➡️ Start organizing your photo library today!
Enhancing Photos with Built-in Editing Tools
Google Photos isn’t just a cloud storage platform for your images—it also comes with powerful built-in editing tools to help you enhance your pictures effortlessly.
Whether you’re looking to make quick adjustments or perform advanced AI-powered edits, Google Photos provides a user-friendly yet powerful photo editor that caters to both beginners and professionals.
In this section, we’ll explore how to use Google Photos for editing, including basic adjustments, filters, and AI-powered tools like Magic Editor and Magic Eraser.
Basic Editing Features in Google Photos
Even if you’re not a professional photographer, you can make your photos look stunning with just a few simple adjustments.
Google Photos offers essential editing tools that allow you to tweak your images effortlessly.
How to Access Editing Tools in Google Photos
1️⃣ Open the Google Photos app on your device.
2️⃣ Select the photo you want to edit.
3️⃣ Tap the Edit (slider icon) at the bottom of the screen.
4️⃣ Choose from a variety of editing tools, including Adjust, Crop, Filters, and Markup.
💡 Pro Tip: Always create a copy of your original photo before making edits to avoid losing the original version.
Adjusting Brightness, Contrast, and Color
Google Photos provides a user-friendly adjustment panel where you can fine-tune the brightness, contrast, saturation, and other elements of your photos.
✅ Key Adjustments You Can Make:
- Brightness – Make the photo lighter or darker.
- Contrast – Increase the difference between the light and dark areas.
- Saturation – Enhance the intensity of colors.
- Warmth – Adjust the temperature of the photo to make it warmer (yellowish) or cooler (bluish).
- Shadows & Highlights – Control the brightness of dark and light areas separately.
🚀 Why This is Useful:
✔ Helps in fixing underexposed or overexposed photos.
✔ Makes colors pop while maintaining a natural look.
✔ Provides professional-looking edits in just a few taps.
Applying Filters for Quick Enhancements
If you want to enhance your photo instantly, Google Photos offers a selection of pre-designed filters that can transform the look of your image with just one tap.
✅ How to Apply Filters in Google Photos:
1️⃣ Open a photo and tap the Edit button.
2️⃣ Scroll through the available filters like “Vivid,” “West,” “Metro,” and “Vista”.
3️⃣ Adjust the filter strength by using the slider.
4️⃣ Tap “Done” and save your edited image.
💡 Best Filters for Different Scenarios:
- Portraits: Try “Luminous” or “Enhance” for a natural glow.
- Landscapes: Use “Vivid” or “Vista” to bring out colors.
- Night Shots: Apply “Afterglow” to brighten up dark areas.
🎯 Why Filters Are Useful:
✔ Quickly enhances dull or washed-out photos.
✔ Provides professional-quality edits without manual adjustments.
✔ Helps in creating a consistent aesthetic for social media.
Advanced Editing with Magic Editor and Magic Eraser
For those looking to take their photo editing to the next level, Google Photos includes AI-powered tools like Magic Editor and Magic Eraser.
These tools use machine learning and computational photography to help you make complex edits with ease.
What is Magic Editor in Google Photos?
Magic Editor is an AI-powered editing tool that allows you to reshape, move, and enhance objects in your photos with precision.
✅ Key Features of Magic Editor:
- Move objects – Shift people or objects to different parts of the photo.
- Resize elements – Make a subject appear larger or smaller.
- Fill missing backgrounds – Use AI to generate missing areas when repositioning subjects.
- Enhance sky and background – Adjust brightness and colors to improve outdoor shots.
🚀 How to Use Magic Editor in Google Photos:
1️⃣ Select a photo and tap Edit.
2️⃣ Choose Magic Editor from the available tools.
3️⃣ Tap on the object you want to move or resize.
4️⃣ Drag it to the desired position and let AI fill in the background seamlessly.
5️⃣ Adjust colors, lighting, or details if needed, then save your changes.
💡 Why Magic Editor is a Game-Changer:
✔ Eliminates the need for third-party editing apps.
✔ Uses AI to enhance images naturally without looking over-edited.
✔ Helps in perfecting group photos, travel shots, and portraits.
Removing Unwanted Objects with Magic Eraser
One of the most powerful tools in Google Photos is Magic Eraser, which allows you to remove photobombers, distractions, and unwanted objects from your images in just a few taps.
✅ How to Use Magic Eraser in Google Photos:
1️⃣ Open a photo in Google Photos and tap Edit.
2️⃣ Select Magic Eraser from the editing options.
3️⃣ Draw a circle around the object you want to remove.
4️⃣ Google Photos will use AI to automatically erase the object and fill the background.
5️⃣ Tap Done and save your edited photo.
💡 Examples of What You Can Remove with Magic Eraser:
- Strangers or photobombers in the background.
- Street signs or objects blocking a perfect shot.
- Unwanted shadows or reflections.
🎯 Why Magic Eraser is So Effective:
✔ Works seamlessly without leaving behind obvious editing marks.
✔ Saves time compared to manual Photoshop editing.
✔ Allows you to fix imperfections in old or new photos effortlessly.
Why Google Photos’ Editing Tools Are a Must-Try
Google Photos isn’t just a photo storage app—it’s a powerful editing suite that helps you transform your images effortlessly.
From basic brightness adjustments to advanced AI-powered edits, Google Photos provides everything you need to enhance your pictures.
🔥 Want to take your photo editing skills to the next level?
➡️ Try Google Photos’ Magic Editor and Magic Eraser today!
Sharing and Collaborating in Google Photos
Google Photos makes it effortless to share and collaborate on photos and albums with family, friends, or colleagues.
Whether you want to share a single photo, create a collaborative album, or set privacy controls, Google Photos provides multiple sharing options to fit your needs.
In this section, we’ll explore how to share photos and albums, control access permissions, and collaborate on shared albums seamlessly.
Sharing Photos and Albums in Google Photos
Sharing photos and albums in Google Photos is quick, simple, and secure.
You can share images directly with specific people, create a shareable link, or even post your photos on social media.
How to Share Individual Photos in Google Photos
If you want to share a single photo with someone, follow these simple steps:
1️⃣ Open the Google Photos app on your device.
2️⃣ Tap on the photo you want to share.
3️⃣ Click the Share icon (box with an upward arrow) at the bottom.
4️⃣ Choose how you want to share:
- Select a contact from your Google Photos sharing list.
- Copy a shareable link and send it via email, WhatsApp, or social media.
- Share directly via Google Drive, Messages, or Facebook.
💡 Pro Tip: If the person you’re sharing with has Google Photos, they will receive a direct notification instead of a link.
How to Share an Entire Album
If you have a collection of photos from an event, vacation, or family gathering, creating and sharing an album is the best option.
✅ Steps to Share an Album in Google Photos:
1️⃣ Open Google Photos and tap on the Library tab.
2️⃣ Select the album you want to share or create a new album by tapping “New album”.
3️⃣ Tap the Share icon at the top of the album.
4️⃣ Choose a sharing method:
- Send an invite to specific people via email or phone number.
- Copy a shareable link to send manually.
- Post the link on social media or messaging apps.
🎯 Why Sharing Albums is Useful:
✔ Organizes photos into themed collections for easy viewing.
✔ Keeps family events, travel photos, and memories in one place.
✔ Allows multiple recipients to access the album with just one link.
Controlling Sharing Permissions for Privacy
When sharing photos or albums, controlling who can view, download, or contribute is essential for privacy and security.
✅ Google Photos Sharing Settings:
- Allow viewers to add their own photos: Enable this if you want others to contribute.
- Disable link sharing: Prevents people from accessing the album unless explicitly invited.
- Remove specific people: Revoke access from any person at any time.
- Turn off commenting and likes: Maintain full control over interactions on shared content.
💡 Best Practice:
Always review sharing settings before sending links to ensure your photos are visible only to the intended audience.
Collaborating on Shared Albums
Google Photos allows you to create shared albums where multiple people can add their own photos, videos, and comments.
This is perfect for family vacations, weddings, work projects, or group events.
How to Create a Collaborative Shared Album
To start a collaborative album, follow these steps:
1️⃣ Open Google Photos and tap on Library.
2️⃣ Tap “New album” and add an album title.
3️⃣ Select the photos or videos you want to include.
4️⃣ Tap Share and invite people to contribute.
5️⃣ Enable “Collaborate” to allow others to add their photos.
🚀 Why Shared Albums Are a Game-Changer:
✔ Helps friends and family contribute to a single album.
✔ Organizes photos from different people in one place.
✔ Eliminates the need to send multiple images via messaging apps.
Managing and Customizing Shared Albums
Once you create a shared album, you can manage contributions, remove photos, and customize album settings.
✅ Key Features for Managing Shared Albums:
- Approve new additions: Get notified when someone adds a photo.
- Remove unwanted images: Delete any photo you don’t want in the album.
- Change album cover: Select a specific image as the album thumbnail.
- Disable collaboration anytime: Stop people from adding new photos.
💡 Pro Tip: If you’re sharing an album for a special event, enable notifications so you never miss when someone adds a new photo!
Why Google Photos is the Best for Sharing and Collaboration
Google Photos provides seamless sharing and collaboration tools that make it easy to share memories with family, friends, or colleagues.
From individual photo sharing to collaborative albums, it ensures your photos are accessible while keeping your privacy intact.
🔥 Want to simplify your photo-sharing experience?
➡️ Start using Google Photos for effortless collaboration today!
Accessing Google Photos Across Devices
Google Photos is designed to provide seamless access to your photo library across multiple devices.
Whether you are using a smartphone, tablet, laptop, or desktop, your photos are always available as long as you are signed in to your Google account.
By enabling Backup & Sync, you can ensure that every photo and video is automatically backed up, synced, and accessible from anywhere.
In this section, we’ll cover how to sync Google Photos across devices and use Google Photos on the web for a hassle-free experience.
Syncing Google Photos Across Multiple Devices
One of the biggest advantages of Google Photos is its ability to sync your media across all your devices.
This means that photos taken on your phone will be instantly available on your tablet, laptop, or even a different phone.
To achieve this, Google Photos uses cloud-based storage and real-time synchronization, ensuring you never lose a memory.
How to Enable Backup & Sync in Google Photos
For seamless synchronization, you need to enable the Backup & Sync feature on each device.
Here’s how you can do it:
On Android and iPhone:
1️⃣ Open the Google Photos app on your phone.
2️⃣ Tap on your profile icon (top-right corner).
3️⃣ Select Photos settings > Backup & Sync.
4️⃣ Toggle Backup & Sync to the ON position.
5️⃣ Choose the Google account where you want to store your photos.
6️⃣ Select Upload size (choose between “High quality” or “Original quality”).
💡 Pro Tip: If you have limited storage space, select “High quality” for unlimited compressed backups instead of full-resolution originals.
On Windows and Mac:
1️⃣ Download and install the Google Drive for Desktop app.
2️⃣ Sign in with your Google account.
3️⃣ In the settings, select Google Photos > Backup & Sync.
4️⃣ Choose the folders you want to sync with Google Photos.
🚀 Why You Should Enable Backup & Sync:
✔ Automatic cloud backup ensures you never lose your photos.
✔ Access your entire photo library on any device instantly.
✔ Free up space on your phone while keeping your photos safe.
How to Access Google Photos on Different Devices
Once your photos are synced, you can access them from any device by simply signing into your Google account.
✅ On Mobile Devices (Android & iOS):
- Open the Google Photos app.
- Sign in with your Google account.
- Browse your library, create albums, edit, and share photos effortlessly.
✅ On Desktop (Windows & Mac):
- Open your web browser and go to photos.google.com.
- Sign in with your Google credentials.
- View, download, edit, and organize your photos from any computer.
✅ On Smart Displays & TVs:
- Use Google Nest Hub to display your synced photo albums.
- Cast your Google Photos library to a Chromecast-enabled TV.
💡 Pro Tip: If you switch to a new phone, just sign in to your Google Photos account and your entire library will be available instantly!
Using Google Photos on the Web
Google Photos isn’t just for mobile devices—it’s also a powerful web-based photo management tool.
By visiting photos.google.com, you can view, edit, organize, and share your photos from any computer, without installing any software.
How to Use Google Photos on the Web
To access Google Photos from a browser, follow these steps:
1️⃣ Open a web browser (Chrome, Firefox, Safari, or Edge).
2️⃣ Go to photos.google.com.
3️⃣ Sign in with your Google account.
4️⃣ Browse your photo library in a grid layout.
5️⃣ Click on any image to view, edit, or share it.
🎯 Why Use Google Photos on the Web?
✔ No need for an app—access your photos from any computer.
✔ Easier photo management with keyboard shortcuts.
✔ Larger screen for better organization and editing.
Uploading Photos to Google Photos from a Computer
If you have photos stored on your computer, hard drive, or external USB, you can upload them manually to Google Photos.
✅ Steps to Upload Photos from a PC or Mac:
1️⃣ Open photos.google.com.
2️⃣ Click the Upload icon (cloud with an upward arrow).
3️⃣ Select “Computer” and choose the images or folders to upload.
4️⃣ Wait for the upload to complete.
💡 Pro Tip: Drag and drop photos directly into the Google Photos window for a faster upload!
Editing Photos in Google Photos on the Web
Google Photos provides built-in editing tools on both mobile and web.
✅ Basic Editing Features:
- Adjust brightness, contrast, and saturation.
- Apply filters for quick enhancements.
- Crop and straighten photos for better framing.
✅ Advanced Editing Features:
- Use Magic Eraser to remove unwanted objects.
- Adjust color temperature and shadows manually.
- Apply portrait light effects for professional-quality edits.
💡 Pro Tip: Your edits are automatically saved and synced across all devices, so you can edit on your laptop and view the changes instantly on your phone!
Why You Should Access Google Photos Across Devices
Google Photos is one of the best cloud-based photo management tools, allowing you to access, edit, and organize your pictures from anywhere.
By enabling Backup & Sync, you can ensure your photos are always available on any device.
🔥 Want to experience seamless photo syncing and access your images anywhere?
➡️ Start using Google Photos today!
Managing Storage and Subscription Options
Google Photos provides an excellent way to store, manage, and organize your photos and videos, but like any cloud service, storage space is limited.
Understanding Google Photos storage limits and knowing how to expand your storage with Google One can help you avoid running out of space and continue backing up your memories seamlessly.
In this section, we’ll dive deep into Google’s storage policies, how storage is calculated, and the benefits of upgrading to Google One.
Understanding Google Photos Storage Limits
When you use Google Photos, your images and videos are stored in your Google Account’s storage quota.
This 15 GB of free cloud storage is shared across Google Photos, Google Drive, and Gmail.
If you frequently back up high-resolution photos or videos, this space can fill up quickly.
Understanding how Google Photos manages storage can help you optimize your space and avoid unnecessary deletions.
What Counts Toward Your Google Storage?
Every Google account gets 15 GB of free storage, but not all media files impact this limit equally.
✅ Photos & Videos That Count Toward Storage:
- Original quality photos (full-resolution, uncompressed images).
- Original quality videos (high-definition videos without compression).
- Emails and attachments in Gmail.
- Files stored in Google Drive, including PDFs, documents, and backups.
✅ Photos That DO NOT Count Toward Storage:
- Photos and videos backed up before June 1, 2021 in “High quality” (now called Storage saver).
- Compressed photos in Storage saver mode (formerly “High quality”).
- Google Docs, Sheets, Slides, and Forms (unless converted to another format).
💡 Pro Tip: If you take a lot of photos, switch to Storage saver mode to reduce file sizes without losing too much image quality!
How to Check Your Google Photos Storage Usage
Before running out of space, it’s a good idea to check how much storage you have left.
🔹 Steps to Check Storage on Google Photos App:
1️⃣ Open the Google Photos app.
2️⃣ Tap on your profile icon in the top-right corner.
3️⃣ Select Account storage to see your usage.
🔹 Steps to Check Storage on a Computer:
1️⃣ Go to photos.google.com/storage.
2️⃣ Sign in with your Google account.
3️⃣ View your remaining storage and which services are using the most space.
🚀 Why This Matters?
✔ Helps you track storage usage before it runs out.
✔ Allows you to delete unnecessary files to free up space.
✔ Helps you decide if you need a Google One subscription.
How to Free Up Space in Google Photos
If you’re running low on space, here are some proven ways to clear storage without losing important photos.
✅ Delete Unwanted Photos & Videos:
- Open Google Photos and delete duplicates, blurry shots, and unnecessary videos.
✅ Empty Trash Folder:
- Deleted photos remain in Trash for 60 days before being permanently removed.
- Go to Trash > Select all > Permanently delete to free up space instantly.
✅ Use Google’s Storage Management Tool:
- Visit Google One storage manager to remove large files.
✅ Convert “Original Quality” Photos to “Storage Saver”:
1️⃣ Open Google Photos settings.
2️⃣ Select Recover Storage > Convert photos to Storage saver.
💡 Pro Tip: Backup your large media files to an external hard drive or alternative cloud storage like Amazon Photos, Dropbox, or OneDrive to save space!
Upgrading to Google One for Additional Storage
If you need more space, Google One offers paid storage plans that expand your Google Photos, Drive, and Gmail storage.
With affordable monthly and yearly plans, upgrading to Google One ensures you never run out of space and unlocks exclusive benefits.
Google One Storage Plans & Pricing
Google One offers various storage plans to fit your needs.
Here’s a breakdown of the current pricing (subject to change):
📌 100 GB Plan – $1.99/month
📌 200 GB Plan – $2.99/month
📌 2 TB Plan – $9.99/month
📌 5 TB Plan – $24.99/month
📌 10 TB+ Plans – Custom pricing
💡 Pro Tip: Save money by choosing the annual plan, which offers a discount compared to monthly billing!
Benefits of Google One Subscription
Upgrading to Google One comes with several perks beyond extra storage.
✅ Expanded Storage:
- Store more high-resolution photos and videos without worrying about limits.
✅ Family Sharing:
- Share your Google One plan with up to 5 family members at no extra cost.
✅ Automatic Phone Backup:
- Android users can back up their device settings, photos, videos, and app data with Google One.
✅ Premium Google Support:
- Get priority customer support for Google services, including Google Photos, Drive, and Gmail.
✅ Exclusive Google Perks:
- Access special offers, Google Store discounts, and free trials for select services.
📢 Want to upgrade your storage and unlock exclusive Google perks?
➡️ Get Google One now!
Why You Should Manage Your Google Photos Storage Wisely
Managing your Google Photos storage is essential to keep your media safe and accessible without interruptions.
If you frequently run out of space, consider freeing up storage or upgrading to Google One for additional benefits.
🔥 Don’t let storage limits stop you from backing up your precious moments!
➡️ Optimize your Google Photos storage today!
Tips and Tricks for Power Users
If you want to take Google Photos to the next level, you’ll love these powerful features that can make your experience even better.
Whether you’re looking to create stunning movies, declutter your photo feed, or use AI-powered search tools, Google Photos offers advanced functionalities that can help you organize, enhance, and manage your photo collection more effectively.
In this section, we’ll dive deep into some of the best tips and tricks for making the most of Google Photos like a pro!
Creating Movies, Animations, and Collages in Google Photos
One of the most exciting features of Google Photos is its ability to automatically create stunning movies, fun animations, and creative collages from your existing images.
These features allow you to relive your favorite moments in a unique way without needing any video editing skills!
How to Create a Movie in Google Photos
Google Photos makes it easy to turn your photos and videos into a professional-looking movie in just a few taps.
Here’s how to create your own Google Photos movie:
1️⃣ Open the Google Photos app on your mobile device.
2️⃣ Tap on the Library tab at the bottom.
3️⃣ Select Utilities and scroll down to find Movie.
4️⃣ Choose a preset theme or select Create your own movie.
5️⃣ Pick the photos and videos you want to include in your movie.
6️⃣ Tap Create and let Google Photos automatically generate the video.
7️⃣ Customize the movie by adding music, text, and effects.
8️⃣ Once satisfied, tap Save to store the movie in your library.
🔥 Why Use Google Photos Movie Maker?
✔ No video editing skills required – Google does the work for you!
✔ Automatically selects the best photos and clips for a smooth experience.
✔ You can add your own music or use Google’s preloaded themes.
✔ Great for birthday videos, travel vlogs, and memory recaps!
How to Create an Animation in Google Photos
Want to bring your still images to life?
Google Photos allows you to create eye-catching animations by combining a sequence of similar photos.
Here’s how to do it:
1️⃣ Open Google Photos and go to the Library tab.
2️⃣ Tap Utilities and select Animation.
3️⃣ Choose multiple photos that capture movement (e.g., action shots).
4️⃣ Tap Create, and Google Photos will generate a smooth GIF-like animation.
5️⃣ Save or share the animation directly from your Google Photos library.
💡 Pro Tip: Use Burst Mode on your phone’s camera to capture a series of images quickly, then turn them into an animation for a cool effect!
How to Make a Collage in Google Photos
Collages are a fun way to combine multiple photos into a single image.
Here’s how you can create one:
1️⃣ Open the Google Photos app and tap on Library.
2️⃣ Go to Utilities and select Collage.
3️⃣ Choose between 2-9 photos you want to include.
4️⃣ Google Photos will automatically arrange them into a stylish layout.
5️⃣ Save and share your collage instantly!
📌 Best Use Cases for Collages:
✔ Trip highlights – Show off multiple travel shots in a single frame.
✔ Before & after comparisons – Great for transformation photos.
✔ Family memories – Combine pictures of different generations.
Archiving Photos to Declutter Your Main Feed
If your Google Photos library is getting cluttered with screenshots, receipts, memes, or irrelevant images, you can use the Archive feature to keep your main feed clean.
The best part? Archived photos remain in your account but won’t show up in your main timeline!
How to Archive Photos in Google Photos
Follow these steps to declutter your photo feed:
1️⃣ Open Google Photos and go to the Photos tab.
2️⃣ Select the photo(s) you want to archive.
3️⃣ Tap the three-dot menu in the top-right corner.
4️⃣ Choose Move to archive.
That’s it! Your selected photos will no longer appear in your main feed, but they’re still searchable and accessible in the Archive folder.
Where to Find Archived Photos?
If you ever need to access your archived photos:
1️⃣ Open Google Photos.
2️ Tap the Library tab at the bottom.
3️⃣ Select Archive to view all your archived images.
💡 Pro Tip: Use the archive feature to store old documents, receipts, and screenshots while keeping your main feed focused on your best moments!
Utilizing Google Lens Integration for Smart Photo Searching
One of the most powerful features inside Google Photos is Google Lens—an AI-powered tool that allows you to search for objects, identify landmarks, and even extract text from images!
If you’ve ever wondered, “What is this object in my photo?” or “Where was this picture taken?”, Google Lens can provide the answer instantly.
How to Use Google Lens in Google Photos
Using Google Lens in Google Photos is incredibly simple:
1️⃣ Open the Google Photos app and select a photo.
2️⃣ Tap the Lens icon (located at the bottom of the screen).
3️⃣ Google Lens will analyze the image and provide relevant information.
🔎 What Can Google Lens Do?
✅ Identify Objects: Point at plants, animals, or items to learn more.
✅ Recognize Landmarks: Get details about historical sites and attractions.
✅ Extract Text (OCR): Copy text from images and translate in real-time.
✅ Find Similar Products: Scan a product and find where to buy it online!
Real-World Uses for Google Lens in Google Photos
💼 For Professionals: Scan business cards and save contact details instantly.
📚 For Students: Extract text from lecture notes and convert it into digital format.
🛍 For Shoppers: Take a picture of an item and find it online for purchase.
🌍 For Travelers: Identify landmarks, food, and street signs when abroad.
💡 Pro Tip: Use Google Lens to scan QR codes, translate text, or even solve math problems directly from a photo!
Supercharge Your Google Photos Experience
By using these advanced Google Photos features, you can organize, create, and search through your photo library like a pro.
🔥 Which feature are you most excited to try?
➡️ Unlock the full potential of Google Photos today!
Ensuring Privacy and Security in Google Photos
Your photos and videos hold precious memories, and ensuring their privacy and security should be a top priority.
Google Photos offers several privacy controls and security settings that allow you to manage how your content is shared, who can access it, and how your personal data is handled.
In this section, we’ll explore how to adjust privacy settings, control facial recognition, manage location data, and securely download your photo library.
Let’s dive in!
Managing Privacy Settings in Google Photos
Privacy is crucial when storing and sharing photos online.
By reviewing and adjusting your Google Photos privacy settings, you can ensure that your personal memories remain secure and are only accessible to those you trust.
Reviewing and Adjusting Sharing Settings
By default, your Google Photos library is private, and only you can view the content.
However, if you share albums, photos, or links, they can become accessible to others.
Here’s how to check and manage your sharing settings:
1️⃣ Open the Google Photos app or visit photos.google.com.
2️⃣ Tap the Library tab at the bottom.
3️⃣ Select Albums and open any shared album.
4️⃣ Tap the three-dot menu (⋮) in the top right corner.
5️⃣ Choose Options to adjust sharing settings.
6️⃣ Disable “Link sharing” to prevent unauthorized access.
7️⃣ Remove people who no longer need access to the shared album.
💡 Pro Tip: Always review shared album settings to prevent unauthorized people from accessing your private content!
Controlling Facial Recognition and Tagging
Google Photos has a powerful facial recognition feature that helps organize photos by identifying people in your images.
While this feature is convenient, some users may prefer more privacy controls over facial recognition.
To manage facial recognition settings:
1️⃣ Open Google Photos and tap your profile picture in the top right.
2️⃣ Select Google Photos settings > “Face grouping”.
3️⃣ Toggle Face grouping ON or OFF based on your preference.
4️⃣ If enabled, you can choose to remove or edit tagged faces.
📌 Why Adjust This Setting?
✔ Prevent Google from automatically grouping people in your photos.
✔ Increase privacy by disabling facial recognition.
✔ Manage how photos of your friends and family are categorized.
Managing Location Data in Photos
When you take a photo, your device may store GPS location data, which helps organize photos based on places you’ve visited.
However, if you share a photo, this location metadata (EXIF data) can be shared as well.
To remove or manage location data in Google Photos:
1️⃣ Open Google Photos and go to Settings.
2️⃣ Tap “Remove geo location in shared links”.
3️⃣ Toggle the setting ON to ensure that shared photos do not include location data.
✅ Why This Matters:
✔ Protects your privacy by hiding sensitive location details.
✔ Prevents people from tracking where a photo was taken.
✔ Keeps your travel history and home location secure.
💡 Pro Tip: If you still want location-based organization but don’t want to share that data, enable location tagging only for personal use and disable it for sharing.
Downloading Your Photo Library Securely
Want to back up your entire Google Photos library or transfer your images to another cloud service?
Google offers a secure and easy way to download your entire photo collection using Google Takeout.
This feature lets you export your photos and videos in bulk, ensuring that your data is always under your control.
How to Download Your Google Photos Using Google Takeout
Follow these steps to download your entire Google Photos library:
1️⃣ Visit Google Takeout at takeout.google.com.
2️⃣ Scroll down and select “Google Photos” from the list of Google services.
3️⃣ Click “All photo albums included” to choose specific albums (optional).
4️⃣ Click Next step and select your preferred export format:
- .ZIP file (easier to open on most devices).
- .TGZ file (for advanced users).
5️⃣ Choose how you want to receive the files:
- Email download link.
- Direct upload to Google Drive, Dropbox, OneDrive, or Box.
6️⃣ Click “Create Export” and wait for Google to process your request.
7️⃣ Once the export is ready, download your files securely.
💡 Pro Tip: Large photo libraries may be split into multiple downloadable files, so make sure you have enough storage space on your device before starting the download.
Why Should You Download Your Google Photos?
✅ Backup your memories in case of accidental deletion or account issues.
✅ Migrate photos to another cloud storage service (Dropbox, iCloud, OneDrive).
✅ Keep an offline copy for extra security.
✅ Free up space on your Google Account if nearing the storage limit.
💡 Pro Tip: Set up a recurring backup schedule using Google Takeout to always have an updated copy of your photos stored safely.
Take Control of Your Google Photos Privacy and Security
With the right privacy settings and security measures, you can protect your personal photos while still enjoying the powerful features of Google Photos.
📌 Key Takeaways:
✔ Review and adjust sharing settings to prevent unauthorized access.
✔ Manage facial recognition and location data for more control over personal information.
✔ Use Google Takeout to securely download and back up your photo library.
🔒 Your memories deserve the best protection! Take charge of your Google Photos security settings today.
🚀 Need more tips on securing your digital life? Click here!
Conclusion – Mastering Google Photos for a Seamless Experience
Google Photos is more than just a photo storage platform—it’s a powerful, AI-driven tool that helps you organize, edit, and share your photos effortlessly.
Whether you’re a casual user looking for a way to back up your pictures or a power user who wants to create animations, movies, and albums, understanding how to use Google Photos effectively can significantly enhance your digital photo management experience.
Throughout this guide, we’ve covered everything you need to know, from basic organization tips to advanced privacy and security settings.
Now, let’s wrap things up with some key takeaways and final thoughts to help you make the most of Google Photos.
Key Takeaways – What You’ve Learned
Let’s quickly recap the most important features of Google Photos:
✅ Automatic Backup & Sync: Never lose a memory with cloud-based storage.
✅ Advanced Search Features: Quickly find images using keywords, people, places, and objects.
✅ Editing Tools: Enhance photos with filters, adjustments, and AI-powered editing.
✅ Album & Sharing Options: Create collaborative albums, shared libraries, and private collections.
✅ Privacy & Security Controls: Keep your photos safe by managing sharing settings, location data, and facial recognition.
✅ Google Lens Integration: Instantly identify objects, translate text, and find similar products.
✅ Download & Export Options: Use Google Takeout to back up and transfer your entire photo library.
By mastering these features, you can ensure that your digital memories remain secure, accessible, and well-organized.
Why Google Photos is Essential for Every User
Google Photos is one of the most feature-rich cloud photo storage services available today.
Unlike traditional storage options, it uses AI-powered tools to help you:
✔ Organize your photos automatically without spending hours sorting them manually.
✔ Enhance images with easy-to-use editing features, making every photo look professional.
✔ Share memories effortlessly with friends and family via links, albums, or shared libraries.
✔ Enjoy seamless integration with other Google services, including Google Drive, Google Lens, and Google Assistant.
If you haven’t fully explored all of Google Photos’ capabilities yet, now is the perfect time to dive in!
Final Tips to Get the Most Out of Google Photos
Want to maximize your experience with Google Photos? Here are some pro tips to take your photo management skills to the next level:
🔹 Set Up Automatic Backups – Ensure all your photos are safely stored by enabling automatic backup in the settings.
🔹 Use Smart Search Features – Save time by searching for images using natural language, like “beach photos from 2023.”
🔹 Create Custom Albums & Stories – Organize your photos into thematic albums, travel logs, or special event collections.
🔹 Utilize Google Lens for Instant Information – Identify landmarks, translate signs, or even shop for items from your photos.
🔹 Manage Storage Efficiently – Use the “Storage Saver” mode to store more photos while reducing file size.
🔹 Review Privacy Settings Regularly – Protect your personal memories by adjusting sharing settings and removing location metadata.
By applying these best practices, you can ensure that Google Photos works for you, not against you.
Ready to Take Full Control of Your Digital Memories?
Google Photos is constantly evolving, introducing new features that make photo management easier and more enjoyable.
Whether you’re a casual user or a tech-savvy photographer, learning how to use Google Photos properly can save you time, improve your organization, and enhance your overall experience.
So, what’s next?
🚀 Start exploring Google Photos today and unlock its full potential!
🔹 Need more expert tips? Check out this resource for additional insights.
🔹 Looking for the best cloud storage alternatives? Read our in-depth comparison of the top photo storage solutions here.
💡 Your memories deserve the best—keep them safe, organized, and accessible with Google Photos!
You might also like :

