Introduction of Smart Garage Door Opener
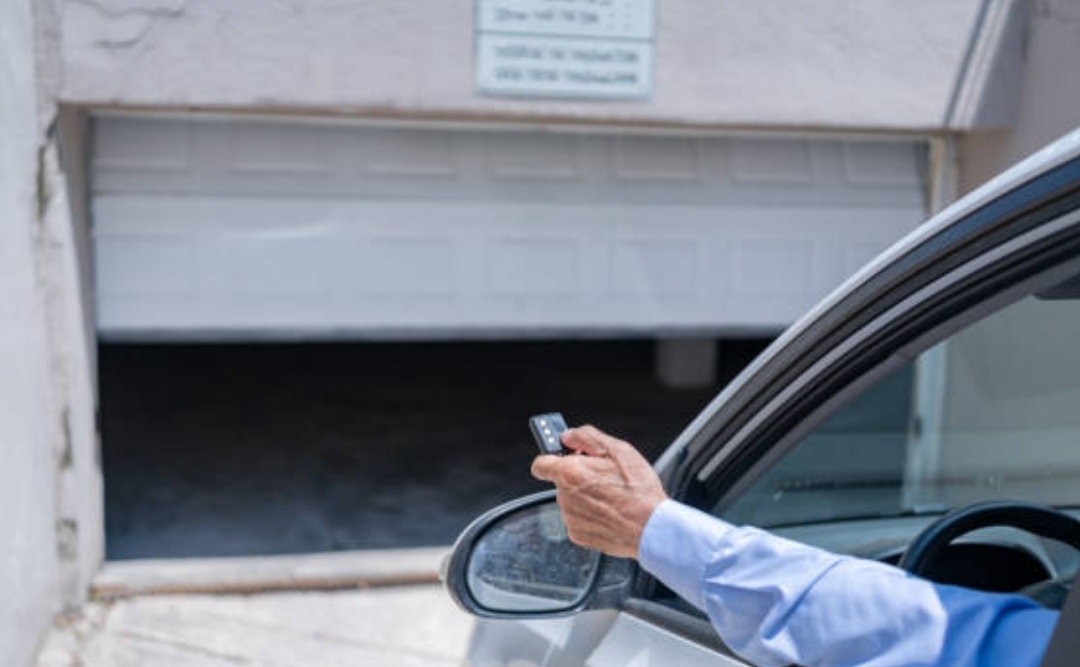
🏡 Imagine pulling into your driveway, and with just a tap on your smartphone, your garage door opens automatically — no remotes, no keypad, just smart automation.
This is the power of modern smart garage door openers, an increasingly popular addition to connected homes.
Smart garage door openers offer unmatched convenience, security, and peace of mind, making them a must-have upgrade for homeowners looking to streamline daily routines and boost home protection.
In this in-depth guide, you’ll learn exactly how to set up a smart garage door opener from start to finish — whether you’re a tech-savvy homeowner or just beginning your smart home journey.
📌 Setting up a smart garage door opener may seem intimidating at first, but it’s actually easier than you think, especially with the right step-by-step guidance and preparation.
Many homeowners choose to install a smart opener themselves to save on installation costs, and we’re here to show you exactly how to do it safely and effectively.
We’ll also cover key aspects such as:
- Choosing the right smart garage door opener brand
- Checking compatibility with your current system
- Installing both the smart controller and sensor hardware
- Configuring your mobile app for real-time notifications and remote access
- Troubleshooting common issues
- Enhancing your setup with home automation features
🚀 Whether your goal is to open your garage from your phone, get notified when someone accesses your garage, or integrate it with your smart home hub — this tutorial is built to help you do just that.
Not only will you learn how to set up a smart garage door opener, but you’ll also pick up valuable tips, expert insights, and time-saving shortcuts that most tutorials leave out.
Why Homeowners Are Upgrading to Smart Garage Door Openers 🔐
The rise of smart home technology has made it easier than ever to control your environment with just a tap, swipe, or voice command.
Smart garage door openers are one of the most underrated yet powerful smart home upgrades, offering a host of benefits such as:
✅ Real-time alerts: Get notified whenever your garage door opens or closes, whether you’re home or away.
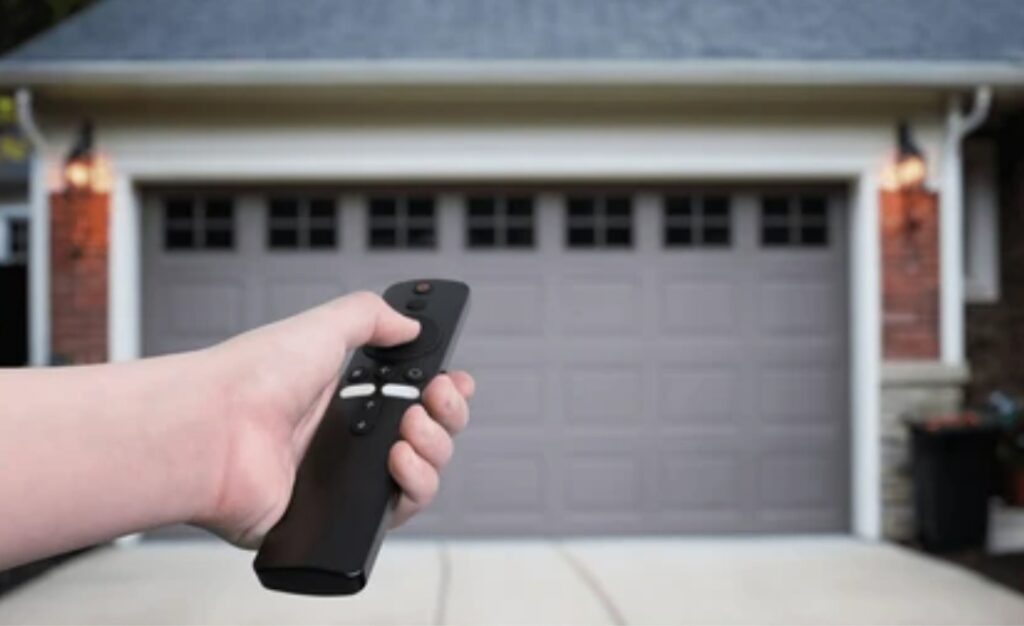
✅ Remote access: Open or close your garage door from anywhere in the world using your smartphone.
✅ Voice control integration: Connect with Alexa, Google Assistant, or Apple HomeKit for hands-free operation.
✅ Access management: Grant or restrict access to family members, friends, or service personnel.
✅ Activity logs: Monitor when your garage was accessed and by whom.
✅ Enhanced security: Many smart garage door openers include features like encryption, motion detection, and automatic locking.
💡 These benefits are not only convenient — they provide peace of mind, especially for families or anyone who frequently receives packages or needs to manage access while away from home.
In today’s fast-paced digital world, upgrading your garage is more than a luxury — it’s becoming a smart investment that boosts your home’s functionality and value.
What You’ll Learn in This Guide 📘
In this comprehensive guide, we’ll walk you through every single step — no fluff, no confusing jargon.
Expect clear instructions, screenshots suggestions, and troubleshooting tips to help you master your setup in one go.
You’ll learn:
🔧 How to check if your garage opener is compatible with smart upgrades
📶 How to optimize your garage’s Wi-Fi signal
🧰 What tools and materials you’ll need for installation
📱 How to pair your opener with a mobile app
📊 How to configure alerts, permissions, and home automation settings
By the end of this tutorial, you’ll be fully equipped to install and operate your smart garage door opener like a pro — without calling a technician.
🔥 Pro Tip: Installing a smart garage door opener is not only about convenience — it’s about future-proofing your home.
Don’t wait until you’re locked out or away on vacation to realize the importance of a smart upgrade.
➡️ Click here to check out our top recommended smart garage door openers for easy installation and advanced features.
Understanding Smart Garage Door Openers 🧠
Before you learn how to set up a smart garage door opener, it’s essential to understand what it is, how it functions, and why more homeowners are making the switch from traditional garage openers.
Smart garage door openers are more than just modern gimmicks — they’re powerful tools that offer greater control, remote access, and real-time monitoring.
Let’s break it down.

What Is a Smart Garage Door Opener? 🤖
A smart garage door opener is a Wi-Fi-enabled device that allows you to open, close, and monitor your garage door from your smartphone or smart home hub.
Unlike traditional openers that rely on a physical remote or keypad, smart garage door openers use wireless technology, allowing full control from anywhere in the world.
📱 Whether you’re at work, on vacation, or upstairs on the couch — a smart opener gives you instant access to your garage at the tap of a button.
They usually consist of:
- A smart controller that connects to your existing garage door motor
- A sensor that detects the open or closed position
- A mobile app or cloud platform where you can control and monitor activity
- Optional voice assistant integrations for hands-free use
🧩 Some systems come as all-in-one openers, while others are add-on smart garage door controllers that upgrade your existing unit.
If you’re wondering how to set up a smart garage door opener with minimal tools or tech knowledge — don’t worry.
Most modern systems are designed for DIY-friendly installation, and we’ll walk you through that process shortly.
How Do Smart Garage Door Openers Work? ⚙️
Smart garage door openers work by using wireless signals, typically Wi-Fi or Bluetooth, to send commands from your phone to the garage motor.
When you tap the “open” button on your app:
- The app sends a signal to your smart controller.
- The controller activates your existing garage motor.
- The garage door opens or closes accordingly.
- A sensor on the door detects its position and confirms the status in your app.
🔒 Security features like two-factor authentication, encryption, and motion alerts are often included to protect against unauthorized access.
Many devices also integrate with Amazon Key, allowing for secure in-garage deliveries, or connect with IFTTT to automate triggers like “Close the garage if it’s open after 10 PM.”
💬 Want to use your voice? With integrations like Alexa, Google Assistant, or Siri Shortcuts, you can simply say, “Hey Google, close my garage,” and it’ll respond instantly.
Benefits of Smart Garage Door Openers 💡
If you’re still debating whether it’s worth learning how to set up a smart garage door opener, here are a few compelling reasons:
✅ Remote Control: Access your garage door from anywhere in the world.
✅ Real-Time Notifications: Get instant alerts when your garage is opened or left open.
✅ Enhanced Security: Built-in encryption and user access control features.
✅ Convenient Guest Access: Grant or restrict access to family, friends, or delivery services.
✅ Voice Control & Automation: Use voice commands or schedule open/close times.
✅ Activity Logs: Keep a digital history of when your garage door was opened or closed.
✅ Energy Efficient: Many systems are low-voltage and integrate with other smart home energy tools.
With these benefits, it’s clear why smart garage door openers are considered a high-ROI upgrade for both everyday users and tech-savvy homeowners alike.
Common Types of Smart Garage Door Openers 🧰
There are two main types of smart openers available in the market:
1. All-in-One Smart Garage Door Openers
These are full replacements for your current system.
They come with a motor, rails, and built-in smart tech from brands like:
- Chamberlain MyQ Ultra-Quiet Belt Drive Opener
- Genie StealthDrive Connect Model
- LiftMaster Elite Series
Perfect if your existing system is outdated or needs a complete replacement.
2. Smart Garage Door Controller Add-Ons
These are compact, affordable units that attach to your existing garage opener.
They’re ideal for DIY setups and usually take under 30 minutes to install.
Popular options include:
- Chamberlain MyQ Smart Garage Hub
- Meross Smart Wi-Fi Garage Door Opener
- Nexx Garage Smart Controller
✨ Many of these add-ons are compatible with most garage motors made after 1993 — a key detail we’ll cover in the next section.
Is Your Garage Door System Compatible? 🛠️
Before diving into how to set up a smart garage door opener, make sure your current system supports smart technology.
Here’s what to check:
- 📅 Year of Manufacture: Most systems made after 1993 with photoelectric sensors are compatible.
- 📶 Wi-Fi Range: Make sure your garage has strong Wi-Fi coverage (we’ll show you how to check this).
- 📄 Opener Brand: Compatible brands include Chamberlain, LiftMaster, Genie, Craftsman, and more.
- 🧱 Mounting Space: Ensure there’s enough space to mount the controller and sensor.
Check this compatibility tool to see if your current opener works with smart controllers.
🔔 Quick Takeaway:
Understanding how smart garage door openers work is the first step to successful setup.
They’re secure, convenient, and incredibly simple to operate — once you know how.
➡️ Click here to explore the best-rated smart garage door openers you can install yourself.
Pre-Installation Checklist ✅
Before you start the process of how to set up a smart garage door opener, there are a few key things you need to prepare.
Getting everything in place ahead of time will ensure a smooth installation and prevent any unexpected hiccups along the way.
This section covers the essential tools, compatibility checks, and preparation steps to take before installing your smart garage controller or opener system.

Check Your Garage Door Opener’s Compatibility 🔍
Not all garage door openers are compatible with smart systems, especially older models.
Before you purchase a smart controller or all-in-one system, make sure your current opener checks these boxes:
✅ Year of Manufacture
If your garage door opener was made after 1993, it most likely includes photoelectric safety sensors, which are required for most smart systems to work properly.
📆 Check the label on the back of your garage motor to find the manufacture date.
✅ Compatible Brands
Most popular smart controllers (like MyQ, Meross, and Nexx) support garage door openers from these brands:
- Chamberlain
- LiftMaster
- Genie
- Craftsman
- Linear
- Stanley
- Sommer
If your brand isn’t listed, check with the manufacturer’s website for a compatibility chart or use their model lookup tool.
✅ Wall Button Wiring
Open your garage wall switch.
If there’s only one wire connected, it may not be compatible with some smart controllers.
You may need an adapter or a different controller model.
💡 Tip: MyQ is usually compatible with most systems made after 1993, but models using DIP switches may need a specific version or won’t be supported.
Ensure Strong Wi-Fi Signal in the Garage 📶
Since smart openers rely on a stable Wi-Fi connection, it’s important to check that your garage has adequate signal strength before setup.
How to Test Wi-Fi Strength
- Stand in your garage with your smartphone.
- Open YouTube or a speed test app like Speedtest by Ookla.
- If pages load slowly or you have fewer than 2 Wi-Fi bars, the signal may be too weak.
📡 If your signal is weak:
- Consider installing a Wi-Fi range extender near your garage
- Upgrade to a mesh Wi-Fi system for consistent coverage across your entire home
- Try connecting your opener to the 2.4GHz network, which typically has better range than 5GHz
🛠️ Many smart controllers like MyQ only support 2.4GHz — double-check this before pairing!
Gather Tools and Materials 🧰
You don’t need a lot of tools to get started — in fact, many smart garage door openers are DIY-friendly and come with everything you need.
But it’s still smart to gather a few basics ahead of time.
Here’s a handy checklist:
✅ Flathead screwdriver
✅ Phillips screwdriver
✅ Power drill with bits (optional for mounting)
✅ Ladder
✅ Smart garage controller or opener system
✅ Smartphone with the controller’s app installed
✅ Strong Wi-Fi connection
✅ Double-sided tape or mounting screws (usually included)
✅ Cable ties or clips for neat wiring

Set Up Your Mobile App Ahead of Time 📱
Most smart garage openers require pairing with an official app.
Download the app before you start the install process so you’re not scrambling for setup codes mid-installation.
Here are some of the most popular apps:
- MyQ by Chamberlain
- Meross App
- Nexx Garage App
- Tailwind Smart App
- Alcidae Smart Garage App
Create an account in advance and allow all necessary permissions (Bluetooth, Wi-Fi, notifications) to avoid any roadblocks during pairing.
Safety First! 🛑
Garage doors are heavy and can be dangerous if not handled properly.
Here are a few safety reminders before you begin setup:
- Disconnect power to your garage motor before working with any wiring.
- Never place your hands or tools near the spring or chain mechanism while powered.
- Use a stable ladder and avoid leaning too far in any direction.
- Keep kids and pets out of the garage during installation.
⚠️ If you’re unsure about electrical wiring or motor components, it’s always best to consult a professional.
🔔 Quick Recap:
Before you begin the actual setup of your smart opener, make sure:
✅ Your garage opener is compatible (post-1993, supported brand)
✅ You have strong Wi-Fi in the garage
✅ All tools and accessories are ready
✅ You’ve downloaded and configured the mobile app
✅ You understand basic safety precautions
➡️ Ready to choose the perfect smart garage door opener for your needs? Click here to see our expert recommendations
Step-by-Step Installation Guide 🔧
Now that you’ve completed your checklist and confirmed compatibility, let’s walk through exactly how to set up a smart garage door opener — step by step.
This comprehensive installation guide will walk you through both add-on smart garage door controllers (like MyQ or Meross) and all-in-one smart openers, depending on your setup.
Option 1 — Installing a Smart Garage Door Controller (Add-On Type) 🧩
If you’re adding a smart controller to an existing opener, follow these steps:
Step 1 – Unbox and Review the Manual 📦
Carefully unpack your smart controller kit.
It should include:
- The smart hub/controller
- A door sensor
- Mounting accessories (tape, screws, brackets)
- A power adapter
- Quick start guide or manual
📖 Take a few minutes to review the manual, as setup steps may vary slightly by brand.
👉 Pro Tip: Keep the box and extra parts in case you ever move homes or switch devices.
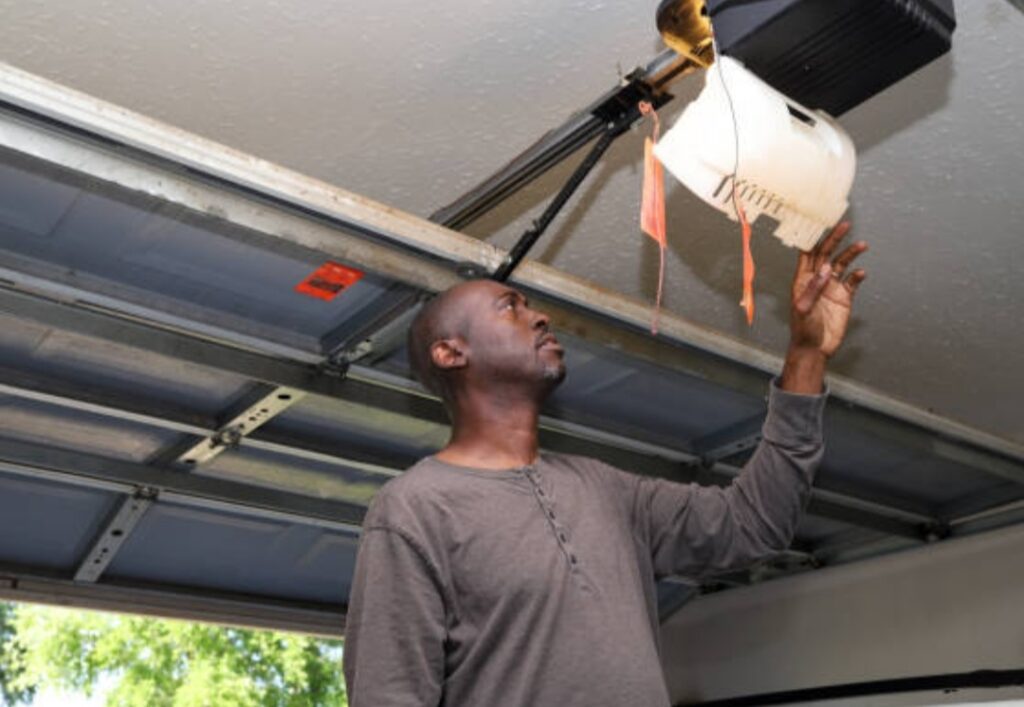
Step 2 – Plug in and Power the Controller 🔌
- Choose an outlet near your garage opener (typically on the ceiling).
- Plug in the controller using the provided adapter.
- Most devices will display a flashing LED to indicate setup mode.
⚡ Avoid plugging it into an extension cord or outlet too far from the opener, as this could affect signal strength.
Step 3 – Connect to Wi-Fi and the Mobile App 📱
Open your previously installed app (e.g., MyQ, Meross, Nexx).
- Follow the on-screen prompts to connect the hub to your Wi-Fi.
- Make sure you’re connecting to a 2.4GHz network (most smart controllers don’t support 5GHz).
- Enter your Wi-Fi credentials and name your garage door.
💡 Most apps will guide you through the pairing process with simple animations or video walkthroughs.
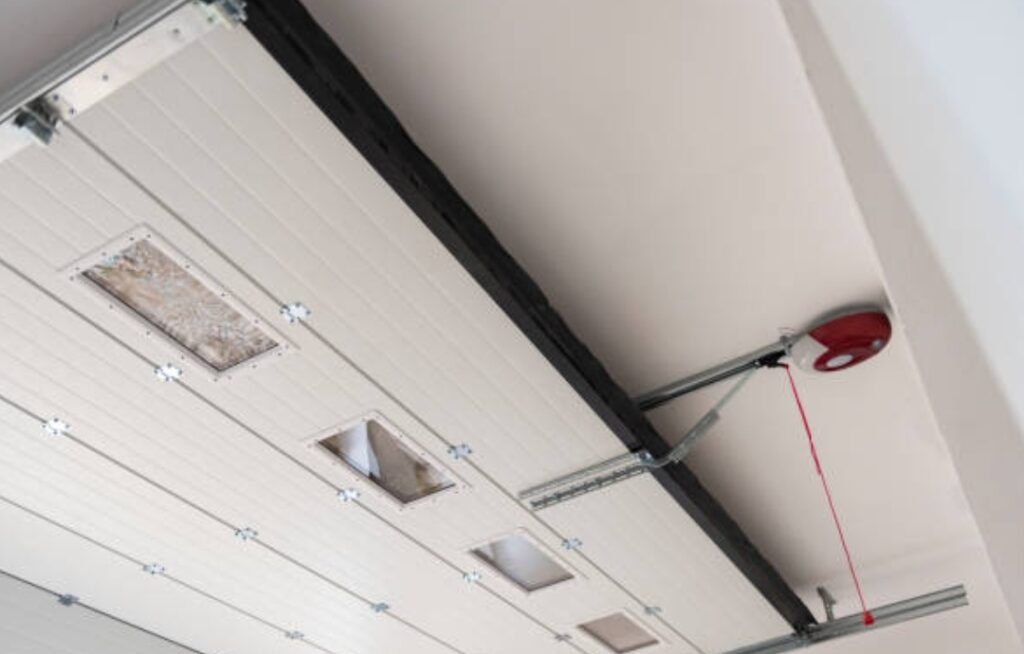
Step 4 – Mount the Door Sensor 🚪
The door sensor detects whether the door is open or closed.
You’ll need to attach it to the top panel of your garage door, either with:
- Double-sided adhesive (included), or
- Screws and brackets (more secure for metal or textured doors)
Ensure the sensor is:
- Facing the correct direction (arrows typically show this)
- Firmly attached and level
🧲 Some sensors are magnetic and must align with a second piece — check your model’s guide carefully.
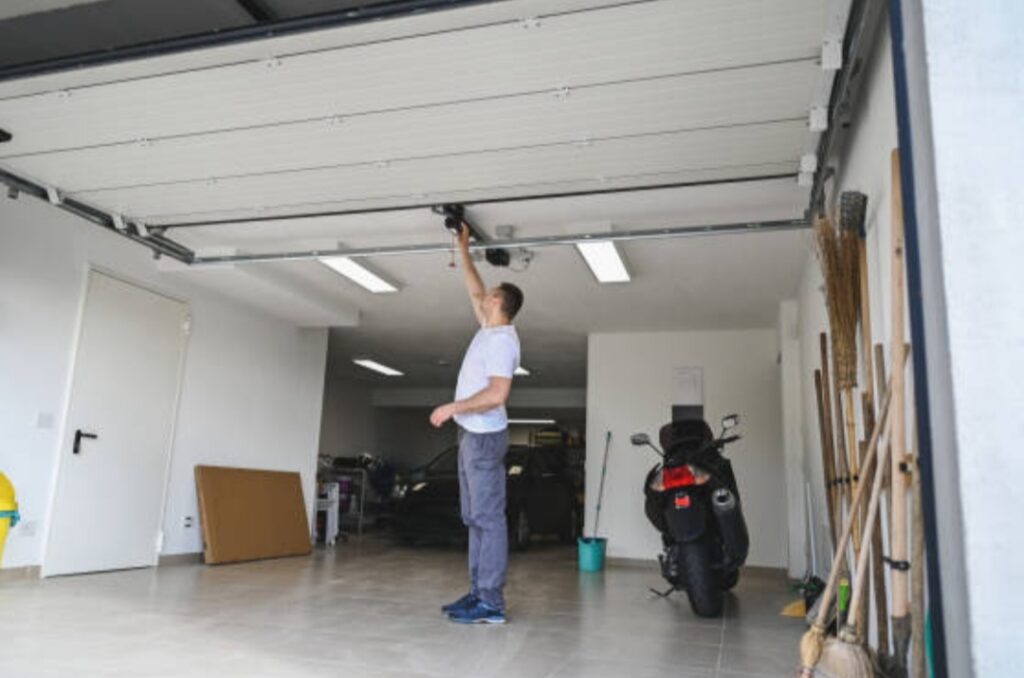
Step 5 – Mount the Controller to the Ceiling or Wall 🧱
Use screws or adhesive strips to mount the controller box near your opener motor — usually within a few feet.
⚠️ Important: Keep it away from moving chains, belts, or motor parts.
Tidy up loose wires with cable ties or clips to keep your installation clean and professional.
Step 6 – Sync with Your Garage Door Opener 💥
Now, you’ll connect the controller to your garage motor:
- Press and hold the “Learn” button on your garage opener (usually found behind a plastic cover)
- Within 30 seconds, return to your app and press “Sync” or “Pair”
- The motor should click, flash, or beep — confirming the connection
🧠 Some controllers use universal remote signals, while others use physical wiring to the wall button terminals — follow the brand-specific instructions carefully.
Step 7 – Test the Smart Controls ✅
Go to your app and:
- Tap “Open” — your garage door should open
- Tap “Close” — your garage door should close
- Try this from inside the garage, then from a distance (e.g., on mobile data)
Make sure:
- The sensor updates in real-time
- Notifications are enabled in your phone settings
- The system logs events correctly
Step 8 – Enable Voice Control or Automation 🗣️
💬 Want to use your voice to control your garage?
Link your controller app to:
- Amazon Alexa
- Google Assistant
- Apple HomeKit (if supported)
- IFTTT for custom routines
Example:
“Alexa, open the garage”
“Google, is my garage door closed?”
Enable voice PIN protection for added security if your platform supports it.
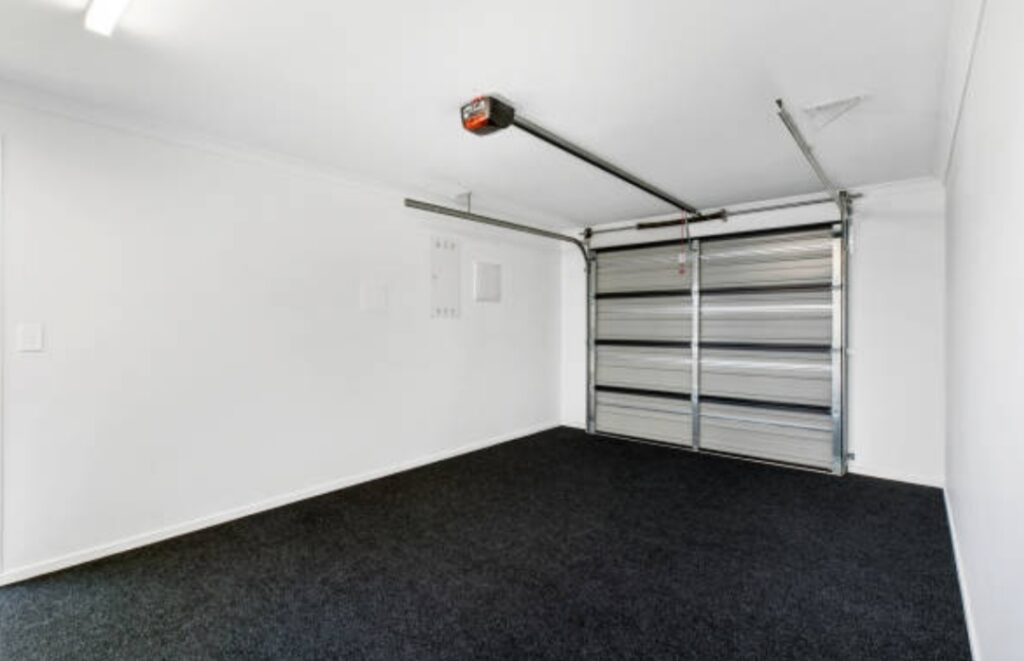
Option 2 — Installing a Full Smart Garage Door Opener System (Motor + Controller) 🛠️
If you’re replacing the entire opener (motor, rail, remote), the process is more hands-on.
Here’s how:
Step 1 – Remove the Old Opener System (If Needed)
- Disconnect power
- Unscrew mounting brackets
- Detach from ceiling, rail, and door arm
- Remove wall switch and safety sensors
This step may require a second person — be cautious, as these motors can be heavy.
Step 2 – Install the New Rail and Motor Assembly 🧲
- Assemble the rail based on your model’s manual
- Attach the motor head
- Install to the ceiling joists using provided brackets
Make sure everything is level and secured tightly.
Step 3 – Connect the Garage Door Arm ⚙️
- Attach the arm to the door and trolley
- Align it for smooth movement
- Secure with bolts or pins
Use your manual’s measurement guide for precise alignment.
Step 4 – Wire the Wall Button and Safety Sensors 🧯
- Connect low-voltage wiring from the motor to your new wall switch
- Mount and align photoelectric safety sensors near the garage floor
- Plug the motor into the outlet
Step 5 – Set Up the Smart App and Connect Wi-Fi 📶
Follow the same mobile app steps as the controller version:
- Connect the motor to Wi-Fi
- Name your door
- Test the open/close from your phone
- Enable notifications and integrations
Final Setup Tips and Troubleshooting 🛠️
Even with the best prep, you might hit a hiccup or two.
Here are common issues and how to solve them:
| Problem | Solution |
| Wi-Fi won’t connect | Move router closer or add extender |
| Door won’t respond to app | Re-pair using “Learn” button |
| Sensor not detecting properly | Re-align or remount door sensor |
| App says “offline” | Power cycle the controller and phone |
📞 Still stuck? Contact your device’s customer support for real-time help or app-based diagnostics.
🔔 Quick Recap
You now know exactly how to set up a smart garage door opener, whether you’re using a controller or replacing the entire system.
By following this guide, you’ve turned your old-school garage into a high-tech, voice-controlled access point — all with just a few tools and a mobile app.
➡️ Check out the most affordable smart garage controllers on Amazon here
➡️ View our top-rated full opener kits for 2025 here
Configuring the Mobile App 📲
Once your smart garage door opener hardware is successfully installed, the next critical step is configuring the mobile app — your gateway to managing, monitoring, and automating your garage door from anywhere in the world.
Whether you’re using popular systems like Chamberlain MyQ, Meross, Nexx, Tailwind, or others, this setup process is relatively similar across platforms.

Step 1 – Download the Right App for Your Smart Device 📥
Before anything else, download the official app that matches your smart controller or opener brand.
Here are the most common apps:
- 📌 Chamberlain MyQ → MyQ: Garage & Access Control
- 📌 Meross Smart Garage → Meross App
- 📌 Nexx Garage → Nexx Home
- 📌 Tailwind iQ3 → Tailwind Smart App
- 📌 Garadget, Genie Aladdin, eKyro, and more → Use their respective brand apps
Download directly from the Apple App Store or Google Play Store.
✅ Double-check app reviews and ensure you’re downloading the official, most recent version.
Step 2 – Create an Account & Log In 🛡️
To access all remote features and secure control, you’ll need to sign up for an account.
This usually requires:
- A valid email address
- A secure password
- Two-factor authentication (2FA), if supported
📬 You may receive a verification email or SMS code — be sure to complete that step.
🔒 Pro Tip: Use a strong password and enable app-lock or biometric login to protect access to your garage.
Step 3 – Add Your Device to the App 🧠
Once you’re logged in, tap “Add Device” or “Set Up New Garage Door Opener” (terminology may vary slightly).
The app will prompt you to:
- Confirm your device model
- Power on your controller or opener
- Ensure it’s in pairing mode (usually indicated by a blinking light)
📡 Most devices connect via Bluetooth or Wi-Fi during this phase.
Make sure:
- Your phone’s Bluetooth is enabled
- You’re connected to a 2.4GHz Wi-Fi network (most do not support 5GHz)
Step 4 – Name Your Garage Door 🚗
Once detected, the app will ask you to name the device.
Choose something simple and voice-control friendly, such as:
- “Garage”
- “Main Garage Door”
- “Home Entrance Garage”
This is how the door will be identified in your voice assistant and mobile dashboard.
💬 You can always rename it later in the app’s settings.
Step 5 – Calibrate & Test the Device 🔄
Depending on the brand, the app may guide you to:
- Open and close the door once or twice
- Verify the door sensor status (open/closed)
- Adjust door delay times or travel limits
- Test Wi-Fi signal strength near the hub or opener
Some brands like Tailwind even use GPS auto-close testing here, allowing your garage to open/close based on your phone’s location.
🚗 This is where your mobile app really comes to life — as your smart command center.
Step 6 – Customize App Notifications & Alerts 🔔
Go to the Notifications or Alerts section of your app.
Configure what you want to be alerted about:
- ✅ Door left open for more than X minutes
- ✅ Garage door opened or closed
- ✅ Unusual access attempts
- ✅ Schedule reminders
📱 Be sure to allow push notifications in your phone’s settings as well.
🎯 Notifications are not only convenient — they add an extra layer of home security.
Step 7 – Integrate Voice Assistants and Smart Home Platforms 🧠
Most apps offer integration with:
- Amazon Alexa
- Google Assistant
- Apple HomeKit
- Samsung SmartThings
- IFTTT or custom routines
To connect:
- Go to your app’s “Integrations” or “Smart Home” section
- Follow on-screen prompts to link your accounts
- Add your garage door as a new device in your assistant app (e.g., Alexa app)
📢 Example voice commands:
- “Alexa, is my garage door open?”
- “Hey Google, close the garage door.”
🛡️ Don’t forget to set up voice PINs or biometric authentication for voice-based opening to enhance safety.
Step 8 – Set Up Schedules and Automation Routines ⏰
Want your garage door to automatically close every night?
Or open when you arrive home?
Here’s how to automate your door:
- Set up daily schedules in the app (e.g., close at 10:00 PM)
- Create geofencing rules (e.g., open when phone is near)
- Use IFTTT to trigger actions like turning on lights when the door opens
🌐 This is where your setup truly becomes “smart home ready.”
Step 9 – Sync with Multiple Users 👨👩👧👦
Need your partner, kids, or roommate to access the garage?
Head to Users > Add Shared User in your app.
You can:
- Send an invite via email or phone number
- Set access times or restrictions
- See who accessed the door and when
👥 Perfect for families, Airbnbs, deliveries, or rental properties.
✅ Quick Checklist for App Setup
✅ Download the correct app
✅ Create your account
✅ Add the device and confirm pairing
✅ Name and calibrate the door
✅ Enable alerts and notifications
✅ Connect to Alexa, Google, or Siri
✅ Create schedules and automations
✅ Add family members and track usage
💡 Pro Tips to Maximize Your App Experience
- Place your router or extender closer to the garage if you’re experiencing signal issues
- Regularly update your app and firmware for bug fixes and new features
- Backup your device settings in case you switch phones
- If using Apple HomeKit, verify HomeBridge or compatible accessory setup
🔗 Recommended Tools for Enhanced Control:
- 👉 Wi-Fi Range Extender for Garage
- 👉 Smart Speaker Compatible with MyQ or Meross
- 👉 Garage Camera for Real-Time Visual Monitoring
➡️ Don’t let distance limit your control.
➡️ Download the smart garage door app now and take full command of your home’s entry point — even when you’re thousands of miles away.
Testing and Troubleshooting Your Smart Garage Door Opener 🔍
Once your smart garage door opener and mobile app are configured, the next essential step is testing and troubleshooting to ensure everything is working smoothly, reliably, and safely.
Whether you’re a first-time smart garage owner or upgrading your system, this section will guide you through real-world tests, common issues, smart diagnostics, and expert solutions.
We’ll also help you uncover hidden issues before they become major headaches — so you can feel confident that your smart garage is running flawlessly.
Step-by-Step Testing After Setup ✅
After completing installation and app configuration, follow this smart test sequence:
🔄 1. Open and Close Test
- Use your mobile app to open and close the door
- Watch for smooth movement, without jerks or hesitations
- Listen for any strange sounds, grinding, or resistance
🚨 If your door stutters or stops midway, check the track, springs, or opener calibration.
📶 2. Wi-Fi Signal Strength Test
- Go to your garage with your phone
- Check Wi-Fi bars on your device or run a speed test
- Most smart openers need 2 Mbps+ download speed
🛠️ If the signal is weak:
- Move your router closer to the garage
- Use a Wi-Fi extender or mesh system (Best Garage Wi-Fi Extender)
📲 3. App Command Responsiveness
Test how quickly the app responds when:
- Opening or closing the door
- Sending notifications
- Checking door status
⚡ A delay longer than 5 seconds might indicate connectivity issues.
Common Issues and How to Fix Them 🧰
Even if you follow all steps perfectly, minor hiccups can still happen.
Here’s a breakdown of common problems and their smart fixes.
❌ Issue: Smart Opener Not Responding to App
Likely Causes:
- Wi-Fi disconnection
- Power interruption
- Mobile app update needed
Fixes:
- Restart your smart opener and Wi-Fi router
- Make sure your phone is on the correct Wi-Fi band (2.4GHz)
- Check if the opener is blinking red or amber (error codes)
- Re-pair the device using the app’s “Reset” or “Reconfigure” option
❌ Issue: Door Opens via Remote, But Not via App
Likely Causes:
- Misconfigured relay wiring
- Device not registered correctly in app
- Sensor calibration error
Fixes:
- Go to the app and remove the device → then re-add
- Check door sensor placement — ensure it aligns when the door is closed
- Re-run the calibration test within the app
❌ Issue: Notifications Not Working
Likely Causes:
- Notification permissions not granted
- App in battery-saver mode
- Background data restrictions
Fixes:
- Enable notifications in both the app and phone settings
- Turn off “Battery Optimization” for the smart opener app
- Restart the app and test alerts
❌ Issue: Door Closes or Opens Randomly
Possible Causes:
- GPS-based automation too sensitive
- Shared users with access
- Power surges or faulty sensor triggering
Fixes:
- Disable GPS auto-open temporarily and test
- Review “User Access Logs” in the app
- Check wiring for any frays or poor grounding
Safety Testing and Calibration Tips 🛡️
Smart doesn’t mean safe by default.
Here’s how to ensure your garage door is safe for kids, pets, and vehicles.
🧪 Test the Auto-Reverse Safety Mechanism
- Place a soft object (like a roll of paper towels) in the door’s path
- Close the door using the app
- The door should automatically stop and reverse
❗ If it doesn’t:
- Check the photo-eye sensors — clean and realign them
- Run manual sensor test via the app if available
📏 Check Sensor Range and Calibration
- Confirm that your smart opener’s door sensor correctly reports “open” and “closed” states
- You can test this by manually moving the door mid-operation and checking the app’s status
⚙️ Recalibrate if the status doesn’t update correctly.

Regular Maintenance Checks for Smart Garage Doors 🧽
Just like any mechanical system, a smart garage door requires occasional checkups.
Set a reminder every 3–6 months to:
- 🧼 Clean the sensors and tracks
- 🔧 Tighten any loose bolts or wires
- 🔋 Check the backup battery status (if available)
- 🔁 Update your smart opener firmware via the app
- 🧠 Review automation rules and user access list
When to Contact Support or a Pro Technician 📞
While most issues can be fixed with smart troubleshooting, don’t hesitate to contact support if:
- The device is unresponsive after reset
- The door is physically stuck
- You see burning smells or sparks
- There are recurring random openings or closings
📱 Brands like MyQ, Meross, Nexx, and Tailwind have dedicated tech support teams that can guide you via chat or call.
📄 Keep your purchase receipt and model number ready for warranty support.
✅ Quick Smart Testing Checklist
✔️ Can I open and close the door remotely?
✔️ Do I get notifications instantly?
✔️ Does the app show the correct status?
✔️ Do voice assistants work properly?
✔️ Does the door reverse when it detects an obstacle?
✔️ Are all users securely added?
🔐 Final Tips for a Flawless Experience
- Enable auto-close failsafes in case the door is left open
- Use doorbell camera integrations for visual confirmation
- Secure your mobile phone with biometrics to prevent unauthorized access
- Periodically review user logs to detect any odd usage patterns
Want peace of mind 24/7?
➡️ Upgrade to a garage camera system that works with your smart opener and see exactly who’s coming and going in real-time.
➡️ Shop smart garage door accessories here to take your automation to the next level.
Enhancing Security and Privacy Features for Your Smart Garage 🔒
Now that your smart garage door opener is fully installed, configured, and tested, let’s focus on what matters most — security and privacy.
While smart features offer convenience, they also open potential gateways for digital threats and vulnerabilities if not properly secured.
This section will walk you through essential security best practices, data privacy settings, and smart protection upgrades to give you peace of mind.
🛡️ Whether you’re using a Chamberlain MyQ, Meross, Nexx, or Tailwind smart opener, these steps apply across the board.
Why Garage Door Security is Critical
Your garage isn’t just for storing tools and cars — it’s often the largest entry point to your home.
Leaving it vulnerable can lead to:
- Unauthorized home access
- Theft of valuable items
- Compromise of smart home networks
- Privacy invasions via smart cameras or sensors
💡 According to home security studies, 34% of burglars enter through the front or garage door — making garage security non-negotiable.
Top Security Features to Enable Immediately
🔐 Here are the must-have security features you should activate as soon as your smart garage system is up and running:
✅ Two-Factor Authentication (2FA)
- Protects against unauthorized app logins
- Enabled via email, SMS, or authenticator apps
✅ Automatic Close Timer
- Closes your garage after a set time
- Prevents the door from being accidentally left open
- Set it for 5–10 minutes if no motion or entry is detected
✅ Geofencing Alerts
- Alerts or closes the door if you leave home without securing it
- Helps automate based on your phone’s GPS location
✅ Access Logs and History
- Lets you review who accessed the garage and when
- Helpful for tracking kids, deliveries, or shared users
✅ Encrypted Communication
- Make sure your device uses AES-128 or AES-256 encryption
- Protects your commands and data from being intercepted
Best Practices to Keep Hackers Out 🛑
Even with encryption, your smart garage opener can be a potential vulnerability if you don’t take extra precautions.
Here are actionable steps to harden your system:
🔒 Secure Your Wi-Fi Network
- Rename your SSID (avoid brand/model names)
- Use WPA3 or WPA2-AES encryption
- Set a strong, unique password (16+ characters)
📱 Limit App Permissions
- Only give necessary permissions (avoid microphone/camera if not needed)
- Turn off background tracking unless using geofencing features
👤 Restrict User Access
- Only add trusted family members to the account
- Review and remove inactive or old users regularly
- Avoid using guest mode unless absolutely necessary
🔄 Regularly Update Firmware and Apps
- Smart garage brands release security patches often
- Enable auto-updates if your app supports it
Integration Security with Other Smart Devices
If you’ve connected your garage opener to Amazon Alexa, Google Assistant, Apple HomeKit, or SmartThings, take these precautions:
- Enable voice PINs for commands like “Open Garage”
- Use routines with security triggers (e.g., auto-close if front door is locked)
- Avoid exposing garage door commands to smart speakers in public areas
Physical Security Add-ons for Extra Protection 🧱
Digital security is great — but don’t overlook physical deterrents.
Here are effective security upgrades for your smart garage:
- 🧲 Smart deadbolt for internal garage door (Top Smart Deadbolt Picks)
- 📹 Garage-focused security camera (Recommended Garage Cameras)
- 🧯 Motion-activated floodlights
- 🚪 Reinforced garage door locks or anti-lift devices
💥 These additions help stop intruders before they get close — and act as strong visual deterrents.
Privacy and Data Protection Tips
Some smart garage brands collect usage data to improve performance.
You can reduce tracking by:
- Turning off analytics/data sharing in the app settings
- Avoiding cloud backup of logs unless necessary
- Using local control (e.g., HomeKit Secure) when possible
Check your brand’s privacy policy for details and opt out where available.
🧠 Final Takeaways on Smart Garage Security
Securing your smart garage door opener doesn’t have to be complicated.
By combining smart features with common-sense habits, you can greatly reduce the risk of intrusions — both physical and digital.
✔️ Enable 2FA
✔️ Use strong Wi-Fi security
✔️ Audit your users and permissions
✔️ Keep firmware and apps up to date
✔️ Add physical deterrents
🚀 Fortify Your Garage the Smart Way!
Want to level up your home’s security?
➡️ Browse smart locks, garage cameras, and alarm kits here — trusted gear that keeps your space safe 24/7.
Integrating Voice Assistants and Smart Home Ecosystems 🧠🏡
In today’s rapidly advancing smart home landscape, one of the most exciting features of a smart garage door opener is its seamless integration with voice assistants and broader smart home ecosystems.
This integration allows you to control, automate, and monitor your garage door using voice commands, mobile routines, or automated triggers — all designed to make your life more convenient and secure.
Whether you’re using Amazon Alexa, Google Assistant, Apple HomeKit, or Samsung SmartThings, this section breaks down everything you need to know to connect your smart garage door opener and get the most out of your connected home.
👉 If you’re wondering “How to Set Up a Smart Garage Door Opener” to work with your voice assistant — you’re in the right place!

Benefits of Voice Assistant Integration 🤖🗣️
By integrating your garage opener with a voice assistant, you unlock a new level of control and automation.
Here’s what you can do:
- ✅ Open or close the garage door with simple voice commands
- ✅ Get real-time status updates (“Is the garage door open?”)
- ✅ Create voice-activated routines (e.g., “Alexa, goodnight” = door closes + lights off)
- ✅ Hands-free control when arriving with groceries, kids, or gear
- ✅ Increased accessibility for elderly or disabled family members
⚠️ Just make sure to secure these features with PINs or passcodes for voice actions.
Compatible Voice Assistants & Ecosystems 🔄
Before diving in, check if your smart garage door opener is compatible with your preferred ecosystem.
Here’s a quick breakdown of popular options:
| Voice Assistant | Compatible Brands | Integration Type |
| Amazon Alexa | MyQ*, Meross, Nexx, Tailwind | Native + Skill-based |
| Google Assistant | Meross, Nexx, Tailwind | App Link + Routines |
| Apple HomeKit | Chamberlain (Bridge Required), Meross, Tailwind | Native (Home App) |
| Samsung SmartThings | Nexx, Meross, Tailwind | Hub Integration |
| IFTTT | Most brands | Automation Triggers |
📝 Note: MyQ requires a third-party workaround (like Chamberlain MyQ Home Bridge) to work with Alexa and Google due to limited direct support.
How to Connect Your Smart Garage Door Opener to Voice Assistants 🔧
Each platform has a slightly different method for integration, but here’s a generalized setup flow:
Amazon Alexa:
- Open the Alexa App
- Go to Skills & Games → Search for your opener brand (e.g., MyQ, Meross)
- Enable the skill and log in to your device account
- Discover devices → Alexa will add it to your smart home
- Optional: Set up Garage Door PIN for secure access
Google Assistant:
- Open Google Home App
- Tap “+” → Set up device → Works with Google
- Find and select your opener brand
- Sign in to your account → Assign device to a room
- Set up Routines (e.g., “Hey Google, close the garage”)
Apple HomeKit:
- Open the Home app
- Tap “+” → Add Accessory
- Scan the HomeKit setup code on the garage hub or packaging
- Assign to a room and name it something easy like “Garage Door”
- Now use Siri commands like “Close my garage”
🛠️ Pro Tip: Use short, intuitive device names like “Garage” to avoid voice recognition errors.
Building Smart Routines and Automations ⚙️
Once integrated, the real magic happens when you start building custom routines.
Here are a few powerful examples:
📍 Geofencing Routine
- Automatically open your garage when you arrive home within a certain distance
- Works great with Google Home, HomeKit, or Alexa routines
🌙 Goodnight Routine
- When you say, “Goodnight Alexa,” the garage closes, lights turn off, and cameras activate
🚗 Leaving Home Automation
- Triggered when your phone disconnects from home Wi-Fi
- Closes the garage and sends a status notification
📦 Delivery Mode
- Create a voice command or IFTTT trigger for Amazon deliveries
- Garage opens for 10 seconds and auto-closes (set auto-close timer in app)
Tips for Safe Voice Control Use 🚨
Voice control is powerful, but also comes with security concerns if not configured properly.
Here’s how to keep your setup secure:
- 🔐 Enable voice PINs for opening or closing the garage
- 🧠 Avoid common device names like “door” (easily guessable)
- 🎙️ Turn off voice purchasing and unrelated access in settings
- 👪 Restrict shared access on the voice assistant platform
Troubleshooting Voice Assistant Integration Issues 🛠️
Running into problems? Here are common issues and how to fix them:
| Problem | Solution |
| Device not found | Re-link the account or re-add the skill |
| Voice commands not recognized | Rename device for simplicity |
| Assistant says “Garage not responding” | Reboot Wi-Fi, hub, or smart opener |
| Commands only work sometimes | Move Wi-Fi router closer or add extender |
| Privacy concerns | Review app settings and disable cloud logging |
Maximize Interoperability with Other Smart Devices 🌐
Want to go all out?
Link your smart garage opener to:
- 🏠 Smart lights — flash lights when garage opens after 8 PM
- 🎥 Security cameras — record every time the door opens
- 📦 Package sensors — get alerts when deliveries are dropped
- 🔔 Smart speakers — play a chime or custom alert when someone enters
Platforms like IFTTT, Home Assistant, or SmartThings can give you limitless integration options with just a few taps.
🚀 Take Your Smart Home to the Next Level!
Want total control at your fingertips and with just your voice?
➡️ Explore voice-controlled smart garage devices here
➡️ Upgrade to full smart home bundles and automation kits
Maintenance Tips and Best Practices for Long-Term Use 🧰
Setting up a smart garage door opener is just the beginning.
To ensure it performs reliably over the years, routine maintenance and smart usage habits are essential.
This section walks you through long-term care tips, safety checks, and optimization strategies to keep your garage system in peak condition.
Whether you’re a beginner or an experienced smart home user, following these practices will help extend the lifespan of your equipment, reduce repair costs, and ensure uninterrupted access.
If you’ve searched “How to Set Up a Smart Garage Door Opener” and are now wondering how to maintain it long-term, you’re in the right place.
Let’s dive in.
Why Smart Garage Maintenance Matters
Just like traditional systems, smart garage openers are exposed to daily wear and tear.
But they also rely on Wi-Fi networks, sensors, software, and electronic components — which require regular care.
Without proper upkeep, you may face issues like:
- Delayed app notifications
- Failure to connect remotely
- Broken sensors causing false alarms
- Increased risk of unauthorized access
That’s why these simple yet powerful maintenance tips are so important.
Monthly Maintenance Checklist 🗓️
A quick 5-10 minute inspection each month can prevent small issues from becoming big problems.
Here’s your monthly smart garage maintenance checklist:
- ✅ Wipe down the sensors with a soft cloth to clear dust and cobwebs
- ✅ Check Wi-Fi signal strength — relocate the router or add a mesh extender if weak
- ✅ Test the auto-reverse function (place a small object under the door)
- ✅ Inspect the mobile app for lag or delay in controls
- ✅ Check remote batteries if applicable
- ✅ Update firmware through the app if prompted
- ✅ Ensure proper door alignment and listen for unusual sounds during operation
Tip: Set a monthly calendar reminder to stay consistent.
Seasonal Tune-Ups for Weather Protection ❄️☀️
Changes in temperature can affect garage performance, especially in extreme summer heat or winter cold.
Perform these tune-ups at the start of every season:
- Lubricate rollers, hinges, and springs with silicone-based lubricant
- Replace or tighten loose bolts and brackets
- Inspect weather seals for cracks, tears, or moisture leakage
- Test the manual release cord to make sure it’s working
- Ensure your backup battery is fully charged (essential in winter)
- Clean out leaves, salt, or debris near sensors or tracks
Bonus Tip: If you live in an area with high humidity or salt air, increase inspections to bi-monthly.
Backup Battery and Power Supply Care 🔋
A smart garage opener is only as good as its power source.
Here’s how to maintain the battery system:
- Test your backup battery quarterly via your mobile app or indicator light
- Replace rechargeable batteries every 18–24 months, even if unused
- Use a surge protector to guard your system during thunderstorms or outages
- Unplug and check the power cord annually for fraying or wear
A battery failure during a storm can leave you locked out — stay ahead of the issue.
Keep Firmware and Apps Up to Date ⬆️
Smart garage openers often receive software updates for security, speed, and features.
Don’t ignore these.
Here’s how to stay current:
- Enable auto-updates for your garage opener app on Android or iOS
- Regularly check the firmware status within the app’s settings
- Visit the manufacturer’s support page for manual firmware updates
- Read update logs — often, they fix bugs or improve response times
Outdated software = vulnerabilities. Don’t skip this step.
Inspect the Door’s Physical Structure 🏗️
Smart components don’t mean you can forget the mechanical parts.
Inspect your garage door itself:
- Look for rust, dents, or warping that may affect motion
- Watch for fraying cables or aging springs
- Ensure the door tracks are clear of grit, gravel, or blockages
- Replace any worn rubber on the bottom seal to prevent drafts or pests
If the door gets stuck or misaligned, your opener might shut down as a safety precaution.
Secure Your System: Logs, Users & Access Control 🔐
Since your garage opener is connected to the internet, cybersecurity is vital.
Here’s how to protect your home:
- Review the access logs regularly in your app (who opened the door and when)
- Remove inactive or unfamiliar users/devices
- Set PIN codes or 2FA for remote access
- Change your passwords every 3–6 months
- Turn off remote access when you’re away for extended periods
- Use secure Wi-Fi with WPA3 encryption and firewall enabled
Don’t give hackers a backdoor to your front door.
Pro Tips for Long-Term Smart Garage Opener Care
Here are a few final pro tips from experienced users and home automation pros:
- Use IFTTT or routines to receive alerts when the door has been open for more than 5 minutes
- Set auto-close timers during specific hours (like 10 PM – 6 AM)
- Keep a manual override key or backup plan in case the smart system fails
- Periodically disconnect the opener and reconnect to the app to prevent pairing bugs
- Use smart cameras or motion sensors for added security around your garage area
⚡ Want to Keep Your Smart Garage Running Like New?
➡️ Shop smart maintenance kits and replacement accessories now
➡️ Get expert virtual support for yearly system tune-ups
Keep your garage opener sharp, secure, and smooth all year round!
Final Thoughts: Is a Smart Garage Door Opener Worth It? 💡
After walking through the step-by-step process on how to set up a smart garage door opener, troubleshoot it, integrate it with your smart home, and keep it running smoothly, one big question remains:
Is it actually worth the investment?
The short answer? Yes — absolutely.
For homeowners who value security, remote access, and modern convenience, a smart garage door opener delivers serious value.
Let’s break it down.
Convenience and Control Anytime, Anywhere 📱
Imagine being able to open and close your garage door from your phone — whether you’re in bed, at work, or on vacation.
No more wondering if you left it open.
No more giving out physical keys or clickers.
You’re in full control, 24/7.
This kind of real-time access is a major upgrade from traditional systems, and it’s one of the biggest reasons people are making the switch.
Enhanced Security and Peace of Mind 🔐
Your garage is often the biggest entry point into your home.
With a smart system, you get instant alerts, user activity logs, and the ability to monitor access remotely.
Some smart garage door openers also offer built-in cameras, motion alerts, or even package delivery compatibility, so your deliveries are secure from porch pirates.
If security is a concern — this is a no-brainer.
Seamless Smart Home Integration 🧠
If you’re already using voice assistants like Alexa, Google Assistant, or Apple HomeKit, a smart garage door opener fits in perfectly.
You can integrate it into home routines like:
- “Goodnight” (which closes the garage automatically)
- “I’m leaving” (locks doors and closes the garage)
- “Delivery Mode” (briefly opens the garage when a package arrives)
The automation possibilities are endless, especially if you use IFTTT, SmartThings, or Home Assistant.
Long-Term Savings and Home Value Boost 💰
While smart garage openers do have an upfront cost, they can:
- Save money by reducing energy loss and theft
- Increase the resale value of your home
- Lower insurance premiums by enhancing security
Think of it as a smart investment, not just a smart gadget.
Are There Any Downsides?
Sure, there are a few things to keep in mind:
- You’ll need a strong and stable Wi-Fi connection in the garage
- The setup process can take time for non-tech-savvy users
- Some advanced features may require a subscription
- Occasional firmware updates and maintenance are needed
But overall? The pros far outweigh the cons.
So, Is It Worth It?
If you’re someone who values security, convenience, automation, and a modern home lifestyle — then yes, a smart garage door opener is 100% worth it.
It’s not just a luxury anymore.
It’s a practical upgrade for anyone looking to simplify daily life and protect what matters most.
Ready to Upgrade Your Garage?
➡️ Explore the top-rated smart garage door openers here
➡️ Get step-by-step setup help and expert product recommendations
Make your life easier, safer, and smarter — starting with your garage.
You might also like :