
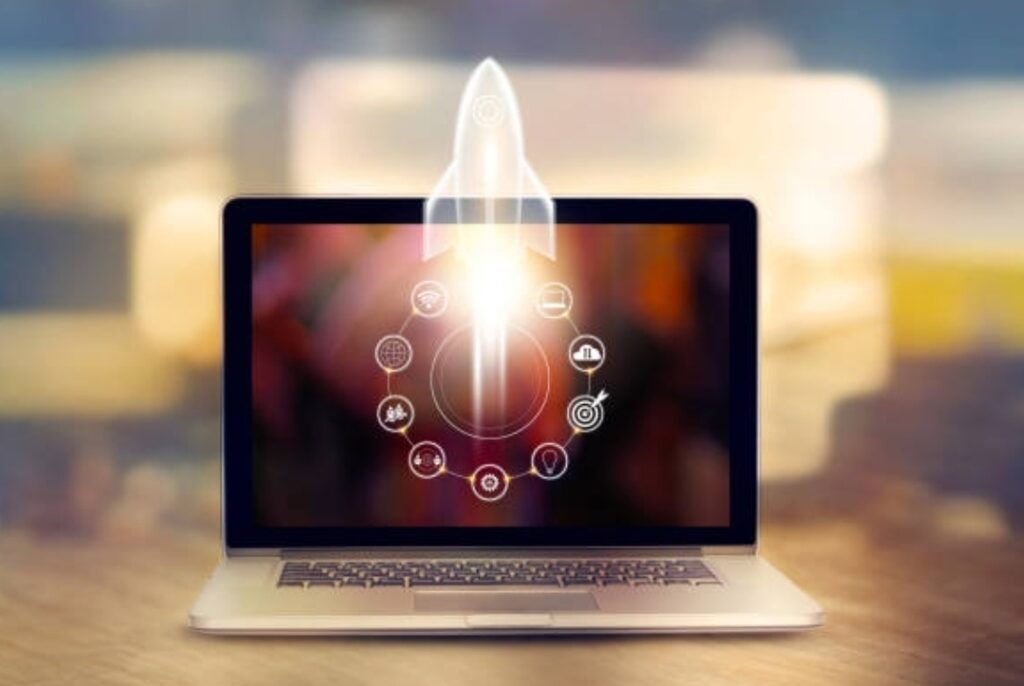
Introduction – Understanding the Importance of Computer Speed
In today’s fast-paced digital world, a slow computer can be more than just an inconvenience—it can be a major roadblock to productivity.
Whether you’re working on an important project, gaming, or simply browsing the internet, a sluggish PC can lead to frustration, lost time, and reduced efficiency.
No one enjoys waiting for a web page to load or watching their cursor freeze in the middle of an important task. That’s why learning how to boost your computer speed is crucial for anyone who wants a smoother and more efficient computing experience.

But what exactly causes your computer to slow down over time?
Let’s break it down:
- Software bloat – As you install more programs, your system accumulates unnecessary files and background processes that consume resources.
- Outdated hardware – Older components struggle to keep up with modern software demands.
- Too many startup programs – Many applications launch automatically when you start your computer, significantly slowing down the boot process.
- Fragmented or cluttered storage – Over time, hard drives get filled with unnecessary files, reducing read/write speeds.
- Malware and viruses – Hidden threats can run in the background, consuming processing power and compromising security.
- Overloaded RAM and CPU usage – Running multiple programs simultaneously can overload your system’s memory and processor.
The good news? You don’t need to be a tech expert to speed up your computer! With the right optimizations, tweaks, and a little maintenance, you can restore your PC’s speed and performance to near-new levels.
Why Speeding Up Your Computer Matters?
A fast and responsive computer isn’t just about convenience—it has a direct impact on your productivity, security, and overall user experience.
Here’s why improving your computer’s speed is more important than you think:
✅ Increases Productivity – A slow PC means waiting longer for files to open, software to load, and tasks to complete. A faster system allows you to get more done in less time.
✅ Enhances Gaming & Streaming – Lag and stuttering ruin the gaming experience. Boosting your PC speed ensures smoother gameplay and uninterrupted streaming.
✅ Improves System Longevity – Regular maintenance and optimization extend the lifespan of your computer, delaying the need for expensive upgrades.
✅ Reduces Crashes & Freezes – A slow computer often experiences frequent crashes and unresponsiveness, leading to frustration and potential data loss.
✅ Enhances Security – Malware and viruses thrive in poorly maintained systems. Optimizing your PC also helps keep it secure by reducing vulnerabilities.
✅ Saves Money – Instead of buying a new computer, simple optimizations can restore your current PC’s performance, saving you hundreds of dollars.
What You’ll Learn in This Guide
This ultimate guide will walk you through proven and up-to-date methods on how to boost computer speed, covering:
🔹 Essential software optimizations to speed up your PC instantly
🔹 Advanced system tweaks for maximum performance
🔹 Hardware upgrades that deliver the most noticeable improvements
🔹 Routine maintenance tips to keep your computer running like new
🔹 Hidden tricks & expert tips that even most tech-savvy users don’t know
Keep Your System Updated – A Critical Step for Faster Performance
Keeping your system updated is one of the simplest yet most effective ways to enhance performance and ensure your computer runs at peak efficiency.
Many users overlook regular updates, thinking they are unnecessary or time-consuming.
However, outdated software, drivers, and operating systems can significantly slow down your PC, cause system crashes, and leave your device vulnerable to security threats.
By consistently updating your system, you can eliminate bugs, improve speed, and ensure compatibility with the latest software.
This section will explain why updates are essential and how they directly impact how to boost your computer speed and overall system health.

Why Regular Updates Matter for Computer Speed
Updates are not just about security patches—they are also designed to enhance performance, stability, and efficiency.
Here’s why keeping your system updated is crucial for speed and overall functionality:
✅ Fixes Performance Issues – Software updates include bug fixes and optimizations that address system slowdowns, glitches, and lag.
✅ Enhances Hardware Compatibility – Updated drivers ensure that your hardware components (CPU, GPU, RAM, and storage) work optimally with the latest software.
✅ Improves Security – Malware and cyber threats can exploit vulnerabilities in outdated software, leading to background processes consuming resources and slowing down your system.
✅ Optimizes System Resources – Updates often include performance enhancements that make your computer run more efficiently.
✅ Ensures Software Compatibility – Running an outdated OS can lead to incompatibility issues with new applications, causing them to run slower or crash.
✅ Reduces Boot Time – Some updates improve startup speed by optimizing background processes and eliminating unnecessary system tasks.
Ignoring system updates means missing out on these critical improvements, leading to a sluggish, unstable, and insecure computing experience.
Update Your Operating System for Maximum Speed
Your operating system (OS) serves as the foundation of your computer.
An outdated OS can significantly reduce speed and efficiency by failing to support new software, lacking optimizations, and accumulating outdated files.
How to check and update your OS:
Windows Users
- Click on the Start menu and go to Settings.
- Navigate to Update & Security → Windows Update.
- Click Check for Updates.
- If updates are available, click Download and Install.
- Restart your computer to apply the changes.
💡 Tip: Enable automatic updates to ensure your system always runs the latest version without manual intervention.
Mac Users
- Click on the Apple menu and select System Settings.
- Go to General → Software Update.
- If an update is available, click Update Now.
- Restart your Mac to finalize the installation.
💡 Pro Tip: macOS updates often include optimizations that improve RAM management, battery efficiency, and overall speed, making them essential for smooth performance.
Update Your Drivers for Faster Performance
Drivers act as communication bridges between your hardware and operating system.
Outdated drivers can cause system slowdowns, crashes, and performance bottlenecks.
Critical Drivers to Update:
✅ Graphics Card Drivers (GPU) – Essential for gaming, video editing, and overall display performance.
✅ Chipset Drivers – Helps the CPU and motherboard function smoothly.
✅ Storage Drivers – Optimizes SSD and HDD performance, reducing lag and boot times.
✅ Network Drivers – Improves Wi-Fi and Ethernet connection speed.
✅ Peripheral Drivers – Ensures smooth operation of keyboards, mice, and printers.
How to Update Drivers in Windows:
- Open Device Manager (Press Win + X and select Device Manager).
- Expand the category of the hardware you want to update (e.g., Display Adapters for GPUs).
- Right-click the device and select Update Driver.
- Choose Search automatically for drivers.
- If an update is found, install it and restart your PC.
💡 Pro Tip: For graphics cards, manually downloading the latest drivers from NVIDIA or AMD ensures maximum performance gains.
How to Update Drivers in macOS:
- macOS automatically updates most drivers through System Update.
- If using third-party peripherals, check the manufacturer’s website for specific driver updates.

Automate Updates for Hassle-Free Performance
Manually updating your system and drivers can be time-consuming.
To ensure your PC remains optimized without constant manual intervention, you can enable automatic updates.
Enable Automatic Updates in Windows:
- Go to Settings → Update & Security → Windows Update.
- Click Advanced Options.
- Toggle Automatically Download Updates to ON.
Enable Automatic Updates in macOS:
- Open System Settings → General → Software Update.
- Check Automatically Keep My Mac Up to Date.
💡 Pro Tip: If you prefer manual updates, set a reminder to check for updates at least once a month to keep your system running smoothly.
What If Updates Slow Down My PC?
While updates generally improve performance, some users experience temporary slowdowns after installing them.
Here’s why this happens and how to fix it:
🚨 Background Installation: Updates often run background processes that temporarily slow down your PC. Solution: Restart your computer after an update to clear excess resource usage.
🚨 Bloatware and Unnecessary Features: Some updates introduce extra features that may slow down older systems. Solution: Disable unnecessary features under Settings > Apps > Optional Features.
🚨 Storage Overload: Large updates consume disk space, causing slowdowns. Solution: Run Disk Cleanup (Win + R, type cleanmgr) to remove old update files.
🚨 Conflicting Drivers: Some updates may install incompatible drivers. Solution: Roll back drivers under Device Manager > Right-click Device > Properties > Driver > Roll Back Driver.
Keep Your System Updated for Peak Speed
Keeping your operating system and drivers up to date is one of the most effective ways to boost computer speed.
By ensuring you have the latest performance improvements, bug fixes, and security patches, you’ll experience a faster, smoother, and more reliable computing experience.
🔹 Regular OS and driver updates eliminate slowdowns and crashes
🔹 Automatic updates keep your PC optimized without extra effort
🔹 Manual updates ensure full control over system performance
Don’t let an outdated system hold you back! Take a few minutes to update your PC today and enjoy instant speed improvements.
🚀 Want an even faster PC? Continue reading for more expert tips for computer speed optimization tips!
Manage Startup Programs – Speed Up Your Boot Time Instantly
Have you ever noticed that your computer takes forever to start up?
One of the biggest culprits behind slow boot times is the number of programs launching automatically when you turn on your PC.
Many applications set themselves to run at startup without your knowledge, consuming valuable system resources and slowing down performance.
By managing these startup programs, you can drastically improve boot speed, reduce unnecessary background processes, and optimize system efficiency.
Let’s explore how controlling startup applications can help boost your computer speed and enhance overall performance.

Why Disabling Unnecessary Startup Programs Matters
When you power on your computer, several programs automatically start running in the background, even if you don’t use them right away.
These applications consume CPU power, RAM, and disk resources, making your system take longer to load and respond.
By disabling non-essential startup programs, you can:
✅ Reduce Boot Time – Your computer will start up significantly faster, allowing you to get to work without frustrating delays.
✅ Free Up System Resources – Your CPU and RAM will have more available power to run the applications you actually need.
✅ Improve Overall Performance – A leaner startup process means your system will run smoother and more efficiently throughout the day.
✅ Minimize Background Processes – Fewer apps running in the background leads to better battery life and less strain on your hardware.
✅ Lower the Risk of Software Conflicts – Some startup programs conflict with each other, causing system slowdowns, freezes, or crashes.
Disabling unnecessary startup applications is one of the quickest ways to boost your computer speed and ensure a snappier, more responsive experience.
How to Disable Unnecessary Startup Programs in Windows
Windows provides a built-in Startup Manager that lets you control which programs launch when your PC starts.
Here’s how you can easily disable unwanted startup applications:
Method 1: Use Task Manager (Recommended for Beginners)
1️⃣ Press Ctrl + Shift + Esc to open Task Manager.
2️⃣ Click on the Startup tab.
3️⃣ You will see a list of all programs that launch at startup along with their impact level (Low, Medium, or High).
4️⃣ Identify unnecessary programs (e.g., Spotify, Skype, Adobe Creative Cloud, OneDrive, etc.).
5️⃣ Right-click the program you want to disable and select Disable.
💡 Tip: Disabling a program does not uninstall it—it only prevents it from running at startup. You can still open it manually when needed.
Method 2: Use Windows Settings
1️⃣ Press Win + I to open Settings.
2️⃣ Go to Apps → Startup.
3️⃣ Toggle Off any application that you don’t need at startup.
4️⃣ Restart your computer to apply the changes.
This method provides a simplified way to manage startup programs, especially for beginners who prefer a graphical interface.
Method 3: Use MSConfig for Advanced Control
For users who want greater control over startup services, the System Configuration (MSConfig) tool is a powerful option.
1️⃣ Press Win + R, type msconfig, and hit Enter.
2️⃣ Navigate to the Startup tab (Windows 7 users) or click Open Task Manager (Windows 10 & 11).
3️⃣ Disable unnecessary startup programs just like in Task Manager.
4️⃣ Go to the Services tab and check Hide All Microsoft Services to avoid disabling critical system services.
5️⃣ Disable any unnecessary third-party services and click OK.
6️⃣ Restart your PC to experience the improved boot speed.
💡 Pro Tip: Be careful when disabling services in MSConfig—only turn off non-essential ones to avoid system instability.
How to Disable Startup Programs on macOS
Mac users also experience slower boot times due to unnecessary startup applications.
Here’s how you can disable them:
Method 1: Use System Settings
1️⃣ Click the Apple menu and go to System Settings.
2️⃣ Navigate to General → Login Items.
3️⃣ You will see a list of programs that start when you log in.
4️⃣ Select the ones you don’t need and click the “-” button to remove them.
💡 Tip: Some apps may not appear here but still run in the background—use Activity Monitor (Command + Space, search for “Activity Monitor”) to close unnecessary processes.
Method 2: Use Terminal (For Advanced Users)
If you prefer command-line control, you can use Terminal to manage startup applications.
1️⃣ Open Terminal (Command + Space, search for “Terminal”).
2️⃣ Type:
bash
CopyEdit
launchctl list
This command will show you a list of all startup services.
3️⃣ To disable a service, type:
bash
CopyEdit
launchctl remove [service-name]
Replace [service-name] with the actual program you want to disable.
4️⃣ Restart your Mac for the changes to take effect.
💡 Pro Tip: If you’re unsure about disabling a program, research it first to avoid disabling essential system processes.

Which Startup Programs Should You Disable?
Not all startup programs are unnecessary—some are critical for system security and functionality.
Here’s a list of programs you can safely disable vs. ones you should keep:
✅ Safe to Disable:
- Spotify, Skype, Zoom, Discord (Can be manually opened when needed)
- Adobe Creative Cloud (Unless you use it daily)
- Microsoft Teams (If not used frequently)
- OneDrive, Google Drive (Unless you rely on automatic sync)
- Gaming launchers (Steam, Epic Games, etc.)
❌ Should NOT Disable:
- Antivirus Software (Essential for security)
- Windows Defender or macOS Security Features
- Graphics Drivers (NVIDIA, AMD, Intel)
- Wi-Fi and Network Drivers
- Cloud Backup Software (If used for automatic backups)
💡 Pro Tip: If you’re unsure whether to disable a program, Google its purpose before turning it off.
Automate Startup Program Management for Hassle-Free Performance
If you don’t want to manually tweak your startup settings, automated tools can help manage them efficiently.
Some popular options include:
✅ CCleaner Startup Manager – A simple tool to manage startup programs with one-click optimization.
✅ Autoruns by Microsoft – Provides detailed control over startup processes for advanced users.
✅ Mac Cleaner Apps (CleanMyMac, AppCleaner) – Helps Mac users remove unnecessary login items automatically.
These tools streamline the process, ensuring your computer starts up faster without manual intervention.
Optimize Startup Programs for a Faster Boot
Disabling unnecessary startup programs is one of the easiest ways to boost computer speed and improve overall performance.
By controlling which applications launch at startup, you can:
🚀 Reduce boot time and start working faster
🚀 Free up system resources for smoother multitasking
🚀 Minimize background processes that slow down performance
Take action now! Go through your startup programs and disable the ones you don’t need—your computer will thank you with faster speed and better efficiency!
Uninstall Unnecessary Software – Free Up Resources and Speed Up Your PC
Over time, your computer accumulates a large number of applications, many of which you rarely use or no longer need.
These unnecessary programs take up valuable storage space, consume system resources, and may even run in the background, slowing down performance.
By removing unused applications, you can free up memory, reduce CPU usage, and drastically improve your computer’s speed.
Let’s explore how uninstalling unnecessary software can enhance your system’s efficiency and ensure a faster, smoother user experience.

Why Removing Unused Applications Matters
Every installed program occupies storage space and may include background services that run even when you’re not using them.
This can lead to:
✅ Slower Performance – Too many programs hog system resources, making your PC sluggish.
✅ Longer Boot Times – Some applications add themselves to startup, slowing down your computer’s launch.
✅ Reduced Storage Space – Unused apps clutter your hard drive, leaving less room for important files.
✅ Security Risks – Older, unmaintained software may have vulnerabilities that hackers can exploit.
✅ Unnecessary Background Processes – Many apps continue running in the background, consuming RAM and CPU power.
By identifying and removing unnecessary programs, you can eliminate these problems and significantly boost computer speed.
Identify and Remove Bloatware – Get Rid of Pre-Installed Junk
When you buy a new computer, it often comes with pre-installed software from manufacturers.
This bloatware includes:
- Trial versions of software (e.g., McAfee, Norton)
- Manufacturer utilities (e.g., Dell SupportAssist, HP Assistant)
- Unwanted games and promotions
- Browser toolbars and extensions
These programs take up space, slow down performance, and constantly nag you with pop-ups.
How to Identify Bloatware on Your PC
1️⃣ Check your installed programs – Open Control Panel → Programs and Features to see a list of installed applications.
2️⃣ Look for manufacturer software – If you see HP, Dell, Lenovo, or Acer-branded software, chances are you don’t need it.
3️⃣ Identify trial versions – Programs like McAfee, Norton, or Microsoft Office trials can be removed if you’re not using them.
4️⃣ Check for unnecessary browser extensions – Some toolbars or extensions slow down your web browsing experience.
Removing bloatware frees up valuable resources and helps improve overall system speed.
How to Uninstall Unnecessary Software in Windows
Windows makes it easy to remove unwanted applications through multiple methods.
Method 1: Use Control Panel
1️⃣ Press Win + R, type appwiz.cpl, and hit Enter.
2️⃣ This opens Programs and Features, where you’ll see all installed applications.
3️⃣ Identify the programs you don’t need, click on them, and select Uninstall.
4️⃣ Follow the on-screen prompts to remove the software completely.
💡 Tip: If an app doesn’t fully uninstall, use a tool like Revo Uninstaller to remove leftover files.
Method 2: Use Windows Settings
1️⃣ Press Win + I to open Settings.
2️⃣ Navigate to Apps → Installed Apps (Windows 11) or Apps & Features (Windows 10).
3️⃣ Scroll through the list and click on apps you don’t use.
4️⃣ Click Uninstall and confirm the action.
This method provides a more user-friendly interface for managing applications.
Method 3: Use Third-Party Uninstallers for Complete Removal
Some programs leave hidden files, registry entries, and background services even after uninstallation.
To completely remove them, use advanced uninstaller tools like:
✅ Revo Uninstaller – Deep scans and removes leftover files.
✅ IObit Uninstaller – Detects stubborn applications and bloatware.
✅ CCleaner – Helps remove unnecessary files after uninstalling software.
These tools ensure that no traces of the program remain, keeping your system clean and optimized.
How to Uninstall Unnecessary Software on Mac
Mac users also accumulate unused applications that slow down their systems.
Here’s how to remove them:
Method 1: Drag and Drop
1️⃣ Open Finder → Applications.
2️⃣ Locate the app you want to remove.
3️⃣ Drag it to the Trash.
4️⃣ Empty the Trash to free up space.
💡 Tip: Some applications leave preference files and cache folders—use CleanMyMac to remove them completely.
Method 2: Use Terminal for Advanced Removal
1️⃣ Open Terminal (Command + Space, type “Terminal”).
2️⃣ Type:
bash
CopyEdit
sudo rm -rf /Applications/[AppName].app
Replace [AppName] with the actual app name.
3️⃣ Press Enter and confirm the action.
4️⃣ Restart your Mac to apply the changes.
Using Terminal ensures deep removal of applications that refuse to delete manually.

Which Programs Should You Uninstall?
Not sure which applications to remove?
Here’s a list of software you can safely uninstall vs. programs you should keep:
✅ Safe to Remove:
- Pre-installed trial software (McAfee, Norton, Office Trial)
- Manufacturer bloatware (HP, Dell, Lenovo utilities)
- Unused gaming launchers (Epic Games, Origin, etc.)
- Old software versions (Duplicate or outdated programs)
- Unnecessary browser extensions and toolbars
❌ Do NOT Remove:
- Windows security updates and patches
- System drivers (NVIDIA, Intel, AMD, Audio, Network drivers)
- Essential utilities (Task Manager, Command Prompt, System Restore tools)
- Antivirus software (unless replacing it with another one)
💡 Pro Tip: Before uninstalling a program, check if it’s essential for system functionality.
Automate Software Cleanup with Optimization Tools
If you want to automate the process, use specialized tools to analyze and remove unnecessary software.
Some of the best options include:
✅ PC Decrapifier – Identifies bloatware and removes it instantly.
✅ CCleaner – Cleans up leftover files after uninstallation.
✅ MacPaw CleanMyMac – Helps Mac users remove old and unused software.
These tools scan for rarely used programs and suggest safe removals, making system cleanup effortless.
Keep Your System Clean and Fast
Uninstalling unnecessary software is one of the easiest ways to boost your computer speed and keep your system running efficiently.
By removing bloatware, trial software, and unused applications, you can:
🚀 Free up storage space for important files
🚀 Improve boot times and system performance
🚀 Reduce background processes that slow down your PC
🚀 Eliminate security risks from outdated or unwanted software
Take action now! Go through your installed programs and remove the ones you don’t need—your PC will reward you with faster speed and improved efficiency!
Optimize Disk Usage – Improve Speed and Storage Efficiency
Your computer’s disk space plays a crucial role in performance.
When your hard drive or SSD is nearly full, it slows down file access, system processes, and even boot times.
Efficient disk space management ensures that your system runs smoothly, loads applications faster, and remains responsive.
In this section, we’ll cover effective ways to clean up disk space and optimize storage for better speed and efficiency.
Clean Up Disk Space – Free Up Storage and Boost Performance
Over time, your PC accumulates temporary files, system cache, old backups, and unnecessary data, all of which take up valuable space.
By removing unnecessary files, you can enhance system speed, reduce lag, and prevent storage-related slowdowns.
Here’s how to clean up disk space efficiently.
Use Built-in Windows Tools to Delete Unnecessary Files
Windows provides powerful built-in tools to clean up temporary files, old updates, and junk data.
1) Run Disk Cleanup (Windows 10 & 11)
Disk Cleanup is a simple yet effective tool for removing unwanted files from your system.
✔️ How to use it:
1️⃣ Press Win + S, type “Disk Cleanup”, and open the tool.
2️⃣ Select your main drive (usually C:) and click OK.
3️⃣ Check categories like Temporary Files, Recycle Bin, Thumbnails, and System Cache.
4️⃣ Click “Clean up system files” to remove outdated Windows updates and temporary installation files.
5️⃣ Hit OK and confirm the deletion.
💡 Tip: Running Disk Cleanup regularly prevents unnecessary data buildup and keeps your PC running fast.
2) Use Storage Sense (Windows 10 & 11)
Storage Sense is an automated cleanup tool that removes junk files, temporary data, and empty recycle bin contents.
✔️ How to enable Storage Sense:
1️⃣ Press Win + I to open Settings.
2️⃣ Go to System → Storage.
3️⃣ Toggle Storage Sense ON and click “Configure Storage Sense”.
4️⃣ Set it to automatically delete temporary files, downloaded files, and Recycle Bin items after a set period.
💡 Pro Tip: Enabling Storage Sense ensures continuous disk optimization without manual intervention.
Manually Delete Large and Duplicate Files
If your disk is running low on space, you may have large or duplicate files consuming storage.
Here’s how to find and delete them:
1) Locate Large Files Using File Explorer
1️⃣ Open File Explorer (Win + E).
2️⃣ Click on “This PC” and type “size:>500MB” in the search bar.
3️⃣ This will list all files larger than 500MB—review and delete those you don’t need.
💡 Tip: Use “size:>1GB” to find even larger files for maximum cleanup.
2) Use Third-Party Tools to Find Duplicate Files
Duplicate files take up valuable disk space without adding any benefit.
Use tools like:
✅ Duplicate Cleaner – Scans for duplicate images, videos, and documents.
✅ CCleaner’s Duplicate Finder – Helps remove unnecessary copies of files.
✅ Wise Duplicate Finder – Locates and deletes redundant files automatically.
💡 Best Practice: Always preview duplicate files before deleting them to avoid removing important data.
Clear Temporary Files, Cache, and System Logs
Temporary files and cache help programs load faster, but over time, they pile up and slow down performance.
Here’s how to clear them safely:
1) Delete Temp Files Using Run Command
1️⃣ Press Win + R, type %temp%, and hit Enter.
2️⃣ Select all files (Ctrl + A) and delete them (Shift + Delete).
3️⃣ Repeat with temp and prefetch commands in the Run dialog.
💡 Tip: Doing this once a month prevents unnecessary storage bloat.
2) Remove Browser Cache and Cookies
Web browsers store cache files, cookies, and temporary data, which take up storage and slow down browsing speed.
Here’s how to clear them:
✅ Google Chrome:
1️⃣ Click “⋮” (Three Dots) → Settings → Privacy & Security → Clear Browsing Data.
2️⃣ Check “Cached Images and Files” and “Cookies and Other Site Data”.
3️⃣ Click “Clear Data”.
✅ Microsoft Edge & Firefox:
1️⃣ Open Settings → Privacy & Security → Clear Data.
2️⃣ Select Cache, Cookies, and Browsing History.
3️⃣ Click Clear.
💡 Pro Tip: Regularly clearing browser cache ensures faster page loading and prevents website slowdowns.
Uninstall Unused Applications to Free Up Storage
Many programs occupy large amounts of space even if you don’t use them regularly.
Here’s how to uninstall them:
1️⃣ Open Settings → Apps → Installed Apps.
2️⃣ Scroll through the list and identify unused applications.
3️⃣ Click the program, then select Uninstall.
4️⃣ Confirm the removal and restart your PC if needed.
💡 Use Revo Uninstaller to remove leftover registry entries and hidden files after uninstallation.
Move Large Files to an External Drive or Cloud Storage
Instead of cluttering your internal disk, move large files to external storage or the cloud.
✅ Use an External Hard Drive – Store movies, backups, and old documents.
✅ Use Cloud Storage – Services like Google Drive, OneDrive, or Dropbox help store files online.
✅ Enable OneDrive Files On-Demand – Saves space by storing files in the cloud and downloading them only when needed.
💡 Pro Tip: If you frequently work with large files, consider an SSD upgrade for better performance.
Keep Your Disk Optimized for Maximum Speed
Cleaning up disk space is one of the easiest yet most effective ways to improve PC performance.
By regularly removing unnecessary files, clearing cache, and uninstalling unused software, you ensure that your system stays fast, responsive, and clutter-free.
🚀 Key Takeaways:
✔️ Use Disk Cleanup & Storage Sense to remove temporary files automatically.
✔️ Delete large, duplicate, and outdated files to free up storage.
✔️ Clear browser cache and system logs to prevent slowdowns.
✔️ Move large files to external storage or cloud services.
Take action now! Spend 5 minutes cleaning up your disk today, and experience a noticeably faster, more efficient computer!
Upgrade Hardware Components – Unlock Maximum Performance
If you’ve tried software optimizations but still experience slowdowns, lag, or poor performance, it might be time to upgrade your hardware.
Hardware upgrades can provide a massive speed boost, ensuring that your computer runs efficiently and handles multiple tasks without freezing or crashing.
Investing in the right upgrades, such as increasing RAM or switching to an SSD, can significantly improve performance.
In this section, we’ll explore the most effective hardware upgrades to boost your computer speed and ensure a smooth and responsive experience.

Increase RAM – Enhance Multitasking and System Performance
RAM (Random Access Memory) plays a crucial role in your computer’s ability to handle multiple tasks at once.
When you run out of RAM, your system starts using virtual memory (swap space), which is significantly slower than physical RAM.
By increasing your RAM, you can boost your computer’s performance, allowing it to run multiple applications smoothly without lag.
How Much RAM Do You Really Need?
The amount of RAM required depends on how you use your computer:
✅ 4GB RAM – Suitable for basic tasks like web browsing, email, and document editing.
✅ 8GB RAM – Ideal for everyday use, light gaming, and multitasking.
✅ 16GB RAM – Recommended for professionals, video editing, programming, and gaming.
✅ 32GB+ RAM – Best for high-end tasks such as 3D rendering, virtual machines, and professional-grade video production.
💡 Tip: If you frequently experience slowdowns when switching between applications, upgrading from 4GB to 8GB RAM can provide a noticeable improvement in speed.
How to Check If Your RAM Needs an Upgrade
Before upgrading, check if your RAM is the bottleneck:
1️⃣ Press Ctrl + Shift + Esc to open Task Manager.
2️⃣ Click on the Performance tab → Select Memory.
3️⃣ If RAM usage is consistently at 80% or higher, you need an upgrade.
💡 Best Practice: If your RAM usage is maxed out frequently, increasing it will drastically improve performance.
How to Upgrade Your RAM – Step-by-Step Guide
Adding RAM is one of the easiest and most cost-effective ways to boost performance.
Follow these steps to upgrade your RAM:
✅ Step 1: Identify Compatible RAM Type
Use tools like Crucial System Scanner to determine the correct RAM size, speed, and type for your system.
✅ Step 2: Purchase the Right RAM Module
Ensure the RAM stick is compatible with your motherboard. Look for DDR4 or DDR5, depending on your PC.
✅ Step 3: Install the RAM Stick
1️⃣ Power off your computer and unplug it.
2️⃣ Open the case and locate the RAM slots on the motherboard.
3️⃣ Align the new RAM module and gently press it into place until it clicks.
4️⃣ Close the case, power on your PC, and check if the new RAM is detected.
💡 Pro Tip: If your computer has two RAM slots, install two identical RAM sticks for dual-channel performance, which is faster than a single stick.
Install a Solid-State Drive (SSD) – The Ultimate Speed Boost
A Solid-State Drive (SSD) is one of the most effective upgrades for improving boot times, software loading speeds, and overall system responsiveness.
Unlike traditional Hard Disk Drives (HDDs), SSDs have no moving parts, allowing them to read and write data much faster.
💡 If you’re wondering how to boost your computer speed significantly, replacing your HDD with an SSD is one of the best solutions!
HDD vs. SSD – Why SSDs Are Better
Here’s a quick comparison:
✔️ HDD (Hard Disk Drive)
- Uses spinning platters to store data.
- Slower read/write speeds (80-160 MB/s).
- More prone to mechanical failure.
- Noisy operation and higher power consumption.
✔️ SSD (Solid-State Drive)
- Uses flash memory for instant data access.
- Speeds up to 550 MB/s (SATA) or 7,000 MB/s (NVMe SSDs).
- More reliable and lasts longer.
- Silent operation and lower power consumption.
💡 Best Choice: NVMe SSDs offer lightning-fast speeds, but even a standard SATA SSD is 5x faster than an HDD.
Benefits of Upgrading to an SSD
✅ Faster Boot Times – Start Windows in seconds instead of minutes.
✅ Instant App Launching – Programs open instantly, without delays.
✅ Better Gaming Performance – Reduces loading screens in games.
✅ Improved File Transfers – Copy and move files 10x faster than HDDs.
✅ Silent Operation – Unlike HDDs, SSDs don’t make noise.
✅ Energy Efficient – Extends laptop battery life by consuming less power.
💡 Pro Tip: If you can’t afford a full SSD upgrade, use an SSD as a boot drive for Windows and keep your HDD for storage.
How to Upgrade to an SSD – Step-by-Step Guide
✅ Step 1: Choose the Right SSD Type
- SATA SSDs – Affordable and faster than HDDs.
- NVMe SSDs – Blazing-fast performance, ideal for gaming and heavy tasks.
✅ Step 2: Backup Your Data
Before installation, back up your files to avoid data loss.
✅ Step 3: Clone Your Current Drive (Optional)
Use tools like Macrium Reflect or Samsung Data Migration to clone your existing Windows installation onto the SSD.
✅ Step 4: Install the SSD
1️⃣ Open your PC and locate the HDD bay.
2️⃣ Remove the old HDD and insert the new SSD.
3️⃣ If using an NVMe SSD, install it into the M.2 slot on the motherboard.
4️⃣ Close the case, power on your PC, and set the SSD as the boot drive.
💡 Tip: If installing a new SSD without cloning, reinstall Windows for a fresh, clean system.

Other Hardware Upgrades to Consider
Apart from RAM and SSDs, other hardware upgrades can further enhance performance.
✅ Upgrade Your CPU – A faster processor improves multitasking, gaming, and content creation.
✅ Improve Cooling Systems – Better airflow and cooling prevent overheating and throttling.
✅ Upgrade Graphics Card (GPU) – Essential for gaming, video editing, and 3D rendering.
💡 Best Practice: If you’re a gamer or video editor, upgrading your GPU and CPU alongside an SSD will provide the best performance gains.
Upgrade Smartly for Maximum Speed
If your computer is running slow despite optimizations, upgrading hardware is the best long-term solution.
🚀 Key Takeaways:
✔️ Upgrading RAM allows for smoother multitasking and prevents system slowdowns.
✔️ Installing an SSD significantly improves boot times, app loading speeds, and file transfers.
✔️ Other upgrades like a better CPU, GPU, and cooling system can further enhance performance.
🔹 Take action today! Upgrade your RAM or switch to an SSD and experience lightning-fast speeds immediately!
Adjust Visual Effects – Improve Performance Instantly
Your computer’s operating system uses various visual effects to enhance the user experience.
However, these effects consume system resources and can slow down performance, especially on older or lower-end devices.
By optimizing visual settings, you can free up processing power, reduce lag, and ensure smoother system performance.
If you’re searching for how to boost your computer speed, tweaking visual effects is one of the easiest ways to make an instant improvement.
Let’s explore how reducing unnecessary visual effects can enhance your PC’s speed.

Optimize Visual Settings – Reduce System Load for Faster Performance
Windows and macOS come with built-in graphical enhancements, such as animations, shadows, transparency effects, and visual transitions.
While these features improve aesthetics, they increase CPU and GPU workload, leading to slower response times.
By adjusting these settings, you can significantly boost performance without affecting functionality.
Why Reducing Visual Effects Can Speed Up Your Computer
Here’s why disabling unnecessary visual effects is an effective way to improve your PC’s performance:
✔️ Lowers CPU & RAM Usage – The fewer effects running, the less processing power is needed.
✔️ Speeds Up Window Transitions – Disabling animations makes opening and closing apps much faster.
✔️ Reduces GPU Load – Transparency effects and shadows require GPU processing, which can slow down performance.
✔️ Extends Battery Life – On laptops, reducing effects saves battery power by lowering system resource consumption.
✔️ Improves System Responsiveness – With fewer visual elements, your computer reacts instantly to commands.
💡 Best Practice: If your PC lags when switching between apps or menus, adjusting visual settings can drastically improve performance.
How to Disable or Reduce Visual Effects on Windows
Windows allows users to customize visual effects to balance performance and aesthetics.
✅ Step 1: Open the Performance Options Menu
1️⃣ Press Win + R, type sysdm.cpl, and press Enter.
2️⃣ Go to the Advanced tab → Click on Settings under Performance.
✅ Step 2: Choose Performance Settings
You’ll see four options under the Visual Effects tab:
✔️ Let Windows choose what’s best – Windows optimizes settings automatically.
✔️ Adjust for best appearance – Enables all visual effects for a polished look.
✔️ Adjust for best performance – Disables all effects for maximum speed.
✔️ Custom – Allows you to enable/disable specific effects manually.
✅ Step 3: Customize Visual Effects (Recommended Settings)
For optimal performance, disable these unnecessary effects:
❌ Animate windows when minimizing and maximizing
❌ Fade or slide menus into view
❌ Show shadows under windows
❌ Show window contents while dragging
❌ Enable transparency effects
💡 Pro Tip: Keep “Smooth edges of screen fonts” enabled to ensure text remains readable.
How to Adjust Visual Effects on macOS
Mac computers also use animations, transparency, and motion effects that can impact speed.
✅ Step 1: Reduce Motion and Transparency
1️⃣ Open System Settings → Click Accessibility.
2️⃣ Go to Display → Enable Reduce motion and Reduce transparency.
✅ Step 2: Disable Dock Animations
1️⃣ Open System Settings → Click Dock & Menu Bar.
2️⃣ Disable “Animate opening applications” and reduce Minimize effect to Scale.
💡 Best Practice: If your Mac feels sluggish, reducing these settings can make a significant difference in speed and responsiveness.
Other Quick Ways to Optimize Visual Performance
Apart from disabling effects, here are additional ways to improve system speed:
✅ Lower Screen Resolution – Reducing resolution eases GPU workload, especially on older computers.
✅ Use Basic Themes – Default or basic themes consume fewer system resources.
✅ Disable Aero Effects (Windows 7/8) – Turning off Aero Glass transparency improves speed.
✅ Update Graphics Drivers – Outdated drivers can cause slower rendering of visuals.
Adjust Visual Settings for Maximum Speed
Reducing unnecessary visual effects is a quick and easy way to improve system performance.
🚀 Key Takeaways:
✔️ Disabling transparency, shadows, and animations boosts system speed.
✔️ Lowering screen resolution reduces GPU workload, improving responsiveness.
✔️ Adjusting these settings can enhance battery life on laptops.
🔹 Take action now! Follow these steps to optimize visual effects and experience a faster, more efficient computer today!
Perform Regular Maintenance – Keep Your PC Running Smoothly
Just like a car needs regular tune-ups to run efficiently, your computer requires routine maintenance to ensure optimal performance.
Neglecting basic maintenance can lead to slower speeds, system crashes, and software errors.
By performing regular system maintenance, you can significantly extend your computer’s lifespan and keep it running at peak efficiency.
If you’re looking for how to boost your computer speed, regular upkeep is one of the easiest and most effective solutions.

Restart Your Computer Regularly – Prevent System Slowdowns
Many users leave their computers running for days or even weeks without restarting.
While this may seem convenient, it can lead to sluggish performance, unresponsive programs, and memory leaks.
Restarting your PC regularly is a simple yet powerful way to keep your system running fast and smooth.
Why Restarting Your Computer Improves Performance
Here’s how a simple restart can enhance your computer’s speed and efficiency:
✔️ Clears RAM & Closes Background Processes – Over time, running programs accumulate in memory, slowing down your system. A restart flushes out unnecessary data and frees up valuable RAM.
✔️ Fixes Software Glitches & Freezes – If your system is lagging, freezing, or behaving erratically, restarting resets all active processes, eliminating temporary software errors.
✔️ Prevents Memory Leaks – Some applications don’t release memory properly, leading to gradual slowdowns. Restarting helps reclaim lost memory and ensures efficient resource allocation.
✔️ Enhances System Updates & Performance – Many updates require a restart to take effect. Restarting regularly ensures your system is always running the latest optimizations.
✔️ Boosts CPU Performance – When you restart, your processor is freed from unnecessary background tasks, leading to faster response times.
💡 Best Practice: If you notice your PC slowing down, restarting it at least once a week can help maintain optimal speed and stability.
How Often Should You Restart Your Computer?
The ideal restart frequency depends on your usage habits and system workload:
✔️ Daily Restart (Heavy Users) – If you use resource-intensive software (e.g., video editing, gaming, or programming), restarting daily prevents system lag.
✔️ Every 2-3 Days (Moderate Users) – For office work, browsing, and light tasks, restarting every few days keeps your system running efficiently.
✔️ Weekly Restart (Casual Users) – If you use your PC occasionally, restarting at least once a week prevents performance degradation.
💡 Pro Tip: Restarting is especially beneficial if you frequently use multiple applications or keep your computer running 24/7.
Other Essential Maintenance Tasks to Keep Your PC Running Fast
In addition to restarting, regular maintenance routines can further enhance performance.
✅ Clear Temporary Files – Delete cache, temp files, and junk data to free up disk space.
✅ Uninstall Unused Programs – Remove software you no longer need to reduce system load.
✅ Update Software & Drivers – Keeping everything up to date ensures stability and security.
✅ Run Disk Cleanup & Defragmentation – Helps optimize storage performance on traditional hard drives.
✅ Scan for Malware & Viruses – Use a reliable antivirus program to detect and remove threats.
Make System Maintenance a Habit
Performing regular maintenance is one of the best ways to keep your PC fast, efficient, and problem-free.
🚀 Key Takeaways:
✔️ Restarting clears memory, boosts speed, and resolves software issues.
✔️ A weekly restart is recommended for most users.
✔️ Combining restarts with other maintenance tasks ensures long-term system health.
🔹 Take action now! Restart your computer and implement these simple maintenance habits to experience a faster, more efficient system today!
Manage Background Processes – Maximize System Efficiency
One of the biggest culprits behind slow computer performance is excessive background processes consuming system resources.
Many applications run silently in the background, using up CPU, RAM, and disk space, even when you’re not actively using them.
If you’re wondering how to boost your computer speed, controlling background activities is a critical step to free up system resources and improve overall performance.
Use Task Manager to Monitor Processes – Identify & End Resource-Heavy Tasks
Your computer may be running dozens of unnecessary processes that slow it down without you even realizing it.
By using Task Manager, you can quickly identify and end processes that consume excessive memory and CPU power.
How to Open Task Manager on Windows
Task Manager is a built-in tool that allows you to monitor and control background processes.
To open it, use one of these methods:
✔️ Shortcut Method: Press Ctrl + Shift + Esc to launch Task Manager instantly.
✔️ Keyboard + Mouse: Press Ctrl + Alt + Delete, then select Task Manager.
✔️ Start Menu Search: Click on the Windows Start Menu, type “Task Manager”, and open it.
Once Task Manager is open, you’ll see a list of all running applications and background processes.
How to Identify High-Resource Processes in Task Manager
To find out which processes are consuming the most resources, follow these steps:
1️⃣ Click on the “Processes” tab.
2️⃣ Sort by CPU usage to see which programs are using the most processing power.
3️⃣ Click on Memory (RAM) to identify apps that are consuming too much memory.
4️⃣ Check Disk Usage to find apps that are slowing down read/write operations.
You may notice certain apps consuming a high percentage of your system resources, even when you’re not using them.
💡 Pro Tip: If a program consistently uses a lot of CPU or RAM, consider disabling or uninstalling it if it’s unnecessary.
How to End Unnecessary Background Processes
If you find a process slowing down your computer, you can end it manually:
1️⃣ Right-click on the process in Task Manager.
2️⃣ Click “End Task” to stop it immediately.
3️⃣ Confirm the action if prompted.
🚨 Warning: Be careful when ending system processes, as some are essential for Windows to function properly. If you’re unsure about a process, Google it before terminating it.
Prevent Unwanted Programs from Running at Startup
Many programs automatically start running in the background when you turn on your computer.
This slows down your boot time and reduces available system resources.
To disable unnecessary startup programs:
1️⃣ Open Task Manager and navigate to the “Startup” tab.
2️⃣ Look for applications with a “High” Startup Impact.
3️⃣ Right-click on unnecessary programs and click “Disable”.
By doing this, you can significantly reduce startup time and improve system performance.
Use Third-Party Tools to Manage Background Processes Efficiently
If you want more advanced control over background processes, consider using third-party optimization tools such as:
✅ CCleaner – Helps disable startup programs and clean junk files.
✅ Process Explorer – Provides detailed insights into running processes.
✅ Razer Cortex – Optimizes system performance for gaming.
These tools simplify the process of monitoring background activities and can help you automate system optimizations.
Take Control of Your System Performance
Managing background processes is one of the easiest ways to boost your PC’s speed and efficiency.
🚀 Key Takeaways:
✔️ Use Task Manager to monitor CPU, RAM, and disk usage.
✔️ End unnecessary processes to free up system resources.
✔️ Disable startup programs to improve boot speed.
✔️ Use third-party tools for advanced optimization.
🔹 Take action now! Open Task Manager and start eliminating resource-hogging processes to enjoy a faster, more responsive computer today!
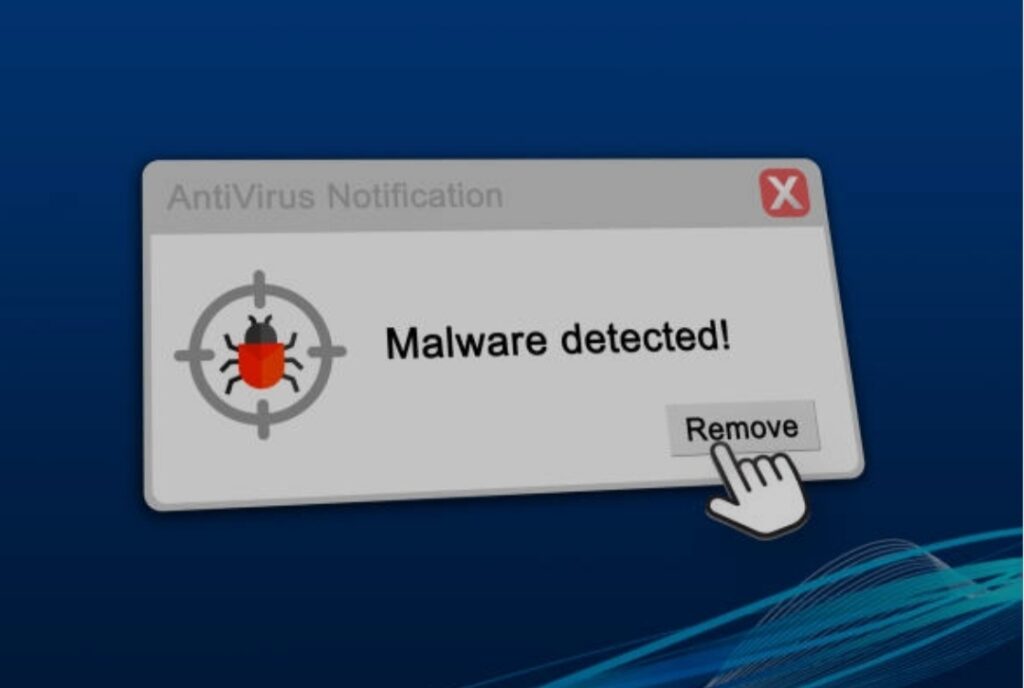
Scan for Malware and Viruses – Keep Your System Secure
A slow computer can often be a sign of malware, viruses, or other security threats running in the background.
These malicious programs consume system resources, disrupt normal operations, and may even compromise your personal data.
If you’re looking for how to boost your computer speed, one of the first things you should do is ensure your device is free from harmful software.
By performing regular malware scans, you can detect and remove threats that are secretly draining your computer’s performance.
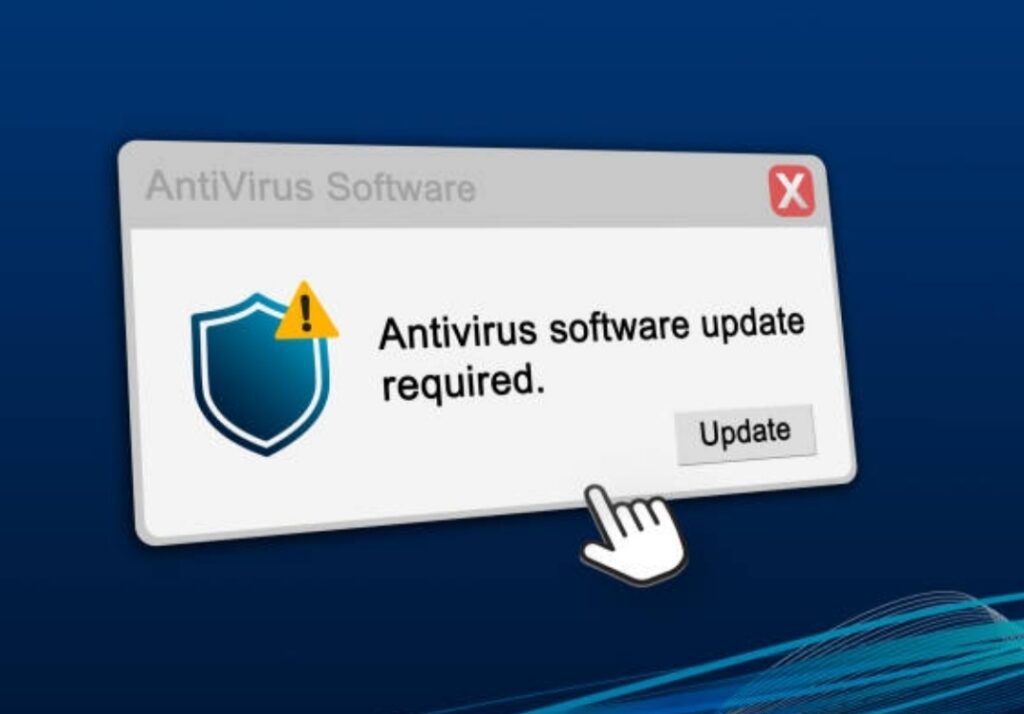
Regular Malware Scans – Use Trusted Antivirus Programs to Detect and Remove Threats
Cybercriminals are constantly developing new viruses, ransomware, and spyware that can infect your system without you even realizing it.
Regularly scanning your PC for malware is essential to maintain both security and speed.
How to Scan Your Computer for Malware and Viruses
To keep your computer clean and running smoothly, follow these steps:
1️⃣ Use a Reliable Antivirus Program – Choose a reputable antivirus or anti-malware software like Windows Defender, Norton, or Malwarebytes.
2️⃣ Perform a Full System Scan – Run a deep scan at least once a week to check all files, programs, and system processes.
3️⃣ Enable Real-Time Protection – Activate real-time scanning features to automatically block malware before it infects your system.
4️⃣ Keep Your Antivirus Updated – Ensure your security software is up-to-date to protect against the latest threats.
How Malware Slows Down Your Computer
Malicious software can drastically reduce your PC’s speed in several ways:
⚠️ Excessive CPU Usage – Malware often runs in the background, consuming a large portion of your CPU power.
⚠️ High Memory Consumption – Some viruses use RAM resources, slowing down your system’s ability to handle tasks efficiently.
⚠️ Disk Overload – Spyware and adware may constantly write and read data, leading to high disk usage.
⚠️ Internet Slowdowns – Certain types of malware, like botnets, hijack your internet connection to carry out attacks or send spam.
🚨 If your computer is running slower than usual, displaying frequent pop-ups, or crashing unexpectedly, malware might be the cause.
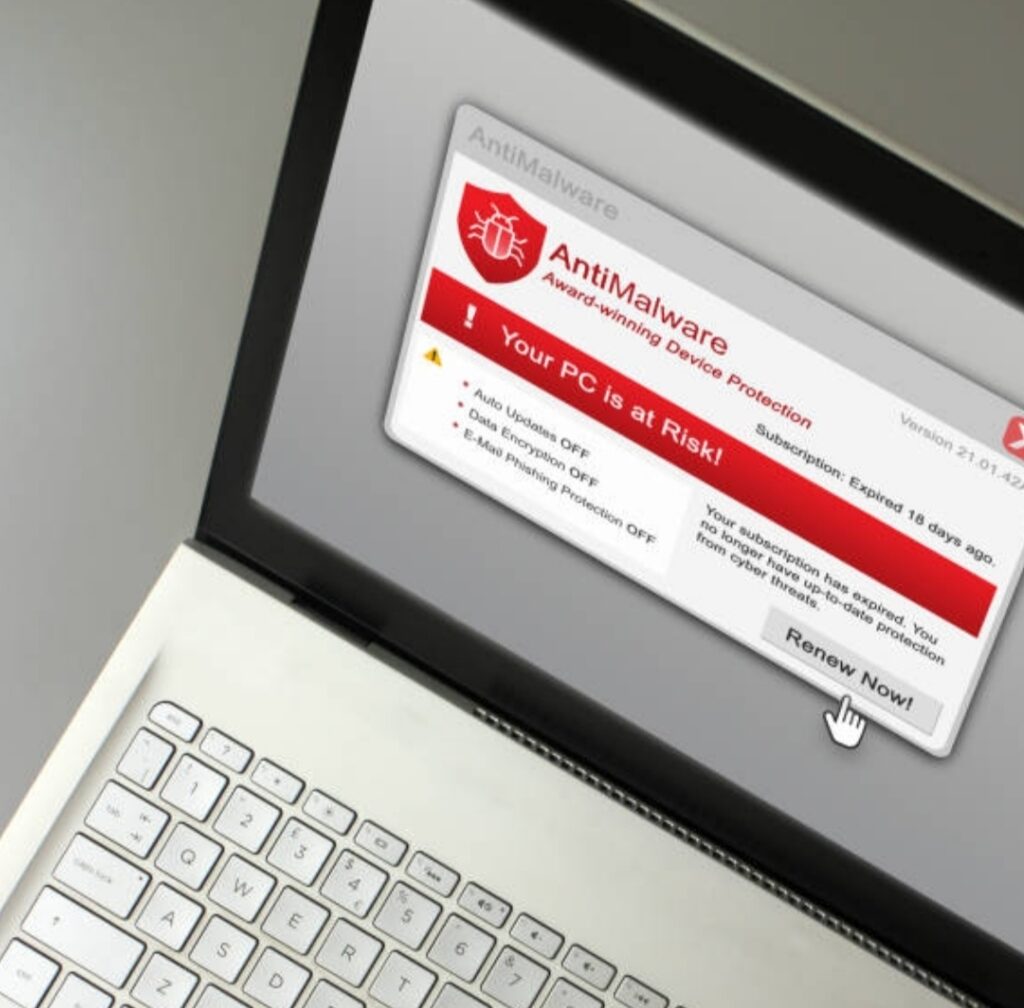
Best Free and Paid Antivirus Software to Remove Malware
If you don’t already have an antivirus program, consider using one of these highly rated options:
✅ Windows Defender (Free) – Comes built into Windows and offers solid protection against viruses.
✅ Malwarebytes (Free & Paid) – Specializes in detecting advanced malware and spyware.
✅ Bitdefender (Paid) – Offers real-time protection, ransomware protection, and a minimal system impact.
✅ Avast Free Antivirus – A lightweight security solution with a strong malware detection rate.
Pro Tip: If your current antivirus isn’t detecting threats, try running a scan with a second security tool like Malwarebytes for a deeper check.
Enable Firewall & Secure Browsing for Extra Protection
Your computer’s firewall acts as a first line of defense against hackers and malware.
To ensure maximum protection:
✔️ Enable Windows Firewall – Go to Control Panel > System and Security > Windows Defender Firewall, then turn it on.
✔️ Use a Secure Browser – Avoid using outdated browsers, and activate safe browsing features in Chrome or Edge.
✔️ Avoid Suspicious Links – Don’t click on links in spam emails or pop-up ads, as they often contain malware.
By combining firewall protection with regular malware scans, you can keep your PC safe and running at optimal speed.
Take Action Now – Secure Your PC and Boost Its Speed
If your computer has been running slower than usual, it’s time to scan for malware and viruses immediately.
🚀 Key Takeaways:
✔️ Use trusted antivirus software to scan and remove malware.
✔️ Perform deep scans regularly to detect hidden threats.
✔️ Enable real-time protection to prevent infections.
✔️ Keep your system updated to defend against the latest viruses.
🔹 Don’t wait! Run a malware scan now and protect your computer from harmful threats today!
Utilize Built-in Performance Tools – Optimize Your Computer Without Extra Software
Modern operating systems come with built-in performance optimization tools designed to help users clean up unnecessary files, monitor system health, and boost overall efficiency.
If you’re looking for how to boost your computer speed, leveraging these tools is an excellent way to maximize performance without installing third-party software.
Using these pre-installed utilities, you can automate maintenance tasks, identify performance bottlenecks, and ensure your computer runs at peak efficiency.
Use Performance Optimization Tools – Automate Maintenance for Faster Performance
Windows and macOS provide powerful built-in tools that can help you analyze system performance, clear junk files, and optimize settings automatically.
Many laptop brands, such as Dell, HP, and Lenovo, also offer manufacturer-specific utilities to enhance system speed and stability.
Windows Performance Tools – Speed Up Your PC Without Third-Party Apps
For Windows users, Microsoft includes several performance-enhancing tools that can identify issues and improve system speed.
Here’s how to use them effectively:
✅ Windows Performance Monitor
This tool provides real-time system performance insights, showing how your CPU, RAM, and disk usage impact speed.
🔹 How to Access:
- Press Windows + R and type perfmon, then hit Enter.
- Check system performance logs and identify processes slowing down your PC.
- End unnecessary tasks or adjust settings to free up system resources.
✅ Disk Cleanup – Remove Junk Files and Free Up Space
Over time, your system accumulates temporary files, old downloads, and system cache, which can slow down your computer.
🔹 How to Use Disk Cleanup:
- Type Disk Cleanup into the Windows search bar and open the tool.
- Select your main drive (usually C:).
- Check the boxes for Temporary Files, Thumbnails, and System Cache.
- Click OK to delete unnecessary files and free up valuable space.
✅ Windows Storage Sense – Automatically Manage Disk Space
Windows 10 and 11 come with Storage Sense, an automated tool that cleans up unnecessary files without user intervention.
🔹 How to Enable Storage Sense:
- Go to Settings > System > Storage.
- Toggle Storage Sense to “On”.
- Customize automatic cleanup settings to regularly remove old files and optimize storage usage.
Manufacturer-Specific Optimization Tools – Get the Most Out of Your PC Brand
If you own a Dell, HP, Lenovo, or ASUS laptop, your manufacturer may provide specialized performance optimization software.
Here are some of the most effective tools:
✔️ Dell SupportAssist – Optimizes Dell laptops by automating updates, cleaning files, and scanning for performance issues.
✔️ HP Support Assistant – Provides performance monitoring, driver updates, and troubleshooting tools for HP devices.
✔️ Lenovo Vantage – Offers customized power settings, hardware scans, and performance tweaks for Lenovo PCs.
✔️ ASUS AI Suite – Optimizes fan speed, overclocking, and power consumption for ASUS users.
If you haven’t used these tools yet, check your laptop’s pre-installed software or visit your manufacturer’s website to download the latest version.
Mac Performance Optimization Tools – Speed Up Your macOS System
For Mac users, Apple provides several built-in tools to analyze performance and clean up system clutter.
✅ Activity Monitor – Identify and Close Resource-Intensive Apps
Mac’s Activity Monitor is similar to Windows Task Manager and helps users see which apps are consuming the most CPU and RAM.
🔹 How to Use It:
- Open Activity Monitor from Applications > Utilities.
- Check the CPU, Memory, and Disk tabs for processes using excessive resources.
- Select any unnecessary process and click “Quit Process” to free up system power.
✅ Optimize Storage – Free Up Disk Space Automatically
Apple’s Optimize Storage feature manages disk space intelligently by removing old files and unnecessary data.
🔹 How to Enable It:
- Go to Apple Menu > About This Mac > Storage.
- Click Manage, then enable Optimize Storage and Empty Trash Automatically.
- This helps prevent storage-related slowdowns and keeps your Mac running fast.
Take Action – Boost Your Computer Speed Using Built-in Tools
🔹 Stop wasting time on a slow computer! Utilize these built-in optimization tools today and experience faster performance, smoother multitasking, and improved efficiency.
💡 Key Takeaways:
✔️ Use Windows Performance Monitor and Activity Monitor to analyze resource usage.
✔️ Enable Disk Cleanup and Storage Sense to remove unnecessary files.
✔️ Take advantage of Dell, HP, and Lenovo optimization tools for better performance.
✔️ Mac users should utilize Optimize Storage and Activity Monitor for system efficiency.
🚀 Try these performance tools now and instantly speed up your PC!
Conclusion – Maintaining Optimal Computer Performance for Long-Term Efficiency
Keeping your computer in top-notch condition is not just a one-time task.
It requires regular maintenance, proactive monitoring, and adopting best practices to ensure long-term efficiency.
By implementing the strategies discussed in this guide, you can significantly improve system performance, prevent slowdowns, and enhance your overall computing experience.
If you’ve been wondering how to boost your computer speed, the key lies in consistent system optimization, removing unnecessary files, and protecting your device from malware threats.
Recap – Essential Steps to Maintain a Fast and Efficient Computer
Let’s take a moment to review the most effective techniques that help you maintain a smooth and responsive computer.
🔹 Manage Startup Programs – Disable unnecessary background applications to speed up boot time.
🔹 Optimize Background Processes – Use Task Manager to monitor resource-heavy applications.
🔹 Clear Unnecessary Files and Cache – Perform regular disk cleanups to free up storage space.
🔹 Use Built-in Performance Tools – Leverage Windows and Mac optimization utilities to automate maintenance.
🔹 Scan for Malware and Viruses – Run frequent antivirus scans to detect and remove security threats.
🔹 Upgrade Your Hardware – If your PC is still lagging, consider upgrading RAM or switching to an SSD.
By following these steps, you ensure that your computer remains fast, efficient, and responsive over time.
The Importance of Regular Maintenance – A Proactive Approach to Performance
Many users only look for solutions when their computers become frustratingly slow.
However, waiting until performance declines can result in longer load times, frequent crashes, and even data loss.
To avoid unnecessary disruptions, it’s essential to make system maintenance a regular habit.
Consider setting a monthly checklist to:
✔️ Delete junk files and empty the recycle bin
✔️ Run a full malware scan using a trusted antivirus
✔️ Check for software and driver updates
✔️ Restart your computer at least once a week to refresh memory usage
✔️ Monitor CPU and RAM usage for unusual spikes
Taking preventive measures helps you enjoy longer-lasting performance and a hassle-free experience.
Common Mistakes That Can Slow Down Your Computer
Even with the best optimization practices, certain bad habits can still negatively impact your computer’s performance.
🚫 Ignoring Software Updates – Outdated programs consume more resources and pose security risks.
🚫 Running Too Many Applications at Once – Multitasking with resource-heavy apps slows down performance.
🚫 Skipping Antivirus Scans – Malware infections can drastically reduce system speed.
🚫 Not Restarting Your Computer Regularly – Keeping your system on for too long can cause memory leaks and slowdowns.
🚫 Using Low-Quality Third-Party Cleanup Tools – Some “PC optimizers” do more harm than good by deleting essential system files.
Avoiding these common pitfalls ensures that your computer remains efficient and problem-free.
Take Action Now – Keep Your Computer Running at Peak Speed
💡 Are you tired of dealing with a slow, unresponsive computer?
Now is the time to apply these powerful optimization techniques and regain control over your system’s speed and efficiency.
🚀 Take action today to:
✔️ Reduce boot-up time and system lag
✔️ Improve multitasking and overall responsiveness
✔️ Enhance security and eliminate performance threats
✔️ Extend the lifespan of your computer
Don’t let slow performance hold you back! Follow these steps and enjoy a faster, smoother, and more reliable computing experience starting today.
You might also like :