
Introduction — Everything You Need to Know Before You Build a DIY Smart Mirror
🔧 Are you ready to upgrade your space with futuristic technology — without breaking the bank?
You’re in the right place.
If you’ve ever wondered how to build a DIY smart mirror, this guide will walk you through every single step, tool, and trick you need to know — in simple, non-technical terms.
Smart mirrors aren’t just high-tech vanity pieces anymore.
They’re functional, stylish, and incredibly rewarding DIY projects that combine coding, design, and craftsmanship into one exciting build.
And the best part?
You don’t need to be an engineer or coder to make your own.
Whether you’re a total beginner or an experienced maker, this post will guide you from zero to your very own wall-mounted, interactive mirror that displays the time, weather, news, calendar, and more — all customized to your needs.

🧠 Why Are Smart Mirrors So Popular in 2025?
Smart mirrors have exploded in popularity thanks to smart home trends, affordable Raspberry Pi computers, and the open-source community that supports projects like MagicMirror².
Now, it’s easier than ever to start a project that once felt like sci-fi fantasy.
Today’s smart mirrors can:
- Show real-time updates from your Google Calendar
- Display live weather conditions
- Offer traffic and commute data
- Include voice assistant integration
- Even feature touchscreens, motion sensors, and smart home automation compatibility
And with rising interest in DIY electronics and the maker movement, there’s never been a better time to build a smart mirror yourself at home.
🌟 What You’ll Learn in This Guide
This blog post isn’t just another cookie-cutter tutorial.
By the end of this post, you’ll know:
✅ The exact tools and materials you need
✅ How to set up a Raspberry Pi and install MagicMirror² software
✅ How to build your mirror frame (or repurpose one)
✅ How to choose between glass vs. acrylic two-way mirrors
✅ How to customize modules like calendar, news, and weather
✅ Troubleshooting tips to fix common smart mirror problems
✅ Smart upgrades: Add-ons like voice assistants, sensors, and more
If you’re searching for how to build a DIY smart mirror, this post is the only guide you’ll need.
💡 Who Should Build a DIY Smart Mirror?
This guide is perfect for:
- 🛠️ Tech hobbyists looking for a weekend project
- 🧑🏫 Educators or students working on a STEM project
- 🧔 Men’s grooming setups or barbershop installs
- 💄 Beauty influencers who want a glam mirror with real-time updates
- 🧩 Makers and tinkerers who love Raspberry Pi, Arduino, or IoT projects
- 💡 Anyone wanting to add a futuristic wow factor to their home
You don’t need advanced skills — just patience, basic tools, and a willingness to follow along.
Ready to stop scrolling and actually build something futuristic, functional, and fantastic?
👇 Let’s dive into the ultimate guide on how to build a DIY smart mirror — from A to Z.
👉 Click here to grab the full parts list with best-value links
What Is a Smart Mirror?
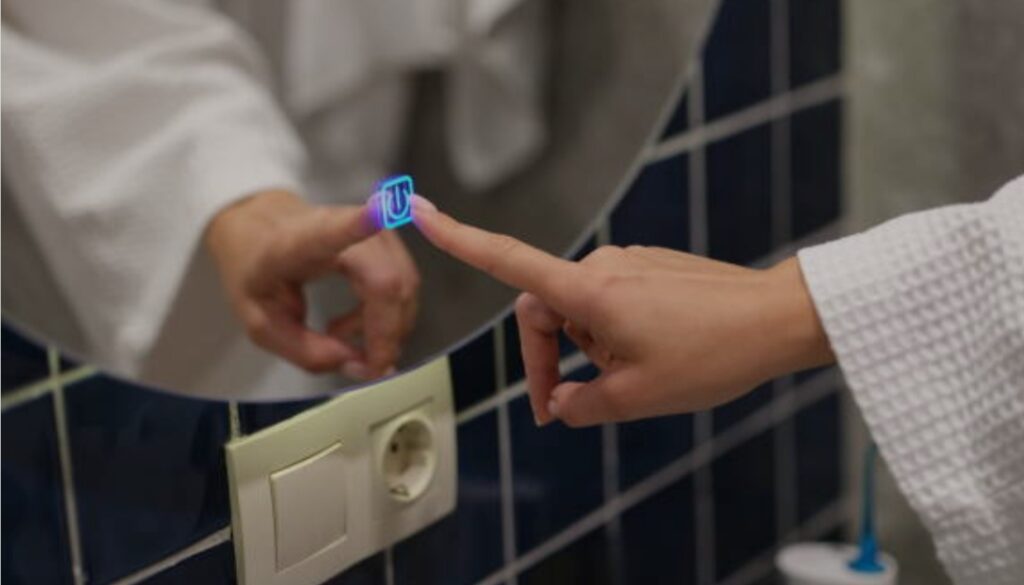
A smart mirror is not your ordinary bathroom or vanity mirror.
It’s an innovative blend of reflective glass and digital technology that transforms your traditional mirror into an interactive smart display.
At first glance, it looks like a sleek, modern mirror.
But behind the scenes?
There’s a screen embedded behind a two-way mirror, powered by a mini-computer (like a Raspberry Pi) and loaded with customizable software.

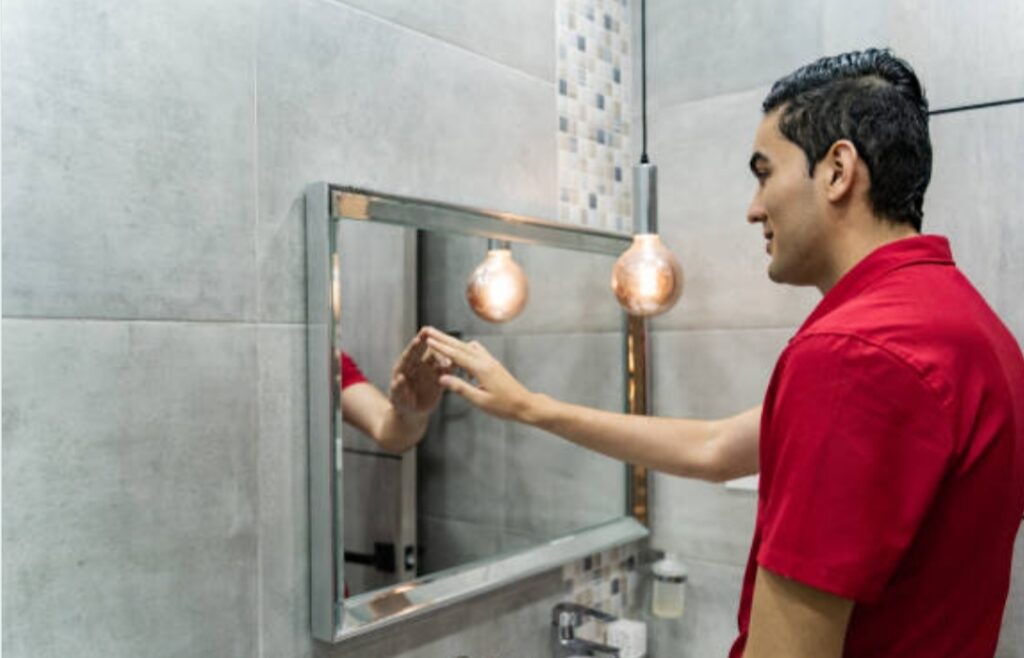
🧠 How Does a Smart Mirror Work?
The magic behind a smart mirror lies in the two-way mirror — a special type of glass that reflects light from one side while allowing light to pass through from the other.
Here’s how the setup works:
- A monitor or screen is mounted directly behind the two-way mirror
- The screen’s display shines through the mirror, but only the light-colored text or widgets are visible
- The rest of the mirror surface reflects your image like any normal mirror
- A mini-computer (usually a Raspberry Pi) runs software that feeds real-time data to the screen
So instead of just checking your reflection, you can see the weather, time, calendar, news, emails, and even smart home updates — all while brushing your teeth or doing makeup.
🔧 Core Components of a Smart Mirror
A basic DIY smart mirror includes the following elements:
- 🖥️ Monitor or screen – typically an old LED monitor or tablet
- 🪞 Two-way mirror glass – the key to the smart mirror effect
- 📟 Raspberry Pi or similar mini-computer – acts as the brain
- 🔌 Power supply and cabling – for connectivity and power
- 🧱 Custom or pre-built frame – to house the components securely
- 💻 Smart mirror software – usually MagicMirror², which is open-source and highly customizable
All of these are covered in full detail later in this guide.
You’ll also find links to recommended products and affordable bundles so you don’t have to waste time hunting for the right parts.
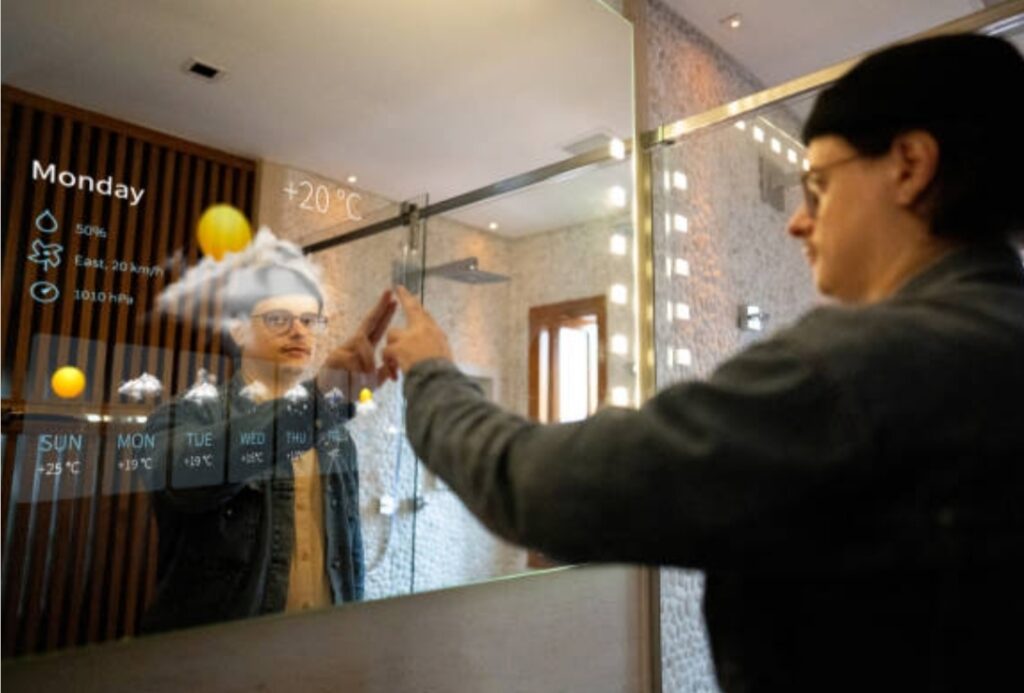
🌐 What Can a Smart Mirror Display?
One of the most exciting things about learning how to build a DIY smart mirror is choosing what it can actually do.
Your smart mirror’s display can show:
- ⏰ Time and date
- ☁️ Live weather forecast
- 📅 Calendar events and reminders
- 📰 News headlines from your favorite sources
- 🚗 Traffic updates and commute times
- 🧠 Quotes, to-do lists, and fitness goals
- 🎵 Spotify or media playback controls
- 🎙️ Voice assistant widgets (Alexa, Google Assistant)
And if you’re more advanced?
You can even integrate smart home devices, facial recognition, touch interfaces, and voice control using open-source plugins and APIs.

📲 Common Types of Smart Mirrors
Not all smart mirrors are created equal.
There are several types, depending on use-case and complexity:
1. Basic Informational Smart Mirror
Shows widgets like time, weather, and calendar — best for beginners.
2. Interactive Smart Mirror
Includes touchscreen or voice control — requires more advanced coding or integration.
3. Fitness Smart Mirror
Acts as a virtual trainer — displays workout sessions, stats, or live streams.
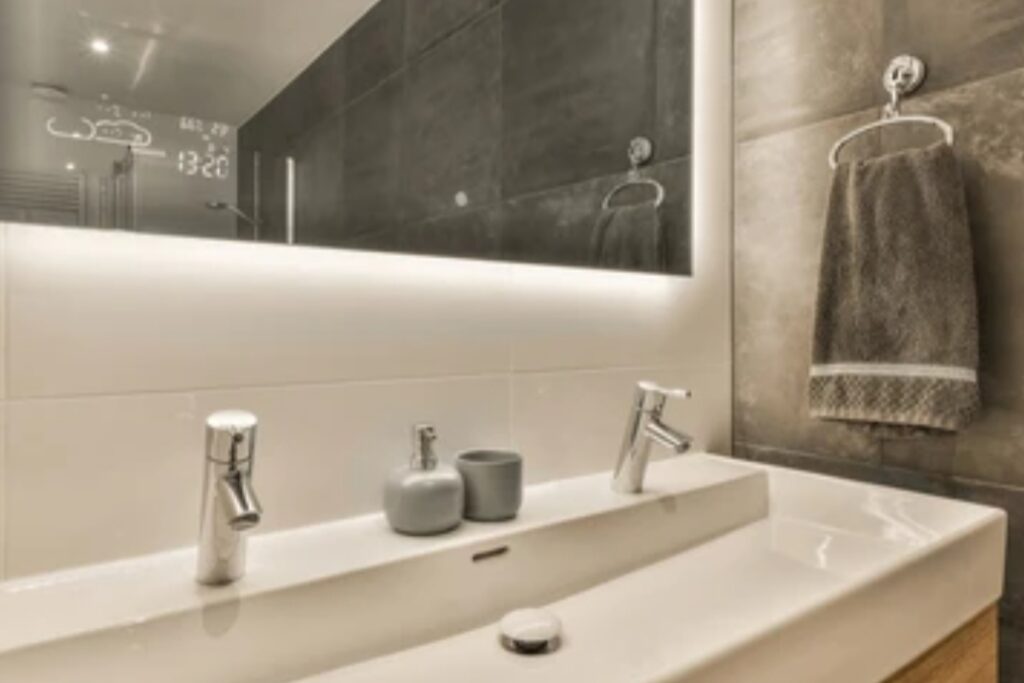
4. Smart Bathroom Mirror
Includes features like anti-fog, lighting, and embedded voice commands.
For this tutorial, we’ll focus on the DIY Raspberry Pi smart mirror, which is the most popular, affordable, and customizable option for makers and homeowners.
🤖 Why Use a Raspberry Pi for Your Smart Mirror?
The Raspberry Pi is a low-cost, credit-card-sized computer that’s ideal for smart home projects like this.
Why it works so well:
- 🧠 Small but powerful
- 💰 Budget-friendly
- 🔌 Low energy consumption
- 🛠️ Wide support from the maker community
- 🔧 Easy to program and update
With just a few commands, you can load MagicMirror² and start seeing widgets on your mirror — no advanced coding required.
If you’re looking for the best platform to build a DIY smart mirror, Raspberry Pi is your perfect match.
If you’ve been Googling how to build a DIY smart mirror, understanding exactly what a smart mirror is gives you the confidence to move forward with your own build.
This knowledge is essential whether you’re mounting your mirror in the bathroom, entryway, or bedroom.
Once you understand the core components and how they work together, the rest of this guide will walk you through building your own smart mirror from scratch — step by step.
⚡ Pro Tip
🔎 Not sure if this project is for you?
If you can plug in a monitor and install apps on your phone, you can build a smart mirror — and save hundreds compared to retail models.
👉 Ready to see what tools and materials you’ll need for your smart mirror project?
Keep scrolling — we’ll show you exactly what to buy, where to get it, and what to avoid.
📦 View the recommended smart mirror tools + kits here
💡 Why Build a DIY Smart Mirror?
You might be wondering…
🧠 Why not just buy a smart mirror from a store and save the hassle?
That’s a fair question.
But here’s the truth:
Building your own smart mirror is not just cheaper — it’s smarter, more customizable, and way more rewarding.
Let’s break down the biggest reasons why learning how to build a DIY smart mirror is one of the best tech projects you can take on in 2025.

🚀 1. Save Hundreds of Dollars (Or More)
Retail smart mirrors can cost anywhere from $500 to $2,000 or more, especially models with touchscreen capabilities or smart home integrations.
When you build your own smart mirror, you can create a feature-rich device for under $150 to $300 depending on the tools and parts you already have.
You can even repurpose:
- An old monitor or tablet
- A picture frame or Ikea cabinet
- Spare wood or hardware lying around
👉 Click here to see a full breakdown of affordable parts
Why overspend when you can build better — and smarter?
🎨 2. Full Control Over Design & Features
Store-bought smart mirrors have fixed features and sizes.
DIY smart mirrors?
They’re 100% customizable.
You get to decide:
- 📐 The size and shape
- 🧾 The interface (minimal or loaded with data)
- 🎨 The color scheme, modules, and even voice control
- 🔌 Whether it’s powered by Raspberry Pi, Arduino, or a PC
This means you can build a bathroom mirror that shows weather + calendar, or a fitness mirror with music, timers, and live coaching — the possibilities are endless.
🧠 3. Learn New Skills & Boost Your Tech Confidence
If you’ve always wanted to explore Raspberry Pi, Linux, IoT, or open-source projects, this is your perfect entry point.
Even total beginners walk away from this project with:
- 👨💻 Basic coding knowledge (JavaScript, HTML/CSS)
- 🔧 Hardware setup skills
- 🧩 Smart home integration experience
- 💡 Problem-solving confidence
It’s not just a project — it’s a learning journey.
And trust us — nothing feels better than powering on your smart mirror for the first time and seeing it work like magic.
🏡 4. Upgrade Your Smart Home (Without Breaking the Bank)
Smart homes are on the rise.
But most upgrades come with a hefty price tag.
When you build your own smart mirror, you’re adding a futuristic, functional, and eye-catching piece of tech that:
- Syncs with your Google Calendar or smart thermostat
- Greets you with weather, reminders, and news
- Looks stunning in bathrooms, entryways, or bedrooms
- Impresses guests (seriously, they’ll ask where you bought it)
Instead of spending $800+ on a voice-controlled mirror, you can create your own for a fraction of the price, and customize it to fit your exact space.
🧩 5. Endless Upgrades and Community Support
One of the biggest perks of building a DIY smart mirror is how easy it is to expand its features later on.
Want to add motion detection?
Voice assistants like Alexa?
Or touchscreen functionality?
You can — thanks to the massive open-source community supporting MagicMirror² and other smart mirror platforms.
With dozens of modules (and new ones added regularly), your mirror can grow with your needs.
Check out the latest plugins here: Browse MagicMirror² modules
💬 6. Make It Uniquely Yours
A DIY smart mirror isn’t mass-produced.
It’s yours — built by your hands, shaped by your ideas, and loaded with the info you care about.
Want it to greet you with “Good morning, Sarah ☀️” and your daily agenda?
You can.
Want it to display crypto prices, traffic updates, or to-do lists?
Done.
You’re not just building a tool — you’re crafting an experience.
⚙️ Why DIY Beats Buying
Let’s recap the benefits of learning how to build a DIY smart mirror:
✅ Cost Savings
Build it for a fraction of the price of commercial models.
🎛️ Full Customization
Design the look, features, and size exactly how you want.
🧠 Learn New Skills
Get hands-on with tech, code, and hardware — even if you’re a beginner.
🏡 Smart Home Upgrade
Add futuristic flair to any room without a major investment.
🔄 Expandability
Easily upgrade, tweak, and improve over time.
💥 Ready to Build Something Epic?
Now that you know why you should build one…
It’s time to learn what you’ll need to get started.
👇 Let’s move on to the full list of tools, parts, and software required to build your very own DIY smart mirror.
🛒 Click here to open the tools & materials checklist in a new tab
🧰 Tools and Materials Needed
Before diving into the exciting build process, let’s make sure you have everything you need to bring your smart mirror to life.
When learning how to build a DIY smart mirror, having the right tools and components is half the battle.
You don’t need a workshop or expensive gear — most of these are budget-friendly and beginner-approved.
Below is a complete checklist broken into hardware, tools, and software.
💡 Pro Tip: We’ve also included recommended product links to help you find the best gear at the best prices.

🖥️ Essential Hardware Components
These are the must-have items that make up the foundation of your DIY smart mirror.
1. 💻 Raspberry Pi (Model 3, 4, or later)
- The “brain” of your smart mirror.
- Raspberry Pi 4 is ideal due to better performance and built-in Wi-Fi.
- Includes microSD card slot, HDMI output, USB ports.
🛒 Buy Raspberry Pi 4 Starter Kit
2. 🖥️ Monitor or Old Display Screen
- Any 15–27” monitor with HDMI works.
- Can be salvaged from an old desktop screen or purchased refurbished.
- Make sure it’s thin enough to fit inside your frame.
🛒 Check refurbished LED monitors
3. 🪞 Two-Way Mirror (Acrylic or Glass)
- Also called a “see-through mirror” or “one-way glass”.
- This allows the display to shine through from behind while still reflecting your image.
- Acrylic is lightweight and safer; glass offers better clarity.
🛒 Buy two-way acrylic mirror sheet
4. 🧱 Wooden Frame or Shadow Box
- Houses the monitor, mirror, and components.
- You can build your own or repurpose a deep photo frame.
- Ensure it’s deep enough for your monitor and wiring.
🛒 Browse shadow box frames
5. 🔌 Power Supply & HDMI Cable
- Raspberry Pi power adapter (5V 3A recommended).
- HDMI cable to connect Pi to the monitor.
🛒 View power cables + HDMI bundles
6. 💾 microSD Card (32GB or More)
- Stores the MagicMirror² software and Raspberry Pi OS.
- Class 10 or UHS-1 recommended for speed.
🛒 Grab a quality microSD card here
🛠️ Tools Required to Build a DIY Smart Mirror
Here’s what you’ll need to assemble and mount your mirror securely.
1. 🔩 Screwdriver Set
- For securing the frame and mounting the monitor.
2. 🔧 Utility Knife or Dremel
- Useful for adjusting the frame or trimming acrylic.
3. 📏 Measuring Tape or Ruler
- For precise alignment and sizing.
4. 🖇️ Double-Sided Tape, Mounting Brackets, or Velcro Strips
- To hold the monitor in place inside the frame.
🛠️ These are all commonly found in basic home toolkits.
No specialty equipment is needed — just patience and precision.
💻 Software and Setup Tools
Here’s what powers the “smart” part of your mirror.
1. 💿 Raspberry Pi OS
- Free operating system optimized for Raspberry Pi.
- Install via Raspberry Pi Imager (available for Mac/Windows/Linux).
2. 🔮 MagicMirror² Software
- The heart of the smart mirror experience.
- Open-source platform with modules like weather, calendar, news, etc.
- Highly customizable with plugins and third-party modules.
🧪 Visit: https://magicmirror.builders
3. 🌐 Internet Connection
- For downloading software updates and connecting live widgets.
- Raspberry Pi has built-in Wi-Fi; Ethernet also works.
💡 Optional Add-Ons and Upgrades
Want to take your mirror to the next level?
Consider these extra tools and modules:
- 🎤 USB Microphone or Webcam – for voice/gesture control
- 🧠 Google Assistant or Alexa Module – add voice assistant capabilities
- 🔊 Mini Speakers – to play music, notifications, or smart alerts
- 🖱️ Touchscreen Display – for interactive mirrors (advanced users)
- 🧲 Motion Sensor – wake your mirror as you approach
🛠️ These are completely optional — but can transform your build from basic to futuristic.
🛒 View smart mirror upgrade accessories here
🧾 Complete Tools & Materials Checklist
Here’s a quick printable summary of everything you’ll need:
✅ Raspberry Pi (Model 4 or higher)
✅ Power Supply (5V 3A)
✅ Monitor with HDMI input
✅ Two-Way Acrylic or Glass Mirror
✅ Wooden Frame or Shadow Box
✅ HDMI Cable
✅ microSD Card (32GB+)
✅ Basic Hand Tools (screwdriver, ruler, knife)
✅ Internet Access
✅ Raspberry Pi OS + MagicMirror² Software
🛠️ Optional Add-Ons:
🎤 Voice Control (Alexa/Google Assistant)
📸 Camera or Microphone
🖱️ Touch Interface
🎵 Audio Module
📎 Click here to download this checklist as a PDF
💥 Ready to Get Building?
You now have the full list of tools and materials needed to build your DIY smart mirror.
From here, it’s all about putting the pieces together.
👉 In the next section, we’ll guide you step-by-step through the full build process — no coding skills needed.
🧠 Tap here to view the build tutorial with images & commands
🛠️ Step-by-Step Guide to Building Your Smart Mirror
Now that you’ve gathered all the tools and materials, it’s time to roll up your sleeves and start building.
Don’t worry — even if you’re new to electronics or coding, this step-by-step tutorial on how to build a DIY smart mirror will walk you through the entire process from start to finish.
Let’s get started!

🔧 Step 1 — Prepare Your Monitor and Frame
This is the foundation of your smart mirror’s physical structure.
1. Remove the monitor casing (optional but recommended)
- Most monitors come with plastic bezels that add bulk.
- Carefully open the back using a screwdriver and gently detach the casing.
- Be cautious around exposed circuits — avoid touching the screen ribbon or power board.
💡 Stripping the casing helps reduce thickness and fits better into your frame.
2. Measure and cut your frame
- Match your frame size to your monitor’s screen area.
- If building a custom wooden frame, cut your panels accordingly.
- If using a shadow box, make sure it’s deep enough to house the screen and cables.
🛠️ Pro Tip: Add ventilation holes if your monitor gets warm.
🪞 Step 2 — Install the Two-Way Mirror
Your mirror glass is what transforms this from a screen into a sleek, futuristic display.
1. Clean the mirror surface
- Use microfiber cloths to avoid streaks or scratches.
2. Mount the two-way mirror into the frame
- Place it flush against the front, reflective side out.
- Secure with clips, adhesive, or frame pressure (depending on your design).
💡 Acrylic mirrors are easier to work with and less prone to cracking.
🔌 Step 3 — Install the Monitor Behind the Mirror
This part aligns your display with the reflective surface.
1. Center the screen directly behind the mirror
- Only the bright parts of the screen will show through the glass.
- Position the screen where you want the modules (clock, weather, calendar) to appear.
2. Secure the monitor in place
- Use velcro strips, brackets, or double-sided mounting tape.
- Make sure the screen is stable and doesn’t shift.
📏 Re-check alignment before closing the frame.
🧠 Step 4 — Set Up the Raspberry Pi
Now let’s bring your smart mirror to life.
1. Install Raspberry Pi OS on the microSD card
- Download Raspberry Pi Imager at raspberrypi.com/software
- Select Raspberry Pi OS (32-bit) → Choose storage → Write
🧠 Insert the microSD card into your Pi and connect mouse, keyboard, and monitor for first-time setup.
2. Boot up and update
- Plug in your Pi.
- Open the terminal and run:
sudo apt update && sudo apt upgrade
🪄 Step 5 — Install MagicMirror² Software
This is the heart of your smart mirror’s display.
1. Open Terminal and install MagicMirror²
curl -sL https://deb.nodesource.com/setup_16.x | sudo -E bash –
sudo apt install -y nodejs
npx create-magicmirror
📦 The script will download and configure the latest version.
2. Start MagicMirror
npm run start
🖥️ Your screen will now display a default interface with clock, calendar, and weather.
🎉 Congratulations — your smart mirror is alive!
⚙️ Step 6 — Customize Your Modules
You can now add powerful widgets to your mirror.
Edit the config file:
nano ~/MagicMirror/config/config.js
🔧 Here you can customize:
- 🌤️ Weather forecast
- 📅 Calendar sync
- 📈 News feeds
- 💸 Stock prices
- ⏰ Alarms and timers
For more modules, visit: https://magicmirror.builders/modules/
🧠 Each module has clear instructions to install and configure.

🧲 Step 7 — Add Smart Features (Optional)
Want to go beyond just display?
You can integrate voice control, gestures, and IoT connectivity.
Popular add-ons include:
- 🗣️ Alexa or Google Assistant modules
- 🎤 Facial recognition login
- 📸 Camera feed or home surveillance
- 💡 Smart lighting control via IFTTT
👀 Explore these advanced features in our Smart Mirror Enhancements Guide
🖼️ Step 8 — Assemble and Mount
Once your software is working and your mirror is aligned:
1. Mount the Raspberry Pi inside the frame
- Attach with velcro, brackets, or corner mounts.
- Tidy up the wiring with cable ties.
2. Close the frame securely
- Ensure everything is tight and flush.
- Plug the power cable into a hidden outlet or behind-wall power strip.
📸 Consider adding a frame stand or wall-mount bracket depending on placement.
🎯 Final Testing and Adjustments
Power it on and stand in front of your new smart mirror!
✅ Check:
- Is the text and content visible and bright enough?
- Is the reflection crisp?
- Are modules syncing correctly?
Tweak brightness and contrast in your monitor settings or tweak MagicMirror CSS files for layout.
🧪 Tip: Adjust fonts, spacing, or alignment via custom.css for a polished look.
💥 You’ve Built It. Now Own It.
👏 You’ve officially completed how to build a DIY smart mirror — and not just any mirror… one that reflects your style, syncs with your life, and makes every morning smarter.
💡 Want to personalize your mirror with voice control, calendar sync, and a live dashboard?
👉 Download our free add-ons pack
👀 Share your mirror build with us on Instagram or tag #SmartMirrorDIY!
🎨 Customization Ideas
One of the biggest advantages of learning how to build a DIY smart mirror is the unlimited potential for personalization.
Once your base mirror is up and running, you can truly make it your own with advanced features, modules, and creative tweaks.
These smart mirror customization ideas will help you unlock powerful functions, elevate design, and enhance user interaction.

🧩 Add Extra MagicMirror² Modules
MagicMirror² supports a vast range of open-source modules created by the community.
These modules let you go beyond just the time and weather display.
🔥 Popular modules to explore:
- 📅 Google Calendar integration – show your upcoming events
- 🌍 Weather forecast with real-time updates
- 📈 Cryptocurrency/Stock Ticker for price tracking
- 📰 RSS News Feeds for headlines from your favorite sites
- 🚦 Traffic Commute Updates via Google Maps
- 🎵 Now Playing Music Info from Spotify or Apple Music
- 🗣️ Voice Command Modules using Google Assistant or Alexa
👉 You can browse the full list at magicmirror.builders/modules
🧠 Each module includes installation steps and config examples.
💬 Enable Voice Control and Interaction
Adding voice assistant functionality turns your mirror into a fully interactive smart hub.
Whether you prefer Alexa or Google Assistant, integration is possible with Raspberry Pi.
How to implement:
- Use Google Assistant SDK or AlexaPi
- Add a microphone like this USB mic and optionally a speaker
- Install and configure the voice module
- Set up wake words or push-to-talk
🗣️ Imagine saying “What’s the weather today?” and seeing it instantly reflected.
✨ This transforms your mirror into an intelligent virtual assistant.
🖼️ Style the Interface with Themes and Layouts
Beyond functionality, you can adjust how your smart mirror looks.
Try customizing:
- Font size and color
- Background opacity
- Module positioning (left, right, top, bottom)
- CSS animations for smooth transitions
🎨 Edit the custom.css file in your MagicMirror folder to get started.
💡 Want a modern look? Use a minimalist black & white theme. Prefer bold? Use color-coded sections to visually group data.
🏠 Turn It into a Smart Home Command Center
Why stop at a mirror?
You can integrate your mirror with your smart home devices to create a full control panel.
Integration ideas:
- 💡 Control smart lights with Philips Hue module
- 🌡️ Show live indoor temperature from your smart thermostat
- 🔐 Display security camera feeds (IP cam or Nest)
- 🔔 Get smart doorbell notifications from Ring
🧠 Pair it with IFTTT or Home Assistant to automate tasks via triggers.
This setup makes your smart mirror the brain of your smart home.
🖼️ Use Photo Frames and Ambient Lighting
Sometimes the best upgrades are visual.
Add ambient lighting or photo frame effects to make your mirror more stylish.
Visual customization ideas:
- 🖼️ Install LED strips (like Govee RGB strips) around the frame
- 🕯️ Use smart lights that change color based on the time of day
- 📷 Set your mirror to show a slideshow of family photos when idle
- 🔲 Add a floating frame border with matte paint for a modern gallery feel
💡 These simple upgrades can dramatically enhance the aesthetics of your smart mirror setup.
🛎️ Add Alerts, Reminders, and Daily Briefings
Get notified without checking your phone.
Your smart mirror can show timely pop-ups and reminders based on your routine.
Examples:
- 🕘 Morning weather and calendar
- ⏰ Reminder for medication
- 📩 Count of unread emails
- 🧠 Daily productivity quotes or affirmations
🧩 Combine modules like MMM-Notification, MMM-Quotes, or MMM-ToDo to automate your digital lifestyle.
🛠️ Add Gesture Control or Facial Recognition (Advanced)
For advanced tinkerers, bring in gesture control or facial recognition.
It adds a futuristic, contact-free way to interact with your mirror.
Hardware needed:
- A USB webcam or Raspberry Pi Camera Module
- Ultrasonic sensor or gesture controller (e.g. PAJ7620U2)
- Face recognition libraries like OpenCV or FaceAPI.js
⚡ Use it to auto-display specific dashboards based on user identity.
Or wave your hand to cycle between modules, play music, or show the time.
This feature will truly wow your guests and elevate your tech cred.
🚀 Make It Your Smart Mirror
🎉 Now that you’ve mastered the basics of how to build a DIY smart mirror, it’s time to unleash your creativity.
✨ These customization ideas will help you transform a basic setup into a feature-rich, stunningly personal smart device.
👉 Explore our curated list of the best MagicMirror modules to get started.
🔧 Already added a unique feature to your smart mirror?
Drop your build in the comments or tag us at #SmartMirrorDIY — we’d love to feature you!
🛠️ Common Troubleshooting Tips
Encountering issues with your DIY smart mirror? Don’t worry — even the best setups face hiccups.
This guide provides clear, actionable solutions to the most frequent problems users face when learning how to build a DIY smart mirror and maintaining one.
These troubleshooting tips ensure your smart mirror runs smoothly and efficiently, giving you the best experience possible.
We’ll cover hardware bugs, software errors, module failures, and more — so you can fix them without tearing your hair out. 🧠💡

⚙️ The Display Isn’t Powering On
If your screen stays black after booting your Raspberry Pi:
✅ Quick Fixes:
- Check power cable and HDMI connection: Ensure everything is securely plugged in.
- Use a verified power adapter for Raspberry Pi (5.1V, 3A recommended).
- Try another HDMI port or cable to rule out hardware failure.
- If using a monitor with auto input detection, manually select HDMI input.
📌 Tip: Test your Raspberry Pi with another monitor to isolate the issue.
🧾 MagicMirror² Doesn’t Launch on Boot
If your mirror boots but doesn’t show the MagicMirror interface:
🛠️ Troubleshooting Steps:
- Open terminal and run:
pm2 logs (if using PM2) or
npm start (from the MagicMirror directory).
- Look for “missing module” or “config error” in the logs.
- Reinstall Node modules using:
npm install inside your MagicMirror folder.
- Confirm your config.js file is valid:
npm run config:check
📌 Common issue: A single missing comma in your config file will crash the interface.
🧩 Modules Not Displaying or Malfunctioning
You’ve installed a module, but it’s not showing up?
🔍 What to Check:
- Open your config.js and verify:
- The module is listed correctly in the modules array.
- Syntax matches the module’s documentation.
- The module is listed correctly in the modules array.
- Confirm the module is installed in the modules/ folder.
- Run npm install inside the module directory if it has dependencies.
👁️ Look in the browser developer console (Ctrl+Shift+I) for module load errors.
📌 Tip: Check the module’s GitHub page — many have active issue threads or FAQs.
🔊 No Audio Output for Voice Assistants
Using Google Assistant or Alexa modules and getting no sound?
🎧 Fixes:
- Check the audio device settings with alsamixer in terminal.
- Make sure your USB speaker or 3.5mm output is properly configured.
- If using HDMI for audio, set:
sudo raspi-config > Advanced Options > Audio > HDMI
- Test audio output:
aplay /usr/share/sounds/alsa/Front_Center.wav
📌 Make sure your assistant module has proper config keys and APIs.
📡 Wi-Fi Issues or Mirror Not Connecting to Internet
Your mirror powers on but doesn’t pull data (like weather or news)?
🌐 How to Fix:
- Check Wi-Fi connection:
ifconfig wlan0 or iwconfig
- Make sure your Pi is in range of the router.
- Restart network interface:
sudo ifdown wlan0 && sudo ifup wlan0
- Or reboot the system:
sudo reboot
📌 Try plugging in Ethernet to bypass Wi-Fi issues during setup.

👤 Facial Recognition or Gesture Controls Not Working
Installed advanced features, but they’re glitching?
🤖 Troubleshooting Tips:
- Make sure your camera module is recognized:
raspistill -o test.jpg
- Update OpenCV or other libraries using:
pip install –upgrade opencv-python
- Test gestures with standalone demos before adding them to the mirror.
- For facial recognition, check training data folders and permissions.
🧠 Advanced modules often need sudo rights and consistent file paths.
🔁 Mirror Keeps Restarting or Crashing
If your smart mirror restarts randomly:
🧯 Solution Checklist:
- Overheating? Check if Raspberry Pi is warm — install a cooling fan.
- Use htop or top to see if RAM/CPU are maxing out.
- Run pm2 logs or journalctl -xe to catch fatal errors.
- Update system software:
sudo apt update && sudo apt upgrade
💡 Too many modules or animation-heavy themes can overload the Pi.
📦 Still Stuck? Use These Diagnostic Tools
When you can’t figure out the issue:
🛠️ Try:
- Run in Safe Mode by disabling all modules, then re-enabling one by one.
- Use online format checkers for your config.js
- Reinstall MagicMirror from scratch as a last resort.
📌 Backup your current config and modules before reinstalling!
🚀 Take Control of Your Smart Mirror Experience
🎯 Don’t let small bugs ruin your smart mirror journey.
Every tech project has bumps — what matters is knowing how to fix them fast.
✅ Bookmark this troubleshooting guide so you always have a go-to reference.
✨ Already tried these tips? Check out this advanced toolkit for smart mirror builders to level up your setup even further.
Need help? Drop your issue in the comments — we’re here to support your DIY success! 💬👇
🔧 Maintenance and Upgrades
Building a smart mirror is just the beginning — maintaining and upgrading it regularly is the key to keeping it modern, secure, and fully functional.
Whether you’re a hobbyist learning how to build a DIY smart mirror or a tech enthusiast aiming for long-term reliability, this guide covers everything you need to know about smart mirror maintenance and future-proofing your setup.
Let’s walk through best practices, essential tasks, and exciting upgrade options to keep your smart mirror performing at its best.

🧼 Routine Maintenance for Longevity
Just like any tech device, your smart mirror needs occasional upkeep to avoid performance drops or hardware failure.
🛠️ Essential Regular Maintenance Tasks:
- Clean the mirror surface weekly using a microfiber cloth and non-abrasive glass cleaner.
- Dust vents and Raspberry Pi casing to prevent overheating.
- Reboot the mirror once a week to clear memory and apply updates.
- Check for software updates in MagicMirror² (git pull in terminal).
- Inspect cables and connections for wear or corrosion.
💡 Schedule these tasks monthly or quarterly depending on usage volume.
🔄 Updating MagicMirror² and Modules
Keeping your software up to date ensures access to the latest features, patches, and security improvements.
📥 How to Update:
To update MagicMirror²:
cd ~/MagicMirror
git pull
npm install
- For individual modules:
- Go to the module’s folder in ~/MagicMirror/modules/
- Run git pull (if it was cloned via Git)
- Or follow update instructions on the module’s GitHub page
- Go to the module’s folder in ~/MagicMirror/modules/
🚨 Always back up your config.js before updating!
💡 Upgrade Your Hardware Components
Upgrading your hardware can extend your mirror’s life and improve performance dramatically.
🧱 Popular Hardware Upgrades:
- 🔁 Replace Raspberry Pi 3 with Raspberry Pi 4 or 5 – faster boot, better graphics
- 🧠 Add more RAM or faster microSD cards for smoother multitasking
- 🖼️ Upgrade to a higher-resolution display for crisper visuals
- 🔈 Install better speakers or microphones for improved voice control
- 🌈 Add smart LED lighting strips to enhance ambience
🧠 These simple tweaks can make your setup feel brand new.
🧩 Expand with New MagicMirror Modules
MagicMirror²’s modular architecture means you can always add more functionality — even months or years later.
🔍 Examples of Useful Module Add-Ons:
- 🗓️ Personal calendar with colored event markers
- 🕹️ Integration with smart home systems (Home Assistant, IFTTT)
- 📸 Real-time IP camera feed
- 📣 Morning briefings or motivational quotes
- 📊 Health tracker (steps, sleep, etc.)
👉 Find updated modules at magicmirror.builders/modules and sort by popularity or date added.
🛡️ Ensure Security and Stability
Especially if your smart mirror connects to the internet, you need to take precautions.
🧰 Security Best Practices:
Change default Pi credentials:
passwd
- Use strong Wi-Fi passwords and firewall your router.
- Disable SSH when not in use.
- Avoid installing unknown third-party modules without vetting their code.
Enable auto-updates for system packages:
sudo apt install unattended-upgrades
🔒 This helps prevent vulnerabilities or backdoor access.
🧠 Tips for Long-Term Performance Optimization
Over time, your smart mirror might slow down or behave erratically.
Here’s how to keep it running smoothly:
⚙️ Performance Tips:
- Use lightweight modules — avoid loading too many at once
- Minimize animation or visual effects in your theme
- Disable logging/debug modes in production
Run diagnostics periodically with:
top
or
htop
- Reboot your mirror every few days to clear memory leaks
✨ Bonus: Use a heat sink or fan to maintain safe CPU temps
🚀 Keep Your Smart Mirror Running Like New
🎯 Your smart mirror deserves more than a one-time setup.
Regular maintenance and creative upgrades are what transform it from a DIY project into a long-term smart device.
👉 Explore these top-rated accessories for smart mirror upgrades to take your build to the next level.
🛠️ Already made some custom changes or upgrades? Share your build with the community or tag us at #DIYSmartMirrorBuild — we might feature it in our next post!
✅ Conclusion – Building a DIY Smart Mirror
Congratulations!
You’ve now explored everything you need to know about how to build a DIY smart mirror — from tools and step-by-step instructions to upgrades, troubleshooting, and beyond.

Building a smart mirror isn’t just a tech project — it’s a rewarding blend of creativity, innovation, and functionality. Whether you’re displaying weather updates, your calendar, news headlines, or integrating smart home features, this mirror becomes a personalized information hub that makes your everyday routine more seamless and visually engaging.
By following the detailed instructions and expert tips provided in this blog, you now have:
- A clear understanding of what a smart mirror is and what it can do
- Step-by-step guidance on building one from scratch
- Proven methods to troubleshoot and fix common problems
- Practical ideas to upgrade and maintain your mirror over time
- Insights into why this project is perfect for both beginners and tech lovers alike
💬 Final Thoughts
As technology continues to evolve, so can your smart mirror. Add more modules, connect it with your smart home, or personalize the interface to suit your lifestyle. The beauty of a DIY smart mirror is that it grows with you — it’s a living project you can enhance over time.
Most importantly, don’t be afraid to experiment, break things, and rebuild. That’s what DIY is all about. 💡🛠️
⚡ Ready to get started on your build? Don’t forget to revisit the tools list, bookmark this guide, and download the smart mirror checklist template to keep your build organized from start to finish.
🎯 Take the First Step Today!
✨ Whether you’re building your first smart mirror or upgrading an older model — now’s the perfect time to bring your mirror to life.
✅ Click here to grab the recommended tools and components
✅ Join our Smart Mirror DIY community for live help and updates
✅ Share your final build with us and get featured!
Let your creativity reflect in your tech. 🪞💡
Your mirror. Your vision. Your future.
You might also like :