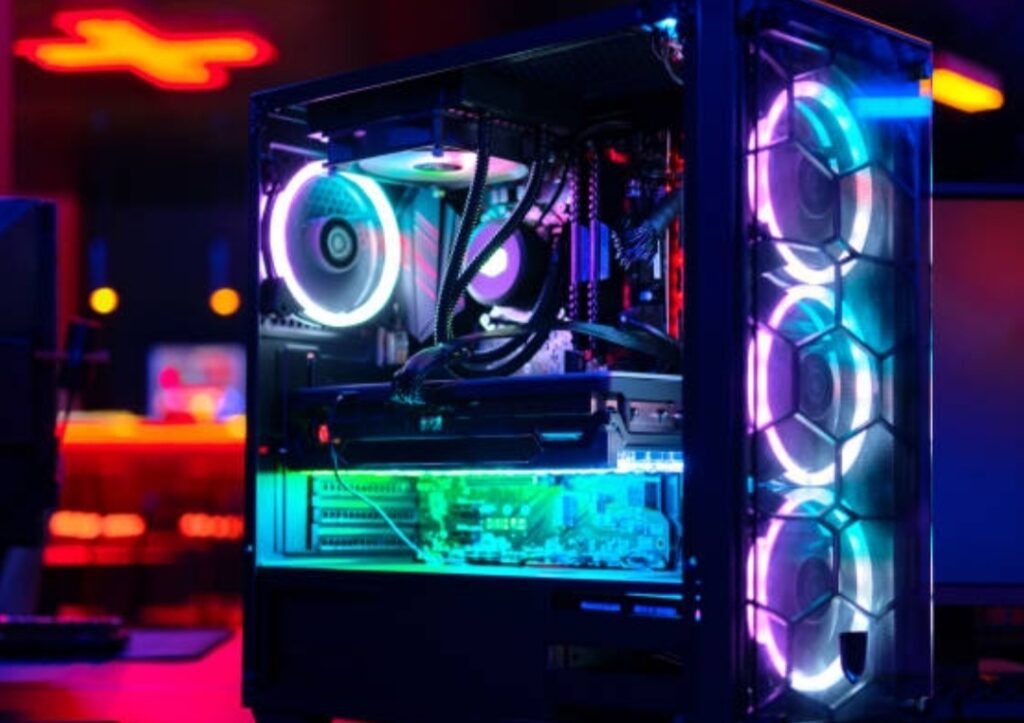
Why Build Your Own Gaming PC?
Building your own gaming PC might seem intimidating at first, but it’s one of the most rewarding and cost-effective ways to get the ultimate gaming experience.
Many gamers face a common dilemma: Should I buy a pre-built gaming PC or build one myself?
While purchasing a pre-assembled gaming PC offers convenience, it comes with certain limitations that could hinder performance, upgradeability, and overall value.
In this section, we’ll dive deep into the advantages of building your own gaming PC, explaining why it’s a smart investment and how it allows you to get the best performance for your budget.
Benefits of Building Over Buying Pre-Built
Cost-Effectiveness – Get More Power for Your Money
One of the biggest reasons to build your own gaming PC is the significant cost savings.
When you buy a pre-built gaming computer, you’re paying extra for labor costs, branding, and sometimes unnecessary software bloatware that slows down your system.
By building your own gaming PC, you can:
✅ Cut out the middleman – You only pay for the components you need, rather than a premium for assembly and branding.
✅ Allocate your budget wisely – Instead of overspending on features you don’t need, you can prioritize high-performance parts like the GPU and CPU.
✅ Take advantage of seasonal discounts – Buying parts separately allows you to hunt for the best deals and discounts on components.
💡 Example: A pre-built gaming PC with an RTX 4070 GPU and an Intel i7 processor might cost you around $1,800-$2,000.
However, if you buy the components yourself and assemble them, you can build the same PC for around $1,400-$1,600, saving you hundreds of dollars!
Customization Options – Build a PC That Fits Your Needs
When buying a pre-built gaming PC, you’re stuck with the manufacturer’s choices for components, cooling solutions, and aesthetics.
Building your own gaming PC gives you the freedom to customize every part of your setup to fit your exact gaming and performance needs.
Customization Benefits:
✅ Choose the right GPU & CPU for your games – If you’re into high-end AAA gaming, you might prioritize a powerful GPU like the RTX 4080 or RX 7900 XTX. If you’re more into competitive eSports, a high-refresh-rate monitor and fast CPU like the Ryzen 7 7800X3D will be more important.
✅ Pick your cooling system – Want a silent PC? Go for an AIO liquid cooler. Prefer high airflow? Choose high-performance case fans.
✅ Decide on the aesthetics – Love RGB lighting? Want an all-white PC build? The choice is yours!
✅ Future-proof your setup – Unlike pre-built PCs, which often come with cheap, low-quality motherboards and power supplies, you can select high-end components that last longer and support future upgrades.
🔹 Example: A pre-built gaming PC might come with generic RAM and a locked-down motherboard, limiting overclocking and future expansion.
By building your own, you can hand-pick high-quality components that allow you to upgrade easily in the future!
Enhanced Performance – Unlock Maximum FPS and Power
When manufacturers build pre-built gaming PCs, they often use lower-end parts (such as cheap motherboards, low-speed RAM, and generic power supplies) to cut costs.
This means you might not get the best performance for your money.
Why a Custom-Built PC Performs Better:
✅ No bottlenecking – You can ensure that your CPU, GPU, RAM, and storage are balanced for optimal performance.
✅ Better cooling solutions – Pre-built PCs often come with stock cooling, which can lead to thermal throttling. By building your own, you can choose high-performance air or liquid cooling to keep temperatures low and boost FPS.
✅ Optimized RAM & Storage speeds – Many pre-built PCs come with slow RAM (2666MHz or lower) and SATA SSDs instead of NVMe SSDs. When building your own, you can pick high-speed RAM (3200MHz+ DDR4 or DDR5) and ultra-fast NVMe SSDs for faster load times.
✅ Overclocking capabilities – Some pre-built systems lock the BIOS, preventing you from overclocking your CPU, RAM, or GPU. A custom-built PC allows full control over clock speeds, helping you push your hardware to the max.
💡 Example: If you build a high-performance gaming PC, you can achieve over 200+ FPS in games like Apex Legends, Call of Duty, and Valorant. A pre-built PC with lower-quality parts might struggle to reach these FPS levels due to weaker cooling and limited BIOS settings.
🔹 Bottom Line: When you build your own gaming PC, you control every detail – ensuring you get the best performance possible for your budget!

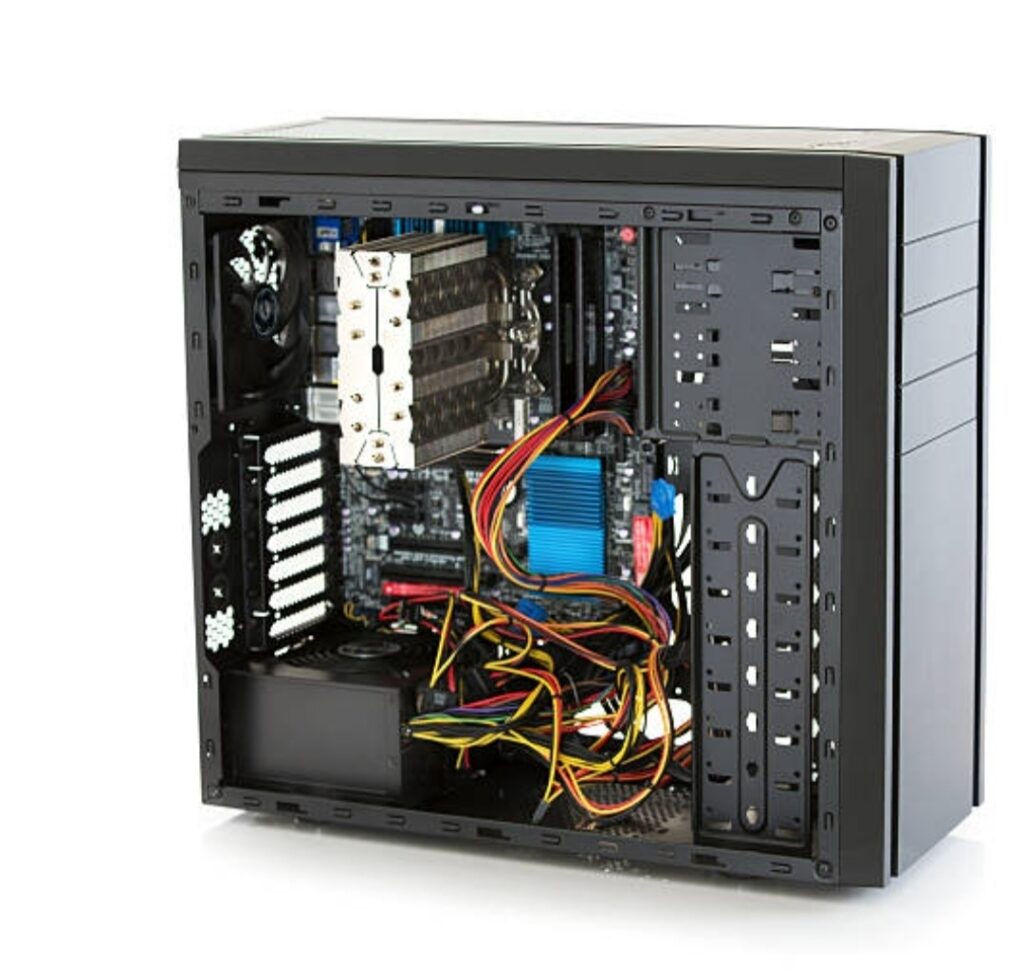
Understanding the Basics of PC Components
Before diving into how to build a gaming PC, it’s crucial to understand the core components that make up a gaming rig.
Each part plays a vital role in your PC’s performance, speed, and gaming experience.
Central Processing Unit (CPU) – The Brain of Your PC
The CPU (or processor) handles all calculations and instructions your PC performs.
For gaming, you’ll want a fast, multi-core CPU that can handle modern game engines and multitasking.
Key CPU Factors:
✅ Core & Thread Count – Modern games utilize 6 to 16 cores, so aim for at least a Ryzen 5 7600X or Intel i5-13600K for gaming.
✅ Clock Speed & Boost – Higher clock speeds (4.5GHz or more) improve game responsiveness.
✅ Overclocking Support – Some CPUs allow overclocking for extra performance (like Intel “K” series or AMD “X” CPUs).
🔹 Recommended CPUs for Gaming:
- Budget: AMD Ryzen 5 5600X / Intel Core i5-12400F
- Mid-Range: AMD Ryzen 7 7800X3D / Intel Core i5-13600K
- High-End: AMD Ryzen 9 7950X3D / Intel Core i9-14900K
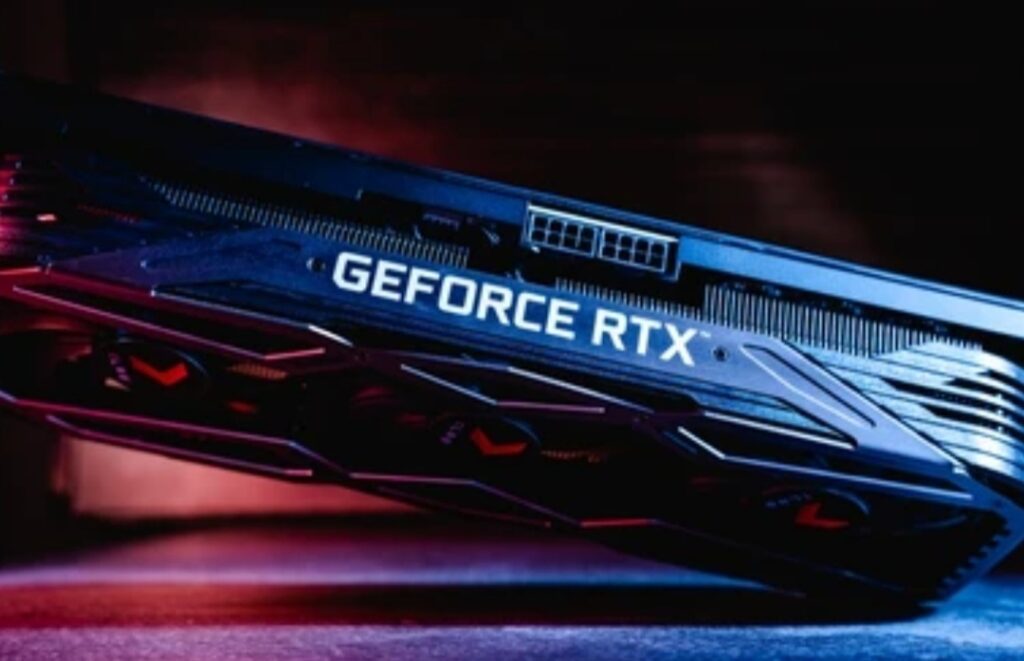
Graphics Processing Unit (GPU) – The Heart of Gaming Performance
Your GPU (graphics card) is the most important component for high-quality gaming visuals.
It determines your FPS, resolution, and graphics settings.
Choosing the Right GPU:
✅ Consider your monitor resolution – For 1080p gaming, an RTX 4060 or RX 7600 is great. For 1440p, go for an RTX 4070 or better. For 4K gaming, aim for an RTX 4080 or RX 7900 XTX.
✅ VRAM (Memory) – 8GB VRAM is the minimum for modern games, but 12GB+ is ideal for future-proofing.
✅ Ray Tracing & DLSS – Nvidia GPUs support DLSS for better FPS, while AMD GPUs offer FSR for similar performance boosts.
🔹 Recommended GPUs for Gaming:
- Budget: Nvidia RTX 4060 / AMD RX 7600
- Mid-Range: Nvidia RTX 4070 Ti / AMD RX 7800 XT
- High-End: Nvidia RTX 4090 / AMD RX 7900 XTX
If you’re serious about gaming and want the best performance, upgradeability, and value, building your own gaming PC is the clear winner.
Not only do you save money, but you also get complete control over your hardware, allowing you to optimize and upgrade over time.
🔥 Ready to start your build? Keep reading as we walk you through every step of how to build a gaming PC from scratch!
Setting a Budget for Your Gaming PC
Building a gaming PC is an exciting investment, but it’s important to set a realistic budget before purchasing components.
With the wide range of gaming hardware available, prices can vary significantly.
Some gamers want a budget-friendly build for casual gaming, while others seek a high-end powerhouse for 4K gaming and streaming.
By understanding how to allocate funds efficiently, you can build a PC that delivers excellent performance without overspending.
In this section, we’ll explore how to allocate your budget for each component and how to balance cost vs. performance to maximize value.
Allocating Funds for Each Component
When setting a budget for your custom gaming PC, it’s important to divide your funds strategically across the key components.
Each part plays a specific role in gaming performance, and knowing where to invest more money can make a huge difference in frame rates, responsiveness, and future-proofing.
💡 Here’s a recommended budget breakdown based on total PC cost:
| Component | Budget Build ($600-$1000) | Mid-Range Build ($1000-$1500) | High-End Build ($1500-$3000) |
| Processor (CPU) | 15-20% of budget | 20-25% of budget | 20-30% of budget |
| Graphics Card (GPU) | 30-40% of budget | 35-45% of budget | 40-50% of budget |
| Motherboard | 10-15% of budget | 10-15% of budget | 10-15% of budget |
| Memory (RAM) | 10-15% of budget | 10-15% of budget | 10-15% of budget |
| Storage (SSD/HDD) | 10-15% of budget | 10-15% of budget | 10-15% of budget |
| Power Supply (PSU) | 5-10% of budget | 5-10% of budget | 5-10% of budget |
| Case & Cooling | 5-10% of budget | 5-10% of budget | 5-10% of budget |
How Much Should You Spend on Each Component?
✅ Processor (CPU) – The CPU is the brain of your gaming PC. It impacts performance in CPU-intensive games, multitasking, and content creation. If you’re gaming at 1080p, a mid-tier CPU will do. For 1440p/4K gaming or streaming, get a higher-end processor.
- Budget: AMD Ryzen 5 5600X, Intel Core i5-12400F
- Mid-Range: AMD Ryzen 7 7800X3D, Intel Core i5-13600K
- High-End: AMD Ryzen 9 7950X3D, Intel Core i9-14900K
✅ Graphics Card (GPU) – The most crucial component for gaming. A stronger GPU means higher FPS and better graphics settings. Spend at least 30-50% of your total budget on a powerful graphics card.
- Budget: Nvidia RTX 4060, AMD RX 7600
- Mid-Range: Nvidia RTX 4070 Ti, AMD RX 7800 XT
- High-End: Nvidia RTX 4090, AMD RX 7900 XTX
✅ Motherboard – The motherboard acts as the foundation of your gaming PC. It doesn’t directly impact gaming performance, but choosing a quality board ensures upgradeability and reliability.
- Budget: B550, B660 chipset motherboards
- Mid-Range: B650, Z690, Z790 motherboards
- High-End: X670E, Z790 high-end motherboards with WiFi & PCIe 5.0
✅ Memory (RAM) – RAM affects loading times, multitasking, and game smoothness. At least 16GB is recommended for gaming, but 32GB is ideal for future-proofing.
- Budget: 16GB DDR4 (3200MHz)
- Mid-Range: 32GB DDR4 (3600MHz) or DDR5 (5200MHz)
- High-End: 32GB-64GB DDR5 (6000MHz+)
✅ Storage (SSD/HDD) – A fast SSD significantly reduces game load times. Always prioritize an NVMe SSD over an HDD for better gaming performance.
- Budget: 500GB-1TB NVMe SSD
- Mid-Range: 1TB-2TB NVMe SSD
- High-End: 2TB+ Gen 4 or Gen 5 NVMe SSD
✅ Power Supply (PSU) – A quality PSU is critical for system stability. Never buy a cheap power supply, as it can lead to system crashes, hardware failures, or even fire hazards.
- Budget: 550W-650W (80+ Bronze)
- Mid-Range: 750W-850W (80+ Gold)
- High-End: 1000W+ (80+ Platinum)
✅ Case & Cooling – A well-ventilated case improves airflow and prevents thermal throttling. Invest in good case fans and cooling solutions for better longevity.
- Budget: Basic ATX case with decent airflow
- Mid-Range: High-airflow case with multiple cooling options
- High-End: Premium case with tempered glass, RGB, and liquid cooling options

Balancing Performance and Cost
When deciding how to build a gaming PC, you need to balance cost and performance.
Some components provide more noticeable performance gains than others.
For example, spending extra on a GPU gives a bigger FPS boost than upgrading from 32GB to 64GB of RAM.
💡 Key Strategies to Get the Best Performance for Your Money:
🔹 Prioritize the GPU for gaming performance – The GPU impacts frame rates, resolution, and game quality. Spend at least 30-40% of your budget on a strong graphics card.
🔹 Don’t overspend on the CPU – A mid-range CPU is enough for gaming unless you also plan to stream or edit videos. Pairing an RTX 4070 with a Ryzen 7 7800X3D will outperform an RTX 4060 with a Ryzen 9 7950X in gaming.
🔹 Choose faster storage over more storage – An NVMe SSD improves load times much more than a large HDD. Start with 1TB NVMe storage, then add more SSD/HDD later if needed.
🔹 Save money on non-essential extras – Fancy RGB lighting, an expensive case, or premium cooling solutions are nice but don’t improve FPS. Stick to performance-first components and upgrade aesthetics later.
🔹 Consider upgrade paths – Invest in a quality motherboard and PSU so you can upgrade to a more powerful GPU or CPU in the future without replacing everything.
Setting a realistic budget and allocating funds wisely will help you build a powerful gaming PC without breaking the bank.
By focusing on performance-first components, you can ensure your system delivers high FPS, smooth gameplay, and long-term upgradeability.
🔥 Ready to start building? In the next section, we’ll walk you through how to build a gaming PC step-by-step, ensuring you get the most out of your budget!
Defining Your Gaming Needs
Before diving into the process of how to build a gaming PC, it’s crucial to define your gaming needs.
Not all gaming setups are the same, and the type of games you play and the performance you expect will directly impact the components you should prioritize.
For example, if you love competitive shooters like Call of Duty or Valorant, you’ll need high frame rates for smoother gameplay.
On the other hand, if you enjoy immersive open-world RPGs like Cyberpunk 2077, you’ll want a powerful GPU for stunning graphics.
By understanding your gaming preferences, you can build a PC that perfectly fits your gaming style without overspending on unnecessary hardware.
Types of Games You Plan to Play
The games you play are one of the biggest deciding factors when choosing your PC components.
Some games are CPU-heavy, meaning they rely more on processor power, while others are GPU-intensive, demanding higher graphical processing power.
Let’s break down different gaming categories and the hardware requirements they need.
Competitive FPS and Esports Games (High FPS Priority)
🔹 Examples: Counter-Strike 2, Valorant, Rainbow Six Siege, Apex Legends, Call of Duty: Warzone
Competitive FPS and esports titles require high frame rates and low input lag for smooth, responsive gameplay.
Since these games are often fast-paced, even a slight performance drop can affect reaction time and aiming precision.
🖥️ Hardware Considerations:
✅ High refresh rate monitor (144Hz or 240Hz) for smoother gameplay
✅ Mid to high-end CPU to process quick inputs and physics calculations
✅ Powerful GPU to ensure consistently high frame rates
✅ Fast SSD to reduce loading times and improve game responsiveness
✅ At least 16GB RAM to handle quick renderings and multitasking
Recommended Build:
- CPU: Intel Core i5-13600K / AMD Ryzen 7 7800X3D
- GPU: Nvidia RTX 4060 Ti / AMD RX 7600 XT (for 144Hz 1080p gaming)
- RAM: 16GB DDR4 (3600MHz) or DDR5 (5200MHz)
- Monitor: 1080p 144Hz or 240Hz for ultra-smooth visuals
Open-World & AAA Games (Graphics Quality Priority)
🔹 Examples: Cyberpunk 2077, The Witcher 3, Red Dead Redemption 2, Elden Ring, Starfield
AAA open-world games are known for stunning graphics, large-scale environments, and cinematic experiences.
These games often push GPUs to their limits with detailed textures, ray tracing, and high-resolution assets.
🖥️ Hardware Considerations:
✅ High-performance GPU to render detailed environments smoothly
✅ Strong CPU to handle complex AI and open-world mechanics
✅ 32GB RAM (Recommended) to ensure smooth gameplay in modern titles
✅ Fast NVMe SSD to prevent texture pop-ins and reduce loading times
✅ 1440p or 4K monitor for the best visual experience
Recommended Build:
- CPU: AMD Ryzen 7 7800X3D / Intel Core i7-13700K
- GPU: Nvidia RTX 4070 Ti / AMD RX 7900 XT (for high settings at 1440p)
- RAM: 32GB DDR5 (6000MHz)
- Monitor: 1440p 144Hz or 4K 60Hz
MMORPGs & Strategy Games (Balanced CPU & GPU Performance)
🔹 Examples: World of Warcraft, Final Fantasy XIV, Civilization VI, Age of Empires IV, Total War: Warhammer III
MMORPGs and strategy games require both CPU and GPU power.
They process large-scale battles, player interactions, and AI decision-making, making multithreaded CPUs an advantage.
🖥️ Hardware Considerations:
✅ Multicore CPU for handling large game worlds and AI
✅ Decent GPU for rendering vast landscapes
✅ Fast storage (SSD or NVMe) for loading game assets quickly
✅ At least 16GB RAM for smooth multitasking and background processes
Recommended Build:
- CPU: Intel Core i7-13700K / AMD Ryzen 7 7700X
- GPU: Nvidia RTX 4060 / AMD RX 7700 XT
- RAM: 16GB DDR5 (5200MHz)
- Monitor: 1080p or 1440p with high refresh rate
Desired Resolutions and Frame Rates
Your gaming experience depends on both resolution and frame rate.
Choosing the right combination ensures that your PC delivers the best possible performance while staying within budget.
Understanding Resolutions (1080p vs. 1440p vs. 4K)
📌 1080p (1920×1080) – Best for budget gaming and competitive esports.
📌 1440p (2560×1440) – Best for high-quality visuals and balanced performance.
📌 4K (3840×2160) – Best for maximum graphical fidelity, but requires high-end hardware.
Frame Rates and Refresh Rates
Your frame rate (FPS) determines how smooth your game looks.
A higher FPS means less motion blur and faster reactions in games.
🔹 Frame Rate & Refresh Rate Recommendations:
- 60 FPS (Standard) – Good for casual gaming, adventure games, and RPGs.
- 144 FPS (Competitive) – Ideal for fast-paced shooters and esports titles.
- 240 FPS+ (Pro-Level) – Best for serious competitive gaming.
Understanding your gaming needs will help you build a PC that matches your playstyle and performance expectations.
If you want a fast and smooth experience, prioritize frame rates.
If you prefer visually stunning gameplay, go for higher resolutions and a powerful GPU.
🔥 Now that you know what kind of gaming experience you want, it’s time to pick the right components!
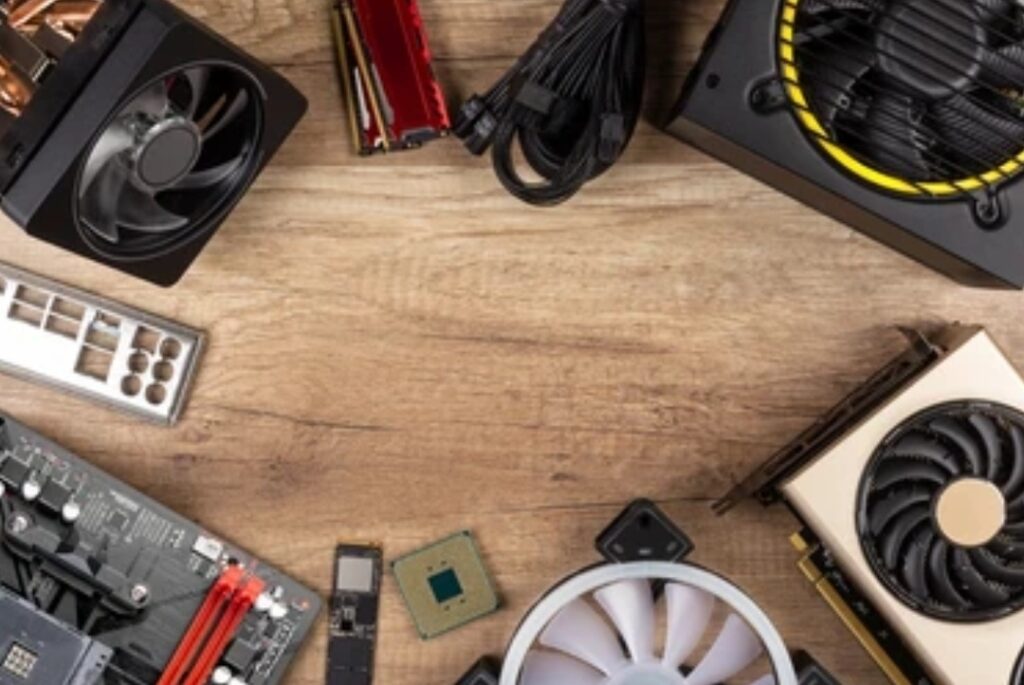
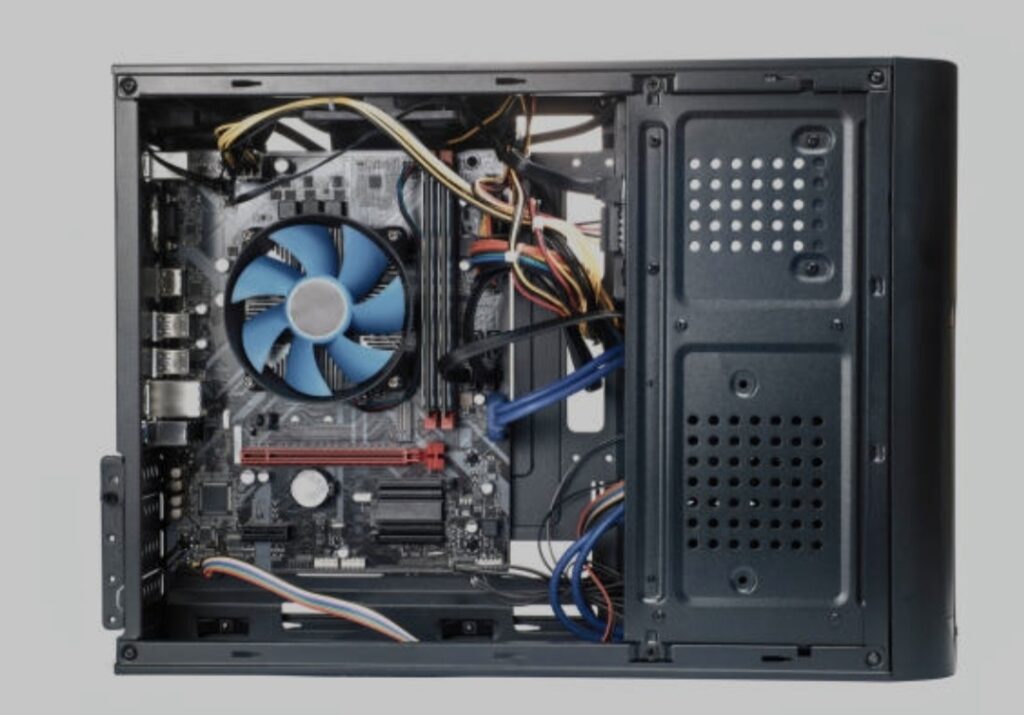
Essential Components of a Gaming PC
Building a high-performance gaming PC requires selecting the right components to ensure smooth gameplay, fast load times, and stunning visuals.
Each part plays a critical role in delivering the best gaming experience, and understanding these components will help you make the right choices based on your budget and gaming preferences.
If you’re wondering how to build a gaming PC that can handle modern titles, let’s explore the key components that power a gaming rig.
Central Processing Unit (CPU)
Importance of CPU in Gaming
The CPU (Central Processing Unit) is the brain of your gaming PC.
It handles game logic, AI processing, physics calculations, and background tasks, making it essential for smooth gameplay.
While some games are GPU-dependent, others, like simulation, open-world, and strategy games, require a powerful processor to manage complex in-game mechanics.
A strong CPU ensures:
✅ Higher frame rates in CPU-intensive games
✅ Faster response times in online multiplayer games
✅ Better performance in open-world titles with AI-driven NPCs
Tip: Avoid bottlenecks by pairing your CPU with a suitable GPU to prevent performance loss.
Recommended CPUs for Various Budgets
💰 Budget Build (1080p Gaming, Esports Titles):
- AMD Ryzen 5 5600X
- Intel Core i5-12400F
💲💲 Mid-Range Build (1440p Gaming, AAA Titles):
- AMD Ryzen 7 7800X3D
- Intel Core i5-13600K
💲💲💲 High-End Build (4K Gaming, Content Creation):
- AMD Ryzen 9 7950X3D
- Intel Core i9-14900K
For best performance, always pair your CPU with sufficient RAM and a high-speed SSD.
Graphics Processing Unit (GPU)
Role of GPU in Gaming Performance
The GPU (Graphics Processing Unit) is the most important component for visual performance.
It determines how well your PC can render textures, lighting effects, and high-resolution graphics.
A powerful GPU allows:
✅ Higher FPS for smoother gameplay
✅ Ray tracing support for realistic lighting and reflections
✅ Better overall gaming experience at higher resolutions
Top GPU Picks for Different Resolutions
🔹 1080p (High FPS Esports & Budget Gaming)
- Nvidia RTX 4060 Ti
- AMD Radeon RX 7600
🔹 1440p (Balanced Performance & Visuals)
- Nvidia RTX 4070 Ti
- AMD RX 7800 XT
🔹 4K (Maximum Graphics & Ray Tracing)
- Nvidia RTX 4090
- AMD RX 7900 XTX
Tip: Make sure your PSU and cooling system can support high-end GPUs!
Memory (RAM)
How Much RAM Do You Need?
The amount of RAM (Random Access Memory) in your gaming PC affects how smoothly games run.
Minimum Requirements:
- 8GB RAM – Only for older games and light gaming
Recommended for Modern Gaming:
- 16GB RAM – Standard for most AAA games
- 32GB RAM – Best for high-end gaming, multitasking, and streaming
Best RAM Types and Speeds for Gaming
When choosing RAM, speed and latency matter.
💨 Best Speeds for Gaming:
✅ DDR4 3200MHz – 3600MHz – Standard for most gaming builds
✅ DDR5 5200MHz – 6000MHz – Future-proof, best for high-end PCs
For optimal performance, always choose RAM with lower latency (CL16-18) and enable XMP in BIOS to unlock its full speed.
Storage Solutions
SSD vs. HDD: Speed and Capacity Considerations
📌 HDD (Hard Disk Drive) – Cheap, but slow load times. Only good for storing files, not games.
📌 SSD (Solid State Drive) – Faster speeds, instant boot times, and no lag in games.
For gaming, an SSD is a must!
Recommended Storage Configurations
✅ Best Budget Setup:
- 512GB NVMe SSD (Boot drive) + 1TB HDD (Game storage)
✅ Balanced Performance:
- 1TB NVMe SSD (Boot & games) + 2TB HDD (Extra storage)
✅ Ultimate Setup:
- 2TB NVMe Gen 4 SSD (For ultra-fast speeds)
For best gaming performance, use an NVMe SSD over SATA SSDs for faster read/write speeds.
Motherboard
Choosing a Motherboard Compatible with Your CPU and GPU
Your motherboard connects all your components, so compatibility is crucial.
💡 Key Features to Consider:
✅ Chipset support (AMD B650/X670 or Intel Z790/B760)
✅ PCIe slots for future GPU upgrades
✅ M.2 slots for NVMe SSDs
✅ Sufficient USB and SATA ports
Features to Look for in a Gaming Motherboard
🛠️ Best Features for Gaming:
✅ Overclocking support (For unlocked CPUs)
✅ WiFi 6 & Bluetooth connectivity
✅ High-quality VRMs for power stability
✅ RGB support for aesthetics
Power Supply Unit (PSU)
Calculating Your Power Needs
Your PSU powers all your components, so choosing the right wattage is crucial.
🔹 Basic Gaming Build: 500W – 650W
🔹 Mid-Range Build: 650W – 750W
🔹 High-End Build: 850W – 1200W (for high-power GPUs)
Selecting a Reliable PSU
Always choose a PSU with:
✅ 80+ Bronze, Gold, or Platinum rating for efficiency
✅ Modular cables for better cable management
✅ Trusted brands like Corsair, EVGA, or Seasonic
A low-quality PSU can damage your components – invest in a good one!
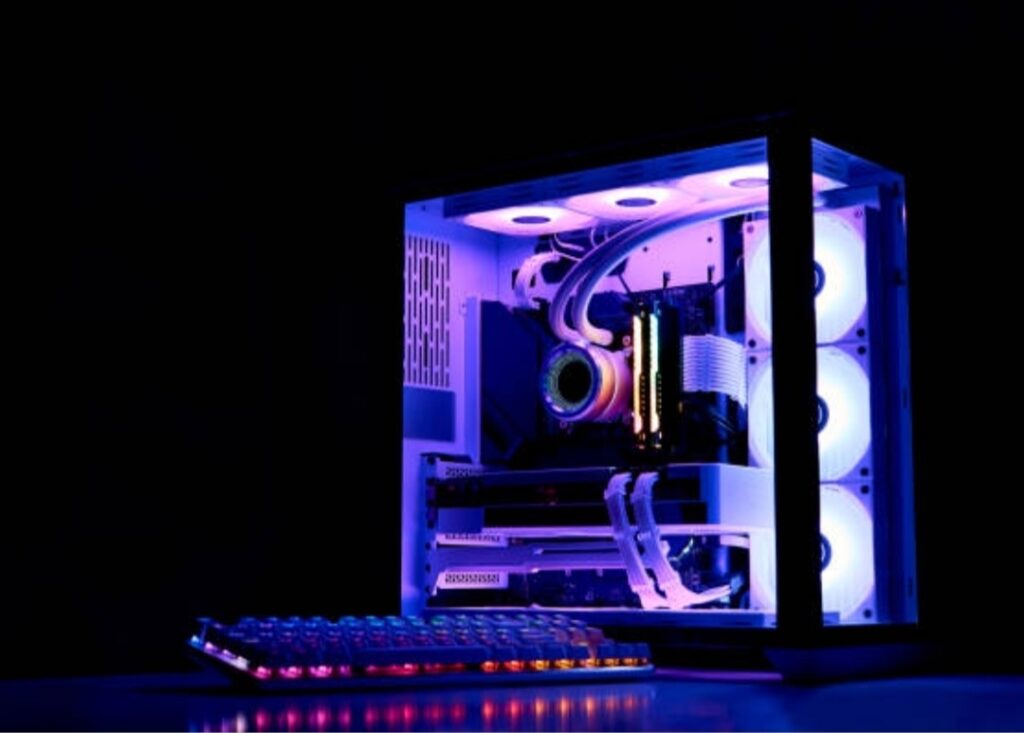
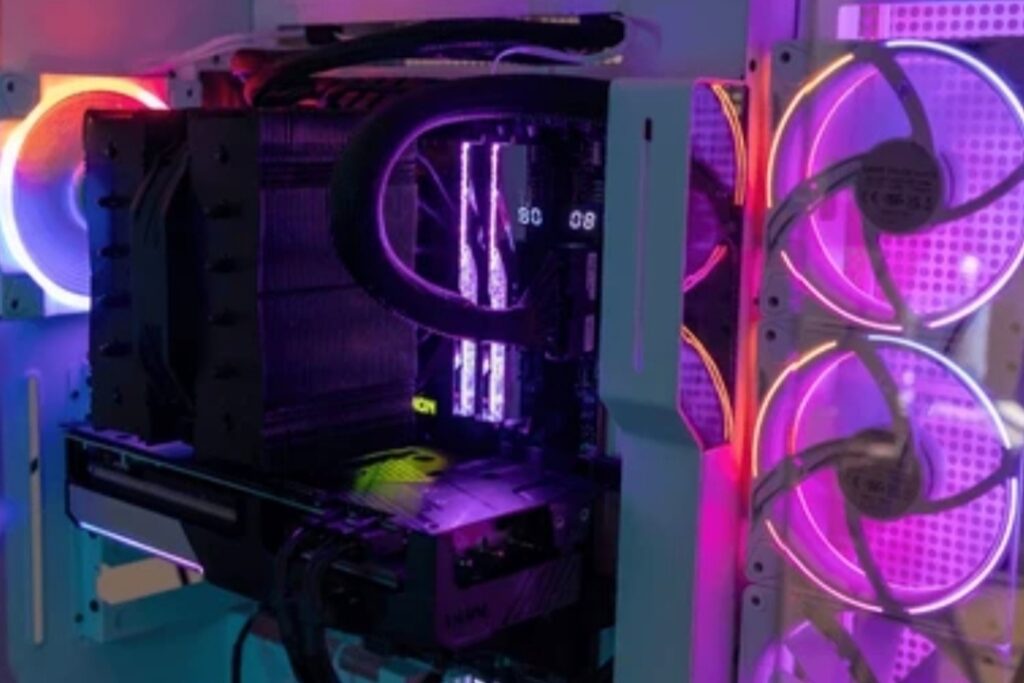
PC Case
Importance of Case Size and Airflow
Your PC case determines airflow, cooling, and component compatibility.
📌 Mini-Tower (Small Build): Compact, but limited airflow
📌 Mid-Tower (Standard Build): Best balance of space and cooling
📌 Full-Tower (High-End Build): Maximum space for custom cooling
Aesthetic Considerations
Choose a case with:
✅ Good airflow (mesh panels, dust filters)
✅ RGB lighting (if you want a stylish build)
✅ Cable management options for a clean setup
Final Tip: Make sure your case fits your GPU size and cooling system!
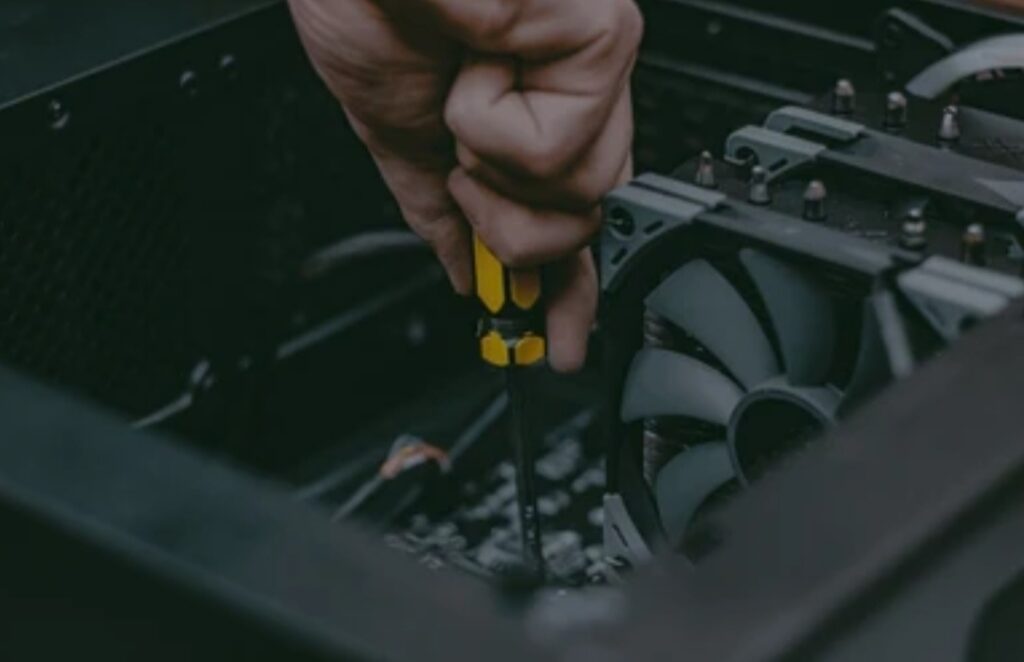
Preparing for Assembly
Before diving into the actual assembly process, it’s crucial to prepare properly.
Building a gaming PC isn’t just about putting parts together—you need the right tools, a clean workspace, and a plan to avoid mistakes.
This section will cover essential tools, safety precautions, and pro tips to ensure a smooth PC building experience.
Tools You’ll Need
To build a gaming PC efficiently, you’ll need the right set of tools and accessories.
Using the proper tools will help you avoid damaging delicate components and ensure a secure installation.
Essential Tools for PC Assembly
🔹 Phillips-Head Screwdrivers (#1 and #2 Size)
A magnetic screwdriver is ideal to prevent dropping screws inside the case.
🔹 Anti-Static Wrist Strap (ESD Strap)
Protects your motherboard, CPU, and RAM from static electricity damage.
🔹 Thermal Paste (If Not Pre-Applied)
Necessary when installing aftermarket coolers for better heat dissipation.
🔹 Cable Ties & Velcro Straps
Helps with cable management, keeping your build neat and airflow optimized.
🔹 Small Flashlight or Headlamp
Essential for better visibility when working inside the case.
🔹 Compressed Air Can
Used to remove dust from components and keep your PC running efficiently.
🔹 Tweezers or Small Needle-Nose Pliers
Helps in grabbing small screws and positioning tiny connectors.
🔹 Scissors or Wire Cutters
For cutting cable ties and trimming loose wires if needed.
Additional Helpful Accessories
✅ Magnetic Parts Tray – Keeps screws organized so you don’t lose them.
✅ Static-Free Work Mat – Adds another layer of ESD protection for delicate parts.
✅ External USB Drive (With OS Installer) – If you plan to install Windows 11 or Linux right after assembly.
Safety Precautions to Take
Handling expensive and delicate PC components requires extra care.
A single mistake—like static discharge or improper handling—can damage hardware before you even turn on your PC.
Follow these important safety precautions to ensure a safe and problem-free assembly.
Preventing Static Discharge (ESD Protection)
Static electricity is one of the biggest dangers when building a gaming PC.
Even a tiny zap can fry a motherboard, CPU, or RAM stick.
Here’s how to avoid static damage:
✅ Use an Anti-Static Wrist Strap – Attach it to a grounded metal object to discharge built-up static.
✅ Work on a Non-Carpeted Surface – Avoid building on carpets, rugs, or upholstered furniture.
✅ Touch a Metal Surface Before Handling Components – If you don’t have a wrist strap, periodically touch your case’s metal frame to discharge static.
✅ Avoid Wearing Wool or Synthetic Clothing – Stick to cotton to reduce static buildup.
Creating a Safe Work Environment
A clean and organized workspace can prevent accidents, lost screws, and component damage.
🔹 Work on a Large, Flat Surface
A wooden desk or table is best—avoid small or uneven spaces.
🔹 Ensure Proper Lighting
A well-lit workspace helps prevent mistakes like incorrect cable connections.
🔹 Keep Food & Drinks Away
Spilled liquid on PC parts = expensive disaster!
🔹 Have a Small Container for Screws
Losing screws is frustrating—use a magnetic tray to keep them in place.
Handling PC Components Safely
💡 Important Tips to Prevent Damage:
✅ Hold Components by the Edges – Never touch the gold contacts or circuit boards.
✅ Don’t Force Connections – If a part doesn’t fit, double-check the orientation instead of forcing it.
✅ Check for Metal Standoffs in the Case – Ensure only the necessary standoffs are installed to prevent short circuits.
Preparing Your PC Case Before Assembly
Setting up your case before installation saves time and frustration later.
📌 Remove Both Side Panels – Gives you full access to the motherboard tray.
📌 Install Necessary Standoffs – Prevents short-circuiting the motherboard.
📌 Check Pre-Installed Case Fans – Adjust for optimal airflow if needed.
📌 Clear Cable Management Routes – Helps in neat wiring later on.
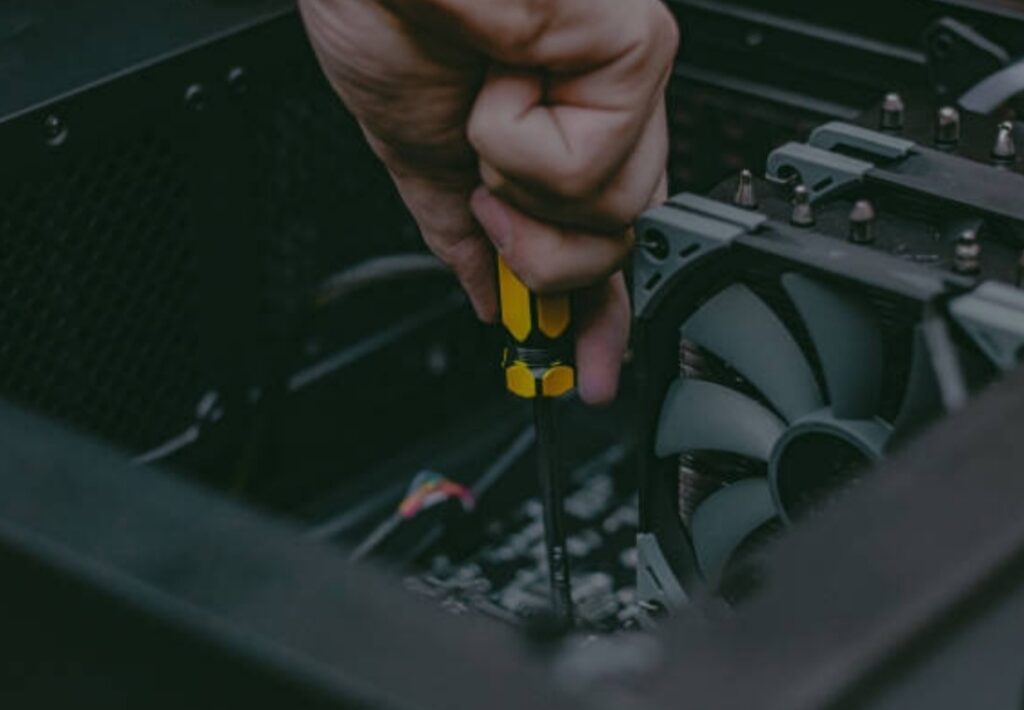
Step-by-Step Assembly Guide
Now that you have all your components and tools ready, it’s time to assemble your gaming PC!
This step-by-step guide will walk you through the entire process, ensuring that your PC is properly installed, optimized for airflow, and ready to deliver top-tier gaming performance.
Let’s get started!

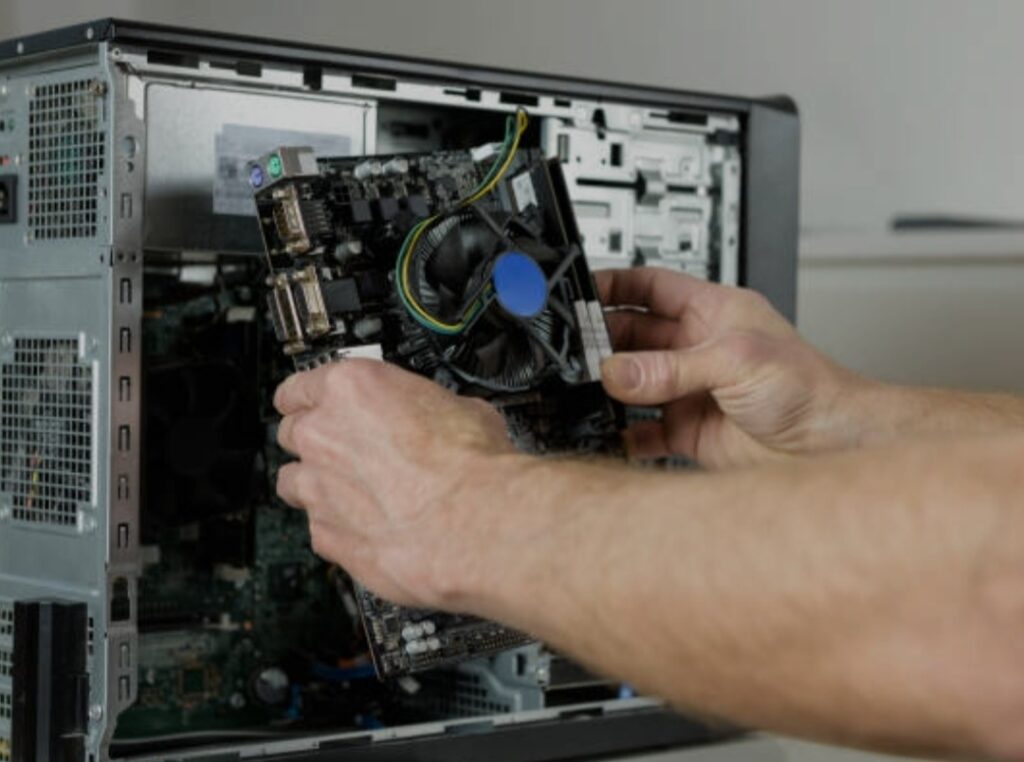
Installing the CPU
The Central Processing Unit (CPU) is the brain of your gaming PC.
Installing it properly is critical because improper placement can lead to bent pins, system failure, or overheating issues.
How to Install the CPU (Step-by-Step)
1️⃣ Open the CPU Socket
- Locate the CPU socket on your motherboard.
- Lift the retention arm to unlock the socket.
2️⃣ Align the CPU Correctly
- Look for the gold triangle on one corner of the CPU.
- Match this with the triangle on the motherboard’s socket.
3️⃣ Gently Place the CPU
- Lower the CPU without forcing it—it should drop in naturally.
- If it doesn’t fit, recheck the alignment instead of applying pressure.
4️⃣ Secure the CPU
- Lower the retention arm back down and lock it in place.
💡 Pro Tip: If you’re using an Intel CPU, don’t touch the pins inside the socket—they’re extremely delicate.
💡 AMD users: The CPU has pins underneath, so handle it by the edges only!
Mounting the Motherboard
Your motherboard is the foundation of your PC, connecting all major components.
Steps to Mount the Motherboard
✅ Step 1: Install the I/O Shield
- Locate the I/O shield (the metal plate that covers your motherboard ports).
- Snap it into the case’s rear opening before placing the motherboard inside.
✅ Step 2: Position the Motherboard Correctly
- Align the motherboard screw holes with the case’s standoff screws.
✅ Step 3: Secure with Screws
- Use a Phillips-head screwdriver to tighten the motherboard gently.
- Don’t overtighten—just snug enough to hold it in place.
💡 Pro Tip: Double-check that your motherboard is aligned with the case’s rear ports before tightening the screws.
Installing RAM Modules
Your RAM (Random Access Memory) directly affects gaming performance and multitasking.
Installing it correctly is crucial for stability and speed.
Steps to Install RAM Properly
1️⃣ Locate the RAM Slots
- Most motherboards have two or four DIMM slots.
- Refer to your motherboard manual to find the correct slots for dual-channel performance.
2️⃣ Unlock the RAM Slots
- Push down the plastic retention clips on both ends.
3️⃣ Align the RAM Stick Correctly
- Each RAM stick has a notch that must match the slot’s groove.
4️⃣ Insert the RAM Stick Firmly
- Press down evenly on both ends until you hear a click.
- The retention clips should snap back into place automatically.
💡 Pro Tip: If your PC doesn’t boot, try reseating the RAM or checking if they’re installed in the recommended slots.
Installing the GPU (Graphics Card)
The Graphics Processing Unit (GPU) is the most important component for gaming performance.
Installing your GPU properly ensures smooth gameplay, high frame rates, and better graphics quality.
How to Install Your Graphics Card
1️⃣ Locate the PCIe Slot
- The top PCIe x16 slot (closest to the CPU) is the best choice.
2️⃣ Remove PCIe Slot Covers
- Unscrew the metal brackets where the GPU will fit.
3️⃣ Insert the GPU
- Align the GPU’s gold PCIe connector with the slot.
- Press down firmly until you hear a click.
4️⃣ Secure the GPU
- Screw the GPU into the case’s expansion slot.
5️⃣ Connect the Power Cables
- Plug in the 6-pin, 8-pin, or 12-pin PCIe power cables (depending on your GPU).
💡 Pro Tip: Make sure your GPU has enough clearance inside your case before securing it!
Connecting Storage Devices (SSD & HDD)
Your storage drives hold your games, OS, and files, so installing them correctly is essential.
Installing an M.2 NVMe SSD
1️⃣ Locate the M.2 Slot
- Usually found near the CPU on the motherboard.
2️⃣ Insert the SSD at a 30° Angle
- Push it in gently until fully seated.
3️⃣ Secure the SSD with a Screw
- Tighten the screw to hold it in place (don’t overtighten).
Installing a 2.5″ SATA SSD or HDD
1️⃣ Mount the Drive in a Bracket or Bay
- Use screws to secure the SSD or HDD inside the case’s drive bay.
2️⃣ Connect SATA Cables
- Attach one end to the drive and the other to the motherboard.
3️⃣ Connect Power Cable from PSU
- Plug in the SATA power connector from your power supply.
💡 Pro Tip: If you’re installing multiple drives, use the fastest drive (NVMe SSD) for your OS and a larger HDD for storage.
Installing the Power Supply Unit (PSU)
The Power Supply Unit (PSU) provides electricity to all components, so it’s important to install it securely.
Steps to Install the PSU
1️⃣ Position the PSU Correctly
- The fan should face downward if your case has a bottom vent.
- If your case has no vent, face the fan upward.
2️⃣ Secure the PSU with Screws
- Use the provided screws to mount it to the case.
3️⃣ Connect Power Cables
- Plug in the 24-pin motherboard connector, 8-pin CPU power, and PCIe power for the GPU.
💡 Pro Tip: Fully modular PSUs allow you to connect only the necessary cables, improving cable management.
Managing Cables for Optimal Airflow
Proper cable management is crucial for good airflow, aesthetics, and easier upgrades.
Best Cable Management Practices
✅ Route Cables Behind the Motherboard Tray – Most modern cases have cable routing channels.
✅ Use Velcro Straps or Zip Ties – Keeps cables neat and organized.
✅ Avoid Blocking Airflow – Position cables away from case fans and heat sources.
✅ Leave Some Slack – Cables should have a little flexibility to avoid stress.
💡 Pro Tip: A clean build improves airflow, cooling efficiency, and maintenance over time
Initial Power-Up and BIOS Configuration
Congratulations! Your gaming PC is now fully assembled.
But before jumping into installing Windows or playing games, it’s crucial to check all connections and configure the BIOS properly.
This step ensures that your PC boots up successfully, recognizes all components, and runs at optimal performance.
Checking All Connections Before Powering On
Before pressing the power button, it’s essential to double-check every connection inside your case.
A single loose cable or misplaced connector can prevent your PC from turning on properly.
Step-by-Step Checklist for Connection Verification
✔️ Check the 24-Pin Motherboard Power Cable
- This is the main power connection that supplies electricity to your motherboard.
- Ensure it is firmly plugged in.
✔️ Verify the CPU Power Connector (4/8-Pin EPS Cable)
- This is separate from the 24-pin cable and is often found near the CPU socket.
- If your motherboard has an 8-pin CPU power slot, ensure both 4+4 connectors are plugged in.
✔️ Confirm RAM Installation
- Make sure each RAM stick is seated properly in the correct DIMM slots.
- If a RAM module is not detected, try reinstalling it.
✔️ Check the Graphics Card Power Cables
- Most modern GPUs require 6-pin, 8-pin, or even 12-pin PCIe power cables.
- If your GPU isn’t getting power, your screen may remain black during boot.
✔️ Ensure the Front Panel Connectors Are Properly Connected
- These tiny cables connect your power button, reset button, and front USB ports to the motherboard.
- If your PC doesn’t turn on, you might have misconnected these cables.
✔️ Verify Storage Drive Connections
- If using an M.2 SSD, make sure it’s fully secured with a screw.
- If using a SATA SSD or HDD, double-check both SATA power and data cables are properly connected.
✔️ Inspect Cooling Solutions
- Check CPU cooler installation – ensure it’s securely mounted and plugged into the CPU fan header.
- If using an AIO liquid cooler, confirm the pump is powered and the fans are spinning.
✔️ Make Sure Case Fans Are Connected
- Plug fans into the motherboard fan headers or a fan hub to ensure proper airflow.
✔️ Check PSU Power Switch
- The power supply switch (usually located on the back of the PSU) must be turned on before pressing the case’s power button.
The First Power-On – What to Expect?
🔹 Press the power button and watch for signs of life.
🔹 Fans should spin up, and LED indicators should light up.
🔹 If your PC turns on but there’s no display, it might be a GPU, RAM, or CPU issue.
🔹 If your PC turns on and off repeatedly, check if your CPU power cable is plugged in.
💡 Pro Tip: If your PC doesn’t turn on, remove the CMOS battery for 5 minutes to reset the BIOS settings.
Accessing and Updating the BIOS
The BIOS (Basic Input/Output System) is the firmware that controls your PC’s hardware settings.
It’s essential to access the BIOS immediately after powering on your gaming PC to check system settings and update firmware if needed.
How to Enter the BIOS
1️⃣ Turn on your PC and immediately press the BIOS key repeatedly.
- The BIOS key depends on your motherboard brand.
- Common BIOS keys include:
- DEL (Delete key) – ASUS, MSI, ASRock
- F2 – Gigabyte, ASUS
- F12 – Some Dell and Lenovo motherboards
- ESC or F10 – HP systems
2️⃣ If You Miss It, Restart and Try Again
- If Windows starts loading, you missed the timing—restart and try again.
3️⃣ Inside the BIOS: Navigating the Interface
- BIOS settings differ depending on the motherboard manufacturer.
- Some newer motherboards feature a graphical UEFI BIOS, while others use a text-based interface.
- Use the arrow keys or mouse (if supported) to navigate.
Updating the BIOS for Maximum Performance
BIOS updates can fix bugs, improve compatibility, and enhance performance.
Most motherboards don’t ship with the latest BIOS version, so updating it is highly recommended.
How to Check Your Current BIOS Version
🔹 Inside the BIOS, look for a section called System Information or Main Menu.
🔹 The BIOS version is usually listed as something like “Version: 1.0.3” or “BIOS Date: 12/2024”.
💡 Pro Tip: If your motherboard is brand new, the pre-installed BIOS may not support newer CPUs.
How to Update the BIOS (Step-by-Step Guide)
✅ Step 1: Download the Latest BIOS File
- Visit your motherboard manufacturer’s website.
- Navigate to the support/downloads section.
- Download the latest BIOS file for your exact motherboard model.
✅ Step 2: Format a USB Drive
- Use a USB flash drive (FAT32 format).
- Copy the BIOS file onto the drive.
✅ Step 3: Enter the BIOS and Open the Update Utility
- Many motherboards have a BIOS Flash Utility (such as Q-Flash, EZ Flash, or Flashback).
- Locate it in the BIOS menu.
✅ Step 4: Select the BIOS File and Start the Update
- Choose the BIOS file from your USB drive.
- Follow on-screen instructions to begin flashing the BIOS.
✅ Step 5: Wait for the Update to Finish
- The system may restart multiple times—this is normal.
- Do NOT turn off your PC during the update!
✅ Step 6: Reset BIOS Settings (Optional but Recommended)
- After updating, go to Load Optimized Defaults to reset BIOS settings.
- Then, adjust your settings (like enabling XMP for RAM speed) before saving.
Optimizing BIOS Settings for Gaming Performance
Once your BIOS is updated, it’s time to optimize it for the best gaming experience.
Recommended BIOS Tweaks
🟢 Enable XMP (Extreme Memory Profile) – Boosts RAM speed for maximum performance.
🟢 Set Boot Order – Prioritize your SSD/HDD for Windows installation.
🟢 Enable Resizable BAR (For NVIDIA RTX and AMD GPUs) – Improves GPU efficiency.
🟢 Adjust Fan Curves – Keeps your system cool and quiet.
🟢 Disable CSM (Legacy Boot Mode) – Ensures compatibility with modern UEFI-based systems.
💡 Pro Tip: If you plan on overclocking, BIOS is where you adjust CPU and GPU performance settings.
Choosing the Right Operating System for Your Gaming PC
When learning how to build a gaming PC, choosing the right operating system (OS) is one of the most critical decisions.
The OS is the foundation of your gaming experience, affecting performance, compatibility, and overall ease of use.
For gamers, the two most popular choices are Windows and Linux.
Windows vs. Linux for Gaming – Which One Should You Choose?
Both Windows and Linux have their advantages and disadvantages when it comes to gaming.
Below, we’ll break down the pros and cons of each OS to help you decide the best option for your gaming setup.
Windows for Gaming – The Industry Standard
Windows is the most popular OS for gaming, and for good reason.
✅ Pros of Using Windows for Gaming:
✔️ Maximum Game Compatibility – Windows supports nearly all major PC games, including AAA titles and indie games.
✔️ DirectX 12 Support – DirectX is a crucial API that optimizes graphics performance and improves FPS.
✔️ Better Driver Support – Windows has native support for NVIDIA and AMD drivers, ensuring optimal GPU performance.
✔️ Easy Installation and Updates – Windows is user-friendly, with frequent updates to fix bugs and improve security.
✔️ Support for Game Launchers – Steam, Epic Games, Xbox Game Pass, Battle.net, and other launchers work seamlessly on Windows.
❌ Cons of Using Windows for Gaming:
⚠️ Cost – Windows is not free, and a genuine license can cost between $100–$200.
⚠️ Resource Usage – Windows runs background processes, consuming RAM and CPU power.
⚠️ Security Vulnerabilities – More users mean higher risks of malware and security threats.
Linux for Gaming – A Growing Alternative
Linux has become increasingly popular among tech-savvy gamers, especially with tools like Proton and Steam Play.
✅ Pros of Using Linux for Gaming:
✔️ Completely Free – No need to pay for a license.
✔️ Lightweight and Efficient – Uses fewer system resources, leaving more power for games.
✔️ More Secure – Linux has fewer malware threats than Windows.
✔️ Open-Source and Customizable – You can tweak Linux to your exact preferences.
❌ Cons of Using Linux for Gaming:
⚠️ Limited Game Support – Many games don’t have native Linux versions, especially AAA titles.
⚠️ Driver Compatibility Issues – Some NVIDIA and AMD features are not fully supported on Linux.
⚠️ Learning Curve – Linux is not beginner-friendly, requiring command-line knowledge for troubleshooting.
Which OS Should You Choose?
If you’re a casual or competitive gamer, Windows is the best choice due to its wider game support and easier setup.
However, if you’re a tech enthusiast who values customization and security, Linux can be a fun challenge with the right configuration.
Installing the Operating System
Once you’ve chosen your OS, it’s time to install it on your gaming PC.
The most common way to install an OS is by creating a bootable USB drive and performing a clean installation.
Creating a Bootable USB Drive
To install Windows or Linux, you need to create a bootable USB drive.
This allows you to install the OS from scratch, ensuring a fresh, optimized gaming experience.
What You’ll Need:
✔️ A USB flash drive (at least 8GB or larger)
✔️ A working PC with internet access
✔️ OS installation media (Windows ISO or Linux ISO)
How to Create a Bootable USB for Windows
Step 1: Download the Windows Installation Media
- Visit the official Microsoft website and download the Windows Media Creation Tool.
Step 2: Insert Your USB Drive
- Plug the USB drive into your PC.
- Ensure there are no important files, as the process will erase everything.
Step 3: Use the Media Creation Tool
- Open the Windows Media Creation Tool and select “Create Installation Media.”
- Choose your preferred version of Windows (Windows 11 or Windows 10).
- Select USB Flash Drive as the installation method.
Step 4: Let the Tool Create the Bootable Drive
- The process will take 5–10 minutes.
- Once completed, your USB is ready for installation.
How to Create a Bootable USB for Linux
Step 1: Download a Linux Distribution
- Visit Ubuntu, Pop!_OS, or Arch Linux and download the ISO file.
Step 2: Use a Bootable USB Creation Tool
- Popular tools include Rufus (Windows) or BalenaEtcher (Mac/Linux).
- Select the Linux ISO file and choose the USB drive as the target.
Step 3: Create the Bootable USB
- Click “Start” and wait for the process to complete.
Step-by-Step OS Installation Process
Now that you have your bootable USB ready, it’s time to install the operating system.
Installing Windows on a Gaming PC
1️⃣ Plug in the bootable USB drive and restart your PC.
2️⃣ Enter BIOS (press DEL, F2, or F12 during boot).
3️⃣ Set USB as the first boot device under “Boot Priority.”
4️⃣ Save and exit BIOS – your PC will boot into the Windows installer.
5️⃣ Click “Install Now” and enter your product key (or choose “I don’t have a product key”).
6️⃣ Choose Custom Installation and select your SSD for installation.
7️⃣ Follow the prompts to complete installation.
8️⃣ After installation, install drivers and Windows updates.
Installing Essential Drivers for Your Gaming PC
After installing the OS, it’s critical to install the latest drivers to ensure smooth performance and hardware compatibility.
Installing Graphics Card Drivers
A dedicated GPU is the heart of a gaming PC, so installing the latest graphics drivers is crucial.
How to Install NVIDIA Graphics Drivers
1️⃣ Go to NVIDIA’s official website.
2️⃣ Enter your GPU model and download the latest Game Ready Driver.
3️⃣ Run the installer and choose Express Installation.
4️⃣ Restart your PC to apply changes.
How to Install AMD Graphics Drivers
1️⃣ Visit AMD’s official website.
2️⃣ Select your Radeon GPU model.
3️⃣ Download and install the latest Adrenalin Software.
4️⃣ Restart your system after installation.
Installing Motherboard and Peripheral Drivers
Your motherboard contains essential components like audio, networking, and USB controllers that require proper drivers.
How to Install Motherboard Drivers
1️⃣ Visit your motherboard manufacturer’s website (ASUS, MSI, Gigabyte, etc.).
2️⃣ Download the latest chipset, LAN, and audio drivers.
3️⃣ Install each driver one at a time and restart your PC.
Installing Peripheral Drivers (Keyboard, Mouse, and Headset)
Most peripherals are plug-and-play, but some require custom drivers for advanced features.
- Visit the manufacturer’s website to download RGB software or custom macros support.
- Check for firmware updates for enhanced compatibility.
Overclocking Basics – Unlocking Extra Performance for Your Gaming PC
When learning how to build a gaming PC, one of the most exciting ways to push your system beyond its stock performance is overclocking.
Overclocking allows you to increase the speed of your CPU, GPU, or RAM, unlocking higher frame rates and smoother gameplay.
However, while overclocking can enhance gaming performance, it comes with risks if not done correctly.
Let’s dive deep into what overclocking is, its advantages and drawbacks, and how to do it safely.
What Is Overclocking?
Overclocking is the process of increasing the clock speed of your processor (CPU), graphics card (GPU), or RAM beyond the manufacturer’s default settings.
By doing so, you can boost your PC’s performance, making it run faster and handle more demanding tasks.
How does overclocking work?
- Your CPU and GPU operate at a default speed, measured in GHz (for CPUs) and MHz (for GPUs & RAM).
- Overclocking increases these speeds, allowing the hardware to process more instructions per second.
- This results in higher FPS in games, smoother multitasking, and faster rendering times.
Benefits of Overclocking
✔️ Increased Gaming Performance – Expect higher frame rates and smoother gameplay in demanding titles.
✔️ Better System Responsiveness – Your PC will feel snappier and more responsive.
✔️ Free Performance Boost – Overclocking gives you extra speed without spending money on upgrades.
✔️ Enhanced Productivity – Faster CPU and RAM speeds improve video editing, 3D rendering, and multitasking.
Risks of Overclocking
⚠️ Increased Heat Output – Overclocking generates extra heat, requiring better cooling solutions.
⚠️ System Instability – Pushing hardware beyond its limits can lead to crashes, freezes, and unexpected reboots.
⚠️ Shortened Hardware Lifespan – Overclocking increases wear and tear, potentially reducing component lifespan.
⚠️ Warranty Voiding – Some manufacturers void warranties if overclocking causes damage.
How to Overclock Your Gaming PC Safely
1️⃣ Use Reliable Overclocking Software
- For CPUs: BIOS, Intel XTU, Ryzen Master
- For GPUs: MSI Afterburner, EVGA Precision X1
2️⃣ Increase Clock Speeds Gradually
- Start with small increments (e.g., 100MHz at a time).
- Run stress tests to ensure stability.
3️⃣ Monitor Temperatures Constantly
- Use tools like HWMonitor, Core Temp, and GPU-Z to track heat levels.
- If temperatures exceed 85°C (CPU) or 90°C (GPU), dial back the overclock.
4️⃣ Test Stability Before Gaming
- Run benchmarks like Cinebench, Prime95, or FurMark.
- If the system crashes, lower the clock speed.
🔥 Pro Tip: Overclocking is not necessary for casual gaming, but for competitive gamers and power users, it can provide a noticeable performance edge.
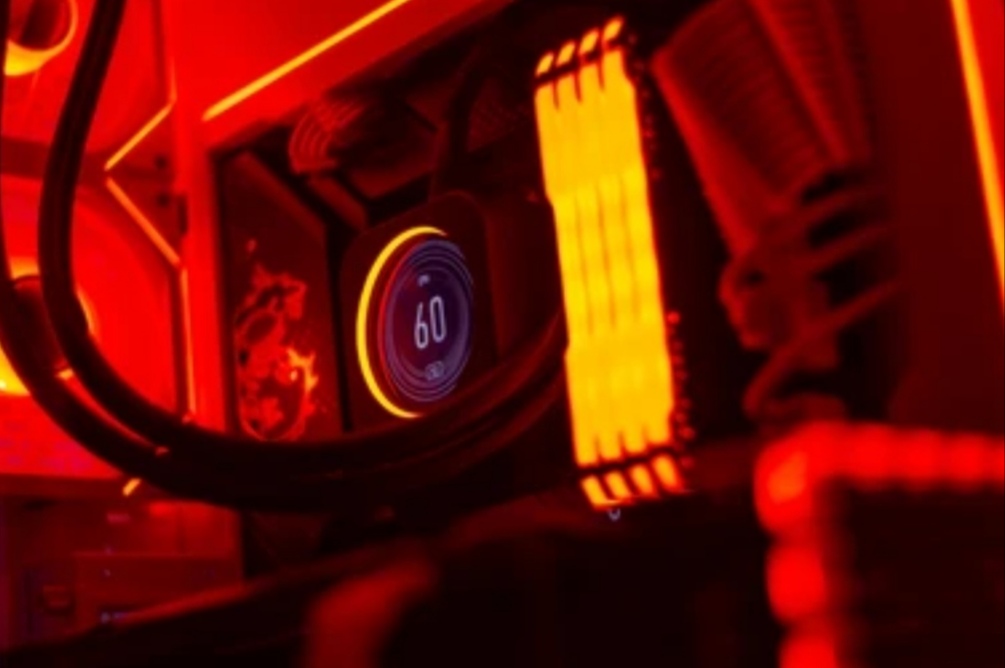
Maintaining Optimal Temperatures – Keeping Your Gaming PC Cool
Heat is the biggest enemy of gaming performance.
A hot PC can cause lag, frame drops, crashes, and even permanent damage to components.
Whether you overclock or not, maintaining low temperatures is essential for long-term performance and system stability.
Why Cooling Is Crucial for Gaming PCs
✔️ Prevents Thermal Throttling – If your CPU or GPU gets too hot, it reduces speed to prevent damage, affecting gaming performance.
✔️ Extends Component Lifespan – Keeping temperatures low reduces stress on hardware, ensuring a longer lifespan.
✔️ Reduces Noise Levels – A cooler PC requires less fan speed, making it quieter while gaming.
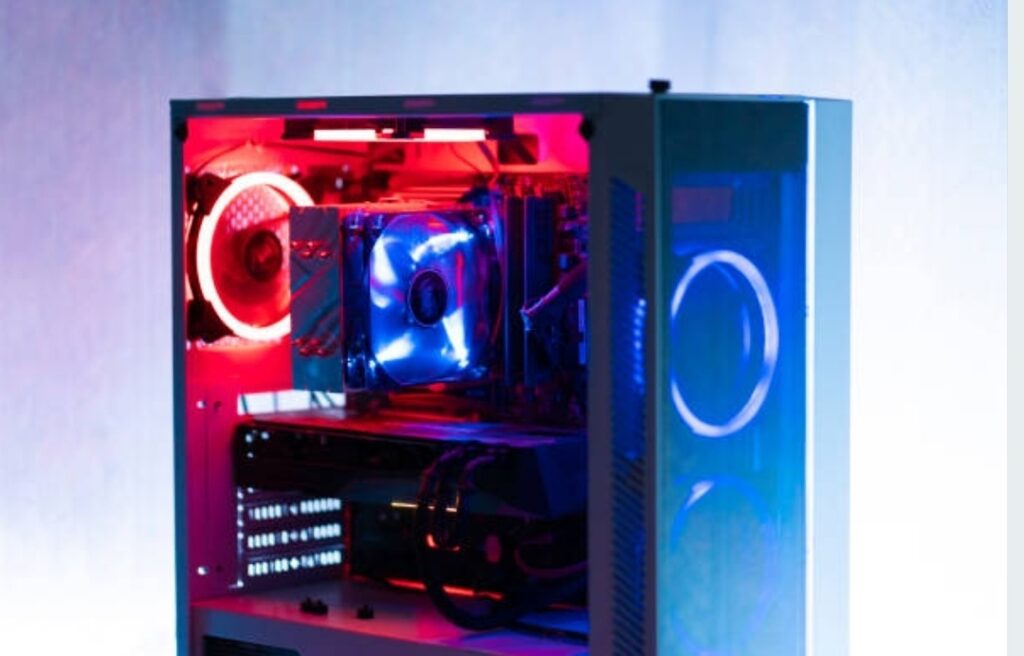
Best Cooling Solutions for Gaming PCs
Air Cooling – Affordable and Effective
- CPU Air Coolers – Brands like Noctua, Cooler Master, and be quiet! offer excellent air coolers.
- Case Fans – Ensure proper airflow with intake and exhaust fans.
Liquid Cooling – Ideal for Overclocking
- All-in-One (AIO) Coolers – A 240mm or 360mm radiator helps cool high-end CPUs.
- Custom Water Cooling – A full-loop liquid cooling system offers maximum cooling but costs more.
Tips for Monitoring and Managing Temperatures
✔️ Check CPU & GPU Temps Regularly – Use HWMonitor, MSI Afterburner, or Core Temp.
✔️ Apply High-Quality Thermal Paste – Brands like Arctic MX-6 or Thermal Grizzly Kryonaut offer better heat transfer.
✔️ Ensure Good Airflow – Use at least three case fans (intake + exhaust).
✔️ Keep the PC Dust-Free – Dust blocks airflow, causing higher temperatures.
✔️ Avoid Blocking Air Vents – Keep your PC in a well-ventilated area.
Regular Maintenance Tips – Keeping Your Gaming PC in Peak Condition
Even the best gaming PC requires regular maintenance to run at optimal performance.
Dust buildup, outdated drivers, and system clutter can slow down performance and cause overheating.
Follow these essential maintenance tips to keep your PC running like new.
Keeping Your System Dust-Free
Dust is a silent killer that can clog fans, reduce airflow, and increase temperatures.
How to Clean Your Gaming PC Properly
✔️ Turn Off & Unplug the PC – Safety first!
✔️ Use Compressed Air – Blow dust out of fans, vents, and heatsinks.
✔️ Clean GPU and CPU Fans – Dust buildup can block airflow, causing overheating.
✔️ Use an Anti-Static Brush – Gently clean motherboards and components.
✔️ Check for Dust Every 2-3 Months – Regular cleaning ensures peak performance.
🔥 Pro Tip: Avoid using vacuum cleaners, as they generate static electricity that can damage components.
Updating Drivers and System Software
Keeping your drivers and software updated is essential for smooth gaming performance.
How to Update Your Drivers
✔️ Update Graphics Drivers – Visit NVIDIA’s website or AMD’s website to get the latest drivers.
✔️ Check Motherboard & Chipset Drivers – Go to your motherboard manufacturer’s site for updates.
✔️ Keep Windows Up-to-Date – Go to Settings > Update & Security > Windows Update.
Recommended Tools and Software for PC Builders
Building a gaming PC is just the beginning.
To keep your system running smoothly, it’s essential to have the right tools and software to monitor performance, test hardware, and optimize settings.
Whether you’re fine-tuning your setup, diagnosing issues, or benchmarking your build, these must-have tools will ensure your PC performs at its best.
System Monitoring Tools – Keep Your PC Running Smoothly
Once you’ve completed your gaming PC build, keeping track of your system’s health and performance is crucial.
The following system monitoring tools help you track CPU and GPU temperatures, RAM usage, and fan speeds in real-time.
MSI Afterburner – The Best All-in-One Monitoring Tool
MSI Afterburner is one of the most powerful and widely used tools for monitoring and optimizing your system.
✔️ Real-time monitoring of CPU & GPU temperatures
✔️ Custom fan speed control for improved cooling
✔️ Overclocking support to boost GPU performance
✔️ On-screen display (OSD) while gaming
💡 Pro Tip:
Even if you don’t have an MSI graphics card, you can still use Afterburner for monitoring and tweaking settings.
HWMonitor – In-Depth System Analysis
HWMonitor is another excellent monitoring tool that gives detailed insights into system temperature, voltage levels, and power consumption.
✔️ Tracks CPU and GPU temperatures
✔️ Displays real-time fan speed & power usage
✔️ Monitors battery health (for laptops)
🔗 Download HWMonitor from official website
HWiNFO – The Ultimate Hardware Diagnostic Tool
HWiNFO provides detailed hardware reports, making it perfect for troubleshooting and diagnosing system issues.
✔️ Comprehensive system diagnostics
✔️ Detects potential overheating issues
✔️ Displays real-time component usage
💡 Best For: Advanced PC users who want in-depth monitoring and diagnostic tools.
Benchmarking Software – Test Your Gaming PC’s Performance
Want to see how well your gaming PC performs compared to others?
Benchmarking software helps analyze system performance, optimize settings, and identify bottlenecks.
Here are the best benchmarking tools for gaming PCs:
3DMark – The Best Benchmark for Gaming PCs
3DMark is the gold standard for testing gaming performance.
✔️ Runs GPU-intensive tests to measure gaming performance
✔️ Provides a benchmark score to compare against other PCs
✔️ Tests ray tracing and DirectX 12 performance
💡 Pro Tip:
Run Time Spy or Fire Strike to test your GPU’s true gaming performance.
Cinebench – The Best CPU Benchmarking Tool
Cinebench is the go-to tool for testing CPU performance.
✔️ Simulates real-world workloads
✔️ Ranks your CPU against others
✔️ Great for testing overclocking stability
UserBenchmark – Easy-to-Use Benchmarking Tool
If you want a quick performance check, UserBenchmark is an easy tool that evaluates your CPU, GPU, RAM, and SSD speeds.
✔️ Compares system performance with similar builds
✔️ Provides upgrade recommendations
✔️ Identifies weak spots in your system
💡 Use It When: You’re considering upgrades and want to know which component needs improvement.
Trusted Online Communities and Forums – Get Expert Help & Advice
Even the most experienced PC builders run into challenges.
That’s why joining trusted online communities and forums is essential for learning, troubleshooting, and discussing PC hardware.
Here are the best places to seek help and share experiences:
Reddit – The Best Community for PC Builders
Reddit is home to thousands of passionate PC enthusiasts, offering guides, troubleshooting tips, and build recommendations.
r/buildapc – The Ultimate PC Building Community
This is one of the best subreddits for new and experienced builders.
✔️ Ask for help when choosing components
✔️ Share your completed builds
✔️ Get troubleshooting advice from experts
💡 Best For: Beginners looking for advice on how to build a gaming PC.
r/pcmasterrace – Show Off Your Gaming PC Setup
If you love talking about PC gaming, overclocking, and custom builds, this is the place for you.
✔️ Discuss the latest PC hardware
✔️ Show off your gaming setup
✔️ Stay updated on new GPU & CPU releases
Linus Tech Tips Forum – Expert Advice from Enthusiasts
Linus Tech Tips (LTT) is one of the largest PC-building communities, where users discuss hardware, software, and troubleshooting.
✔️ Active community of experienced builders
✔️ Detailed guides on overclocking & performance tuning
✔️ Discussions on gaming monitors, peripherals, and accessories
💡 Why Join?
This forum is backed by experts, making it one of the most trusted sources for PC hardware discussions.
Tom’s Hardware – The Best Tech Forum for Troubleshooting
Tom’s Hardware is one of the oldest and most respected tech forums, offering in-depth discussions and reviews on PC components.
✔️ Step-by-step troubleshooting guides
✔️ Discussions on latest GPUs, CPUs, and RAM
✔️ Extensive overclocking tips & tricks
PCPartPicker – Plan & Optimize Your PC Build
PCPartPicker is more than just a price comparison tool—it’s also an active community of PC builders.
✔️ Check component compatibility before purchasing
✔️ Compare prices from multiple online retailers
✔️ View user-submitted PC builds for inspiration
💡 Best For:
If you’re planning future upgrades, PCPartPicker helps ensure all your components work together.
Learn, Share, and Build the Ultimate Gaming PC
The world of PC building is always evolving.
By using the right tools and joining trusted online communities, you’ll stay ahead of the game, whether you’re optimizing performance, troubleshooting issues, or planning your next upgrade.
💡 What’s Next?
✔️ Download and install the best PC monitoring and benchmarking tools.
✔️ Join the top online forums and communities to connect with other PC builders.
✔️ Continue learning about the latest hardware and performance tuning techniques.
🚀 Your journey as a PC builder doesn’t stop here—keep pushing the limits and enjoy the ultimate gaming experience!
💻 Ready to upgrade? Check out the best gaming accessories to enhance your setup! 🔥
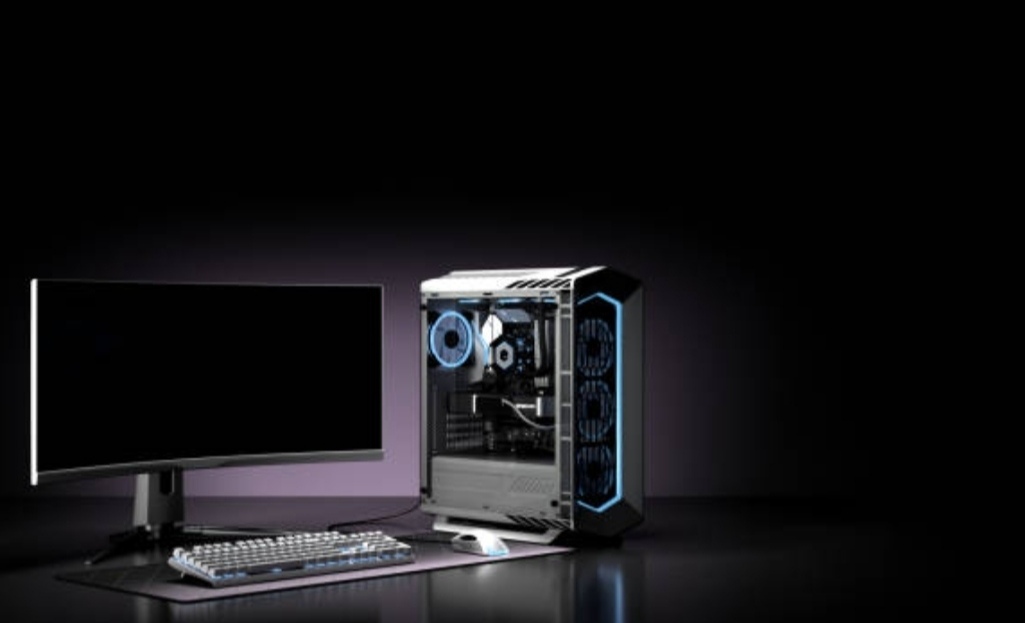
Conclusion: Enjoying Your Custom-Built Gaming PC – The Ultimate Reward
Congratulations! 🎉
You’ve successfully built your own gaming PC, fine-tuned its performance, optimized cooling, and ensured long-term maintenance.
Now, it’s time to sit back, power up your system, and enjoy the incredible gaming experience you’ve worked so hard to achieve.
But the journey doesn’t end here—there’s always more to learn, improve, and upgrade.
Let’s explore how to make the most out of your custom gaming rig and where to find valuable resources for troubleshooting and future upgrades.

Final Thoughts – Why Building a Gaming PC Is Worth It
Building your own PC isn’t just about saving money or getting better hardware.
It’s about the satisfaction of creating something with your own hands.
Here’s why your DIY gaming PC is superior to a prebuilt system:
✔️ Custom Performance – You handpicked every component, ensuring maximum performance for your needs.
✔️ Easier Future Upgrades – Unlike prebuilt systems, you can upgrade your gaming PC anytime without restrictions.
✔️ Cost-Effective in the Long Run – While the initial cost may seem high, building your own PC is cheaper over time since you can replace individual parts instead of buying a whole new system.
✔️ Deep Understanding of PC Hardware – Now that you’ve built your PC, you know how it works, making troubleshooting easier and stress-free.
💡 Pro Tip:
Now that you’ve built your ultimate gaming machine, take the time to explore benchmarking tools like 3DMark, Cinebench, and Unigine Heaven to test your system’s power.
This will help you fine-tune performance settings and ensure you’re getting the most FPS possible in your favorite games.
Leveling Up – How to Get the Most Out of Your Gaming PC
To fully enjoy your custom-built gaming PC, here are some essential tips and tricks:
Optimize Your Game Settings for Maximum Performance
- Adjust Graphics Settings – Find the right balance between FPS and visual quality in each game.
- Enable G-Sync or FreeSync – If you have a compatible monitor, enabling these features will eliminate screen tearing and improve smoothness.
- Update Your GPU Drivers – Always keep your graphics drivers updated to get the best performance in new game releases.
Invest in High-Quality Peripherals
- Mechanical Keyboards & Gaming Mice – Improve your responsiveness in competitive games.
- High Refresh Rate Monitor (144Hz, 240Hz, or more) – Experience ultra-smooth gaming with higher refresh rates.
- Surround Sound Headsets – Gain a competitive edge with better spatial awareness in FPS games.
Keep Your PC Secure & Clean
- Install an Antivirus & Malware Protection – Protect your PC from cyber threats.
- Use a Surge Protector or UPS – Prevent power surges from damaging your components.
- Keep Your Gaming PC Clean & Dust-Free – Regularly clean your fans and case to maintain optimal cooling.
💡 Bonus Tip:
If you ever experience stuttering, lag, or overheating issues, use tools like MSI Afterburner or HWMonitor to check real-time system performance.
Resources for Further Learning & Troubleshooting
Even after building your own gaming PC, you may run into performance issues, software errors, or upgrade questions.
Don’t worry—there are plenty of resources available to help you troubleshoot problems and stay updated on the latest PC hardware trends.
Best Websites & Forums for PC Building and Troubleshooting
✔️ Reddit – r/buildapc & r/pcmasterrace – A great community where PC enthusiasts share troubleshooting tips and recommendations.
✔️ Tom’s Hardware – One of the best sites for PC component reviews, overclocking guides, and troubleshooting advice.
✔️ Linus Tech Tips Forum – Get help from experienced PC builders and hardware experts.
✔️ PCPartPicker – Helps you plan future upgrades by showing component compatibility and the best pricing options.
YouTube Channels for Learning & PC Building Tips
🎥 Linus Tech Tips – In-depth hardware reviews, PC building guides, and troubleshooting tutorials.
🎥 JayzTwoCents – Covers PC cooling, overclocking, and performance optimization.
🎥 Gamers Nexus – Focuses on benchmarking, in-depth hardware reviews, and component testing.
🎥 Bitwit – Entertaining and informative PC building guides for beginners.
Final Words – Your Gaming Adventure Starts Now! 🚀
You’ve now built, optimized, and maintained your gaming PC, setting yourself up for an incredible gaming experience.
But this is just the beginning!
🔥 What’s next?
- Dive into the world of PC gaming and modding.
- Learn about custom water cooling and extreme overclocking.
- Explore VR gaming, triple-monitor setups, or high-end accessories to take your experience to the next level
💪 Most importantly—enjoy your gaming PC to the fullest!
If you ever need upgrades or troubleshooting help, refer back to the resources mentioned above.
🚀 Now go ahead, fire up your favorite game, and experience the power of your custom-built gaming PC!
You might also like :