🎮 Introduction: Why Smart TV Calibration Matters for Gaming
In the realm of modern gaming, where milliseconds can determine victory or defeat, calibrating your smart TV for gaming is not just a luxury—it’s a necessity.
Whether you’re navigating the intricate landscapes of Elden Ring or engaging in high-speed races in Forza Horizon, the responsiveness and visual fidelity of your display can significantly impact your gaming experience.
But what does calibrating your smart TV for gaming entail?
At its core, it involves fine-tuning your TV’s settings to achieve optimal performance, ensuring minimal input lag, accurate color representation, and smooth motion handling.
This process is crucial for gamers who demand precision and immersion in their gameplay.
🔧 The Importance of Calibrating Your Smart TV for Gaming
🎯 Enhancing Input Responsiveness
Input lag—the delay between pressing a button and seeing the corresponding action on screen—can be detrimental in fast-paced games.
By activating Game Mode on your smart TV, you can significantly reduce this lag.
Game Mode disables certain image processing features, allowing for quicker response times and a more seamless gaming experience.
For instance, Samsung TVs offer a Game Mode that, when enabled, minimizes input lag and enhances motion clarity.
🌈 Achieving Accurate Color Representation
Accurate color calibration ensures that the game’s visuals appear as intended by the developers.
Adjusting settings like brightness, contrast, and color temperature can lead to more vibrant and realistic images.
For example, setting the color temperature to ‘Warm’ or ‘Cinema’ mode can provide a more natural look, enhancing the overall visual experience .
⚡ Maximizing Refresh Rates for Smooth Gameplay
Modern gaming consoles, such as the PlayStation 5 and Xbox Series X, support high refresh rates up to 120Hz.
To take full advantage of this, your smart TV must be properly calibrated. Ensuring that your TV supports HDMI 2.1 and enabling features like Variable Refresh Rate (VRR) can lead to smoother motion and reduced screen tearing.
🛠️ Steps to Calibrate Your Smart TV for Gaming
1. 🕹️ Enable Game Mode
Activating Game Mode is the first step in optimizing your TV for gaming. This mode reduces input lag by disabling certain image processing features. To enable Game Mode:
- Samsung TVs: Go to Settings > General > External Device Manager > Game Mode Settings, then turn Game Mode on.
- LG TVs: Navigate to Settings > Picture > Picture Mode Settings, and select ‘Game’.
- Sony TVs: Access Settings > Watching TV > External Inputs > HDMI Signal Format, and choose ‘Enhanced Format’ for the HDMI port connected to your console.
2. 🎨 Adjust Picture Settings
Fine-tuning your TV’s picture settings can greatly enhance your gaming visuals. Consider the following adjustments:
- Brightness: Set to 50% or adjust based on room lighting.
- Contrast: Aim for 80-85% to ensure clear distinction between light and dark areas.
- Sharpness: Set to 0% to avoid artificial edge enhancement.
- Color Temperature: Choose ‘Warm’ or ‘Cinema’ mode for accurate colors.
- Backlight: Adjust according to ambient light; higher in bright rooms, lower in dark environments.
3. 🔄 Enable Advanced Features
Modern TVs come equipped with advanced features that can enhance gaming performance:
- Variable Refresh Rate (VRR): Reduces screen tearing by synchronizing the TV’s refresh rate with the game’s frame rate.
- Auto Low Latency Mode (ALLM): Automatically switches the TV to Game Mode when a gaming signal is detected .
- HDR (High Dynamic Range): Provides a wider range of colors and improved contrast. Ensure HDR is enabled on both your TV and gaming console for the best experience.
Calibrating your smart TV for gaming is a crucial step in achieving the best possible gaming experience.
By adjusting settings such as Game Mode, picture parameters, and enabling advanced features like VRR and HDR, you can enjoy smoother gameplay, more accurate visuals, and reduced input lag.
Ready to elevate your gaming sessions? Start calibrating your smart TV today and immerse yourself in a world of enhanced visuals and responsive gameplay.
📝 Additional Tips
- Use High-Quality HDMI Cables: Ensure you’re using HDMI 2.1 cables to support higher resolutions and refresh rates.
- Regularly Update Firmware: Keep your TV’s firmware up to date to benefit from the latest features and improvements.
- Consult Manufacturer Guidelines: Refer to your TV’s user manual or manufacturer’s website for model-specific calibration tips.
Note: For optimal results, consider using calibration tools or professional services to fine-tune your TV settings.
Understanding Your Smart TV’s Capabilities
Before diving into how to calibrate your smart TV for gaming, it’s absolutely essential to understand the core features, limitations, and technology embedded in your device.
Knowing your TV’s specifications can help you unlock the best possible gaming experience, allowing you to tailor calibration settings based on your model’s strengths and weaknesses.
This section will walk you through the essential features and performance benchmarks to check before calibration.
Let’s make sure your TV is fully prepared to handle today’s demanding games.

🔍 Know Your Panel Type (LED, OLED, QLED, Mini-LED)
Not all TVs are created equal.
The type of display panel used in your smart TV has a direct impact on your gaming performance, especially when it comes to brightness, contrast, color accuracy, and response time.
Let’s break it down:
- LED (Light Emitting Diode)
Affordable and widely available, but often comes with slower response times and less accurate blacks compared to other types. - OLED (Organic Light Emitting Diode)
Known for deep blacks and infinite contrast ratios.
Ideal for cinematic gaming, although some models may risk burn-in with static HUDs in certain games. - QLED (Quantum Dot LED)
Powered by Samsung and others, these offer enhanced color brightness and saturation.
Great for vibrant game visuals in bright rooms. - Mini-LED
A newer tech offering precise backlight control and excellent peak brightness—perfect for HDR gaming.
Understanding your display technology is the first step in mastering how to calibrate a smart TV for gaming—since it determines how much you can push color, brightness, and black levels before distortion kicks in.
🎮 Check for Game-Specific Features (VRR, ALLM, Game Mode, etc.)
Smart TVs built in the last few years often come loaded with gaming-specific technologies that can be toggled in settings—these should be identified and understood before you begin calibration.
Here are key features to look out for:
- Game Mode
Reduces input lag by skipping post-processing.
Essential for competitive play.
You’ll learn later how to configure this, but first make sure your TV supports it. - VRR (Variable Refresh Rate)
This feature synchronizes your display’s refresh rate with the game’s frame rate, eliminating screen tearing.
Most useful with consoles like PS5, Xbox Series X, and high-end gaming PCs. - ALLM (Auto Low Latency Mode)
Automatically enables Game Mode when a console is detected.
Saves time and ensures you’re always gaming in optimal settings. - FreeSync / G-Sync Compatibility
Technologies developed by AMD and NVIDIA respectively, these help maintain smooth frame rates.
If your TV supports either, enable them via the settings or your console/PC dashboard. - HDMI 2.1 Ports
Necessary for high refresh rates (like 120Hz) and 4K gaming.
Use the correct HDMI port to unleash your console’s full potential.
👉 Before even thinking about “how to calibrate smart TV for gaming,” confirm that your TV supports these technologies.
If not, some calibration steps may have reduced effects.
🧠 Understand Native Refresh Rate and Resolution Capabilities
Your TV’s refresh rate and resolution settings have a huge influence on how smooth and clear your gameplay looks.
Let’s break down the essentials:
- Native Refresh Rate
TVs typically have native refresh rates of 60Hz or 120Hz.
A higher refresh rate = smoother gameplay, especially for first-person shooters or racing games.
If your TV supports 120Hz, make sure you connect your console via HDMI 2.1 and enable this setting in both the TV and the console. - Resolution (1080p, 4K, 8K)
Calibrating your smart TV for gaming will differ slightly based on resolution.
4K offers sharp visuals but requires more processing power.
Always use the native resolution of the TV to avoid blurring from scaling. - Upscaling Engine
If you’re playing older-gen consoles (like PS3, Xbox 360), your TV may upscale the image.
Understanding how your TV handles upscaling helps you tweak sharpness and contrast appropriately.
Knowing these limitations will prevent you from over-calibrating beyond what your panel can deliver.
⚙️ Review TV’s Picture Modes and Settings Options
Most smart TVs come with predefined picture modes—such as Standard, Cinema, Vivid, and Game.
Here’s what to know:
- Vivid / Dynamic Mode
Avoid for gaming—it over-saturates colors and adds unnecessary post-processing, leading to input lag. - Cinema / Movie Mode
Great for watching movies, but too soft and dark for gaming. - Standard Mode
A balanced profile, but still includes motion smoothing and enhancement features that interfere with gaming. - Game Mode
The only mode specifically optimized for low latency and quick response.
Calibration should start from this mode to reduce the number of manual adjustments required.
Understanding these modes is a critical piece of learning how to calibrate your smart TV for gaming effectively.
You don’t want to manually undo a bunch of unnecessary features that are already optimized in Game Mode.
📲 Check Your TV’s Software/Firmware Version
One of the most overlooked aspects in calibration is ensuring that your TV firmware is up to date.
Why it matters:
- Improved Game Mode Support
Manufacturers often release updates to optimize Game Mode for newer consoles and PC GPUs. - Added Support for HDMI 2.1, VRR, and HDR
Features like VRR may not work properly without the latest firmware. - Bug Fixes and Optimization
Some calibration bugs or incorrect picture processing can be fixed via updates.
To check firmware:
- On most TVs, go to Settings > Support > Software Update.
👉 Before applying calibration changes, update your firmware for the best results.
📈 Analyze Your Gaming Setup (Console, PC, Streaming)
Your gaming source also plays a role in how your TV should be calibrated.
Ask yourself:
- Are you gaming on a console, PC, or cloud streaming service?
Each source has its own visual output settings and performance range.
💡 Tips:
- For PC gamers:
Make sure the TV is recognized as a display with full RGB range and 4:4:4 chroma.
Use Windows display settings or your GPU control panel for best results. - For console users:
Navigate to the display settings and enable features like 4K, HDR, and 120Hz if available. - For cloud gamers (Xbox Cloud, GeForce Now):
Stable internet matters more, but calibration still improves visual clarity and reduces motion blur.
This helps tailor your calibration for the exact hardware you’re using, giving you a fully customized visual experience.
Understanding your TV’s capabilities is the foundation of smart TV calibration for gaming.
From display panel type to advanced features like VRR and HDMI 2.1, every aspect plays a role in how your picture looks and feels during gameplay.
Before adjusting settings, you must fully grasp what your TV is capable of—so you don’t waste time tweaking features it doesn’t support.
👉 Ready to move on? In the next section, we’ll start the step-by-step guide on how to calibrate your smart TV for gaming like a pro.
🔧 Step-by-Step Calibration Process
Once you understand your smart TV’s capabilities, it’s time to dive into the step-by-step calibration process.
This section will walk you through how to calibrate your smart TV for gaming with precision — ensuring you get optimal color accuracy, minimal input lag, and a smooth, immersive gameplay experience.
By following these steps, you can eliminate lag, reduce motion blur, and fine-tune your visuals to match the demands of today’s high-performance games.
🎯 Whether you’re using a PS5, Xbox Series X, a gaming PC, or cloud services — this guide is tailored for all setups.
🛠️ Step 1 — Switch to Game Mode (The Foundation of Calibration)
✅ Why This Matters:
Game Mode reduces input lag by disabling heavy post-processing features like motion smoothing, sharpening filters, and unnecessary image enhancements.
👉 This is the first and most crucial step in learning how to calibrate smart TV for gaming.
How to Enable Game Mode:
- Go to your TV’s Settings > Picture > Picture Mode.
- Select Game Mode or Game Optimizer, depending on your brand.
- Some TVs label it under Expert Settings, or you might find a dedicated Game Dashboard in high-end models.
📝 Pro Tip:
Some TVs (like LG, Samsung, and Sony) automatically enable Game Mode when a console is detected through HDMI (via ALLM – Auto Low Latency Mode).
Double-check if it’s active to avoid missed performance gains.
🌈 Step 2 — Adjust Brightness & Contrast Levels for Clarity
✅ Why This Matters:
Brightness affects visibility in dark scenes, while contrast manages how deep your blacks are and how bright your whites can get.
Poor calibration here can lead to washed-out images or overly dark gameplay environments.
Suggested Settings:
- Brightness:
Start with 50% (or default) and slowly increase until dark scenes are visible but not overly grey.
In dark rooms, you might want slightly less; in bright rooms, increase a bit. - Contrast:
Set between 80–90%.
Adjust until whites appear bright but not blown out or lacking detail.
🎮 Gaming Example:
In horror games like Resident Evil, poor brightness = enemies hiding in pure blackness.
Good calibration gives you visibility without ruining immersion.
🎨 Step 3 — Set Correct Color Temperature and Tint
✅ Why This Matters:
Gaming visuals are designed around specific color standards.
Incorrect temperature = inaccurate skin tones, foliage, and lighting effects.
How to Calibrate:
- Go to Settings > Picture > Expert Settings.
- Color Temperature:
Set to Warm 2 for a natural, game-studio-intended appearance. - Tint:
Leave it at default (0) unless colors seem off (e.g., too green or magenta).
🎯 Bonus Tip:
Avoid “Cool” or “Vivid” presets — they oversaturate colors, leading to cartoonish visuals and eye fatigue.
💡 Step 4 — Calibrate Sharpness Without Creating Artifacts
✅ Why This Matters:
High sharpness doesn’t improve detail — instead, it adds unwanted halos and jagged edges to objects.
Best Practice:
- Set sharpness to 0–10, depending on your model.
Lower is better for native 4K gaming and PC connections.
If text or HUD elements have a white outline or shimmer — sharpness is too high.
🎥 Step 5 — Turn Off Unnecessary Post-Processing Features
✅ Why This Matters:
Post-processing effects add delay and distortion — which is exactly what you want to avoid while gaming.
Disable These Settings:
- Motion Smoothing / TruMotion / MotionFlow
Causes “soap opera” effect and input lag. - Noise Reduction (Digital or MPEG)
Unnecessary for gaming and adds blur. - Black Frame Insertion / Motion Interpolation
Can reduce brightness and responsiveness.
How to Disable:
- Head to Advanced Video Settings or Expert Settings.
- Look for keywords like “Motion,” “Clarity,” “NR,” “Dynamic Contrast,” and turn them OFF.
🌟 Step 6 — Enable HDR & Tweak Dynamic Range
✅ Why This Matters:
HDR (High Dynamic Range) brings your games to life with deeper blacks, brighter highlights, and better contrast — but it needs to be tuned properly.
Steps:
- Make sure HDR is enabled in both the TV and your console or PC.
- Adjust Dynamic Tone Mapping to “On” or “HGIG” (if your TV supports it).
- Use your console’s HDR calibration tool (PS5 and Xbox both include one).
🎯 Quick Tip:
If colors seem overly saturated or dark, go back and tweak brightness and color temperature in HDR mode — they’re often saved separately from SDR.
🧪 Step 7 — Test Input Lag and Responsiveness
✅ Why This Matters:
High input lag can make fast-paced games unplayable, especially shooters and fighters.
How to Test:
- Use a game like Call of Duty, Fortnite, or Rocket League.
- Press jump or shoot and check if the action is instant.
- You can also use input lag tester apps with a smartphone and camera.
Recommended Lag:
- Below 20ms is excellent.
- 20–40ms is acceptable for casual gaming.
⚠️ If lag is high:
- Recheck Game Mode.
- Disable motion processing.
- Use high-quality HDMI 2.1 cable here.
🎯 Step 8 — Finalize Settings and Save Your Profile
✅ Why This Matters:
Once you’ve perfected your picture and responsiveness, save your settings to avoid losing them after firmware updates or power outages.
Tips:
- Some TVs allow you to name custom profiles, like “PS5 Game” or “HDR PC”.
- Always test settings with multiple games: dark, bright, fast-paced, and open-world.
📢 🔥 Pro Tip:
Want to level up your gaming visuals instantly?
👉 Use a professional calibration disc or download test patterns from trusted sources here for even more precise results.
📌 Final Thoughts on the Calibration Process
Learning how to calibrate smart TV for gaming can seem overwhelming, but breaking it down into step-by-step chunks makes it easy and effective.
With the right balance of Game Mode, HDR optimization, and sharpness control, you’ll enjoy responsive gameplay with cinematic visuals — whether you’re raiding dungeons or racing supercars.
✅ Don’t forget:
Each TV is unique — always tweak based on your environment, lighting, and viewing habits.
🎯 Brand-Specific Calibration Tips
Every smart TV brand has its own unique interface, default settings, and picture processing technology.
That means the perfect calibration isn’t one-size-fits-all.
To truly understand how to calibrate smart TV for gaming, you need to fine-tune your settings based on the specific TV you own.
This section dives deep into the most popular smart TV brands and how to optimize them for low input lag, vibrant visuals, and responsive gameplay.
✨ Whether you use LG, Samsung, Sony, TCL, Hisense, or Vizio — these brand-specific calibration tips will transform your gaming experience.

📺 LG Smart TVs – OLED, NanoCell & QNED Gaming Calibration
LG TVs are known for their stunning OLED panels and cutting-edge Game Optimizer features.
If you’re using an LG OLED (like the C1, C2, or C3), you’re already halfway to a near-perfect gaming experience — but some tuning is still essential.
🔧 Best Settings:
- Picture Mode: Game Optimizer
- OLED Pixel Brightness: 50–60
- Contrast: 85–90
- Black Level: Auto (or Low for deep blacks)
- Sharpness: 10 or less
- Color Temp: Warm 2
- Motion Eye Care / TruMotion: OFF
- Input Lag Reduction: ON
✅ Tip: Use LG’s Game Dashboard to quickly switch between genres like FPS, RTS, and RPG to apply presets on the fly.
✅ Enable HDMI Ultra HD Deep Color under general settings for the port your console/PC uses.
📺 Samsung Smart TVs – Neo QLED, QLED & Crystal UHD Gaming Optimization
Samsung TVs are known for their bright panels and punchy colors — perfect for vivid gaming environments.
Samsung’s Game Mode and Game Bar are powerful tools, but the factory presets often need tweaks.
🔧 Best Settings:
- Picture Mode: Game Mode
- Contrast Enhancer: OFF
- Color Tone: Warm2
- Shadow Detail: 0 or +1
- Sharpness: 0
- Game Motion Plus: OFF for lowest lag | ON for slight motion smoothing (not for competitive gaming)
- Dynamic Black Equalizer: +2 to +4 (helps spot enemies in shadows)
✅ Use the Samsung Game Bar to monitor input lag and adjust settings in real time.
✅ Make sure Input Signal Plus is turned ON for the HDMI port used for gaming.
📺 Sony Bravia & XR Series – PS5 Optimized Calibration
Sony smart TVs are engineered with PS5 in mind, especially their Bravia XR line.
Thanks to features like Auto HDR Tone Mapping and ALLM, calibration is smoother — but still needs some personalization.
🔧 Best Settings:
- Picture Mode: Game
- Brightness: Max out for HDR gaming
- Contrast: 90+
- Gamma: -2 (for deeper blacks)
- Black Adjust / Advanced Contrast Enhancer: OFF
- Motionflow / Cinemotion: OFF
- Color Temperature: Expert 1 (similar to Warm2)
- Input Lag Reduction: ON
🎮 Pro Tip: Make sure HDMI Signal Format is set to Enhanced Format or VRR Mode (for 120Hz gaming and variable refresh rate).
📺 TCL Smart TVs (Roku & Google TV) – Budget Gaming Calibration
TCL TVs are budget-friendly but surprisingly capable for console and PC gaming — especially the 5-Series and 6-Series models.
Their Roku and Google TV variants each have different interfaces, but the calibration principles are similar.
🔧 Best Settings:
- Picture Mode: Game or Movie (with adjustments)
- Backlight: 80–90%
- Contrast: 95
- Brightness: 50
- Sharpness: 0
- Color: 45
- Gamma: 2.2
- HDR Settings: Enabled under Advanced Settings
- Action Smoothing: OFF
🎯 Bonus: TCL’s Roku TVs automatically activate Game Mode when a console is detected.
📺 Hisense Smart TVs – ULED & VIDAA Gaming Picture Settings
Hisense TVs are gaining popularity due to their high brightness and wide color support at lower prices.
With the U6, U7, and U8 series supporting HDMI 2.1 and VRR, they’re excellent gaming displays when properly tuned.
🔧 Best Settings:
- Picture Mode: Game
- Backlight: 80–100 depending on room brightness
- Contrast: 90
- Local Dimming: Medium or High
- Color Temperature: Warm
- Motion Enhancement: OFF
- Noise Reduction: OFF
✅ Hisense TVs sometimes default back to Standard Mode. Always double-check after system updates or source changes.
📺 Vizio Smart TVs – Calibrate for Competitive Edge
Vizio’s M-Series and P-Series TVs deliver solid HDR and low input lag, making them a go-to for budget-conscious competitive gamers.
🔧 Best Settings:
- Picture Mode: Game
- Backlight: 90
- Contrast: 80–90
- Sharpness: 0–5
- Color Temp: Normal or Warm
- Reduce Judder / Reduce Motion Blur: OFF
- Black Detail / Smart Dimming: OFF or Low
✅ Enable Game Low Latency under Input Settings to reduce lag during fast-paced gameplay.
🎯 Summary Table – Quick Look Brand-Specific Settings
| Brand | Best Mode | Key Adjustments | Special Tip |
| LG | Game Optimizer | OLED Brightness, TruMotion OFF | Use Game Dashboard for real-time tweaks |
| Samsung | Game Mode | Contrast Enhancer OFF, Game Motion Plus optional | Use Game Bar for input lag monitoring |
| Sony | Game Mode | Gamma -2, Auto HDR Tone Mapping ON | Set HDMI signal format to Enhanced |
| TCL | Game / Movie | Gamma 2.2, Action Smoothing OFF | Roku auto-enables Game Mode |
| Hisense | Game Mode | Local Dimming High, Noise Reduction OFF | Recheck settings after source change |
| Vizio | Game Mode | Smart Dimming Low, Sharpness 0–5 | Enable Game Low Latency |
👉 Own a TV not listed here?
Drop the brand in the comments or check our full calibration guide for all models!
We’ll help you tailor your settings to perfection.
📌 Don’t forget to save your settings under a custom profile so you don’t lose them after updates.
🎯 If you’re ready to upgrade your HDMI setup, check out our list of premium HDMI 2.1 cables that work best with these brands.
Optimizing Audio Settings for Gaming
When people talk about how to calibrate smart TV for gaming, visuals usually steal the spotlight — but don’t underestimate the power of great audio.
In fact, immersive sound can be the difference between hearing enemy footsteps before it’s too late or completely missing an audio cue that costs you the match.
Whether you’re playing FPS titles, open-world RPGs, or competitive eSports, your audio setup matters just as much as your picture settings.
And optimizing your smart TV’s sound settings for gaming doesn’t have to be complicated.
This guide will help you get razor-sharp directional audio, reduce audio lag, and even show you when it’s worth switching to a soundbar or gaming headset.
Let’s calibrate your smart TV’s audio like a pro. 🔊

🎮 Why Gaming Audio Optimization Is Critical
Before diving into settings, let’s answer a common question:
“Do sound settings really affect gaming?”
✅ YES — big time.
In fast-paced shooters, latency or imbalanced sound can completely break immersion and performance.
In story-driven games, muffled dialogue and distorted effects ruin the cinematic feel.
Here’s why you should take audio calibration seriously:
- 🧠 Audio cues enhance reaction time.
- 🔊 Spatial awareness is crucial in 3D audio environments.
- 🎯 Footsteps, reloads, and ambient sounds provide tactical advantages.
🛠️ General Smart TV Audio Settings for Gaming
Most modern smart TVs come with a variety of sound modes, and many default to “Standard” or “Movie” profiles — not ideal for gaming.
Start here for universal settings that will work across brands:
🔧 Recommended Settings:
- Sound Mode: Switch to Game, Clear Voice, or Standard
- Surround Sound: OFF (unless supported by high-end speaker setup)
- Equalizer: Adjust for more mids & highs (reduces bass boominess)
- Volume Leveler / Auto Volume: OFF (this can distort dynamic sound)
- Dialog Enhancer: ON (for clearer speech in games like RPGs)
- Audio Delay / Lip Sync: Auto or manual adjustment if sound lags behind video
- HDMI ARC/eARC: ON for external sound systems
📢 Pro Tip: If your TV has a Game Audio Mode, it usually boosts positional accuracy while reducing delay.
🔗 Should You Use a Soundbar or Stick With Built-In TV Speakers?
Let’s be real — most built-in TV speakers are underwhelming.
They’re not designed with directional sound or low-latency processing in mind.
If you’re serious about gaming, consider upgrading to one of these options:
✅ Best Audio Upgrades for Gaming:
- Gaming Soundbar: Delivers better bass and simulated surround for consoles
- Dolby Atmos-enabled Sound System: For immersive storytelling in RPGs or cinematic games
- Wireless Gaming Headset: Best for competitive gameplay (especially with voice chat)
💡 Hook Tip: Want to hear the exact direction of footsteps in Warzone, Fortnite, or Valorant?
Then you need to upgrade your audio system now — don’t wait!

🎯 Brand-Specific Audio Calibration Tips
Here’s how to tweak audio for popular smart TV brands:
🔊 LG Smart TVs:
- AI Sound Pro: OFF for gaming (adds processing delay)
- Use Standard Mode or Clear Voice
- Adjust EQ manually to boost mids for voices & footsteps
🔊 Samsung Smart TVs:
- Adaptive Sound: OFF
- Set to Game Mode under sound settings
- Use EQ to cut extreme bass for clarity
🔊 Sony Smart TVs:
- Use Game Audio Profile (if available)
- Turn off S-Force Front Surround for direct sound
- Enable Auto Lip Sync for HDMI devices
🔊 TCL / Hisense:
- Stick to Standard Mode with EQ customization
- Disable any dialog clarity enhancements that distort game sounds
- Set HDMI Audio Output Format to Bitstream
🔊 Vizio:
- Use Game Sound Mode or Custom
- Set Digital Audio Out to Passthrough for soundbars
- Use Voice Clarity boost in EQ settings
🎧 Tips to Reduce Audio Lag for Gamers
Audio lag, also known as latency, is a nightmare for fast-paced gameplay.
Here’s how to reduce it:
- Connect directly through HDMI ARC/eARC (avoid optical if your TV has ARC)
- Turn OFF sound processing features (Surround, AI audio, Adaptive Sound, etc.)
- Match sound output type (PCM, Dolby Digital) with your sound system
- If using Bluetooth audio, expect slight delay — not ideal for competitive gaming
- Prefer wired or eARC soundbars for ultra-low latency
🎯 Best Hack: Use your console’s audio output settings to force passthrough and reduce processing delays from the TV.
📊 Quick Comparison Table – Built-In Audio vs Soundbar vs Headset
| Audio Option | Latency | Immersion | Directional Sound | Best For |
| Built-In Speakers | Medium | Low | Poor | Casual or RPG gaming |
| Soundbar | Low | Medium | Good | Console gaming & couch co-op |
| Gaming Headset | Very Low | High | Excellent | Competitive FPS, solo campaigns |
Don’t just settle for default audio settings.
Optimizing your sound profile is one of the most underrated ways to improve your gameplay.
Take 5–10 minutes today to tweak your TV’s settings and experience the difference.
🎧 Want to elevate your gaming audio instantly?
Check out the best-rated gaming soundbars or low-latency headsets to boost your edge today.
🕹️ Remember: Every footstep, gunshot, or voice line can help you win — if you can hear it clearly.
🎮 Additional Tips for Enhancing Gaming Experience
Optimizing your smart TV for gaming goes far beyond just picture and sound settings.
To unlock the ultimate gaming experience, there are several key enhancements, smart tweaks, and powerful tools you can implement that will elevate your gameplay to the next level.
This section covers advanced gaming optimization strategies to help you gain a competitive edge, reduce input lag, protect your hardware, and enjoy buttery-smooth performance — whether you’re on a PS5, Xbox Series X, Nintendo Switch, or gaming PC.
If you’re serious about learning how to calibrate smart TV for gaming effectively, these bonus tips are absolutely unmissable.
🕹️ 1. Use a Dedicated Gaming HDMI Port
Most newer smart TVs have dedicated HDMI ports labeled “Game” or “HDMI 2.1”.
Using these ports ensures that your console or PC takes full advantage of the TV’s lowest input lag and auto low latency mode (ALLM).
Why it matters:
- Reduces input lag dramatically (ideal for FPS & fighting games)
- Enables variable refresh rate (VRR) and Auto HDR features
- Ensures better compatibility with next-gen consoles
📌 Pro Tip: Always plug your PS5 or Xbox into HDMI 2.1 ports for best performance.
⚡ 2. Turn On Game Mode for Ultra-Low Latency
Most smart TVs now offer a “Game Mode” which disables unnecessary video processing like motion smoothing, frame interpolation, or post-processing effects that increase lag.
How to enable:
- Go to Settings > Picture > Special Viewing Mode > Game Mode
- OR let your console auto-detect and toggle Game Mode via ALLM
✅ Benefits:
- Smoother gameplay
- Reduced input delay
- Native response feel
🔋 3. Keep Firmware and System Software Updated
A surprising number of users overlook this simple tip.
Smart TVs and consoles get frequent firmware updates that include performance boosts, compatibility improvements, and bug fixes for gaming features like VRR and HDR.
Update checklist:
- TV firmware (via system settings or manufacturer’s app)
- Console firmware (system software updates)
- Game patches (latest versions reduce crashes & fix sync issues)
💡 Hook: An outdated firmware can quietly ruin your visual quality or add input lag — don’t let it sabotage your session.
🌐 4. Optimize Your Internet for Online Gaming
If you play competitive or online multiplayer games, network optimization is a must.
Poor ping or unstable connection can cause lag spikes, disconnections, or frustrating delays — even if your TV is perfectly calibrated.
Optimization Tips:
- Use wired Ethernet connection over Wi-Fi
- If on Wi-Fi, connect to 5GHz band instead of 2.4GHz
- Use gaming routers or Quality of Service (QoS) settings to prioritize gaming traffic
- Keep devices like streaming or downloads off the same network during gaming
🌟 Bonus Tip: Consider a Powerline Ethernet Adapter if your console is far from the router.
🌈 5. Adjust Your Lighting Environment
Your room lighting has a big impact on your ability to see detail during gameplay, especially in darker scenes or HDR-rich environments.
Ideal Gaming Setup:
- Use bias lighting behind your TV to reduce eye strain
- Avoid direct lighting on the TV screen (reduces glare)
- Use dimmable smart lights for immersive ambiance
💡 You can even sync smart lights with your game for interactive lighting that responds to the action.
💻 6. Use Game-Specific TV Profiles
Some smart TVs — especially models from LG, Samsung, and Sony — allow customizable picture profiles per HDMI input.
This means you can create a dedicated picture and audio preset just for your console, without affecting other inputs like streaming or cable.
📺 For example:
- HDMI 1: Xbox Series X – Game Mode, Warm2, 120Hz
- HDMI 2: Netflix Streaming – Cinema Mode, Dolby Vision
🎯 This allows for seamless, optimized gaming every time you switch on — no manual adjustment required.
📸 7. Use Dynamic Tone Mapping or HGiG (for HDR Gaming)
If you’re gaming in HDR (especially on consoles like PS5 or Xbox Series X), enabling HGiG or Dynamic Tone Mapping ensures you’re getting the most accurate highlights, contrast, and shadows.
HDR Optimization:
- For LG TVs: Use HGiG instead of Dynamic Tone Mapping
- For Samsung: Use Game HDR+ if available
- For PS5/Xbox: Run built-in HDR calibration tool
✅ This prevents washed-out highlights or crushed blacks during gameplay.
🎯 8. Calibrate Controller Sensitivity & In-Game Settings
Even with a perfectly optimized TV, your gameplay can suffer if your controller and game settings aren’t fine-tuned.
Quick Wins:
- Adjust controller sensitivity for smoother aim
- Calibrate dead zones to avoid drift or input lag
- Enable in-game motion blur OFF, film grain OFF for sharper visuals
- Use in-game performance mode (60fps or 120fps) if supported
🧼 9. Clean Your Ports and Display
Dusty HDMI ports and dirty screens can quietly degrade performance or cause flickering.
Maintenance Tips:
- Use compressed air to clean ports once a month
- Wipe your TV with a microfiber cloth (avoid alcohol-based cleaners)
- Regularly check cables for wear or looseness
✅ Pro Tip: Faulty HDMI cables are often the silent culprit behind flickering or no signal.
🏆 10. Take Advantage of Game Features on Next-Gen Consoles
If you own a PS5, Xbox Series X/S, or high-end gaming PC, take full advantage of the next-gen features your system provides — your smart TV is only half the battle.
🎮 Key Enhancements:
- VRR (Variable Refresh Rate)
- 120Hz Gaming Mode
- Auto HDR
- Quick Resume / Instant Game Load
Make sure your TV supports these features and that they’re enabled in both your console and TV settings.
🔥 Want to experience buttery-smooth, low-lag, crystal-clear gaming?
Then don’t just stop at the basics — implement these additional tips today to maximize your setup.
🛒 Explore the best gaming HDMI 2.1 cables, low-latency soundbars, and bias lighting kits to transform your setup into a pro-tier gaming station.
⚠️ Common Mistakes to Avoid When Calibrating Smart TVs for Gaming
When trying to optimize your gaming display, even the most well-intentioned gamers often fall into critical traps that sabotage performance, ruin image quality, or increase input lag.
Knowing what not to do is just as important as understanding how to calibrate smart TV for gaming effectively.
This section breaks down the most common calibration mistakes, explains why they matter, and shows you how to avoid them to ensure your smart TV delivers flawless visuals, ultra-smooth response, and immersive gaming every time you power it on.
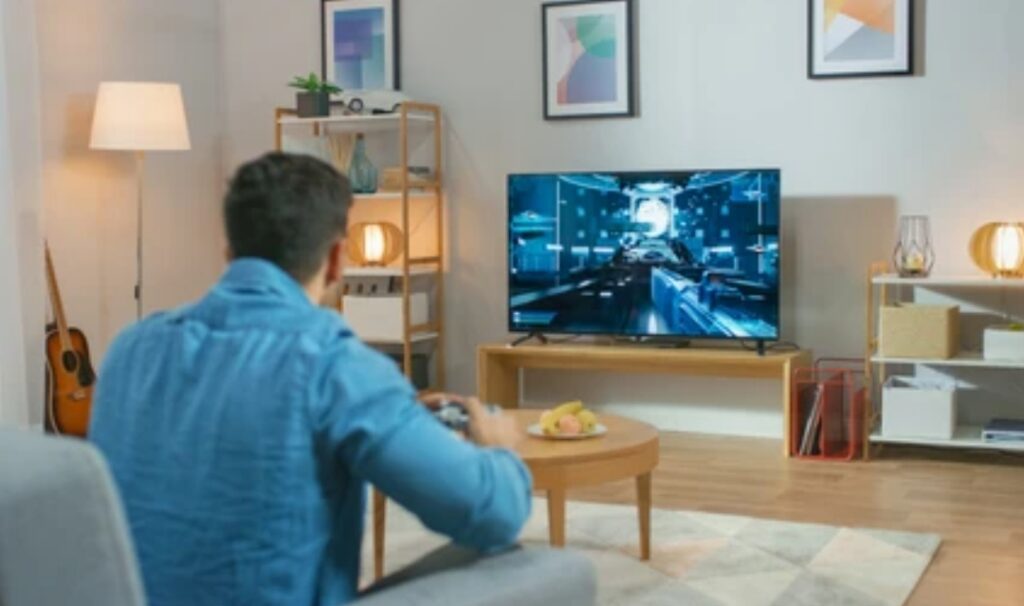
❌ 1. Leaving Game Mode Off
This is perhaps the #1 mistake gamers make — failing to enable Game Mode on their TV.
Most smart TVs come with image processing features that are great for movies or sports, but these same features drastically increase input lag in games.
Symptoms:
- Unresponsive controller feedback
- Delayed character movement
- Lag in fast-paced titles like shooters or fighters
Fix:
Always activate Game Mode via:
- Settings > Picture > Special Viewing Modes > Game Mode
- Or ensure your console enables it automatically through ALLM (Auto Low Latency Mode)
🟢 Game Mode reduces input lag from ~80ms to as low as 10ms on supported TVs.
🎚️ 2. Cranking Up Sharpness Too High
While it might seem like high sharpness = clearer image, the opposite is usually true.
Over-sharpening adds artificial edge enhancement that:
- Introduces visual noise
- Makes graphics look overly digital or jagged
- Obscures intended game textures and realism
Fix:
Set sharpness to 0–10% of the available range, or turn it off completely for native fidelity.
💡 3. Misusing Brightness and Contrast Settings
Many gamers incorrectly adjust brightness and contrast based on how the image looks — instead of how the TV processes dark and light detail.
Overexposed? Underwhelmed?
- Setting brightness too high washes out blacks
- Setting contrast too high crushes highlights
- This can cause visual fatigue and reduce HDR impact
Fix:
- Use built-in calibration patterns (or in-console calibration tools)
- Set brightness just enough to reveal shadow detail
- Adjust contrast to preserve highlight textures without clipping
🌈 4. Incorrect HDR Calibration
HDR (High Dynamic Range) can look phenomenal — or it can ruin your image if not properly configured.
Many users leave HDR settings at default, resulting in:
- Overblown whites
- Crushed blacks
- Oversaturated or dull colors
Fix:
- For PS5 or Xbox, use the in-console HDR calibration tool
- On LG TVs, use HGiG mode for more accurate tone mapping
- For Samsung, enable Game HDR+ or tone map through the console
🔧 HGiG ensures your console handles the HDR tone mapping, not your TV — giving more consistent results.
🔄 5. Not Updating Firmware
It may not seem directly related to calibration, but outdated firmware can break or limit gaming features.
Out-of-date TVs may:
- Miss out on Auto Game Mode
- Fail to support VRR or 120Hz refresh rates
- Suffer from bugs in picture processing
Fix:
- Check TV settings for software/firmware updates
- Use your TV brand’s official app for easier updates
- Keep your PS5/Xbox/PC graphics drivers current as well
💡 Some gaming issues are fixed simply by updating to the latest firmware.
⚠️ 6. Using Poor-Quality or Old HDMI Cables
If you’re trying to run 4K at 120Hz with HDR, your old HDMI cable from 2013 won’t cut it.
Low-spec cables cause:
- Screen flickering
- No signal
- Downgrading to 60Hz or SDR
Fix:
Use a certified HDMI 2.1 cable that supports:
- 48Gbps bandwidth
- 4K/120Hz
- eARC, VRR, ALLM
📦 Look for labels like “Ultra High Speed HDMI” or choose trusted brands like Cable Matters, Zeskit, or Belkin.

🖼️ 7. Ignoring In-Game Calibration Settings
Every game has unique color grading, black levels, and motion effects.
Relying solely on TV settings without fine-tuning in-game options leads to poor results.
Fix:
- Use in-game brightness, gamma, and motion blur settings
- Turn motion blur OFF for cleaner visuals
- Use Performance Mode (60/120fps) if supported
🎮 Calibrating both the TV and the game settings gives you double the control.
🚫 8. Using Cinema, Standard, or Vivid Modes for Gaming
Default picture modes like “Cinema” or “Vivid” often include heavy post-processing, color enhancements, and motion smoothing that ruin the real-time nature of gaming.
These modes:
- Increase latency
- Artificially alter colors
- Create motion blur or ghosting
Fix:
- Always use Game Mode
- Customize Game Mode settings to your preference (color temp, HDR, gamma)
📌 Game Mode + manual tweaks = the best of both worlds.
⚠️ 9. Not Testing Input Lag or Frame Rate
Just because a game looks good doesn’t mean it’s running optimally.
Input lag and dropped frames are silent killers of competitive performance.
Fix:
- Use free online tools like DisplayLag.com
- Measure real-world response using games with input test tools
- Test on a 120Hz game to detect dropped frames
🧠 The lower the input lag, the more competitive you’ll be.
⚙️ 10. Not Saving Custom Presets Per HDMI Port
Many gamers go through the trouble of calibration — then forget to save it, or apply it across every input.
This causes frustration when switching between console and streaming, and leads to:
- Misaligned colors
- Re-doing settings every time
- Missed features like VRR or 4:4:4 chroma
Fix:
- Assign custom picture profiles to specific HDMI ports
- Label them clearly (e.g., “Xbox Game HDR”, “PS5 FPS”, “PC Ultra Settings”)
📺 Your smart TV likely supports multiple profiles — use them to your advantage.
🎯 Avoiding these mistakes can be the difference between average and epic gameplay!
Make sure you don’t sabotage your gaming experience with incorrect settings or outdated habits.
Double-check your calibration now, and consider grabbing certified HDMI cables, low-latency soundbars, or even professional calibration tools to unlock the full potential of your gaming setup.
❓ FAQs – Frequently Asked Questions About Calibrating Your Smart TV for Gaming
Below are some of the most commonly asked questions by gamers who want to know exactly how to calibrate smart TV for gaming without missing a detail.
Whether you’re using a PS5, Xbox Series X, or a high-end gaming PC, these answers are designed to help you optimize your setup quickly and avoid costly mistakes.
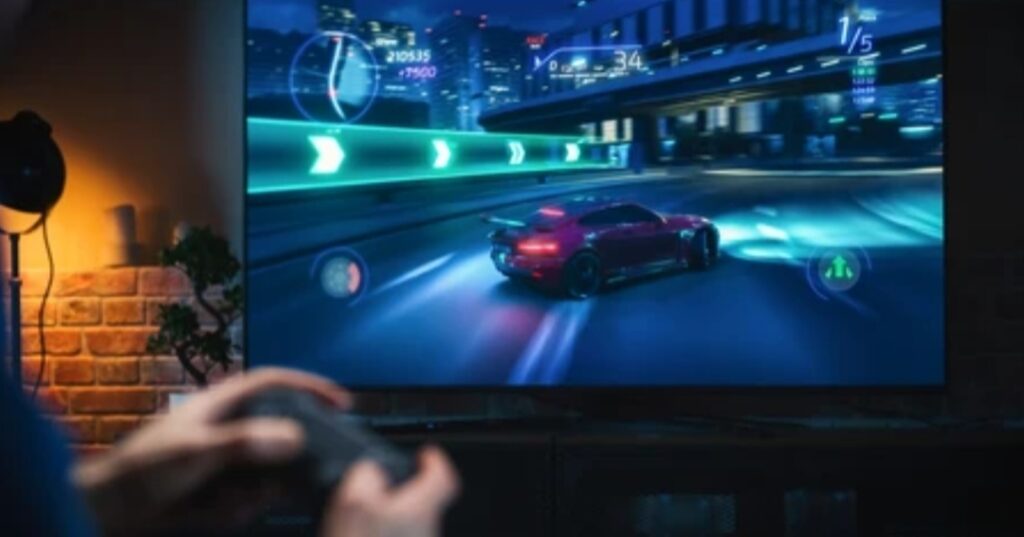
✅ What is the best picture mode for gaming on a smart TV?
Game Mode is the best picture mode for gaming on most smart TVs.
It disables unnecessary image processing features to reduce input lag, allowing for faster controller response and smoother gameplay.
Most modern TVs will automatically enable it when a console is detected via ALLM (Auto Low Latency Mode).
🟢 Always start with Game Mode, then fine-tune brightness, contrast, and sharpness manually.
🎮 How do I know if my TV is properly calibrated for gaming?
You’ll know your TV is properly calibrated when:
- Input lag is minimal (controls feel instant)
- Brightness and contrast reveal clear shadow and highlight detail
- Colors appear natural and consistent
- There’s no screen tearing or stuttering
- HDR content appears vibrant but not washed out
For best results, test using built-in console calibration tools or calibration patterns on YouTube.
💡 Should I calibrate my smart TV differently for day and night gaming?
Yes, lighting conditions significantly affect picture quality.
Daytime gaming often requires slightly higher brightness, while night gaming benefits from lower brightness and contrast to reduce eye strain.
✅ Pro tip: Set up multiple custom profiles — one for daytime, one for nighttime.
⚠️ Does calibration affect input lag?
Absolutely.
Calibration settings like noise reduction, motion smoothing, and sharpness enhancements can significantly increase input lag.
That’s why Game Mode exists — it disables these latency-inducing processes to give you the lowest possible response time.
Stick to Game Mode and avoid extra image processing if you play competitive or fast-paced games.
📺 What are the best calibration settings for PS5 or Xbox Series X on a smart TV?
While settings can vary by brand, here’s a great baseline for both consoles:
- Picture Mode: Game Mode
- Resolution: 4K UHD
- HDR: Enabled with console-calibrated tone mapping
- Color Temperature: Warm 2 or Neutral
- Sharpness: 0–10%
- Motion Smoothing: OFF
- Input Signal Plus / HDMI UHD Color: ON
- ALLM / VRR: ON (if supported)
Also, make sure you’re using a certified HDMI 2.1 cable for full 4K/120Hz support.
🔄 How often should I recalibrate my smart TV for gaming?
Recalibration isn’t needed frequently, but you should consider it:
- After a firmware update
- When switching to a new console
- If you move your TV to a new room with different lighting
- When playing a game with unusual brightness or HDR mapping
✅ Tip: Re-check your settings every 3–6 months or if something “feels off” during gameplay.
🎯 Can I use the same calibration for movies and gaming?
Technically yes, but it’s not recommended.
Movies require different picture settings (like high contrast and motion smoothing) which add latency and distort game visuals.
For best results:
- Use “Game Mode” for gaming
- Use “Cinema Mode” or “Filmmaker Mode” for movies
📌 Pro tip: Assign different settings to each HDMI input or save custom profiles you can easily switch between.
🔧 Are there apps or tools to help me calibrate my TV for gaming?
Yes, there are a few excellent options:
- Spears & Munsil UHD Benchmark Disc – for advanced calibration
- YouTube Calibration Patterns – for quick free setups
- Console Tools – PS5, Xbox Series X, and even Nintendo Switch offer built-in calibration wizards
- Calman Home – a professional-grade tool for deep calibration (ideal if you’re serious)
📲 Some smart TVs also have mobile apps for easier control over calibration settings.
🕹️ What does ALLM mean and why does it matter?
ALLM (Auto Low Latency Mode) is a feature that automatically switches your TV to Game Mode when a console is detected.
It ensures you always get:
- Lower input lag
- Faster response
- Seamless switching between media and gaming modes
This feature is supported on HDMI 2.1 TVs and modern consoles like PS5 and Xbox Series X.
✅ Always enable it for a smoother gaming experience.
🎯 Final Takeaway: FAQs
These FAQs are designed to help gamers at all experience levels feel confident about calibrating their smart TVs for peak gaming performance.
If you want the best possible visuals, performance, and immersion from your setup, bookmark this guide, share it with your gaming squad, and make sure you’re not leaving picture quality and performance to chance!
👉 Upgrade your experience now by using a professional calibration tool or game-optimized HDMI cable and unlock your smart TV’s true potential!
🏁 Conclusion – Your Ultimate Smart TV Gaming Setup Is Just a Few Clicks Away
You’ve now unlocked the complete guide on how to calibrate smart TV for gaming — step-by-step, brand-specific, and optimized for peak performance.
From mastering input lag and contrast ratios to tailoring your HDR settings, color temperature, and even audio preferences, you’re no longer guessing — you’re gaming like a pro.
🎮 Whether you’re gearing up for a competitive FPS session or immersing yourself in a cinematic open-world game, proper calibration can make or break your entire gaming experience.
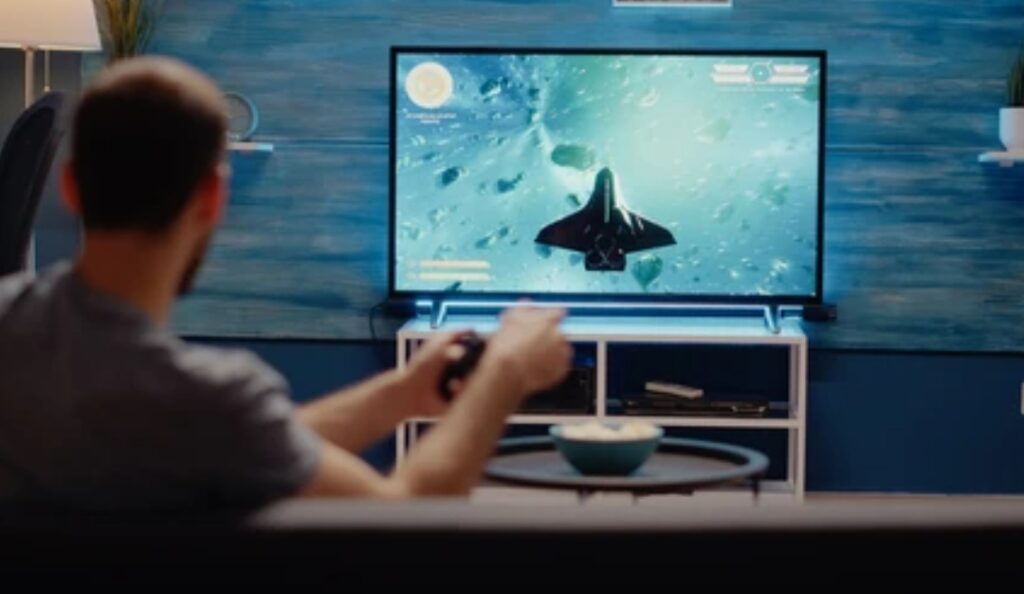
🔥 Key Takeaways for Gamers
- Use Game Mode to drastically reduce input lag
- Manually adjust brightness, contrast, and sharpness based on your environment
- Enable HDR, ALLM, and VRR (if supported) for enhanced visuals
- Don’t forget about audio calibration — immersion goes beyond visuals
- Customize settings for daytime vs. nighttime gaming sessions
- Avoid common mistakes like using the wrong picture mode or ignoring firmware updates
✅ The more dialed-in your setup, the more competitive and immersive your gaming will be.
🚀 Final Words – Take Action Now and Level Up
You’ve made it to the end, and that means you’re serious about transforming your gaming setup.
But don’t let this be just another guide you read and forget.
👉 Take action right now — grab your remote, apply the calibration settings we’ve covered, and test your results in your favorite game.
Want an even smoother and more powerful setup?
👉 Upgrade with a premium HDMI 2.1 cable, or invest in a professional calibration tool to fine-tune every pixel on your screen.
Don’t settle for “default” when epic is only a few tweaks away.
We hope this comprehensive guide helped you understand how to calibrate your smart TV for gaming the right way.
Share this article with fellow gamers, bookmark it for future reference, and feel free to drop your questions in the comments section.
📥 And if you’re serious about elite gaming visuals, subscribe to our gaming calibration newsletter for more pro tips, tools, and gear reviews.
🎯 Game smarter. Play better. Dominate your screen.
You might also like :

