The Importance of Regular Laptop Maintenance
Properly maintaining your laptop is essential to ensuring it performs optimally and lasts for years.
Regular cleaning and care not only improve the performance of your laptop but also protect your investment.
In this guide, we will show you exactly how to clean your laptop and maintain it in top condition.
Whether you use your laptop for work, gaming, or casual browsing, keeping it clean and maintained is vital for both functionality and hygiene.
Boosting Laptop Performance
Dirt, dust, and debris can accumulate inside and outside your laptop, clogging vents and slowing down your system.
Regular cleaning removes these obstructions, allowing your laptop’s cooling system to function efficiently.
When your laptop stays cool, its processor, memory, and other components can perform at their full potential without throttling due to overheating.
This is particularly important if you multitask or use resource-intensive applications.
A well-maintained laptop runs faster, boots up quicker, and provides a smoother overall experience.
Extending Longevity
Routine maintenance significantly increases your laptop’s lifespan.
Dust buildup can lead to overheating, which is one of the leading causes of hardware failure.
For instance, dust can block the cooling fans, causing the CPU or GPU to overheat and wear out prematurely.
By keeping your laptop clean, you reduce the risk of costly repairs or replacements.
Additionally, maintaining the battery, software, and physical components ensures your laptop stays reliable for years to come.
Preventing Health Hazards
Your laptop is a breeding ground for germs and bacteria, especially if you eat or work on it daily.
Studies show that keyboards often harbor more bacteria than a toilet seat.
Regular cleaning not only improves your laptop’s appearance but also protects your health.
Use disinfectant wipes to sanitize the keyboard and touchpad to eliminate germs and keep yourself safe from potential illnesses.
Improving Aesthetic Appeal
A clean laptop looks professional and inviting.
Smudges, fingerprints, and dust on your screen or casing can make your device appear neglected.
Regularly wiping down the exterior and screen ensures it remains visually appealing, especially if you use your laptop in a professional setting or during meetings.
Saving Money on Repairs
Regular maintenance saves you from expensive repairs.
Overheating, caused by neglected cleaning, often leads to severe hardware issues that require costly solutions.
Cleaning your laptop’s vents, fans, and keyboard can prevent long-term damage and save you money in the long run.
For example, replacing a laptop fan or fixing a burnt motherboard can cost hundreds of dollars. Investing a few minutes in cleaning can help you avoid these expenses altogether.
Enhancing Software Stability
A clean laptop isn’t just about the physical components—it’s also about the software.
When your system is clutter-free and updated, it operates more smoothly.
Taking time to clean out junk files, update software, and scan for malware ensures your laptop runs efficiently.
These steps improve both system speed and security, giving you peace of mind while you work or browse.
A Proactive Maintenance Routine
Setting up a regular cleaning routine makes all the difference.
Simple tasks like wiping the screen weekly, cleaning the keyboard monthly, and dusting the interior every few months can keep your laptop running like new.
For busy professionals or students, this proactive approach ensures that your laptop is always ready to perform when you need it most.
Don’t wait until your laptop shows signs of slowing down!
Invest in the best laptop cleaning tools and supplies today.
Regular maintenance can save you time, money, and frustration while ensuring your laptop delivers peak performance every day.
How to Clean Laptop & Maintain It

1. Preparing for Cleaning
To clean your laptop effectively and safely, preparation is key.
This ensures you not only protect your device but also achieve the best results.
Below, we’ll walk you through the essential steps to prepare for cleaning your laptop.
Following these steps will help you learn exactly how to clean your laptop while avoiding mistakes that could damage it.
Safety First: Power Down and Unplug
Before you begin cleaning, it’s critical to prioritize safety.
Electronic devices like laptops are sensitive to moisture and can be damaged if not handled properly during cleaning.
- Turn Off Your Laptop Completely
Make sure the laptop is powered off—not just in sleep mode. This step minimizes the risk of electrical shock or short circuits when cleaning components, especially if you plan to clean the keyboard or ports. Keeping the laptop turned on during cleaning can result in accidental inputs or even damage to internal circuits.
- Disconnect the Charger
Unplug the laptop from any power source. Cleaning while connected to a charger increases the chances of electric shock, especially if liquid cleaning agents are involved.
- Remove External Devices
Disconnect all external peripherals such as a mouse, USB drives, external hard drives, or headphones. This makes cleaning easier and ensures that no liquids or debris accidentally enter connected ports.
- Remove the Battery (If Possible)
If your laptop has a removable battery, it’s a good idea to take it out. This eliminates any risk of electrical discharge during cleaning. For non-removable batteries, ensure the laptop is powered off and unplugged.
Pro Tip: If you’re unsure about the proper way to power down or disconnect components of your laptop, refer to the user manual provided by the manufacturer. Check out the best laptop accessories for maintenance here.
Gather Necessary Cleaning Supplies
The next step is to gather the right tools and cleaning supplies.
Using proper materials ensures that you clean your laptop thoroughly without causing scratches or damage to delicate components.
- Microfiber Cloth
Microfiber cloths are essential for cleaning the screen and other surfaces without leaving scratches or lint. Avoid using paper towels or rough cloths, as they can damage the display and exterior.
- Compressed Air Canister
This is a must-have tool for removing dust and debris from the keyboard, vents, and other hard-to-reach areas. Compressed air is highly effective for blowing out particles trapped under the keys or inside the laptop’s cooling system. Always use short bursts to prevent moisture buildup.
- Isopropyl Alcohol (70% or Higher)
Isopropyl alcohol is perfect for sanitizing your keyboard and cleaning sticky spots without leaving residue. Avoid using household cleaners, as they may contain chemicals that can damage the laptop’s finish. Dilute the alcohol with water if necessary, and use it sparingly with a cotton swab or microfiber cloth.
- Cotton Swabs and Toothpicks
Cotton swabs are excellent for cleaning small, intricate areas like between keys, USB ports, and vents. Toothpicks can also be used to carefully remove stubborn debris lodged in narrow crevices. Be gentle to avoid causing damage.
- Screen Cleaner or Distilled Water
If you don’t have a dedicated screen cleaner, distilled water is a safe alternative for cleaning your laptop screen. Avoid using tap water, as it may leave streaks or mineral deposits on the screen.
- Small Soft Brush
A small, soft-bristled brush can help you gently clean dust from vents, the keyboard, or the laptop’s exterior.
- Lint-Free Cleaning Wipes
Pre-moistened cleaning wipes designed for electronics can be a convenient option for cleaning the laptop’s exterior or screen.
Setting Up Your Workspace
- Choose a Clean, Flat Surface
Place your laptop on a sturdy, flat surface with ample lighting. Ensure the area is clean and free from dust or dirt that could transfer onto the device during cleaning.
- Lay Down a Soft Towel
To prevent scratches or accidental damage, place a soft towel or mat under your laptop. This also protects the surface of your workspace from potential spills.
- Keep Liquids at a Safe Distance
While cleaning solutions and water may be necessary, always use them sparingly. Keep the liquids away from the laptop to avoid accidental spills.
Quick Tip: Having the right cleaning supplies on hand can make the process smooth and effective. Get all the laptop cleaning essentials here.
Why Preparation is Critical
Proper preparation not only ensures effective cleaning but also protects your laptop from accidental damage.
Skipping these steps can result in moisture seeping into internal components, scratched screens, or broken ports.
By following these simple precautions, you can confidently clean your laptop and maintain its performance for years.
Ready to clean your laptop like a pro? Explore our expert-approved cleaning kits now!
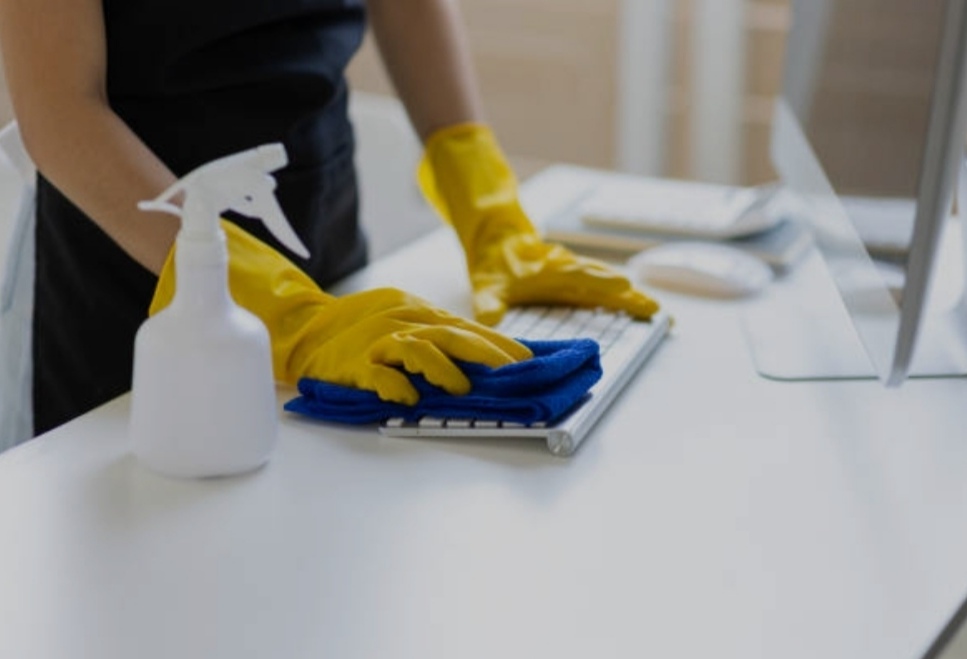
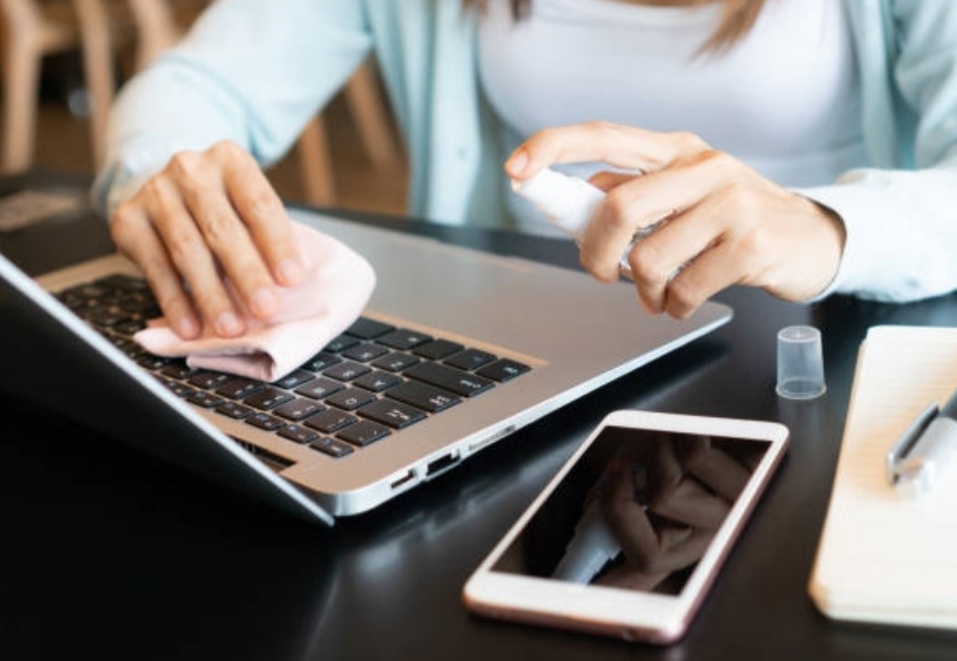
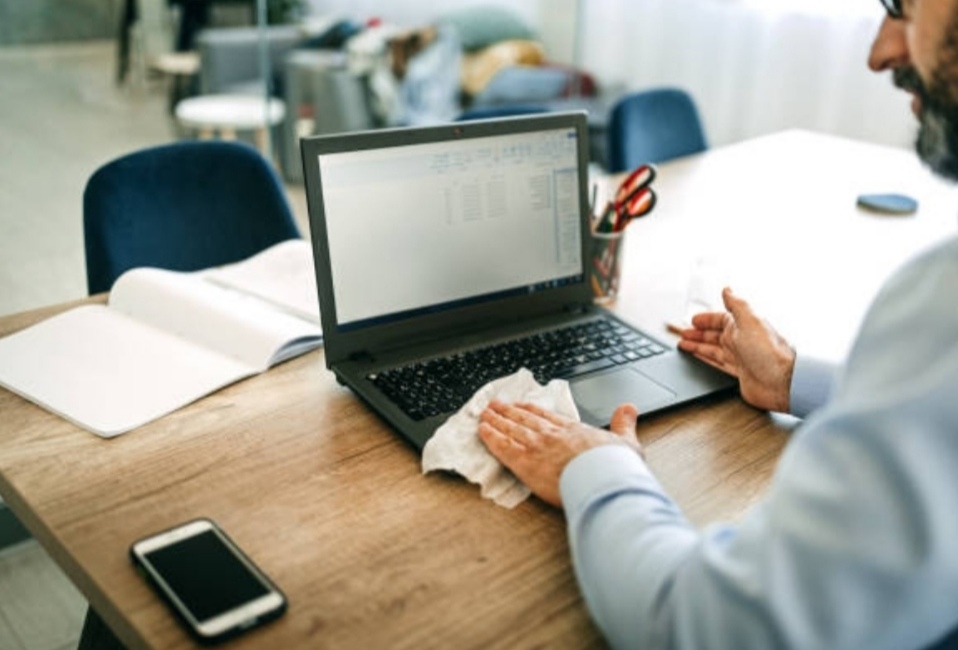
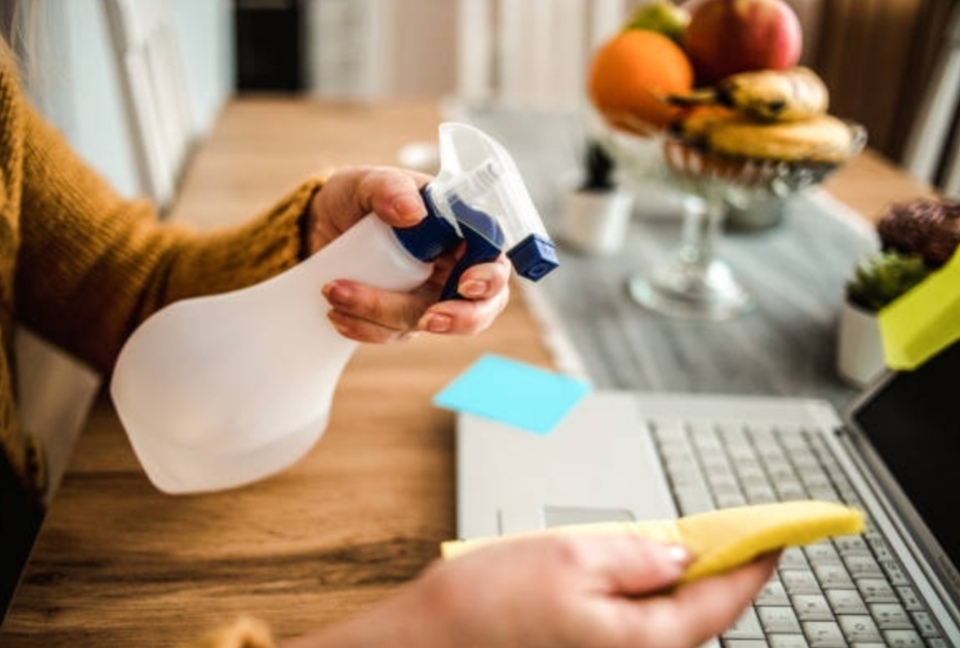
2. External Cleaning
Properly cleaning the external parts of your laptop not only enhances its appearance but also ensures it remains in excellent working condition.
This section provides detailed steps to help you clean the laptop’s exterior, keyboard, and screen effectively and safely.
Following these steps will teach you how to clean your laptop without risking damage to sensitive components.
Cleaning the Laptop Exterior
The laptop’s casing is the first part to show signs of wear, fingerprints, and grime.
Regular cleaning prevents dirt from building up and makes your laptop look new and well-maintained.
Here’s how you can clean the exterior properly:
- Prepare the Surface
- Place the laptop on a clean, flat surface, such as a desk or table.
- Lay a soft towel underneath it to prevent scratches while cleaning.
- Dampen a Microfiber Cloth
- Use a soft microfiber cloth slightly dampened with water or a specialized electronics cleaning solution. Avoid soaking the cloth, as excess liquid can seep into the device and cause damage.
- Wipe Down the Casing
- Gently wipe the entire exterior of the laptop, including the top cover, base, and sides. Use circular motions to remove smudges and fingerprints effectively.
- Pay special attention to the areas around the edges, where dirt tends to accumulate.
- Clean the Ports
- Use a dry cotton swab or a toothpick to remove dust and debris from the ports carefully. Avoid using liquids near the ports. If necessary, use compressed air to blow out stubborn dirt.
- Polish for a New Look
- After wiping down the casing, use a dry microfiber cloth to buff the surface, leaving it streak-free and polished.
Pro Tip: Avoid using abrasive cleaners or paper towels, as these can scratch the laptop’s surface. For stubborn spots, dampen the cloth with isopropyl alcohol for a more effective clean.
Maintaining the Keyboard
The keyboard is one of the most frequently used parts of a laptop, making it prone to collecting dust, crumbs, and oils from your fingers.
A dirty keyboard not only looks unhygienic but can also affect its functionality over time. Here’s how to clean your laptop keyboard thoroughly:
- Remove Loose Debris
- Hold your laptop upside down and gently shake it to dislodge loose debris. Be careful not to shake it too hard.
- Use compressed air to blow out dirt and dust between the keys. Hold the can upright and use short bursts of air.
- Clean Between the Keys
- Use a soft-bristled brush or a small vacuum cleaner designed for electronics to sweep away dust from between the keys.
- For more stubborn dirt, wrap a toothpick in a microfiber cloth and gently clean the gaps.
- Sanitize the Key Surfaces
- Dampen a microfiber cloth with isopropyl alcohol (70% or higher) and gently wipe the key surfaces. This removes oils, bacteria, and sticky residues.
- For hard-to-reach areas, use a cotton swab dipped in isopropyl alcohol. Avoid letting the liquid drip into the keyboard.
- Dry Thoroughly
- Allow the keyboard to air-dry completely before turning the laptop back on. This prevents any moisture from seeping into the internal components.
Quick Tip: For stubborn dirt or spills, consider investing in a keyboard cleaning kit designed specifically for laptops.
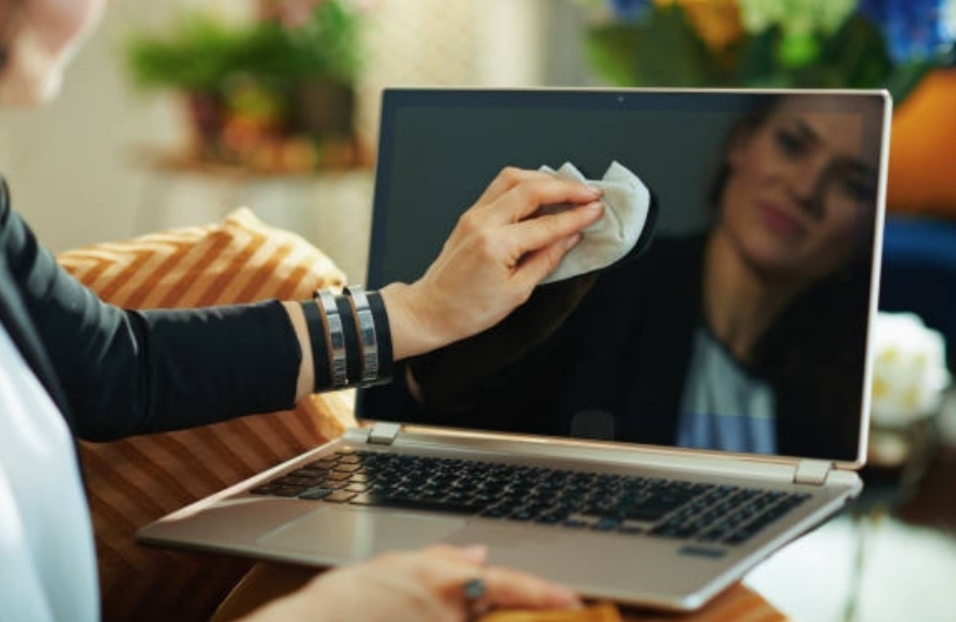
Screen Care
The laptop screen is delicate and requires special attention during cleaning.
Using the wrong products or techniques can damage the screen’s coating and reduce visibility. Follow these steps to safely clean your laptop screen:
- Use a Dry Microfiber Cloth First
- Begin by gently wiping the screen with a clean, dry microfiber cloth to remove dust and smudges. This step prevents scratching caused by rubbing dirt particles into the screen.
- Dampen the Cloth for a Deeper Clean
- If smudges remain, lightly dampen a microfiber cloth with distilled water or a screen-cleaning solution. Never spray liquid directly onto the screen, as it can drip into the edges and damage the internal components.
- Wipe Gently
- Use slow, circular motions to clean the screen. Avoid pressing too hard, as excessive pressure can damage the pixels or LCD panel.
- Avoid Harsh Chemicals
- Do not use window cleaners, ammonia-based solutions, or household cleaning products, as these can strip the screen’s protective coating and leave streaks.
- Inspect for Streaks
- Once cleaned, use a dry part of the microfiber cloth to buff the screen and remove any streaks.
- Prevent Future Smudges
- Consider using an anti-glare screen protector to minimize smudges and fingerprints. This also helps protect the screen from scratches.
Pro Tip: Always clean your screen with a designated microfiber cloth to avoid lint or scratches. Replace your cloth regularly to maintain effectiveness.
Why External Cleaning Matters
Regularly cleaning the exterior of your laptop ensures it looks professional, lasts longer, and performs optimally.
Dust buildup in ports can cause connectivity issues, while a dirty keyboard can harbor bacteria and impact typing efficiency.
Moreover, a clean screen improves visibility, reducing eye strain and enhancing your overall computing experience.
Want to keep your laptop looking brand new? Discover the best laptop cleaning accessories here.
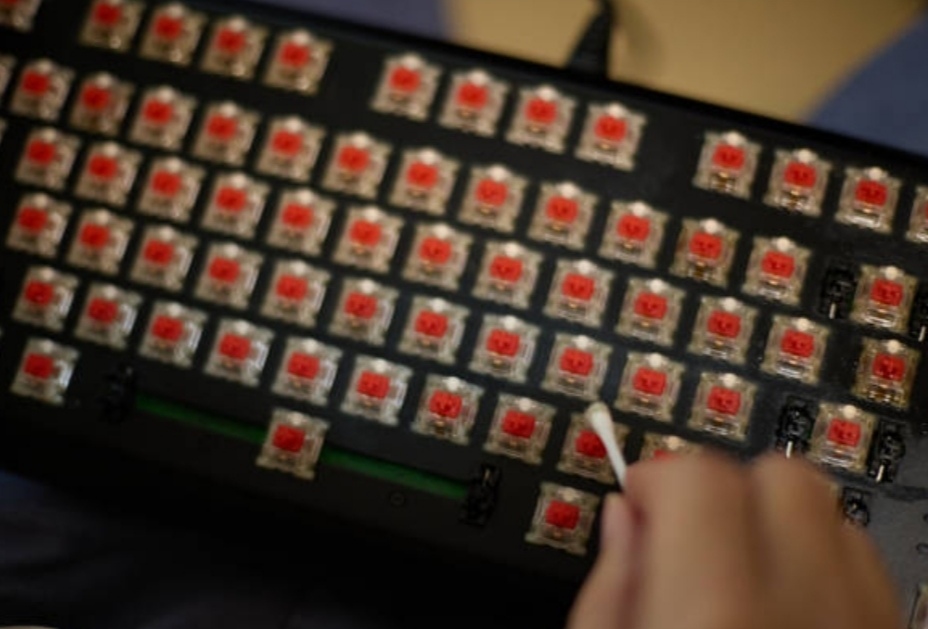
3. Internal Maintenance
Maintaining the internal components of your laptop is just as important as cleaning the exterior.
Over time, dust and debris accumulate inside the laptop, potentially causing overheating, reduced performance, and hardware damage.
Internal cleaning is a crucial step when learning how to clean your laptop. Let’s dive into the essential aspects of maintaining your laptop’s internal components.
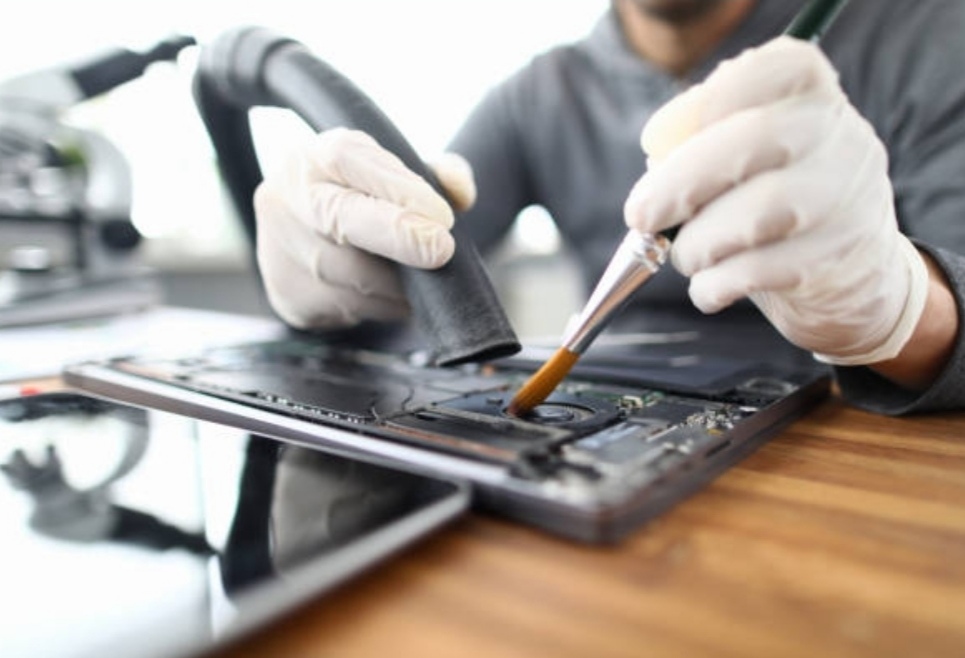
Dusting Internal Components
Dust buildup inside your laptop can lead to overheating, as clogged vents and fans struggle to dissipate heat effectively.
Regularly dusting internal components is vital to keeping your laptop cool and ensuring optimal performance. Here’s how to do it safely and effectively:
- Gather the Right Tools
- Use a can of compressed air, a small brush with soft bristles, and a screwdriver set designed for electronics.
- Avoid using vacuum cleaners, as they can generate static electricity, which may damage internal components.
- Turn Off and Disassemble the Laptop
- Shut down the laptop completely and unplug it from any power source.
- If the battery is removable, take it out to prevent accidental power surges during cleaning.
- Refer to your laptop’s user manual for instructions on accessing internal components. Typically, you’ll need to remove the bottom panel using a precision screwdriver.
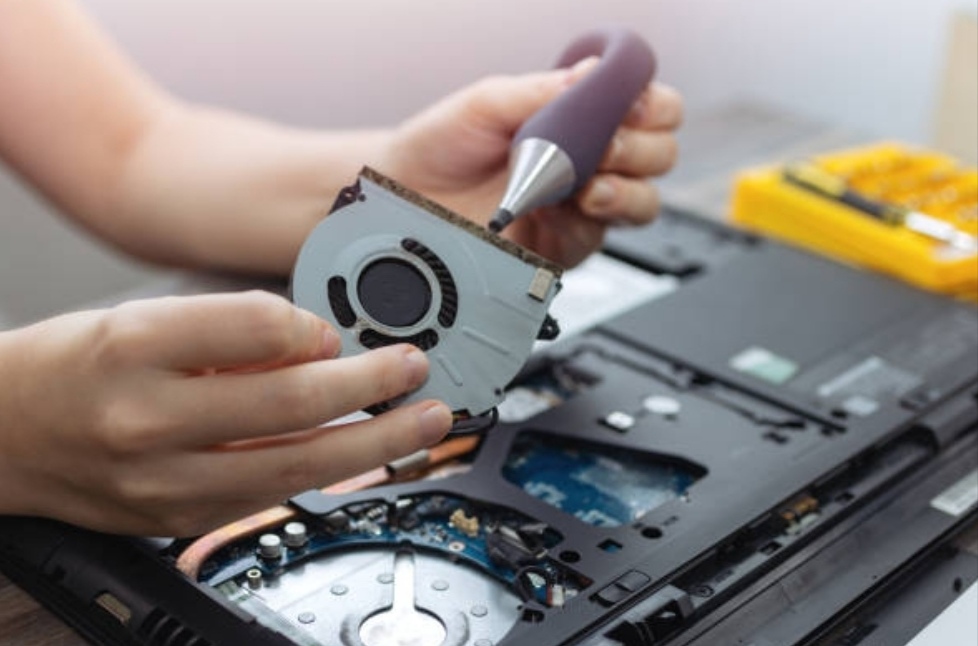
- Clean the Vents and Fans
- Begin by gently blowing compressed air into the vents to dislodge dust. Hold the can upright and use short bursts of air to avoid moisture buildup.
- Next, use the compressed air to clean the fans. Hold the fan blades in place with a small object to prevent them from spinning, as excessive spinning can damage the motor.
- For stubborn dust, use a soft brush to gently loosen debris from the fan blades and surrounding areas.
- Dust Other Internal Components
- Use the compressed air to clean the motherboard, RAM slots, and other visible components. Ensure you do not touch the components directly, as oils from your fingers can cause damage.
- Avoid blowing dust deeper into the laptop. Instead, direct the airflow toward an open area where the dust can escape.
- Reassemble and Test the Laptop
- Once all internal components are clean, carefully reassemble the laptop. Ensure all screws are tightened securely but not overly tight, as this can damage the casing.
- Power on the laptop to confirm it is functioning correctly.
Pro Tip: To minimize future dust buildup, use your laptop on flat, clean surfaces and consider investing in a laptop cooling pad that improves airflow.
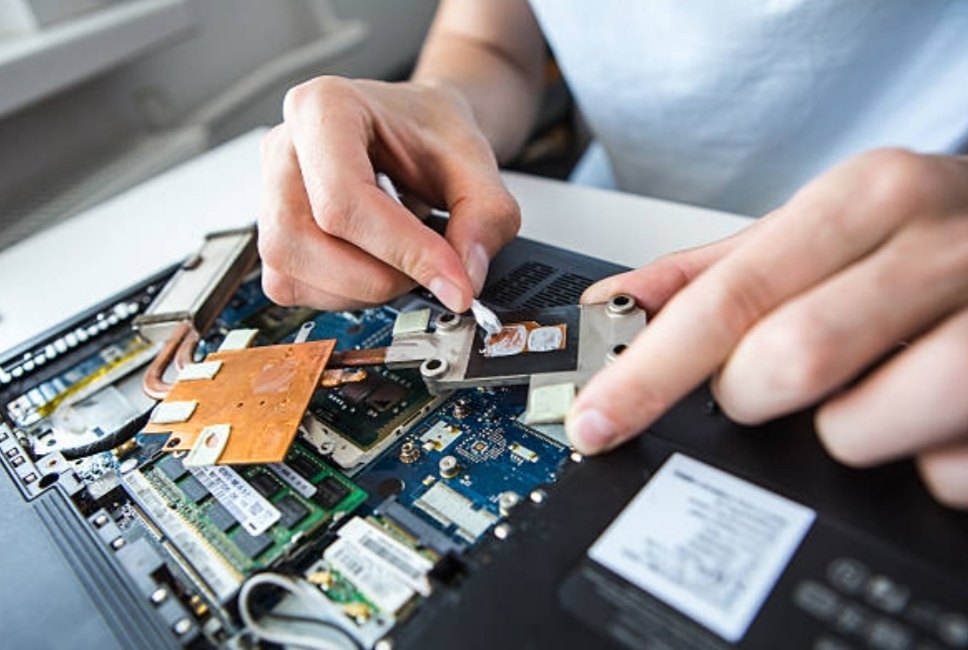
Checking and Replacing Thermal Paste
Thermal paste plays a critical role in maintaining the temperature of your laptop’s CPU and GPU.
Over time, thermal paste can dry out, reducing its effectiveness and causing the laptop to overheat.
Here’s a detailed guide on checking and replacing thermal paste:
- What Is Thermal Paste and Why Is It Important?
- Thermal paste, also known as thermal compound, is a material applied between the CPU or GPU and the heat sink. It improves heat transfer, allowing the heat sink to dissipate heat more efficiently.
- Signs that your thermal paste may need replacement include frequent overheating, fan noise, or reduced performance during high-demand tasks.
- Disassemble the Laptop
- As with dusting, start by turning off the laptop, unplugging it, and removing the battery if possible.
- Remove the bottom panel and locate the heat sink, which is typically attached to the CPU and GPU.
- Remove the Old Thermal Paste
- Carefully detach the heat sink from the CPU and GPU. Use isopropyl alcohol (90% or higher) and a lint-free cloth to clean the old thermal paste from both the heat sink and the processor.
- Be gentle to avoid scratching or damaging the components.
- Apply the New Thermal Paste
- Choose a high-quality thermal paste for the best results. Apply a small, pea-sized amount of thermal paste to the center of the CPU and GPU.
- Reattach the heat sink, allowing the pressure to spread the thermal paste evenly. Avoid applying too much thermal paste, as excess material can spill over and cause conductivity issues.
- Reassemble and Test
- Reassemble the laptop, ensuring all components are secured. Power on the laptop and monitor the temperature to confirm that the thermal paste is effectively reducing heat.
Quick Tip: Replacing thermal paste every 2–3 years is generally sufficient, but high-performance laptops or gaming laptops may require more frequent maintenance.
Why Internal Maintenance Matters
Proper internal maintenance extends the lifespan of your laptop, improves performance, and prevents costly repairs.
Dust buildup and degraded thermal paste are common causes of overheating, which can lead to hardware failure.
Regular cleaning and maintenance ensure your laptop runs smoothly and efficiently.
Want to protect your investment? Check out our recommended laptop maintenance kits!
By incorporating these essential internal maintenance steps into your routine, you’ll master how to clean your laptop like a pro. Take action today to keep your laptop in peak condition!
4. Software Maintenance
Keeping your laptop’s software in top shape is just as important as cleaning its physical components.
Software maintenance not only enhances your laptop’s performance but also ensures your system stays secure and up-to-date.
Whether you’re a casual user or a professional, these steps will help you master how to clean your laptop digitally and maintain it for long-term reliability.
Updating Operating System and Drivers
Keeping your operating system (OS) and drivers updated is essential for optimal laptop performance and security.
Updates provide the latest features, bug fixes, and protection against vulnerabilities. Here’s why and how you should prioritize software updates:
- Why Are Updates Important?
- Operating system updates fix security loopholes and protect your laptop from malware and cyberattacks.
- Driver updates improve compatibility between hardware and software, ensuring your laptop runs efficiently.
- Outdated software can lead to system crashes, slow performance, and even hardware malfunctions.
- How to Update Your Operating System
- For Windows Users:
- Open the Settings app by pressing Win + I.
- Navigate to Update & Security > Windows Update.
- Click Check for Updates and install any available updates. Restart your laptop if prompted.
- For Mac Users:
- Go to System Preferences > Software Update.
- Check for updates and click Update Now if available.
- Enable automatic updates to ensure your system always receives the latest patches without manual intervention.
- For Windows Users:
- How to Update Drivers
- Drivers are the software that allows your hardware to communicate with your operating system. Updating them regularly improves system stability and performance.
- For Windows:
- Open Device Manager by right-clicking the Start button.
- Expand the category for the hardware you want to update (e.g., Display Adapters).
- Right-click the hardware and select Update Driver. Choose Search automatically for updated driver software.
- For Macs:
- Drivers are typically updated through macOS updates, so ensuring macOS is up-to-date will also keep drivers current.
- Alternatively, visit the manufacturer’s website (e.g., NVIDIA, Intel, or Dell) to download and install the latest drivers for your device.
Pro Tip: Regularly updating drivers for your graphics card, network adapter, and chipset is crucial for gaming and multimedia laptops.
Regular Disk Cleanup and Defragmentation
Over time, your laptop accumulates temporary files, cache, and other unnecessary data that can slow it down.
Regular disk cleanup and defragmentation can free up storage space and optimize performance. Here’s a step-by-step guide:
- What Is Disk Cleanup and Why Is It Important?
- Disk cleanup removes junk files, such as temporary files, system cache, and items in the recycle bin, freeing up valuable storage space.
- Defragmentation reorganizes fragmented data on your hard drive, making it easier for the system to access files, resulting in faster performance. Note: SSDs do not require defragmentation.
- How to Perform Disk Cleanup
- On Windows:
- Type Disk Cleanup into the Start menu search bar and select the app.
- Choose the drive you want to clean (usually the C: drive).
- Select the file types to delete (e.g., Temporary Files, Recycle Bin, Thumbnails).
- Click OK, then confirm by clicking Delete Files.
- On Macs:
- Use Finder to locate and delete unnecessary files, such as downloads and old backups.
- Utilize Storage Management tools in macOS to optimize storage and remove clutter.
- On Windows:
- How to Defragment Your Hard Drive
- On Windows:
- Open the Defragment and Optimize Drives tool by typing it into the search bar.
- Select your hard drive and click Optimize.
- Allow the process to complete; it may take some time for heavily fragmented drives.
- On Macs:
- macOS automatically handles disk optimization for most users.
- On Windows:
Pro Tip: Use third-party tools like CCleaner for advanced cleanup and maintenance.
Managing Startup Programs
One of the simplest ways to boost your laptop’s speed and reduce boot time is by managing startup programs. These are the applications that automatically launch when your system starts. Here’s how to control them effectively:
- Why Manage Startup Programs?
- Too many startup programs can slow down your laptop’s boot time and consume system resources unnecessarily.
- Removing unneeded programs ensures a faster startup and improved overall performance.
- How to Disable Startup Programs
- On Windows:
- Open the Task Manager by pressing Ctrl + Shift + Esc.
- Click the Startup tab to view a list of programs that launch at startup.
- Select a program and click Disable if it’s unnecessary. Common culprits include messaging apps, cloud storage tools, and third-party utilities.
- On Macs:
- Go to System Preferences > Users & Groups.
- Select your user account and click the Login Items tab.
- Highlight a program you don’t need at startup and click the – button to remove it.
- On Windows:
- Which Programs Should You Keep?
- Essential programs include antivirus software, system utilities, and device-specific drivers.
- Disable non-essential applications such as Spotify, Skype, or Adobe Update Manager.
Pro Tip: Use tools like Autoruns for Windows to get an in-depth view of startup programs and services.
Why Software Maintenance Matters
Regular software maintenance not only improves your laptop’s speed and performance but also extends its lifespan.
Keeping your system clean and optimized ensures smooth multitasking, faster response times, and protection against security threats.
Take charge of your laptop’s performance today! Download our recommended tools to keep your laptop running like new!
By following these software maintenance tips, you’ll gain a comprehensive understanding of how to clean your laptop inside and out.
5. Battery Care
Taking proper care of your laptop’s battery is essential to maintaining its longevity and performance.
Batteries naturally degrade over time, but with the right practices, you can significantly slow down this process.
This section provides actionable tips on how to clean your laptop usage habits, specifically focusing on proper charging techniques and battery calibration for long-term health.
Proper Charging Practices
One of the most important aspects of maintaining a laptop battery is adopting proper charging habits.
By following these practices, you can extend your battery’s lifespan and ensure it performs efficiently for years to come:
- Avoid Constant Full Discharges
- Draining your laptop battery to 0% regularly can shorten its lifespan. Lithium-ion batteries, which are commonly used in laptops, perform best when they’re kept between 20% and 80%.
- Allowing the battery to drop below 20% occasionally is fine, but frequent full discharges cause unnecessary stress on the battery cells.
- Do Not Keep the Laptop Plugged in Continuously
- Leaving your laptop plugged in 24/7, especially after it reaches 100% charge, can lead to overheating and reduce the overall capacity of the battery over time.
- If you use your laptop as a desktop replacement, consider using it in “battery saver mode” or removing the battery (if possible) while the laptop is connected to AC power.
- Use Original Chargers
- Always use the manufacturer’s original charger or a certified replacement to charge your laptop. Third-party chargers may not provide the correct voltage or current, potentially damaging the battery.
- Check the power rating of your charger to ensure compatibility with your device.
- Enable Battery Saver Settings
- Modern laptops come with built-in battery management tools to help extend battery health.
- For Windows: Navigate to Settings > System > Power & Battery and enable “Battery Saver” mode when needed.
- For macOS: Go to System Preferences > Battery > Battery Health and enable optimized charging.
- Keep Your Laptop Cool
- Overheating is one of the biggest threats to battery health. Ensure proper ventilation and clean the vents regularly to prevent dust buildup.
- Avoid using your laptop on soft surfaces like beds or sofas, which can block airflow and cause the battery to overheat.
Pro Tip: Invest in a good quality cooling pad to maintain optimal laptop temperature during prolonged use.
Calibrating the Battery
Over time, your laptop’s battery may lose its ability to provide accurate charge readings.
Calibration ensures that your laptop’s operating system correctly displays the battery’s remaining capacity.
Here’s a step-by-step guide to recalibrate your laptop battery:
- What Is Battery Calibration and Why Is It Important?
- Calibration resets the battery’s monitoring system, ensuring it provides an accurate percentage of charge left.
- Without calibration, your laptop may shut down unexpectedly or display incorrect charge levels.
- Steps to Recalibrate Your Laptop Battery
- Step 1: Fully Charge Your Battery
- Plug in your laptop and charge it to 100%. Leave it connected for an additional 2–3 hours to ensure the battery is fully saturated.
- Step 2: Discharge the Battery Completely
- Disconnect the charger and use your laptop normally until the battery drains completely and the laptop powers off. Save your work as the battery nears 0%.
- Step 3: Leave It Off for a Few Hours
- Let the laptop rest for at least 5 hours to allow the battery to fully discharge and cool down.
- Step 4: Recharge Without Interruption
- Plug your laptop back in and charge it to 100% without turning it on. Ensure there are no interruptions during the charging process.
- Once fully charged, your battery should now display accurate charge levels.
- Step 1: Fully Charge Your Battery
- How Often Should You Calibrate?
- It’s recommended to calibrate your laptop battery every 2–3 months if you frequently rely on battery power.
- If you primarily use your laptop while plugged in, calibration may be needed less frequently.
Pro Tip: Some modern laptops come with built-in tools for calibration. Check your manufacturer’s support website for instructions tailored to your device.
Final Thoughts on Battery Care
Proper battery care is crucial for ensuring your laptop remains reliable and efficient.
By adopting the charging practices mentioned above and regularly calibrating your battery, you can prevent unexpected shutdowns, extend your battery’s lifespan, and maintain optimal performance.
Ready to keep your laptop running like new? Explore our recommended battery care accessories!
Remember, taking care of your laptop’s battery is an essential step in learning how to clean your laptop and maintain it effectively for years to come.
Follow these tips today for worry-free laptop performance!
6. Safe Usage and Storage
To ensure your laptop remains in top condition, adopting safe usage and proper storage practices is critical.
Laptops are delicate machines that can easily be damaged by improper handling or environmental factors.
This section provides detailed tips for avoiding overheating and protecting your laptop against physical damage.
By following these guidelines, you can extend your device’s lifespan and ensure it operates smoothly for years to come.
Avoiding Overheating
Overheating is one of the leading causes of laptop performance issues and long-term hardware damage.
Maintaining proper temperatures is crucial for ensuring optimal performance and extending the lifespan of your device. Here’s how to prevent overheating effectively:
- Use Your Laptop on Hard, Flat Surfaces
- Soft surfaces like beds, sofas, or carpets can block ventilation ports, preventing airflow and causing your laptop to overheat.
- Always place your laptop on a hard, flat surface such as a desk or a laptop cooling stand to ensure proper ventilation.
- Keep the Vents Clear
- Dust and debris can accumulate in the air vents, reducing airflow and causing the internal components to heat up.
- Make a habit of cleaning your laptop regularly. Use compressed air to blow out dust from the vents and fans. This is an essential part of how to clean your laptop for optimal cooling.
- Avoid Using the Laptop in Hot Environments
- Extreme temperatures, especially heat, can severely impact your laptop’s performance. Avoid exposing your device to direct sunlight, near heating appliances, or in poorly ventilated rooms.
- If you’re using your laptop outdoors, make sure it’s shaded and away from heat sources.
- Monitor and Control Internal Temperatures
- Install temperature-monitoring software like HWMonitor or Core Temp to keep an eye on your CPU and GPU temperatures.
- If you notice the temperatures climbing too high, close unnecessary applications to reduce strain on the system.
- Invest in a Laptop Cooling Pad
- A cooling pad is an external accessory that provides additional airflow to keep your laptop cool. It’s especially useful for gaming or heavy workloads that put extra strain on the CPU and GPU.
- Update Thermal Paste When Needed
- Over time, the thermal paste on your laptop’s CPU and GPU may dry out, reducing its effectiveness in transferring heat.
- Replacing the thermal paste every 2–3 years can significantly improve cooling performance.
Pro Tip: Schedule regular cleaning sessions and use cooling accessories to ensure your laptop stays cool and performs efficiently.
Protecting Against Physical Damage
Laptops are portable, making them prone to physical damage during daily use or transportation.
Protecting your laptop against bumps, scratches, and drops is essential for maintaining its durability and functionality.
Follow these tips to safeguard your device:
- Use a Protective Case or Sleeve
- A high-quality laptop case or sleeve provides an extra layer of protection against scratches, minor bumps, and accidental spills.
- Choose a case that fits your laptop snugly and includes shock-absorbing padding for added safety.
- Be Mindful During Transport
- Always use a padded laptop bag or backpack with a dedicated compartment for your laptop.
- Avoid placing heavy items on top of your laptop while it’s in a bag, as this can damage the screen or internal components.
- Handle with Care
- Avoid carrying your laptop by the screen or lid, as this can strain the hinges and lead to damage over time. Always hold the laptop by its base.
- When opening or closing the lid, use both hands to ensure even pressure on the hinges.
- Keep Food and Drinks Away
- Spills are a leading cause of laptop damage. Avoid eating or drinking near your laptop, and always keep liquids at a safe distance.
- If a spill does occur, immediately turn off your laptop, unplug it, and consult a professional for cleaning and repairs.
- Avoid Stacking Items on Your Laptop
- Placing heavy objects on your closed laptop can cause pressure damage to the screen and keyboard.
- Store your laptop on a clear, clutter-free surface when not in use.
- Protect the Screen
- Use a screen protector to guard against scratches, fingerprints, and smudges.
- Clean the screen gently using a microfiber cloth and an appropriate screen-cleaning solution. Avoid pressing too hard, as this can damage the display.
- Secure Your Laptop When Traveling
- If you’re flying or commuting, secure your laptop with a TSA-approved lock or anti-theft bag to prevent theft or loss.
- Never check your laptop in luggage. Keep it in your carry-on bag to minimize the risk of damage.
Final Thoughts on Safe Usage and Storage
By following these safe usage and storage practices, you can prevent common problems like overheating and physical damage.
These small but impactful habits will ensure your laptop stays reliable, durable, and efficient over its lifespan.
Ready to protect your laptop like a pro? Explore our top-rated laptop accessories today!
Incorporating these tips into your daily routine is just as essential as learning how to clean your laptop.
When combined, these maintenance practices create a comprehensive approach to laptop care, helping you maximize your investment and avoid costly repairs.
7. Regular Maintenance Schedule
A regular maintenance schedule is the backbone of keeping your laptop in pristine condition.
Just like any other device, laptops require consistent care to maintain their performance, extend their lifespan, and avoid unnecessary breakdowns.
Setting up a structured maintenance routine ensures that all components—from hardware to software—are running smoothly.
This section will guide you through creating a cleaning routine with specific tasks and recommended frequencies.
These actionable steps will help you maintain your laptop and keep it functioning like new.
Creating a Cleaning Routine
To maintain your laptop’s optimal performance, you need to follow a structured cleaning routine that targets both the exterior and internal components.
Cleaning your laptop regularly prevents dust buildup, keeps the system cool, and ensures that both the hardware and software operate efficiently.
Let’s break down the ideal cleaning schedule:
Daily Maintenance Tasks
- Wipe Down the Exterior
- Use a soft, lint-free microfiber cloth to gently wipe the laptop’s exterior.
- Pay special attention to areas like the palm rest and keyboard, where oils and fingerprints accumulate quickly.
- Avoid using harsh cleaning agents that can damage the surface. Instead, use a lightly dampened cloth for stubborn smudges.
- Close Unnecessary Applications
- Regularly shut down programs that you’re not actively using to free up system resources.
- This will help maintain your laptop’s speed and prevent unnecessary wear on components like the processor and RAM.
- Check for Updates
- Ensure your operating system, drivers, and antivirus software are up-to-date to maintain security and performance.
Weekly Maintenance Tasks
- Clean the Keyboard and Touchpad
- Use compressed air to blow out any dust and debris stuck between the keys.
- Wipe down the keys and touchpad with a slightly damp microfiber cloth.
- Inspect Ventilation Ports
- Check the air vents for visible dust buildup. If you notice any blockage, gently clean it using a can of compressed air.
- This simple step can prevent overheating and improve the efficiency of your laptop’s cooling system.
- Organize Files and Delete Junk
- Go through your downloads folder and delete unnecessary files.
- Organize your documents, images, and videos into specific folders to make finding them easier.
- This habit ensures your storage remains clutter-free, boosting system performance.
- Run a Malware Scan
- Use a trusted antivirus program to perform a quick scan for potential threats.
- Regular scans protect your laptop from viruses, ransomware, and other security risks.
Monthly Maintenance Tasks
- Deep Clean the Screen
- Dust, smudges, and fingerprints can obscure your screen and make it harder to read.
- Use a specialized screen cleaner or a mix of distilled water and isopropyl alcohol (in equal parts) to clean your display.
- Wipe the screen with a microfiber cloth in gentle, circular motions.
- Check Internal Storage
- Run a disk cleanup tool to remove temporary files, cache, and other unnecessary data that can slow down your system.
- For Windows users, tools like “Disk Cleanup” or third-party options like CCleaner work well.
- Defragment Your Hard Drive (HDD Users Only)
- If your laptop uses a traditional hard drive (HDD), defragmenting it once a month improves data access speed.
- For SSD users, this step isn’t necessary, as SSDs function differently and don’t require defragmentation.
- Back Up Your Data
- Use an external hard drive or a cloud storage service to back up important files.
- Regular backups ensure you don’t lose critical data in case of hardware failure.
Quarterly Maintenance Tasks
- Clean the Fans and Internal Components
- Dust buildup on internal components like the fans and motherboard can affect performance.
- Use compressed air to clean the internals or consider professional cleaning if you’re not comfortable opening the laptop.
- Calibrate the Battery
- If your laptop battery shows inaccurate charge levels, recalibrating it every three months can help.
- Fully charge the battery, then let it drain completely before recharging to 100%.
- Inspect Cables and Accessories
- Check your laptop’s charger, USB cables, and other accessories for wear and tear.
- Replace damaged cables to prevent potential hazards like short circuits.
Annual Maintenance Tasks
- Professional Servicing
- Take your laptop to a professional for an annual tune-up. This can include deep cleaning, thermal paste replacement, and hardware diagnostics.
- Professional servicing ensures your laptop is running at peak efficiency.
- Upgrade Components if Necessary
- Assess your laptop’s performance and consider upgrading components like RAM, storage, or even the battery if needed.
- Upgrading can give your laptop a significant performance boost without needing a full replacement.
The Importance of a Maintenance Schedule
Setting up and sticking to a maintenance schedule is essential for keeping your laptop functioning efficiently.
These regular tasks not only enhance the performance and speed of your device but also prevent costly repairs in the long run.
By following this comprehensive cleaning routine, you’ll also master how to clean your laptop effectively—both inside and out.
From daily care to annual servicing, each step plays a crucial role in maintaining your laptop’s longevity and reliability.
Ready to create your maintenance schedule? Get started with our recommended laptop cleaning tools today!
Remember, consistent care will save you time, money, and frustration while ensuring your laptop remains your trusted companion for years to come.
Conclusion of How to Clean Laptop
Taking consistent care of your laptop is not just about keeping it looking clean—it’s about ensuring optimal performance, extending its lifespan, and avoiding costly repairs.
By following the detailed maintenance strategies outlined in this guide, you’ll keep your laptop running smoothly for years to come.
In this section, we’ll recap the benefits of consistent laptop care and emphasize how a well-maintained laptop can lead to improved functionality and long-term reliability.
Benefits of Consistent Laptop Care
Regular cleaning and maintenance are investments in the health of your laptop.
Let’s break down the major benefits of adopting these habits and explain why they’re essential for every laptop user.
1. Enhanced Performance
A clean laptop is a high-performing laptop.
Dust buildup in internal components can lead to overheating, slower processing speeds, and even system crashes.
Regular cleaning of your laptop’s keyboard, fans, and vents ensures proper airflow and prevents your system from lagging.
- Why it matters: Dust-free vents and clean fans prevent overheating, which allows the processor, GPU, and other critical components to operate at their best.
- Pro Tip: If you’re wondering how to clean a laptop effectively, investing in tools like compressed air cans or specialized laptop cleaning kits can make the process simpler and safer.
2. Increased Longevity
Consistent maintenance significantly extends the lifespan of your device.
When you prevent wear and tear by regularly cleaning, updating, and inspecting your laptop, it reduces the chances of hardware failure.
- Why it matters: Replacing a laptop can be expensive, but simple steps like recalibrating the battery, clearing dust from internal components, and running software updates can delay the need for a new device.
- Quick Tip: Back up your data regularly to protect against unexpected issues, such as hardware failure or malware attacks.
3. Reduced Repair Costs
Neglecting laptop maintenance can lead to costly repairs down the line.
For instance, clogged vents can overheat your device, potentially causing irreparable damage to the motherboard or GPU.
A little preventative care can save hundreds of dollars in repair bills.
- Why it matters: Professional repairs are not only expensive but can also leave you without your device for days or even weeks. Simple DIY cleaning steps, like wiping down your screen and keeping your keyboard free of debris, prevent issues from escalating.
4. Improved Security and Stability
Beyond hardware, consistent maintenance also involves taking care of your laptop’s software.
Running antivirus scans, updating operating systems, and clearing unnecessary files are all part of good laptop hygiene.
- Why it matters: Outdated software and malware threats can compromise your data and put your personal information at risk. Regular maintenance ensures your laptop is stable, secure, and up to date.
- Actionable Step: Make it a habit to check for software updates weekly and run a full malware scan monthly.
5. Better Aesthetics and User Experience
A clean laptop isn’t just more functional—it’s also more pleasant to use.
Sticky keys, smudged screens, and dusty surfaces can make using your device frustrating.
Cleaning your laptop regularly ensures it feels fresh and responsive every time you use it.
- Why it matters: Cleanliness directly impacts how enjoyable your laptop is to use. From a spotless screen to debris-free keys, these small details make a big difference.
- Pro Tip: Use a microfiber cloth and an alcohol-free cleaner to gently wipe down your screen and keyboard for a polished look.
6. Contribution to Sustainability
Taking care of your laptop doesn’t just benefit you—it benefits the environment. Extending the life of your laptop reduces electronic waste, a significant environmental concern.
- Why it matters: Proper maintenance minimizes the need for premature replacements, helping you make eco-friendly choices.
- Call to Action: Commit to a regular maintenance schedule to reduce your carbon footprint while enjoying a reliable, long-lasting device.
How Regular Care Boosts Your Laptop’s Value
Your laptop is an investment. Whether you use it for work, school, or entertainment, keeping it in top condition ensures you get the most value for your money.
A well-maintained laptop retains its resale value better, runs smoother, and avoids costly downtime due to unexpected failures.
- By following the tips in this guide, you now know how to clean a laptop thoroughly, both inside and out.
- You’ve also learned that a little effort each day can save you from expensive repairs and frustration in the future.
Ready to Take Action?
Maintaining your laptop doesn’t have to be overwhelming.
Start with small steps like wiping down the screen, clearing vents, and organizing files. Build a regular routine that includes weekly, monthly, and quarterly tasks.
By making laptop care a habit, you’ll enjoy a smoother, faster, and more reliable experience every time you power it on.
[Explore our recommended laptop cleaning tools and kits now to get started!]
Your laptop deserves the best care—don’t wait for issues to arise. Take charge of your device’s performance and longevity today!
You might also like :