
Introduction 🖥️ Unlock the Power of a Dual Monitor Setup for Maximum Productivity
Ever feel like your laptop screen just isn’t big enough to get things done efficiently?
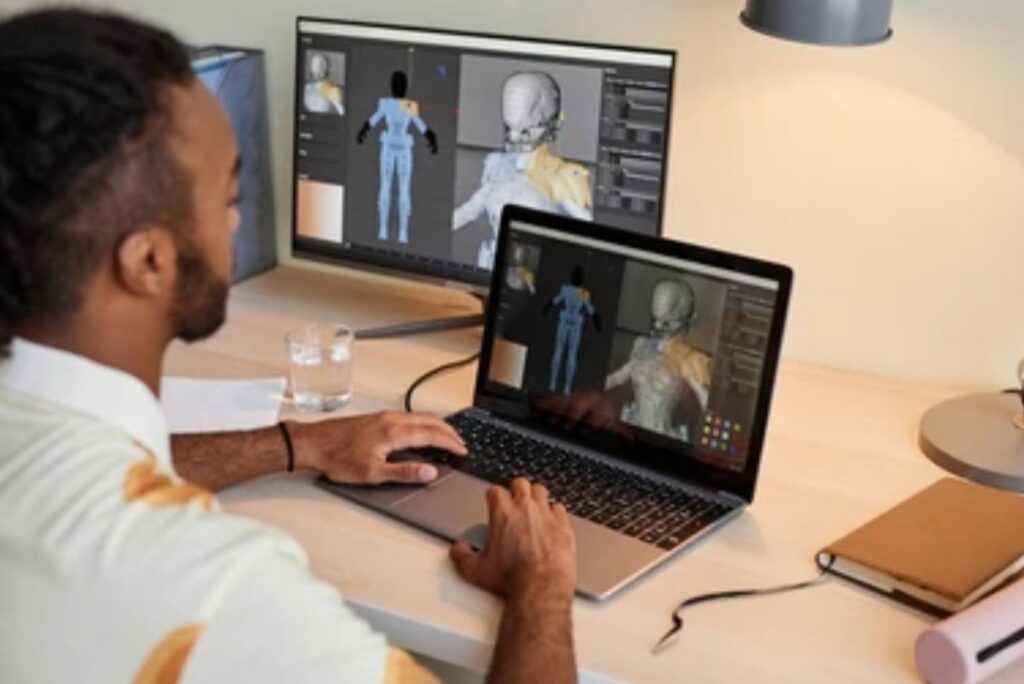
Whether you’re juggling spreadsheets, editing videos, designing graphics, or just need more room for multiple tabs, learning how to connect multiple monitors to laptop can completely revolutionize your workspace.
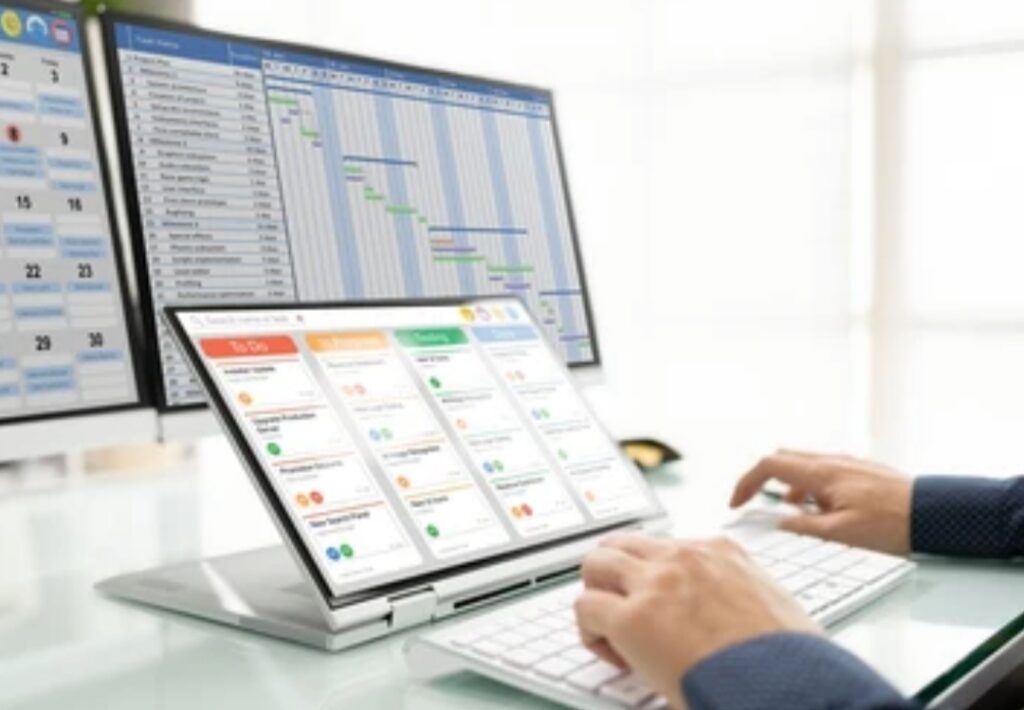
In today’s fast-paced digital environment, more professionals, students, content creators, and even gamers are embracing the dual monitor setup trend — and it’s not hard to see why.
Adding multiple displays to your Windows or Mac laptop can significantly boost your multitasking abilities, reduce time wasted in switching between tabs, and make your workflow feel smoother and more professional.
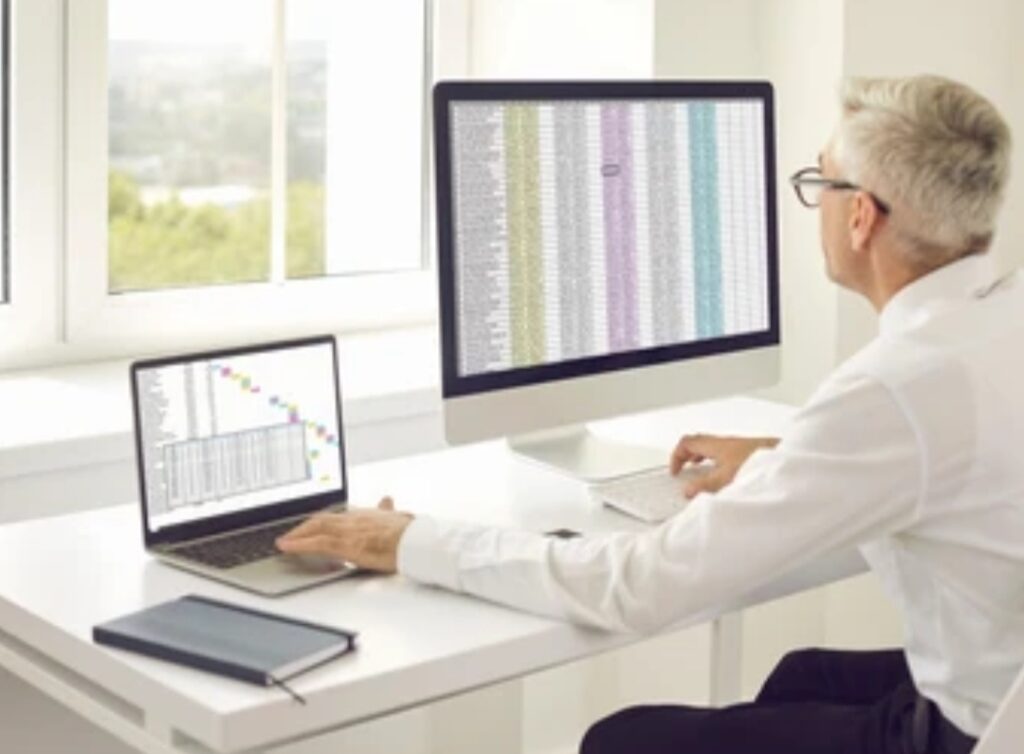
According to productivity studies, users with dual monitors are proven to complete tasks up to 42% faster compared to those working with a single screen.
So if you’re aiming for next-level efficiency, this guide is your go-to resource.
We’ll show you exactly how to connect multiple monitors to your laptop, explain all the tools you’ll need, offer OS-specific instructions for Windows and macOS, and include pro tips to optimize your screen space like a productivity ninja.

👀 Here’s what you’ll discover in this guide:
- The essential hardware and cables you need to connect additional monitors
- Step-by-step walkthroughs for dual monitor setups on both Windows and Mac
- Common troubleshooting tips for display issues
- Bonus productivity hacks using multiple displays
- Our top monitor accessory recommendations to supercharge your workspace
Whether you’re using a Windows laptop with USB-C, a MacBook Pro with Thunderbolt 4, or an older laptop with HDMI and VGA, this detailed, up-to-date guide will ensure you don’t waste time guessing or Googling outdated solutions.
It’s time to take control of your screen real estate and build a workspace that actually works for you.
Let’s dive into the world of multiple monitors and transform your laptop setup into a high-performance workstation 🚀
💥 Power Tip for Beginners
If you’re just starting out and wondering whether it’s even possible to connect more than one monitor to your laptop: YES — in most cases, it’s not only possible, but surprisingly easy!
All it takes is the right cable, a few clicks, and this powerful plug-and-play monitor dock.
Ready to stop tab-switching and start dominating your workflow?
👉 Scroll down and follow the step-by-step guide to unlock your perfect dual monitor setup!
What You Need Before Getting Started 🔌 Essential Requirements for a Dual Monitor Setup
Before jumping into how to connect multiple monitors to your laptop, it’s important to understand what you’ll need to make it work smoothly and efficiently.
Whether you’re using Windows or Mac, the core requirements are quite similar — but there are a few platform-specific differences you should know.
Let’s walk you through everything from hardware compatibility to adapter options, so you don’t waste time (or money) trying the wrong solution.
🧩 Check Your Laptop’s Video Output Ports
The very first step in setting up multiple displays on Windows/Mac is identifying what kind of video output ports your laptop supports.
Here are the most common ones to look for:
- HDMI – Most standard on mid-range laptops and TVs
- USB-C / Thunderbolt 3 or 4 – Found on newer laptops (especially MacBooks and high-end Windows ultrabooks)
- DisplayPort / Mini DisplayPort – Mostly used in business-class laptops
- VGA – Outdated, but still used on older laptops or projectors
Tip: On MacBooks, especially the M1 and M2 series, the number of supported external displays can be limited, even if you have multiple Thunderbolt ports. (We’ll cover this further in the Mac section.)
✅ Use a flashlight if needed to examine the side/back of your laptop — port labels are often hard to see.
🖥️ How Many Monitors Can Your Laptop Support?
Not all laptops are created equal when it comes to handling multiple external displays.
Some can only support one extra screen, while others (especially gaming or business laptops) can drive 2, 3, or even 4 monitors.
Here’s how to check:
- On Windows:
- Right-click on your desktop → Select Display settings
- Scroll down to see the Display configuration
- Click “Detect” to see how many monitors are supported
- Right-click on your desktop → Select Display settings
- On macOS:
- Click the Apple logo → System Settings > Displays
- Your connected displays will appear as boxes
- Click “Arrangement” to manage positioning
- Click the Apple logo → System Settings > Displays
You can also check your GPU (graphics card) specifications online to find out how many monitors it supports. Search “your laptop model external display support.”
💡 Pro Tip: If your laptop can’t natively support more than one monitor, consider using a DisplayLink USB adapter to bypass GPU limits.
🔌 Cables and Adapters You Might Need
Once you’ve identified your laptop’s output ports, the next step is getting the right cables and possibly adapters.
Here are the most common combinations:
| Laptop Port | Monitor Port | What You Need |
| HDMI | HDMI | HDMI cable |
| USB-C | HDMI/DisplayPort | USB-C to HDMI adapter or dock |
| Mini DisplayPort | HDMI | Mini DP to HDMI adapter |
| VGA | VGA | VGA cable (not recommended due to poor quality) |
🛑 Warning: HDMI to VGA adapters often do not work unless they are powered, due to analog-to-digital conversion.
For dual or triple monitor setups, many users opt for:
- USB-C docking stations with multiple video outputs
- Thunderbolt 3/4 docks for MacBooks and newer laptops
- Multi-monitor hubs designed to extend your laptop’s display support
⚙️ Software & Driver Requirements
Some docking stations and DisplayLink adapters require software drivers.
Before buying or connecting your accessories, check:
- For Windows: Update your graphics drivers via Device Manager
- For Mac: Make sure you’re on the latest version of macOS Ventura or Sonoma for better external display support
- If using DisplayLink, download their latest drivers from the official site
✅ Always restart your laptop after installing display-related drivers to avoid glitches.
🧠 Know Your Display Goals: Mirror vs. Extend
When connecting multiple monitors, it’s important to understand the two main display modes:
- Mirror Display: Shows the same screen across all monitors (ideal for presentations)
- Extend Display: Expands your desktop across all monitors (best for productivity and multitasking)
You’ll be able to switch between these modes once your monitors are connected — but knowing which one you prefer helps plan your cable and dock setup better.
🧰 Must-Have Accessories for a Hassle-Free Setup
These accessories can dramatically improve your setup and performance:
- ✅ USB-C docking station — best for multiple outputs, charging, and high-speed data
- ✅ Adjustable monitor stands — improve ergonomics and screen alignment
- ✅ Cable organizers — avoid messy desk setups
- ✅ External keyboard and mouse — give you freedom to position your laptop and screens more comfortably
- ✅ HDMI splitter or KVM switch (if sharing monitors between two systems)
💬 Quick Recap
To connect multiple monitors to your laptop, make sure you:
- ✔ Identify your output ports
- ✔ Confirm how many displays your laptop supports
- ✔ Get the right cables or adapters
- ✔ Install any required drivers or software
- ✔ Use a docking station or DisplayLink if needed
⚡ Don’t Buy the Wrong Adapter — Check Your Ports First!
👉 Before you grab that extra monitor, make sure your laptop can handle it.
Need help finding the right adapter? Check out our best-selling USB-C to HDMI adapters that are plug-and-play ready.
How to Set Up Dual Monitors on Windows 🖥️ + 🖥️ (Complete Step-by-Step Tutorial)
If you’re a Windows user wondering how to connect multiple monitors to your laptop, you’re in the right place.
Setting up a dual monitor setup on Windows is relatively simple — and the benefits are game-changing.
From video editing to coding to remote work, adding a second (or third) display can double your screen real estate, streamline multitasking, and reduce tab-switching stress.
Let’s walk through the exact steps to connect and configure multiple displays on Windows 10 and Windows 11 — along with some power-user tips and troubleshooting hacks.
This section covers both built-in options and advanced setups using docks, USB hubs, or adapters.

🔗 Step 1: Connect Your Monitors to the Laptop
Start by physically connecting your monitors to your laptop using the correct cables.
Use this checklist:
- ✅ Identify the right ports (HDMI, USB-C, DisplayPort, etc.)
- ✅ Use high-quality cables to prevent flickering or resolution issues
- ✅ For multiple monitors, use a USB-C docking station or DisplayLink adapter if your laptop has limited ports
💡 Tip: Plug in one monitor at a time to ensure Windows detects them correctly.
⚙️ Step 2: Open Display Settings on Windows
Once the monitors are connected, configure them:
➤ For Windows 11:
- Right-click on the desktop and select Display settings
- Scroll to “Multiple displays”
- Click “Detect” if one or more monitors don’t appear
- Under “Select and rearrange displays”, drag the screens to match their physical layout
➤ For Windows 10:
- Right-click on the desktop and choose Display settings
- You’ll see numbered boxes representing each display
- Drag and drop to match physical monitor positions
- Click “Identify” to see which number corresponds to which monitor
📐 Step 3: Choose Your Display Mode
Under Multiple displays, choose your preferred screen behavior:
- Duplicate – Same content on both screens (ideal for presentations)
- Extend – Spread your desktop across both screens (best for productivity)
- Second screen only – Use only the external monitor
✅ For a true dual monitor experience, always select “Extend these displays.”
🎛️ Step 4: Adjust Resolution & Scaling
Windows allows per-monitor customization:
- Choose each display and set its resolution, scaling (DPI), and refresh rate
- For Full HD monitors, set resolution to 1920×1080
- For 4K displays, adjust scaling to 150%–200% to prevent text and icons from appearing tiny
- Refresh rate (60Hz or 120Hz) can be adjusted for smoother visuals if supported
💡 Pro Tip: Go to Advanced display settings to manage refresh rates and color profiles individually.
🖱️ Step 5: Rearranging Monitors for Seamless Navigation
Drag the monitor thumbnails to match the physical layout of your screens.
If your second monitor is physically placed on the right, drag its icon to the right side.
✅ This prevents your mouse from jumping across in an awkward direction.
⏱️ Quick Setup Shortcuts for Faster Access
Use these Windows keyboard shortcuts to quickly toggle display modes:
- Windows + P: Open quick display switch menu
- PC screen only
- Duplicate
- Extend
- Second screen only
- PC screen only
- Ctrl + Windows + Left/Right: Snap windows across monitors
- Windows + Shift + Left/Right Arrow: Move a window from one screen to another
🧰 Common Issues & How to Fix Them on Windows
Issue 1: Monitor not detected
✔ Solution: Click “Detect” under display settings, or check cables and power connection.
Issue 2: Blurry or scaled display
✔ Solution: Adjust scaling settings under Display > Scale and Layout
Issue 3: Screen flickering or not displaying full resolution
✔ Solution: Update display drivers via Device Manager > Display adapters
Issue 4: Laptop only supports one monitor
✔ Solution: Use a DisplayLink adapter or multi-monitor docking station to bypass GPU limitations.
📊 Bonus Tip: Save Display Profiles for Multi-Location Setups
If you regularly move between home and office, you can save and auto-load display settings with tools like:
- DisplayFusion (advanced multi-monitor management)
- Windows Layout Manager (for automatic arrangement)
🛠️ Recommended Tools for Windows Multi-Display Management
| Tool | Description |
| DisplayFusion | Best for multi-monitor taskbars, wallpapers, and layouts |
| PowerToys (by Microsoft) | Adds snapping zones for precise window placement |
| Actual Multiple Monitors | Mirror displays, lock cursors, add desktop profiles |
🔥 Ready to Supercharge Your Windows Productivity?
💡 Don’t settle for tab chaos and tiny screen limitations.
Grab a trusted dual-monitor dock for Windows and build a powerful workspace now!
How to Set Up Multiple Displays on Mac 🍏 (MacBook, iMac, and macOS Ventura/Sonoma)
If you’re using a MacBook or iMac and wondering how to connect multiple monitors to your laptop, this guide is for you.
Setting up multiple displays on a Mac can greatly boost your productivity — allowing you to run multiple apps, manage creative workflows, and enjoy better screen space for multitasking.
However, Apple’s approach to multi-monitor setups has some limitations (especially on M1 and M2 Macs), so it’s important to follow the right method depending on your device and macOS version.
Let’s break it down step by step.
🧩 Step 1: Identify Your Mac’s Model and Supported Display Configuration
Not all Macs support the same number of external monitors.
✅ First, check your Mac model and chip type:
- Click the Apple logo → About This Mac → View your model and chip
Then check Apple’s official support page or use this quick reference:
| Mac Model | Supported External Displays |
| MacBook Air M1 (2020) | 1 external monitor only (natively) |
| MacBook Pro M1 (2020) | 1 external monitor only (natively) |
| Mac Mini M1 (2020) | 2 displays (1 HDMI + 1 Thunderbolt) |
| MacBook Pro M1 Pro/Max | 2–4 displays (varies by chip) |
| MacBook Air M2 | 1 display (native) or more with DisplayLink |
| Mac Studio M1 Ultra | Up to 5 displays |
| Intel-based Macs | Typically 2–3 monitors supported |
❗Important Note: Even if your Mac has two Thunderbolt ports, M1/M2 models may only support one external display without DisplayLink dock or hub.
🔌 Step 2: Connect the Monitors to Your Mac
Depending on your Mac, use one of the following ports:
- Thunderbolt 3/4 (USB-C) – Common in MacBooks (use USB-C to HDMI/DP adapters)
- HDMI – Available on newer MacBook Pro and Mac Mini models
- Mini DisplayPort – Older iMacs and MacBooks
✅ Use high-quality adapters or docks to avoid signal loss, flickering, or sleep/wake issues.
🛠 Recommended accessories:
- Anker USB-C Hub with HDMI
- CalDigit TS4 Thunderbolt Dock
- DisplayLink docks for bypassing M1/M2 limitations
💡 Mac users should avoid cheap USB-C to HDMI splitters — they often mirror displays rather than extending them.
🖥️ Step 3: Open Display Settings on macOS Ventura or Sonoma
Once you plug in your external displays, macOS will usually detect them instantly.
To configure:
- Click Apple logo → System Settings
- Select Displays in the left sidebar
- You’ll see visual representations of your monitors
- Drag monitors to match their physical layout
✅ If a monitor doesn’t appear:
- Click “Detect Displays” (hold Option key to reveal it)
- Restart your Mac or check your cables/dock
⚙️ Step 4: Choose Mirror or Extend Mode
macOS allows you to either mirror your display (same content on each screen) or extend (expand desktop across monitors).
To configure:
- Open System Settings > Displays
- Under “Arrangement,” uncheck Mirror Displays to use extend mode
- Drag the white bar (menu bar) to the screen you want as your primary display
💡 This is helpful when using a MacBook alongside one or two larger external monitors.
🎛️ Step 5: Adjust Display Resolution and Scaling
Macs automatically optimize resolution for Retina or non-Retina displays.
But you can tweak:
- Go to System Settings > Displays
- Choose each monitor → Select Default for display or Scaled
- You can also adjust refresh rate if the display supports it (great for 120Hz+ monitors)
✅ Use apps like Display Menu (free on Mac App Store) to access more advanced options.
🚀 Enable Multi-Display Support on M1/M2 Macs (Bypassing Limits)
Apple Silicon (M1/M2) has native display limits, but you can still connect 2 or more monitors using DisplayLink.
Here’s how:
- Buy a DisplayLink-compatible docking station
- Download DisplayLink Manager from the official website
- Install and grant Screen Recording permission in System Settings > Privacy & Security
- Plug monitors into the dock — they’ll be recognized as extended displays
🟢 Works seamlessly on:
- MacBook Air M1/M2
- MacBook Pro M1
🔴 Note: Not all third-party docks support DisplayLink, so choose trusted brands like Plugable, Anker, or CalDigit.
🔥 Bonus macOS Tools for Multiple Displays
- BetterDisplay – Advanced scaling, mirroring, and rotation tools
- Magnet – Snap windows into grids across monitors
- SwitchResX – Custom resolutions and refresh rate control
- Display Menu – One-click resolution switching
🧰 Troubleshooting Multi-Monitor Setup on Mac
Problem 1: External display not detected
✔ Solution: Hold Option key and click Detect Displays
Problem 2: Screens mirror instead of extend
✔ Solution: Uncheck Mirror Displays in Arrangement tab
Problem 3: Only one external display works on M1/M2 Mac
✔ Solution: Use DisplayLink Docking Station to bypass limitations
Problem 4: Resolution too low
✔ Solution: Use Scaled mode or third-party apps like BetterDisplay
💬 Quick Recap for Mac Users
- ✅ Most Intel Macs support 2+ displays
- ✅ M1/M2 models need DisplayLink for multiple monitors
- ✅ Use System Settings > Displays to configure layout, scaling, and arrangement
- ✅ USB-C docks or Thunderbolt hubs make setup clean and flexible
⚡ Don’t Let Apple’s Limits Hold You Back
🚀 Unlock full multi-monitor power on Mac with a DisplayLink dock or Thunderbolt hub that works flawlessly with M1/M2 chips.
Make your Mac workspace smarter, cleaner, and more productive — starting today!
Best Docking Stations and Adapters for Multi-Monitor Setups 🔌
When learning how to connect multiple monitors to your laptop, one of the most crucial components is having the right hardware — specifically a high-performance docking station or adapter that enables a seamless dual monitor setup or even more screens.
Not all laptops have multiple video output ports. That’s where these essential multi-display accessories come in.
Whether you’re on Windows or Mac, using a docking station makes your setup cleaner, faster, and future-proof.
Below is a carefully curated list of the best-performing docks and adapters for 2025, compatible with USB-C, Thunderbolt, HDMI, DisplayPort, and DisplayLink technology.

🥇 1. CalDigit TS4 Thunderbolt 4 Dock Top Premium Choice
If you’re looking for maximum power, flexibility, and professional-grade quality — this is it.
Key Features:
- 18 ports including 3 x Thunderbolt 4, 2 x DisplayPort 1.4
- Supports dual 4K displays at 60Hz or single 8K output
- Works flawlessly with MacBook M1/M2/M3, Windows laptops
- 98W charging for laptops
- Super stable — zero flicker, lag, or dropouts
🟢 Perfect for: Developers, designers, and power users
🥈 2. Plugable UD-6950H USB 3.0 Dual 4K Docking Station Best for M1/M2 MacBooks
This DisplayLink-powered dock lets you connect two external monitors to any M1/M2 Mac, even when the Mac only supports one display natively.
Key Features:
- 2 x HDMI + 2 x DisplayPort
- Supports dual 4K at 60Hz
- 6 x USB 3.0 ports, Ethernet, Audio in/out
- DisplayLink driver enables extended display mode on M1/M2 Macs
🟢 Best choice for M1 Mac users who need multiple screens
🥉 3. Anker 575 USB-C Docking Station Affordable & Reliable for Dual Monitors
If you’re on a budget but still want a quality dual monitor setup, Anker has your back.
Key Features:
- Dual HDMI ports (4K 30Hz max), USB-C charging
- Compatible with Windows and newer Macs
- SD card reader, 2 x USB 3.0, Ethernet
- Compact and portable design
🟢 Great for students, remote workers, and casual users
🔄 4. DisplayLink Adapters (Plug-and-Play Solutions)
If you don’t want a full dock, you can opt for DisplayLink USB adapters that convert a single USB-A or USB-C port into an HDMI or DisplayPort output.
Top Picks:
- StarTech USB-C to Dual HDMI Adapter
- WAVLINK USB 3.0 to HDMI Video Graphics Adapter
Why DisplayLink Rocks:
- Bypasses native GPU limits (especially for M1/M2 Macs)
- Easy setup with driver download
- Ideal for adding 2nd or 3rd monitor without upgrading laptop
⚡ Pro Tips When Choosing a Docking Station
✅ Check your laptop’s ports
Not all USB-C ports support video — look for Thunderbolt or DP Alt Mode compatibility.
✅ Know your display resolution needs
Some docks support only 1080p, while others handle dual 4K or 8K.
✅ Power Delivery (PD)
Ensure the dock can charge your laptop while in use (e.g. 85W–100W PD for most modern laptops).
✅ macOS vs. Windows compatibility
Some docks behave differently across operating systems — always check brand support notes.
✅ Avoid cheap clones
No-name or generic hubs often overheat, glitch, or fail with multiple displays.
🔥 Upgrade Your Workspace with the Right Docking Station Today!
💡 Don’t let limited ports hold you back.
Unlock the power of multiple displays with a top-rated docking station that supports all your productivity needs.
➡️ Click here to get yours now and transform your desk into a multitasking powerhouse!
Tips to Optimize Your Dual Monitor Setup for Maximum Productivity 🚀
So, you’ve successfully figured out how to connect multiple monitors to your laptop — congrats!
But now comes the real game-changer: how do you use a dual monitor setup to actually improve your workflow, efficiency, and productivity?
Many users simply plug in a second screen without optimizing their workspace, resulting in clutter, confusion, and inefficiency.
This section will show you exactly how to master your multi-display setup — from layout strategies to software hacks and ergonomic tricks.
Whether you’re on Windows or macOS, these tips will transform your setup from good to jaw-dropping.

🖥️ Arrange Monitors for Comfort and Functionality
Screen placement matters — a lot.
How you position your monitors can either help you focus or leave you with neck strain and poor posture.
📌 Best Practices:
- Keep your primary screen directly in front of you.
- Place the secondary screen slightly angled on your dominant-hand side.
- Make sure the top of the monitor is at or just below eye level.
- Distance between eyes and screen should be 18–28 inches for most users.
🔧 On Windows:
Right-click desktop → Display Settings → Rearrange monitors
🍏 On Mac:
System Settings → Displays → Drag monitors to reflect your physical layout
💡 Pro Tip: Use a monitor arm for precise adjustments and to free up desk space.
🔀 Use Extended Display Instead of Mirroring
Mirroring just duplicates your main display — which doesn’t help much.
✅ Use Extend Mode to expand your desktop across both monitors:
- Open Display Settings (Windows) or System Settings > Displays (Mac)
- Uncheck Mirror Displays
- Drag windows and apps freely between screens
💥 You now have double the screen space — ideal for multitasking, comparing data, or running creative software.
⌨️ Assign Specific Tasks to Each Screen
Want to maximize productivity with your dual monitor setup?
Here’s a proven layout workflow:
🔹 Primary Monitor
- Main work apps (e.g. Google Docs, Photoshop, Excel, Final Cut)
🔹 Secondary Monitor
- Reference material (e.g. YouTube tutorials, research tabs, Slack, Zoom)
📚 Writers & coders: Keep writing on one screen, source material or code preview on the other.
🎬 Video editors: Timeline on one monitor, full preview on the other.
🧩 Use Virtual Desktops or Task View
🔄 On Windows:
- Use Task View (Win + Tab) → Add new desktops
- Assign different tasks/apps to each desktop across monitors
🍏 On Mac:
- Swipe up with 3 fingers → Create new Spaces on each monitor
- Use Mission Control to manage them easily
✅ This reduces screen clutter and helps you focus on one project at a time.
📦 Organize with Window Management Tools
Having multiple monitors can get messy — unless you organize your windows like a pro.
🛠️ Best Tools for Windows:
- Microsoft PowerToys → FancyZones
- DisplayFusion (advanced monitor control)
🛠️ Best Tools for Mac:
- Magnet (drag & snap windows)
- Moom or Rectangle (custom grid layouts)
💡 These apps help you quickly resize and position apps into productivity-boosting zones.
🎯 Calibrate Displays for Color Accuracy
If you work in design, video, or photography — color consistency is crucial.
🎨 Use built-in calibration tools:
- Windows: Control Panel → Color Management → Calibrate Display
- Mac: System Settings → Displays → Color Profile → Calibrate
For best results, invest in a hardware color calibrator like Datacolor SpyderX.
⚡ Power Productivity with Keyboard Shortcuts
⌨️ Mastering keyboard shortcuts saves time across multiple displays:
🪟 Windows Shortcuts:
- Win + Shift + Left/Right Arrow: Move windows between monitors
- Win + P: Quick toggle between display modes
- Ctrl + Win + D: New virtual desktop
🍏 Mac Shortcuts:
- Control + Arrow Keys: Switch Spaces
- Command + F1: Toggle mirroring on/off
- Command + Tab: Quick app switch between displays
📴 Reduce Distractions on the Secondary Screen
If your second screen becomes a distraction (social media, YouTube, etc.), it kills productivity.
✅ Use tools like:
- Cold Turkey (blocks apps/sites on Windows)
- Focus App (blocks distractions on Mac)
- Display Blackout Software — dims unused monitors temporarily
🛡️ Maintain Performance and Reduce Lag
A dual-monitor setup can eat up system resources.
🧹 Tips to keep things running smooth:
- Use monitors with matching resolution and refresh rates
- Update your graphics drivers
- Upgrade RAM if your laptop stutters
- Close background apps that hog GPU/CPU
💡 Gaming or creative work? Use a laptop cooling pad to prevent thermal throttling.
💼 Use Your Setup to Create Zones: Work, Meeting, and Play
Use each screen for a separate “mode”:
📈 Work Zone: Projects, data, content creation
📞 Meeting Zone: Video calls, chats, browser
🎮 Play Zone: YouTube, music, gaming
By compartmentalizing your screen real estate, you stay mentally organized and reduce fatigue.
🚀 Get the Most Out of Every Inch of Screen Space
Stop wasting your second screen!
Turn your dual monitor setup into a productivity beast with these optimization tips, apps, and layout strategies.
👉 Upgrade your workspace now to feel the difference in your focus, efficiency, and results!
Common Problems When Connecting Multiple Monitors and How to Fix Them 🔧
Even if you’ve figured out how to connect multiple monitors to your laptop, it doesn’t always go smoothly.
Sometimes, one display won’t turn on. Other times, the second monitor is detected but stays black, or you’re stuck with the wrong resolution or screen flickering issues.
Whether you’re on Windows or Mac, this section addresses the most common problems with dual monitor setups and shows you how to fix them — fast.
Use this troubleshooting guide to save hours of frustration and get your multiple displays working flawlessly.
❌ Problem #1: Second Monitor Not Detected
🛠️ Fix:
- Check the cables first – Loose or faulty HDMI/DisplayPort/USB-C cables are a common cause. Try switching cables.
- Restart your laptop and plug in the monitors again after boot.
- On Windows:
- Right-click Desktop → Display Settings → Click “Detect”
- Right-click Desktop → Display Settings → Click “Detect”
- On Mac:
- Go to System Settings → Displays → Click “Detect Displays”
- Go to System Settings → Displays → Click “Detect Displays”
💡 If your laptop supports only one external display natively (common in M1 MacBooks), use a DisplayLink adapter to bypass this limit.
🔄 Problem #2: Screen Flickering or Resolution Issues
🛠️ Fix:
- Ensure your display cables are high quality and support the required resolution/refresh rate.
- Go to:
- Windows: Display Settings → Advanced Display Settings → Match resolution/refresh rate
- Mac: System Settings → Displays → Set resolution manually
- Windows: Display Settings → Advanced Display Settings → Match resolution/refresh rate
- Update GPU drivers:
- Windows: Device Manager → Display Adapters → Right-click → Update Driver
- Mac: Ensure you’re on the latest macOS version
- Windows: Device Manager → Display Adapters → Right-click → Update Driver
📌 Pro Tip: Use monitors with similar resolution and refresh rates to avoid sync issues.
📉 Problem #3: External Monitor Keeps Disconnecting
🛠️ Fix:
- Disable power-saving features on both laptop and display.
- On Windows:
- Control Panel → Power Options → Disable USB selective suspend
- Device Manager → USB Root Hub → Disable “Allow the computer to turn off this device”
- Control Panel → Power Options → Disable USB selective suspend
- Use a powered docking station instead of a basic USB hub.
⚠️ Cheap adapters and non-certified USB-C hubs often cause random disconnects — invest in quality docking stations.
🔒 Problem #4: DisplayLink Not Working on M1/M2 Mac
🛠️ Fix:
- Download the latest DisplayLink Manager from the official website.
- Go to System Settings → Privacy & Security → Enable Screen Recording for DisplayLink
- Reboot and reconnect
🚨 Without these steps, DisplayLink won’t work properly on macOS Ventura and newer.
🚫 Problem #5: One Monitor Stuck on Low Resolution
🛠️ Fix:
- Update your graphics driver
- Try a different cable (some HDMI/DP cables don’t support high resolutions)
- Use Display Settings or Third-Party Monitor Control Apps to force resolution override
- On Mac: Use SwitchResX to unlock full resolution options
🧭 Problem #6: Cursor or Windows Getting “Lost” Between Monitors
🛠️ Fix:
- Rearrange monitor layout in Display Settings to match physical position
- Use distinct wallpapers or wallpapers that stretch across screens for easy visual tracking
- Enable “Snap Windows” feature in Windows or install window snapping apps on Mac
⚙️ Problem #7: Mac Only Detects One External Monitor
🛠️ Fix:
- Native M1 and M2 MacBooks only support one monitor by default
- Bypass this with a DisplayLink-enabled docking station or adapter
- Check for dock compatibility with your Mac chipset
🧠 Many users are unaware of this Apple limitation — this is one of the top reasons their dual monitor setup fails.
✅ Quick Troubleshooting Checklist:
- ✅ Use high-quality, certified cables and adapters
- ✅ Restart your laptop with the monitors already connected
- ✅ Match display refresh rates and resolutions
- ✅ Check for OS and GPU driver updates
- ✅ Use DisplayLink docks for M1/M2 MacBooks
- ✅ Don’t use cheap USB hubs — always go with tested dock stations
⚡ Don’t Let Tech Glitches Slow You Down!
💡 Fixing your multiple monitor issues doesn’t have to be hard.
With the right tools and knowledge, you can overcome any challenge and unlock the full power of your dual monitor setup.
➡️ Get a reliable dock or adapter now to eliminate these common issues and boost productivity without interruption.
FAQs: Everything You Need to Know About Multi-Monitor Setups 💡
Whether you’re working remotely, gaming, editing videos, or just boosting your day-to-day productivity, using multiple monitors on your laptop can be a total game-changer.
But if you still have questions about compatibility, limitations, or how to get the best results, you’re not alone.
Below are the most frequently asked questions about dual monitor setups and multiple displays on Windows/Mac — all answered clearly and accurately for 2025 and beyond.

🔌 Can I connect two monitors to any laptop?
Yes, but it depends on your laptop’s hardware and operating system.
✅ Most modern Windows and macOS laptops support at least one external monitor.
💻 However, some older laptops or entry-level models may only support one display through HDMI or USB-C.
🔌 To connect two monitors, you may need:
- A USB-C hub with HDMI/DP outputs
- A docking station
- A DisplayLink adapter (especially for MacBooks with M1/M2 chips)
📌 Check your laptop’s specifications or graphics card capability to confirm multi-display support.
🖥️ What type of cable do I need to connect multiple monitors?
It depends on your laptop and the monitor’s input ports.
Common cables include:
- HDMI to HDMI (most universal)
- USB-C to HDMI/DP (for newer laptops)
- DisplayPort to DisplayPort
- Mini DisplayPort to HDMI
- Thunderbolt docks or hubs (Mac)
💡 Pro Tip: For best performance, use high-speed HDMI 2.1 or DisplayPort 1.4 cables to support higher refresh rates and resolutions (4K+).
💻 How do I use dual monitors with a MacBook?
Here’s how to set up multiple displays on a Mac:
- Connect your monitor using USB-C, HDMI, or via a docking station.
- Go to System Settings > Displays
- Click on “Arrange” to position your displays.
- Uncheck “Mirror Displays” to extend your screen.
🚨 M1/M2 MacBooks only support one external display natively.
✅ To bypass this, use a DisplayLink docking station with proper driver installation.
🪟 How do I set up multiple monitors on Windows 10 or Windows 11?
- Connect your monitors via HDMI, USB-C, or DisplayPort.
- Right-click on Desktop → Display Settings
- Click “Detect” if your second monitor isn’t showing.
- Choose “Extend these displays” for multi-monitor support.
- Rearrange the displays to match your physical layout.
🎯 Windows allows you to tweak resolution, orientation, and identify each display directly from this settings panel.
🧠 Will dual monitors slow down my laptop?
Not necessarily, but it depends on your system’s specs.
🔍 Potential performance issues may occur if:
- You’re using intensive applications (video editing, 3D rendering) on both screens
- Your laptop has limited RAM or GPU power
- You’re using outdated graphics drivers
💡 Solutions:
- Upgrade to 16GB+ RAM
- Close unused apps
- Use discrete GPU laptops for heavy workloads
🎨 Can I use different resolutions on each monitor?
Yes. Windows and macOS allow each monitor to run at its own resolution and refresh rate.
However:
- Large resolution differences may cause cursor lag or display glitches.
- It’s best to use monitors with similar specs for smoother transitions between screens.
🔁 Can I mirror one display while extending another?
In general, you can either extend or mirror, but not mix both modes across different screens — unless you’re using third-party apps.
⚙️ Some advanced setups (especially with DisplayLink docks) allow for partial mirroring with extending.
🧩 Can I connect more than 2 monitors to my laptop?
Yes, but it depends on your GPU and ports.
Modern laptops with dedicated GPUs can support 3 or more monitors with:
- Multiple HDMI/DP outputs
- A powered docking station
- DisplayLink adapters
🛡️ Is it safe to run my laptop with multiple monitors 8+ hours a day?
Absolutely.
As long as your laptop has adequate cooling, you can safely run multi-monitors full-time.
🔥 Tips:
- Use a cooling pad
- Elevate your laptop for better airflow
- Clean fans regularly
💸 Do I need expensive monitors for dual setups?
No. You can start with budget-friendly 1080p monitors.
But if you’re into:
- Video editing → Go for color-calibrated IPS panels
- Coding or spreadsheets → Consider ultrawide or 4K monitors
- Gaming → Look for high refresh rate displays
💡 Always choose monitors with VESA mount compatibility if you plan to use monitor arms.
✅ Bonus Quick Answers:
Q: How do I connect two monitors to my laptop?
A: Use HDMI, DisplayPort, or USB-C ports. If your laptop lacks enough ports, use a docking station or DisplayLink adapter.
Q: Can I connect 3 monitors to my laptop?
A: Yes, with a discrete GPU and a multi-display dock or adapter.
Q: Is dual monitor setup worth it?
A: Absolutely — it boosts productivity, enhances multitasking, and improves workflow across all industries.
🎯 Ready to Maximize Your Screen Real Estate?
Don’t just stop at a single screen.
Unleash your laptop’s full potential with a powerful dual or multi-monitor setup that enhances your creativity, efficiency, and multitasking like never before.
👉 Grab your ideal monitor or docking station now and create your ultimate workspace today!
Final Thoughts: Create a High-Performance Laptop Workspace in 2025 🔥
As we move deeper into the era of remote work, digital productivity, and creative multitasking, knowing how to connect multiple monitors to your laptop isn’t just a tech skill — it’s a game-changing advantage.
A proper dual monitor setup (or even triple displays!) can drastically improve how you work, think, and create.
Whether you’re a:
- Remote worker needing multiple tabs open
- Designer managing layers and previews
- Gamer streaming and chatting at once
- Student juggling assignments and lectures
- Business owner analyzing spreadsheets across screens…
➡️ More screen space = More productivity. Period.

Why You Should Set Up Multiple Displays Now (If You Haven’t Already)
Here’s what you gain:
- 🔁 Seamless multitasking — No more window flipping
- 🧠 Mental clarity — Keep work and reference side-by-side
- 🖥️ Better presentations — One screen for sharing, one for notes
- 🎮 Enhanced experiences — Separate gaming, streaming, chat
- 📊 Improved workflows — Especially for coders, editors, and analysts
In today’s fast-paced, screen-dominant world, every pixel matters.
Why work in cramped conditions when your laptop is capable of much more?
Action Steps to Take Right Now
🔧 Whether you’re on Windows or Mac, here’s your checklist:
✅ Confirm your laptop’s multi-display support
✅ Get the right cables or a docking station
✅ Arrange your monitors correctly in settings
✅ Troubleshoot using our common fix guide
✅ Add monitor arms, hubs, or mounts for ergonomics
Don’t wait until you’re overwhelmed by tabs, tools, and toggles.
🎯 Supercharge Your Productivity Today
👉 Ready to stop wasting time switching between windows?
💡 Set up your dual monitor workspace today and feel the difference from Day One.
➡️ Grab the best docking station, monitor, or adapter here to future-proof your workspace.
🔥 Go from cluttered to laser-focused, from frustrated to flawlessly efficient.
✅ Let’s Recap:
- Connecting multiple monitors to a laptop is easy with the right setup
- Mac and Windows both support dual/multi-display workflows
- Docking stations, adapters, and proper cables are your best friends
- Troubleshooting display issues is simple with the right guide (like this one!)
- The benefits are massive: better workflow, faster task switching, and improved performance
Multiple displays aren’t a luxury anymore. They’re a necessity.
🏁 Final Word:
Don’t just use your laptop — optimize it.
In 2025, screen real estate is digital gold.
Whether you’re leveling up your home office, gaming rig, or creative studio, adding more monitors will revolutionize the way you work and think.
💥 Make your laptop a productivity powerhouse — starting now.
🧠 Want More?
If you found this guide helpful:
- ✅ Bookmark it
- ✅ Share it with your productivity squad
- ✅ Explore our top picks for best docking stations and monitor arms here
You might also like :