Understanding Your Smartphone Camera’s Capabilities

The Myth of Megapixels: Why More Isn’t Always Better
When shopping for a smartphone, many people focus on megapixels, assuming that a higher number equals better photo quality.
However, this is one of the most common misconceptions in mobile photography.
While megapixels play a role in determining image resolution, they are not the sole factor in producing high-quality photos.
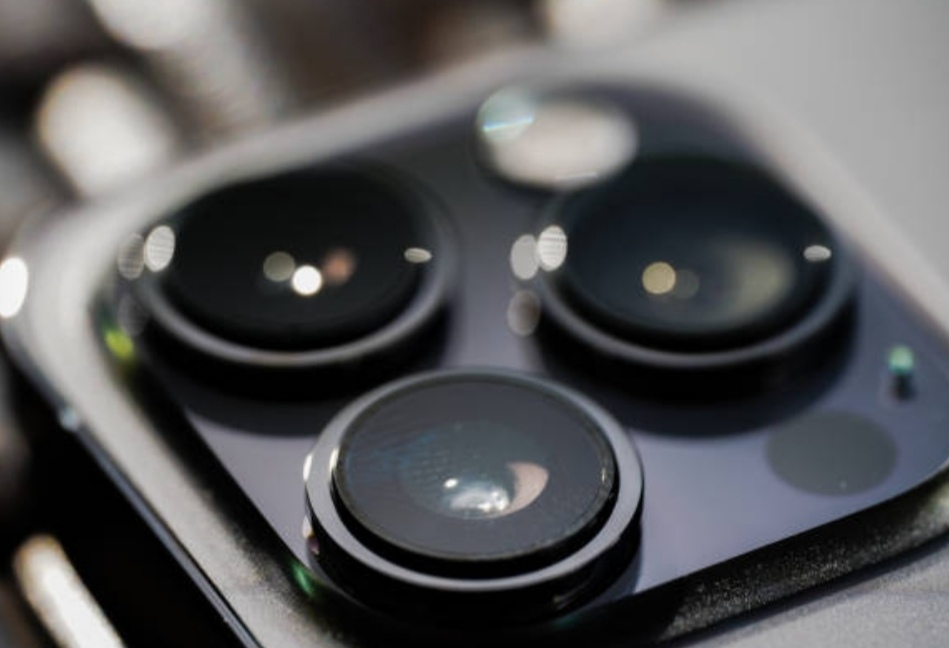
A megapixel represents one million pixels in an image. Smartphones with 48MP, 64MP, or even 108MP cameras might sound impressive, but having more megapixels primarily increases the image’s size and detail.
What truly matters is the quality of those pixels, which depends on factors like sensor size, lens construction, and image processing.
For example, a smartphone with a 12MP camera and a large sensor can produce sharper, clearer images than a 108MP camera with a small sensor.
This is because larger sensors capture more light, leading to better performance in low-light conditions and enhanced dynamic range.
Low-light performance is one of the critical factors to consider if you want to learn how to improve smartphone camera quality.
Why Small Sensors Limit Image Quality
Many smartphones prioritize slim designs, which restrict the size of their camera sensors.
A smaller sensor results in smaller pixels, which limits the amount of light each pixel can capture.
This causes increased noise, especially in low-light environments.
To address this issue, manufacturers often rely on computational photography techniques, such as pixel binning.
Pixel binning combines multiple smaller pixels into one larger pixel to improve light sensitivity.
For instance, a 48MP camera might group pixels to create a 12MP image with greater clarity and brightness.
This method enhances photos but cannot replace the benefits of having a physically larger sensor.
The Role of Lenses in Image Clarity
Another factor that significantly influences image quality is the lens used in smartphone cameras.
The lens focuses light onto the sensor, and its quality determines how sharp and accurate your photos will be.
Smartphones with high-quality lenses produce less distortion and better edge-to-edge clarity.
A camera’s aperture, measured in f-stops (e.g., f/1.8 or f/2.2), also plays a vital role.
A wider aperture (lower f-number) allows more light to enter the lens, improving performance in dim conditions.
When selecting a smartphone, prioritize models with both large sensors and wide-aperture lenses for superior results.
Image Processing: The Hidden Key to Great Photos
Modern smartphones rely heavily on image processing powered by artificial intelligence (AI) to enhance photos automatically. Features like HDR (High Dynamic Range), Night Mode, and Portrait Mode combine multiple exposures, adjust lighting, and refine details to create polished images.
Even if a smartphone has fewer megapixels, advanced image processing can make a huge difference.
For instance, brands like Google and Apple use AI algorithms to optimize color accuracy, reduce noise, and improve focus.
This is why devices like the Google Pixel or iPhone consistently outperform competitors in photography tests despite having fewer megapixels.
Focus on the Bigger Picture, Not Just Megapixels
If you’re wondering how to improve smartphone camera quality, the takeaway here is simple: don’t obsess over megapixels.
Instead, pay attention to other critical components like sensor size, lens quality, and image processing capabilities. These factors collectively determine the overall quality of your photos.
When purchasing a new smartphone or enhancing your photography skills, remember this golden rule: the best camera is the one you know how to use effectively.
Focus on mastering your device’s features, and you’ll see a noticeable improvement in your photos.
Ready to unlock the full potential of your smartphone camera? Explore our recommended tools and resources to elevate your photography today!
Mastering Camera Settings for Optimal Results
Utilizing Pro Mode for Manual Control
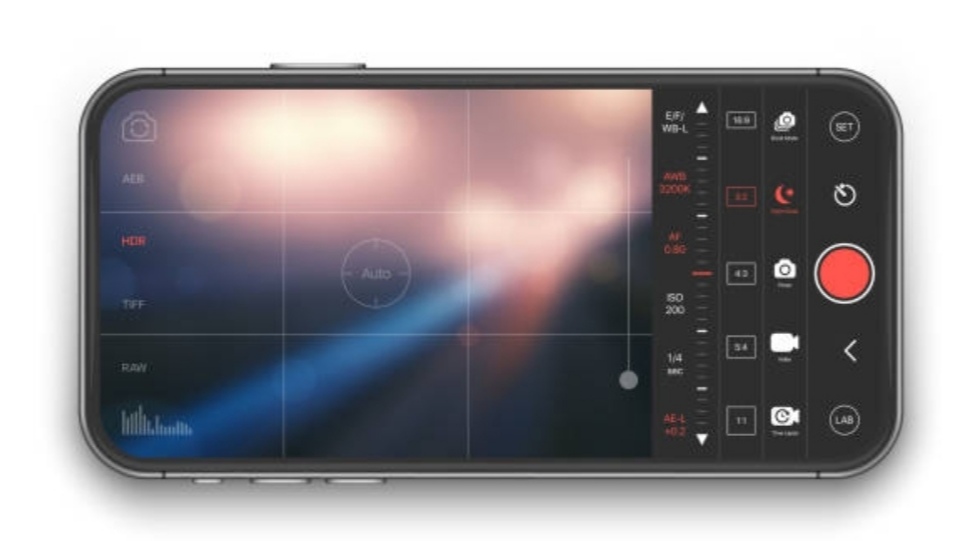
Most smartphone users rely on automatic camera modes to capture their images, but unlocking the full potential of your device’s camera requires exploring Pro Mode.
This feature gives you manual control over critical settings like ISO, shutter speed, white balance, and focus.
Learning how to fine-tune these parameters can dramatically improve the quality of your photos, especially in challenging lighting conditions.
ISO: Balancing Brightness and Noise
ISO controls your camera sensor’s sensitivity to light. In Pro Mode, you can manually adjust ISO to match your shooting environment.
A lower ISO (e.g., 100 or 200) is ideal for well-lit scenes as it minimizes noise and preserves image clarity.
Higher ISO settings (e.g., 800 or above) increase brightness in low-light conditions but can introduce grain or noise into your photos.
To achieve better results, combine higher ISO with proper lighting or a steady surface to reduce noise.
Shutter Speed: Capturing Motion and Light
Shutter speed refers to the amount of time your camera’s shutter remains open, controlling how much light hits the sensor.
A faster shutter speed (e.g., 1/1000) freezes motion, making it perfect for action shots or moving subjects.
Conversely, slower shutter speeds (e.g., 1/4 or longer) allow more light to enter, which is useful for low-light photography or creating motion blur effects like light trails.
To use slow shutter speeds effectively, stabilize your phone with a tripod to avoid camera shake.
White Balance: Achieving Accurate Colors
White balance adjusts the color temperature of your photos to make whites appear neutral, regardless of the lighting conditions.
Pro Mode allows you to manually select settings such as Tungsten, Fluorescent, Daylight, or Cloudy.
Experiment with these options to ensure your photos reflect true-to-life colors.
For a more creative approach, you can adjust the warmth or coolness to create unique atmospheres in your images.
Focus: Highlighting What Matters
Auto-focus is reliable for everyday photography, but manual focus gives you precision control, especially in macro or portrait shots.
With Pro Mode, you can fine-tune the focus to emphasize your subject and create stunning background blur (bokeh).
Use manual focus to ensure sharpness in intricate details, such as close-up shots of flowers or textures.
By mastering these Pro Mode settings, you’ll learn how to improve smartphone camera quality and take professional-grade photos with your device.
Don’t hesitate to practice in different lighting environments to fully understand how these controls interact with one another.
Leveraging HDR and Night Modes
Smartphone cameras often struggle in scenes with high contrast or low light, but features like High Dynamic Range (HDR) and Night Mode can bridge the gap between ordinary and extraordinary photos.
Learning when and how to use these modes is essential for capturing stunning images.
What Is HDR and When to Use It?
HDR, or High Dynamic Range, is a feature designed to enhance the details in both the brightest and darkest areas of a photo.
It works by taking multiple images at different exposures and combining them into a single, balanced photo.
This is especially useful in high-contrast situations, such as capturing sunsets, landscapes, or interiors with bright windows.
To use HDR effectively:
- Enable HDR in your camera settings or let your phone automatically activate it when needed.
- Keep your phone steady, as HDR takes multiple exposures and combines them.
- Use HDR sparingly for moving subjects, as it can cause blurring.
With HDR, you can avoid blown-out highlights or underexposed shadows, ensuring your photos are vibrant and well-detailed.
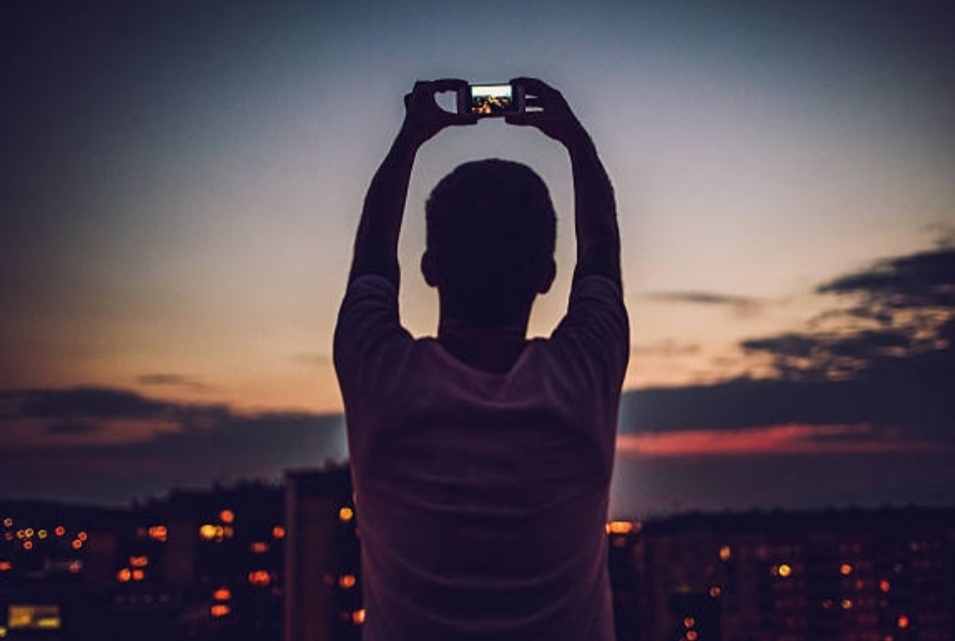
Night Mode: Illuminating Low-Light Scenes
Night Mode has revolutionized low-light photography on smartphones. Instead of producing grainy or dark images, Night Mode uses advanced algorithms and long-exposure techniques to brighten the scene while preserving details.
To get the most out of Night Mode:
- Hold your phone steady or use a tripod for sharper results.
- Avoid moving subjects, as Night Mode relies on long exposure to capture light.
- Use available light sources creatively, such as streetlights, candles, or neon signs.
Night Mode is particularly effective for cityscapes, indoor events, and nighttime portraits. With this feature, you can capture breathtaking images even in challenging lighting conditions.
Combining Pro Mode with HDR and Night Modes
While Pro Mode allows you to manually control settings, HDR and Night Modes handle complex adjustments automatically.
Experiment with all three to see what works best for specific scenarios.
For instance, use Pro Mode for creative control during daylight and Night Mode for low-light environments.
Why Practice Is Essential
The key to mastering these modes is practice.
Take time to explore your camera settings and test different scenarios.
With consistent effort, you’ll gain the confidence to adapt to any situation and elevate your photography skills.
Transform your photos today with these powerful techniques! Explore our recommended accessories like tripods and lens attachments to take your photography to the next level.
Composition Techniques to Elevate Your Photography
Creating compelling images is not just about having the best camera settings—it’s about how you compose your shots.
By applying tried-and-true composition techniques like the Rule of Thirds, framing, leading lines, and symmetry, you can elevate your photography to the next level.
These methods ensure your photos not only capture attention but also tell a story.
The Rule of Thirds and Framing
The Rule of Thirds: A Timeless Guide to Better Composition
The Rule of Thirds is a fundamental principle of photography.
It divides your frame into nine equal parts using two horizontal and two vertical lines.
The idea is to place your subject or focal points along these lines or at their intersections. This creates a more balanced and visually appealing image.
When you use the Rule of Thirds:
- Position Key Elements Off-Center: Place subjects like people, buildings, or landscapes at the intersecting points to draw attention naturally. For example, in a portrait, position the subject’s eyes at the upper third of the frame.
- Enhance Negative Space: Off-center compositions leave room for the background, adding depth and context to your photos.
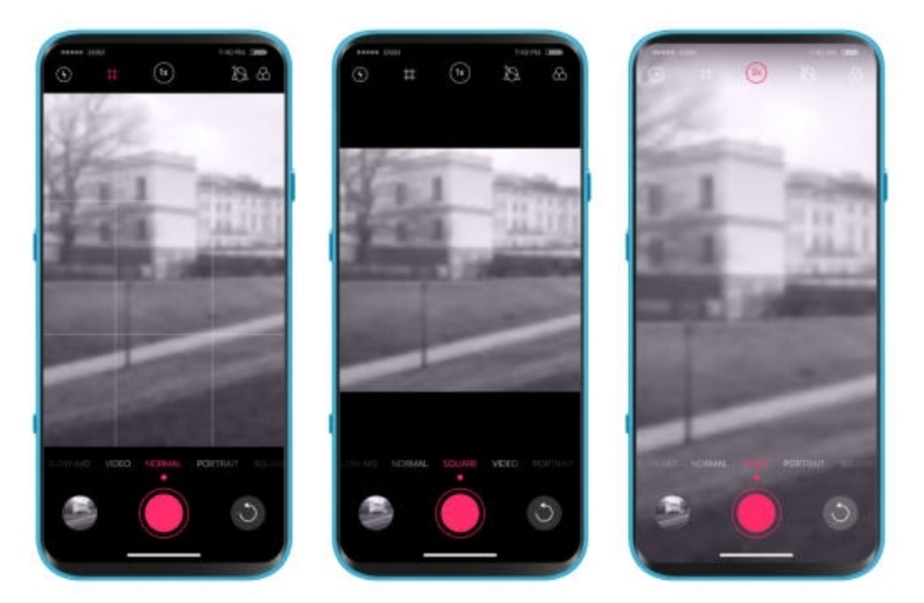
- Use Your Camera’s Grid Lines: Most smartphones include a grid feature. Activate it to easily align your shots with the Rule of Thirds.
By following this technique, you can avoid centering every subject, which often results in static and uninteresting photos.
The Rule of Thirds ensures dynamic, engaging compositions that instantly improve your smartphone camera quality.
Framing: Directing the Viewer’s Attention
Framing is another powerful technique to highlight your subject.
It involves using elements within the scene—such as windows, doorways, tree branches, or architectural structures—to “frame” your subject and guide the viewer’s eye.
Here’s how to use framing effectively:
- Look for Natural Frames: Use arches, fences, or even hands to create a boundary around your subject.
- Layer Your Shot: Incorporate objects in the foreground and background to add depth and interest.
- Focus on the Subject: Ensure that the framed subject remains sharp while the surrounding frame can be blurred for effect, especially when using portrait mode.
Framing not only makes your subject stand out but also creates a sense of context and storytelling in your image.
For example, framing a landscape through a cave opening or a bridge adds intrigue to an otherwise ordinary scene.

Leading Lines and Symmetry
Leading Lines: Guiding the Viewer’s Eye
Leading lines are visual cues within your photo that draw the viewer’s eye toward the main subject.
These lines can be anything—roads, pathways, rivers, or even patterns on walls.
By incorporating leading lines into your composition, you create a sense of direction and purpose in your photos.
To use leading lines effectively:
- Identify Natural Lines: Look for roads, railways, fences, or even shadows that converge toward your subject.
- Experiment with Angles: Capture leading lines from unique perspectives, such as a low angle, to make them more dramatic.
- Guide to the Subject: Always ensure the lines lead directly to your subject rather than away, as this keeps the focus intact.
For example, a photo of a person standing at the end of a pier uses the pier’s edges as leading lines to draw the viewer’s focus toward the subject.
Symmetry: Achieving Balance and Harmony
Symmetry involves creating balanced compositions where both halves of the image mirror each other.
It’s a technique that immediately catches attention and appeals to our sense of order and harmony.
Here’s how to create symmetry in your photos:
- Center Your Subject: Perfect symmetry often requires placing the subject at the exact center of the frame. This works particularly well for architectural shots or reflections.
- Use Reflections: Capture symmetrical reflections on water, glass, or polished surfaces for stunning results.
- Seek Patterns: Look for symmetrical patterns in nature, such as flowers or leaves, or in urban settings, like tiled floors or staircases.
Symmetry is especially impactful when combined with vibrant lighting or unique perspectives. It creates visually striking photos that stand out in a sea of ordinary images.
Combining Composition Techniques for Maximum Impact
Don’t limit yourself to just one technique at a time.
For instance, you can use the Rule of Thirds while incorporating leading lines to direct attention to your subject.
Similarly, framing can enhance symmetry by drawing attention to a perfectly balanced shot.
Why Composition Matters in Smartphone Photography
Mastering composition techniques is one of the easiest ways to improve smartphone camera quality without upgrading your device.
Thoughtful compositions elevate the visual storytelling of your photos, making them memorable and impactful.
Take your photography skills to new heights! Check out our recommended smartphone camera accessories, such as lens attachments and tripods, to capture even better shots.
Enhancing Photos with AI and Computational Photography
AI and computational photography are revolutionizing how we capture and edit images on smartphones.
These technologies leverage machine learning, advanced algorithms, and real-time processing to transform average photos into stunning works of art.
Below, we’ll explore how to maximize these tools to improve smartphone camera quality and take your photography skills to the next level.
Utilizing AI Features for Image Enhancement
What Are AI-Driven Features in Smartphone Cameras?
AI-driven features in smartphones are designed to optimize image quality automatically.
They analyze the scene, identify elements such as faces, objects, or backgrounds, and make adjustments in real time.
These features ensure that every photo is well-lit, sharp, and aesthetically pleasing, even in challenging conditions.
Examples of AI-Driven Features That Enhance Photos
- Google’s Magic Editor:
Google’s Magic Editor, available on Pixel devices, uses AI to retouch and enhance photos effortlessly. You can adjust lighting, remove unwanted objects, and reposition subjects within the frame—all with a few taps. This tool is particularly useful for fixing imperfections or editing photos after capturing them.
- Scene Optimization:
Most smartphones come with scene detection powered by AI. When you point your camera at a landscape, portrait, or night scene, the AI automatically selects the best settings for ISO, shutter speed, and white balance.
- Portrait Mode Enhancements:
AI helps create perfect portrait shots by separating the subject from the background and applying a natural-looking bokeh effect. Advanced AI even refines edges around hair or other intricate details, ensuring a professional look.
- Face and Eye Tracking:
AI algorithms ensure that faces and eyes remain sharp and well-focused, even in group photos or during movement.
How to Use AI Features Effectively to Improve Smartphone Camera Quality
- Enable Scene Optimization: Check your camera settings and turn on AI-based scene optimization. This feature works wonders for beginners who are unfamiliar with manual adjustments.
- Experiment with Magic Tools: Explore editing tools like Google’s Magic Editor or Apple’s Photo app enhancements to retouch and refine your images after taking them.
- Use AI to Fix Lighting Issues: If your photos are underexposed or overexposed, AI-driven HDR (High Dynamic Range) can adjust the contrast and brightness to balance the lighting across the frame.
- Test AI Filters and Modes: Many smartphones offer AI-powered filters that enhance colors and textures. Experiment with these filters to find the perfect look for your photos.
AI-driven features allow even novice photographers to create stunning images effortlessly, making them an essential tool for anyone looking to improve smartphone camera quality.
The Role of Computational Photography in Modern Smartphones
What Is Computational Photography?
Computational photography refers to the use of advanced algorithms and software to process and enhance images beyond what traditional optics can achieve.
Unlike conventional photography, where the quality relies solely on hardware like lenses and sensors, computational photography utilizes software to fill the gaps, enabling smartphones to produce DSLR-like results.
Key Computational Photography Techniques
- HDR (High Dynamic Range):
Computational photography combines multiple shots taken at different exposure levels to create one perfectly balanced image. HDR ensures that both shadows and highlights retain detail, even in high-contrast lighting conditions.
- Night Mode:
This feature uses long exposures and advanced algorithms to brighten low-light scenes without introducing noise. Multiple images are merged, and AI corrects any blurriness caused by hand movement.
- Super-Resolution:
Computational photography enhances image sharpness by combining data from multiple frames, resulting in higher resolution and clarity.
- Depth Mapping:
Using multiple cameras or sensors, smartphones create detailed depth maps for features like portrait mode, 3D imaging, or augmented reality (AR).
- Pixel Binning:
Many smartphones combine smaller pixels into larger ones to capture more light, resulting in better low-light performance and vibrant colors.
How Computational Photography Enhances Smartphone Camera Quality
- Improved Low-Light Performance: Night mode, powered by computational photography, captures bright and detailed images even in extremely dim environments.
- Sharper Details: Algorithms process and refine every pixel, ensuring maximum clarity in your photos.
- Enhanced Color Accuracy: Advanced computational techniques ensure colors appear vibrant yet natural, making your photos look realistic and appealing.
- Real-Time Processing: Features like AI-based image stabilization and noise reduction work in real time, ensuring that every photo looks polished as soon as you capture it.
Tips to Leverage Computational Photography
- Activate Night Mode: Use this feature for nighttime cityscapes or indoor shots with minimal lighting.
- Experiment with HDR Settings: Try HDR mode for landscapes or high-contrast scenes to bring out more detail.
- Capture Action Shots: Computational photography makes it easier to take sharp photos of moving subjects by reducing blur.
- Use Depth Effects: Explore depth modes for creative portrait photography with professional-looking background blur.
Why AI and Computational Photography Are Game-Changers
AI and computational photography bridge the gap between professional cameras and smartphones, enabling anyone to produce high-quality photos.
They simplify complex tasks like lighting adjustments, noise reduction, and image enhancement, making them accessible to users of all skill levels.
Unlock the full potential of your smartphone camera with recommended editing apps and accessories. Start creating pro-level photos today!
Post-Processing: Editing Your Photos Like a Pro
Editing your photos allows you to refine details, adjust lighting, and create a polished, eye-catching look.
Modern editing tools make it easy to enhance your photos, even if you’re a beginner. Below, we’ll dive into the best apps and essential techniques to fine-tune your images like a pro.

Essential Editing Tools and Apps
In today’s digital age, editing apps are more powerful than ever, offering a range of features that rival desktop software.
Whether you’re looking for simplicity or advanced functionality, there’s an app to suit your needs.
1. Adobe Lightroom (Mobile and Desktop)
Adobe Lightroom is a go-to app for both amateur and professional photographers. Its user-friendly interface and robust editing tools make it perfect for adjusting exposure, colors, and fine details. You can also use its Presets feature to apply professional-grade effects with a single tap. Lightroom is ideal for enhancing your images while maintaining their natural look.
2. Snapseed
Developed by Google, Snapseed is a free editing app that packs professional-level tools. Its Selective Adjustment Tool allows you to edit specific parts of your image without affecting the rest. Snapseed also offers filters, cropping, and advanced options like healing tools to remove unwanted elements from your photos.
3. VSCO
Known for its aesthetic filters, VSCO is a favorite among social media enthusiasts. In addition to its filters, VSCO provides tools to adjust exposure, contrast, and sharpness, helping you achieve a consistent, polished look.
4. Photoshop Express
Photoshop Express is a simplified version of Adobe Photoshop designed for mobile users. It includes tools for cropping, straightening, and removing blemishes, as well as pre-designed Quick Fix Filters for instant enhancement.
5. Afterlight
If you’re looking for creative overlays and textures, Afterlight is an excellent choice. It offers basic editing tools along with features like double exposure effects and light leaks, giving your photos a unique artistic touch.
6. Canva
While primarily known for design, Canva includes a powerful photo editor. It’s perfect for adding text overlays, creating collages, or applying filters to enhance your images.
Tips for Choosing the Right Editing App
- Consider Your Skill Level: Beginners may find Snapseed or VSCO easier to navigate, while advanced users may prefer Lightroom or Photoshop Express.
- Match the App to Your Goals: If you want quick edits, go for apps like VSCO or Snapseed. For more in-depth work, choose Lightroom or Photoshop Express.
- Experiment: Download a few apps and test their features to find one that suits your workflow.
Basic Editing Techniques: Exposure, Contrast, and Color Correction
Even the most advanced cameras can’t always capture perfect photos.
Post-processing allows you to make necessary adjustments to lighting, colors, and overall composition to elevate your images. Let’s break down these essential techniques step by step:
1. Adjusting Exposure
Exposure determines how light or dark your image appears. Proper exposure ensures that no details are lost in the shadows or highlights.
- How to Adjust:
Most apps include a brightness or exposure slider. Move the slider up to brighten the image or down to darken it. Be cautious not to overexpose, as it can make the photo look unnatural.
- Pro Tip: For photos with bright skies and dark foregrounds, use HDR mode during shooting to reduce the need for drastic exposure adjustments later.
2. Enhancing Contrast
Contrast adds depth to your image by making the dark areas darker and the light areas brighter.
- How to Adjust:
Locate the contrast slider in your editing app and make small adjustments to find the right balance. Too much contrast can make the photo look harsh, while too little can make it appear flat.
- Pro Tip: For portraits, keep the contrast subtle to maintain soft skin tones.
3. Perfecting Color Correction
Color correction ensures that the hues in your photo look natural and vibrant. This includes adjusting white balance, saturation, and vibrance.
- White Balance: Fixes color temperature. Warm up the photo by increasing the yellow tones or cool it down by adding blues.
- Saturation: Controls the intensity of colors. Be careful not to oversaturate, as it can make the photo look artificial.
- Vibrance: Affects muted colors while preserving skin tones. This is particularly useful for landscapes and travel photography.
- How to Adjust: Use the sliders for each setting in your chosen app. Many apps also offer Auto Color Correction to save time.
4. Cropping and Straightening
Framing your subject correctly is essential for a professional-looking photo.
- How to Crop: Use the cropping tool to remove distractions from the edges of the frame. Stick to standard aspect ratios like 4:3 or 16:9 for a polished look.
- Straightening: Ensure the horizon line is level by using the straightening tool available in most apps.
5. Sharpening and Noise Reduction
- Sharpening: Enhances the details in your photo, making it appear crisp and clear.
- Noise Reduction: Reduces graininess in low-light photos. Be careful not to overdo it, as excessive noise reduction can make the image look soft or smudged.
Tips for Effective Editing
- Work in Layers: Many apps, like Lightroom, allow you to save edits in layers. This lets you revert changes easily if needed.
- Start Small: Make subtle adjustments and gradually build up to avoid overediting.
- Save Copies: Always save the original image before making edits.
Ready to create stunning photos? Start editing with tools like Adobe Lightroom or Snapseed today and see the difference!
Why Post-Processing Matters
Editing is more than just a finishing touch—it’s a chance to bring your creative vision to life.
Whether you’re adjusting exposure, enhancing colors, or applying filters, post-processing can significantly improve smartphone camera quality, helping you achieve results that stand out.
Take your smartphone photography to the next level with recommended photo editing apps and tools. Your journey to professional-quality photos starts here!
Accessories to Boost Your Smartphone Photography
Accessories are essential for taking your smartphone photography to the next level.
They expand your camera’s capabilities, improve image quality, and help you achieve professional results.
Here are the must-have accessories and how they can make a difference in your photography.

External Lenses and Tripods
External lenses and tripods are among the most versatile tools you can add to your photography kit.
They can transform the way your smartphone captures images by improving clarity, stability, and field of view.
1. External Lenses: Expanding Your Perspective
External lenses attach directly to your smartphone’s camera, allowing you to experiment with different focal lengths and styles.
Here’s how they can improve your photos:
- Wide-Angle Lenses: Perfect for capturing landscapes, architecture, or group photos. A wide-angle lens increases your field of view, letting you include more in the frame.
- Macro Lenses: Ideal for close-up shots of tiny subjects like flowers, insects, or textures. Macro lenses reveal intricate details that are otherwise invisible to the naked eye.
- Telephoto Lenses: Great for zooming in on distant subjects without losing image quality. These lenses are a must-have for wildlife photography and portraits.
- Fisheye Lenses: These create a unique, ultra-wide-angle effect, ideal for creative and fun shots.
- Anamorphic Lenses: Designed for videography, these lenses create cinematic effects with a widescreen aspect ratio and lens flares.
Pro Tip: Look for high-quality external lenses that are compatible with your smartphone model. Brands like Moment, Olloclip, and Apexel offer excellent lens kits.
2. Tripods: Achieving Stability and Precision
A stable camera is essential for sharp, high-quality images. Tripods provide the stability you need for long exposure shots, low-light conditions, and videos.
- Benefits of Using a Tripod:
- Prevents camera shake for crisp, clear photos.
- Enables hands-free shooting, perfect for group photos or selfies.
- Essential for capturing long-exposure shots, such as light trails or star photography.
- Types of Tripods:
- Mini Tripods: Compact and portable, ideal for travel photography.
- Full-Size Tripods: Adjustable for height and angle, providing maximum stability.
- Flexible Tripods: Features bendable legs that can wrap around objects like tree branches or poles.
Pro Tip: Pair your tripod with a Bluetooth remote or timer to avoid touching your phone during the shot, which can cause vibrations.
Enhance your photos today with high-quality external lenses and compact, versatile tripods.
Lighting Equipment for Better Illumination
Lighting plays a crucial role in photography.
Poor lighting can result in grainy, dark, or flat images, while proper illumination can make your photos vibrant and professional.
External lighting tools can significantly improve your smartphone photography, especially in low-light conditions.
1. Portable LED Lights
Portable LED lights are small, lightweight, and easy to attach to your smartphone. They provide consistent and adjustable lighting for any situation.
- Ring Lights: These circular lights are perfect for portraits, selfies, and videos. They evenly illuminate your subject, reducing shadows and creating a flattering effect.
- Clip-On LED Lights: Compact and attachable to your phone, these lights are great for on-the-go photography.
- Continuous LED Panels: Larger and more powerful, these lights are ideal for product photography and videos.
Pro Tip: Look for LED lights with adjustable brightness and color temperature. This allows you to customize the lighting to match your environment or achieve creative effects.
2. External Flashes
While smartphone cameras have built-in flashes, they often produce harsh and unflattering light. External flashes provide better control and softer illumination.
- Benefits of External Flashes:
- Reduces harsh shadows for a more natural look.
- Improves lighting for portraits and indoor photography.
- Provides consistent lighting for fast-moving subjects.
Pro Tip: Use a diffuser with your flash to soften the light and create a more professional look.
3. Reflectors and Light Modifiers
Reflectors and light modifiers are inexpensive tools that can dramatically improve your photos by bouncing or diffusing light.
- Reflectors: Bounce light back onto your subject to reduce shadows. They come in various colors (white, silver, gold) to create different effects.
- Diffusers: Soften harsh light to create a natural, even glow.
Brighten your photos with portable LED lights and reflectors. Elevate your low-light photography today!
Tips for Choosing the Right Accessories
- Quality Over Quantity: Invest in high-quality accessories that deliver consistent results.
- Compatibility: Ensure the accessories are compatible with your smartphone model.
- Portability: Opt for lightweight and compact options if you plan to shoot on the go.
- Experiment: Don’t be afraid to try different tools to discover what works best for your style.
Ready to take your smartphone photography to the next level? Explore the best accessories like external lenses, tripods, and lighting solutions today!
Why Accessories Are Essential for Smartphone Photography
Adding the right accessories to your smartphone photography toolkit can make a world of difference.
Whether you’re shooting landscapes, portraits, or low-light scenes, these tools can help you achieve stunning results.
By incorporating external lenses, tripods, and lighting equipment, you’ll unlock new creative possibilities and truly enhance your smartphone camera quality.
Keeping Your Camera in Top Condition
Maintaining your smartphone camera is a crucial part of improving photo quality.
Regular upkeep ensures your camera operates at its best, producing sharp and vibrant images.
Here’s how you can care for your camera to achieve professional results every time.

Regular Cleaning and Maintenance
Keeping your camera lens clean and free from debris is one of the simplest yet most effective ways to enhance your smartphone’s camera quality.
A dirty lens can cause blurry or hazy images, even with the best camera settings.
1. Why Cleaning Matters
Dust, fingerprints, and smudges can accumulate on your camera lens over time.
These obstructions scatter light entering the lens, reducing the sharpness and clarity of your photos.
Regular cleaning ensures your lens remains free of these issues, resulting in crisp and detailed images.
Pro Tip: Always inspect your lens before taking photos, especially if you’re shooting outdoors or in dusty environments.
2. How to Clean Your Camera Lens
Follow these steps to safely clean your smartphone camera lens without causing scratches or damage:
- Use a Microfiber Cloth: A microfiber cloth is gentle on your lens and effectively removes smudges and fingerprints. Avoid using paper towels or your shirt, as they can scratch the lens.
- Lens Cleaning Solution: For stubborn smudges, apply a few drops of a camera-safe cleaning solution to the microfiber cloth. Never spray the solution directly onto the lens.
- Compressed Air: Use compressed air to blow away dust and debris from hard-to-reach areas. This is especially useful for cleaning around the edges of the lens.
- Lens Cleaning Pens: These tools feature a brush on one end and a cleaning pad on the other, making them perfect for detailed cleaning.
3. Preventing Lens Dirt and Scratches
- Use a Lens Protector: A lens protector is an affordable way to shield your camera lens from scratches and dirt.
- Avoid Touching the Lens: Handle your smartphone by the edges to minimize fingerprints on the lens.
- Store Your Phone Safely: Keep your phone in a protective case and avoid placing it face down on surfaces.
Protect your camera lens with high-quality lens protectors to ensure consistently sharp photos.
Software Updates and Firmware
Keeping your smartphone’s software and firmware updated is essential for maintaining optimal camera performance.
These updates often include bug fixes, performance improvements, and new features that can directly enhance your photography experience.
1. The Importance of Software Updates
Smartphone manufacturers frequently release software updates to improve camera functionality. These updates may include:
- Improved Image Processing: Enhanced algorithms for better color accuracy, sharpness, and noise reduction.
- New Features: Updates often introduce new camera modes, such as night mode, portrait enhancements, or slow-motion capabilities.
- Bug Fixes: Resolves issues that may affect your camera’s performance, such as lag or focus problems.
Pro Tip: Always enable automatic updates to ensure you’re using the latest version of your smartphone’s operating system.
2. How to Update Your Smartphone Camera Software
Updating your camera software is simple and ensures you’re benefiting from the latest advancements. Here’s how:
- Check for System Updates: Go to your phone’s settings and look for system updates. If an update is available, download and install it.
- Update Camera Apps: If you use third-party camera apps, regularly check for updates in your app store.
- Firmware Updates: Some smartphones allow you to update camera firmware separately. Check your device’s user manual for instructions.
Pro Tip: After installing an update, restart your phone to ensure the changes take effect.
3. Additional Tips for Optimizing Camera Performance
- Clear Cache: Over time, cached data can slow down your camera app. Clearing the cache improves speed and responsiveness.
- Free Up Storage Space: A full storage drive can cause your camera app to lag. Regularly delete unwanted photos or transfer them to cloud storage.
- Close Background Apps: Running too many apps simultaneously can drain your phone’s resources, affecting camera performance.
Stay ahead with the latest updates—learn how to keep your camera software up-to-date with step-by-step guides.
Why Maintenance is Key for Superior Photos
Neglecting your smartphone camera’s maintenance can lead to poor photo quality, even if you’re using the latest model.
By regularly cleaning your lens and updating your software, you’ll ensure your camera performs at its peak.
These small steps can make a significant difference in how to improve smartphone camera quality, delivering sharper, more vibrant images every time.
Quick Maintenance Checklist
- Clean your camera lens weekly using a microfiber cloth and lens-safe solution.
- Inspect your lens for scratches or dirt before taking photos.
- Install software and firmware updates as soon as they’re available.
- Clear cache and free up storage space regularly.
- Protect your lens with a high-quality protector.
Want stunning photos? Start with regular maintenance—explore top-rated cleaning kits and lens protectors today!
Staying Updated with the Latest Camera Innovations
Modern smartphones are equipped with cameras that rival professional DSLRs in many aspects.
From improved hardware to groundbreaking software, these advancements aim to provide users with tools for capturing stunning images effortlessly.
Staying informed about these innovations can significantly help you improve smartphone camera quality.

Exploring New Features in Recent Smartphone Releases
Smartphone manufacturers are in constant competition to offer the best camera experience.
Let’s take a closer look at some of the cutting-edge features introduced in the latest models.
1. Advanced AI-Powered Features
Artificial Intelligence (AI) plays a pivotal role in improving smartphone camera performance.
Recent smartphones are equipped with AI-driven capabilities that optimize settings based on the scene.
- Scene Recognition: AI algorithms can identify whether you’re shooting landscapes, portraits, or food and automatically adjust settings for the best results.
- Smart HDR: High Dynamic Range is enhanced with AI to produce images with balanced highlights and shadows, even in challenging lighting conditions.
- Portrait Mode Refinement: AI now delivers more accurate edge detection, ensuring better subject separation from the background for stunning bokeh effects.
Pro Tip: Enable AI features on your smartphone camera for effortless enhancements tailored to your subject.
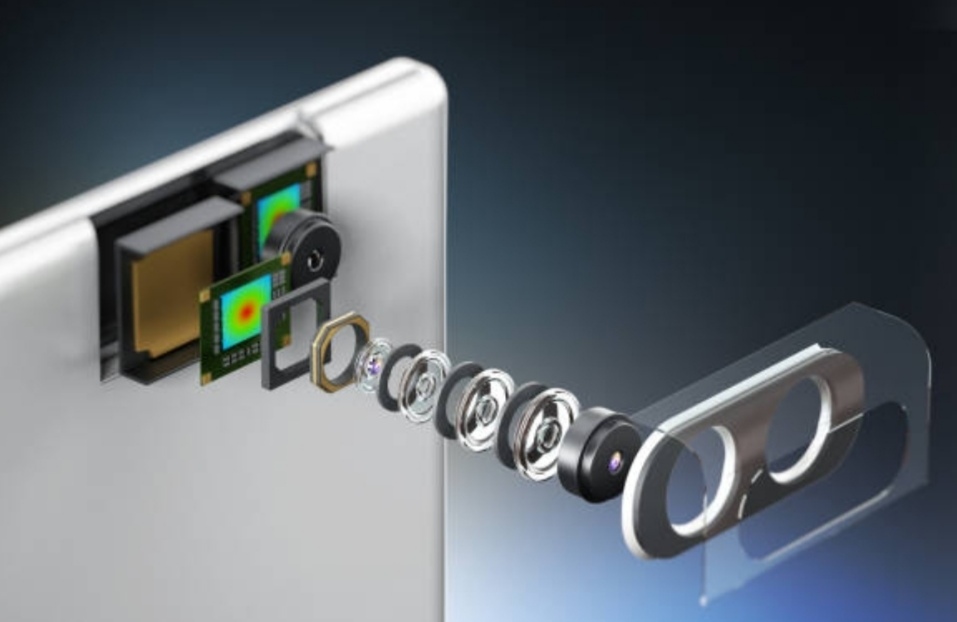
2. Multi-Lens Systems
Gone are the days of single-lens cameras. Modern smartphones now feature triple or quad-camera setups, each serving a specific purpose:
- Ultra-Wide Lenses: Perfect for capturing landscapes and group shots, ultra-wide lenses offer a broader field of view.
- Telephoto Lenses: These lenses allow for optical zoom without sacrificing image quality.
- Macro Lenses: Designed for close-up photography, macro lenses capture intricate details of small subjects.
- Depth Sensors: Enhance the depth of field for more dramatic portrait shots.
Upgrade your photography game with smartphones featuring multi-lens systems. Check out top-rated smartphones with advanced camera setups.
3. Computational Photography
Computational photography combines hardware and software to improve image quality. Recent advancements include:
- Night Mode: Brightens low-light photos without introducing noise.
- Astrophotography: Capture clear images of stars and the night sky.
- Super-Resolution Zoom: Uses AI and software to enhance digital zoom quality, producing sharp images even at high magnifications.
4. 8K Video Recording and Pro Modes
The latest smartphones support 8K video recording, offering unparalleled detail and clarity. Additionally, Pro Modes provide manual control over settings like ISO, shutter speed, and white balance, enabling users to fine-tune their shots.
Explore smartphones with 8K video recording capabilities for professional-grade videos.
Anticipating Future Trends in Mobile Photography
The future of smartphone photography is promising, with emerging technologies set to redefine the way we capture images.
Let’s explore some of the trends shaping the future of mobile photography.
1. AI-Powered Editing Tools
AI will continue to revolutionize editing by automating complex processes. Expect advancements like:
- Instant Photo Restoration: AI tools that repair old or damaged photos instantly.
- Background Replacement: Swap backgrounds in portraits with just a click.
- Advanced Noise Reduction: Eliminate noise in low-light photos without compromising detail.
2. Foldable Smartphones and Rotating Cameras
Foldable smartphones are gaining popularity, offering larger screens for previewing photos.
Some models feature rotating cameras that function as both front and rear cameras, ensuring high-quality selfies.
Pro Tip: Foldable smartphones are ideal for content creators who want versatility in their photography tools.
3. Quantum Dot Technology and Sensor Innovations
Future smartphones may adopt quantum dot technology, enhancing color accuracy and brightness in photos.
Additionally, larger camera sensors will improve light sensitivity, resulting in better low-light performance.
4. 3D Photography and AR Integration
With augmented reality (AR) becoming mainstream, smartphone cameras will integrate AR features for interactive photo experiences. 3D photography will allow users to capture scenes with depth and perspective, ideal for VR applications.
5. Improved Optical Image Stabilization (OIS)
OIS technology is evolving to minimize motion blur further, ensuring sharper photos and smoother videos.
This feature will particularly benefit action and sports photography enthusiasts.
Why Staying Updated Matters
The world of smartphone photography is ever-changing.
By staying informed about the latest innovations, you can make informed decisions when upgrading your device or learning how to improve smartphone camera quality with your existing phone.
Key Takeaways
- Modern smartphones offer features like AI scene recognition, multi-lens systems, and computational photography for exceptional image quality.
- Emerging technologies such as quantum dot sensors, AR integration, and 3D photography will shape the future of mobile photography.
- Regularly explore new smartphone releases and updates to stay ahead in smartphone photography trends.
Conclusion: Elevating Your Mobile Photography Experience
Mobile photography is an art that continues to evolve as technology advances and as photographers refine their techniques.
By implementing the strategies outlined in this article, you can take your smartphone photography to new heights.
Let’s recap the key takeaways and leave you with some final inspiration to embark on your journey to becoming a master of mobile photography.

Recap of Key Strategies to Improve Camera Quality
Throughout this article, we’ve covered actionable tips, innovative tools, and essential practices to help you improve smartphone camera quality.
Here’s a summary of the main points to keep in mind:
- Optimize Camera Settings: Familiarize yourself with your smartphone’s camera settings to unlock its full potential. Adjust resolution, frame rates, and manual settings like ISO and shutter speed to achieve professional results.
- Leverage Lighting Effectively: Good lighting can transform a photo. Whenever possible, use natural light to highlight your subject. For indoor or low-light settings, consider using portable lighting tools or your phone’s flash judiciously.
- Keep Your Camera Clean and Updated: Regularly clean your camera lens to eliminate smudges and debris that can blur your photos. Additionally, keep your smartphone’s software and camera firmware updated to ensure optimal performance and access to new features.
- Experiment with Composition: Use techniques like the Rule of Thirds, leading lines, and symmetry to compose visually appealing shots. Don’t hesitate to experiment with unconventional angles to add creativity to your photography.
- Take Advantage of Camera Features: Modern smartphones come with features like AI scene recognition, Night Mode, and Pro Mode. Learn how to use these tools to capture sharp, well-lit, and high-quality images.
- Post-Processing Tools: Utilize apps like Adobe Lightroom, Snapseed, or your phone’s built-in editing tools to enhance your photos. Post-processing can help correct exposure, sharpen details, and elevate your shots to professional levels.
- Stay Updated on Trends and Technology: Keep an eye on the latest smartphone camera innovations, such as multi-lens systems, 8K video recording, and AI-powered editing tools. These advancements can dramatically improve your results.
By following these strategies, you’ll be well-equipped to capture stunning images and develop your mobile photography skills.
Encouragement to Experiment and Develop Your Style
The beauty of mobile photography lies in its accessibility and creative potential.
While technical skills and tools play a significant role, developing your unique photographic style is just as important.
Here’s how you can embrace experimentation and uncover your creative vision:
1. Try Different Photography Genres
Don’t limit yourself to one type of photography. Experiment with landscapes, portraits, macro, and street photography to discover what resonates with you. Each genre will challenge you to approach lighting, composition, and editing differently, helping you grow as a photographer.
2. Embrace Mistakes as Learning Opportunities
Not every photo will be perfect, and that’s okay. Use your mistakes as opportunities to learn. For instance, if your images turn out blurry, explore ways to improve focus or stabilize your shots. Over time, you’ll gain a better understanding of what works and what doesn’t.
3. Experiment with Editing Styles
Editing is a powerful way to express your creativity. Try different editing styles, from natural adjustments to bold, artistic filters. Apps like Adobe Lightroom or Snapseed offer versatile tools that let you experiment with color grading, contrast, and textures.
4. Explore New Perspectives
Get creative with angles and perspectives. Try shooting from high above, close to the ground, or even through reflective surfaces like puddles or mirrors. Unique perspectives can turn ordinary scenes into extraordinary photographs.
5. Be Inspired but Stay Authentic
Follow photographers whose work you admire, but don’t be afraid to carve your own path. Your style should reflect your vision and personality, making your photos truly one-of-a-kind.
Improving your smartphone camera quality is a continuous journey of learning, experimenting, and staying curious about new technologies.
Whether you’re a beginner or an experienced mobile photographer, there’s always room to grow.
Remember, great photography isn’t just about having the best equipment—it’s about understanding how to make the most of what you have.
Start by implementing the tips discussed here, and let your creativity shine through every shot.
- Explore your smartphone’s camera features and practice using them in different scenarios.
- Stay informed about the latest smartphone camera innovations by researching new releases and trends.
- Don’t forget to share your work with others! Posting your photos on platforms like Instagram or photography forums can help you gain valuable feedback and connect with like-minded enthusiasts.
Ready to take your mobile photography skills to the next level? Discover smartphone accessories and tools that can enhance your experience today!
You might also like :