keywords : how to record screen on any devices, how to record screen, screen recorder app,
🔷 Introduction to Screen Recording on Any Device
In today’s fast-paced digital world, screen recording has become an essential skill—not just for tech-savvy individuals but for everyone who uses a smartphone, tablet, or computer.
Whether you’re a content creator, online tutor, gamer, remote worker, or just someone who wants to share a how-to tutorial, knowing how to record screen on any devices can save you time, enhance communication, and boost productivity.
📌 Here’s the truth:
We live in an age where digital content is king—and if you’re not recording, you’re missing out.
🎥 Why Screen Recording Matters More Than Ever
There was a time when screen recording was something only YouTubers or techies did.
But now, everyone from teachers to business professionals uses it to:
- Share step-by-step instructions
- Record online classes and Zoom meetings
- Demonstrate apps or software
- Report bugs and errors to tech support
- Save live streams, tutorials, or webinars for later viewing
- Create engaging social media content
And the best part?
💡 You don’t need to be a tech expert to start screen recording.
In fact, there are dozens of free, user-friendly screen recorder apps available that make the process insanely simple on any platform—from Windows and Mac, to Android, iPhone, and even Chromebooks.
✅ What This Guide Covers (And Why It’s Worth Your Time)
This step-by-step guide will show you:
- 🔹 Exactly how to record screen on Windows, Mac, Android, iOS, and Chromebook devices
- 🔹 How to use both built-in features and third-party screen recorder apps
- 🔹 Which apps are best for free screen recording without watermarks
- 🔹 Pro tips to get crystal-clear, professional-looking screen recordings
- 🔹 Best practices to ensure audio + video quality
- 🔹 Bonus tools to edit and share your recordings with ease
Whether you’re using a desktop, smartphone, or tablet, you’ll find a tailored method to fit your device and recording goal.
🧠 Important Note:
If you’re searching for the best method to record your screen in 2025, this guide is up-to-date with the latest features and tools that work right now—including new updates in Android 14, iOS 17, macOS Sonoma, and Windows 11.
So you won’t be reading old, outdated information that no longer works.
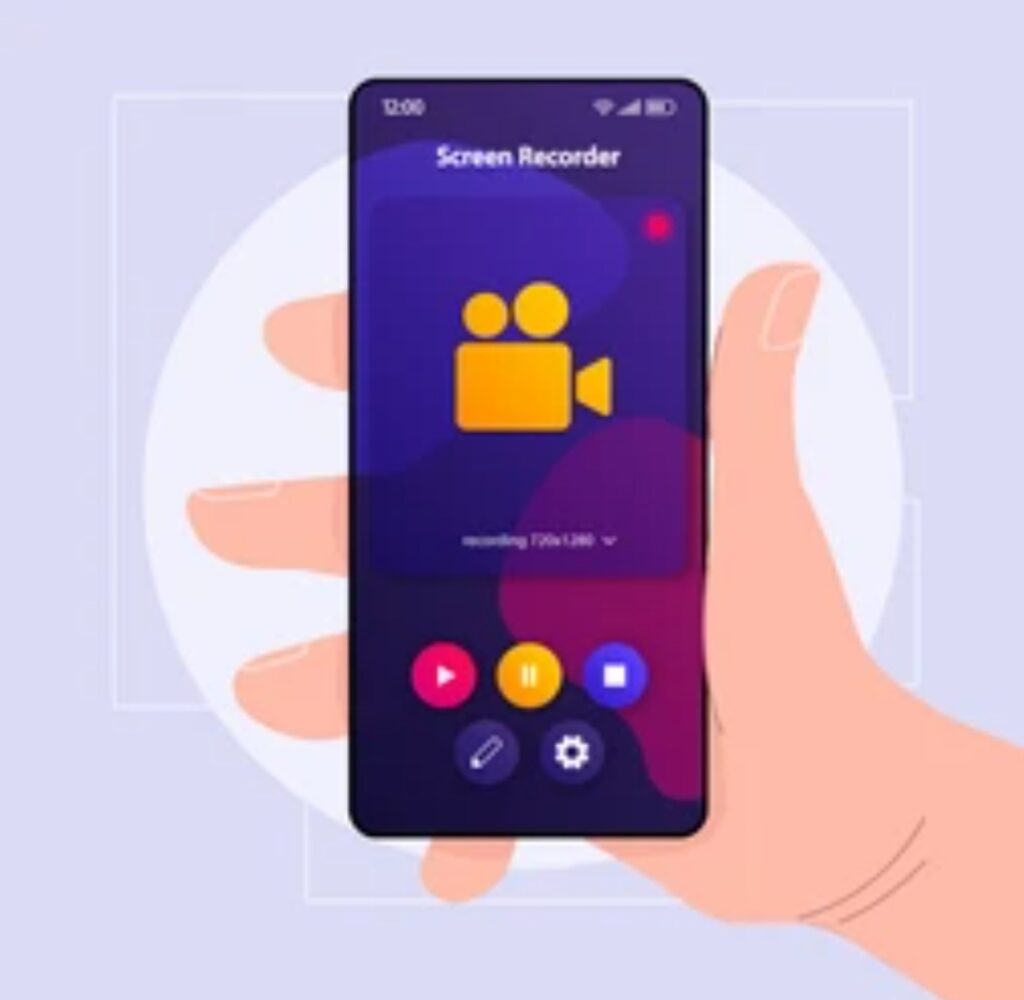
💬 What is a Screen Recorder App?
A screen recorder app is software or a built-in feature that captures everything that’s happening on your screen—whether it’s a video call, a game, a tutorial, or even a scrolling webpage.
Many of these apps also let you:
- Record internal audio or external mic
- Add webcam footage (picture-in-picture)
- Draw or annotate on the screen in real-time
- Trim and edit the video before saving or uploading
With just a few taps or clicks, you can create shareable, professional-quality screen recordings right from your device.
🔑 Why You Need to Learn How to Record Screen on Any Devices
Still not convinced?
Here are just a few powerful reasons to master screen recording today:
- Better communication: Explain things visually instead of writing long messages
- Time-saving: Record once, replay many times (especially useful in team training or customer support)
- Monetization potential: Tutorials, walkthroughs, and demo videos are some of the most-watched content on YouTube
- Memory keeper: Save your best gaming moments or live sessions forever
- Enhanced productivity: Use screen recordings for feedback, presentations, or documentation
👉 In short, learning how to record screen across all your devices is one of the most valuable digital skills you can have in this content-driven era.
🧭 Who Is This Guide For?
This guide is perfect for:
- Beginners who have never recorded their screen before
- Freelancers, teachers, and marketers who want to create high-quality tutorials
- Tech reviewers, YouTubers, and gamers looking for free tools
- Students recording lectures or submitting digital assignments
- Anyone who wants a simple, no-jargon explanation
You won’t find any complicated coding, difficult instructions, or technical fluff here.
Just a clean, easy-to-follow guide you can use right now.
💥 Pro Tip:
To get the most out of your recordings, pair them with a good microphone and clear screen resolution settings.
Later in this guide, we’ll also cover editing and exporting tips to make your screen captures look even more polished.
🛠 Tools You’ll Need (Optional But Recommended)
Depending on your device and goal, you might need:
- A reliable screen recorder app (Free or Premium)
- External microphone or headphones (for clear audio)
- Basic video editing app (like CapCut, Filmora, or ScreenFlow)
- Cloud storage (e.g., Google Drive, Dropbox) for saving & sharing
We’ll recommend the best apps for each device in the next sections.
🚀 Ready to Begin?
Let’s dive into the exact steps to record your screen on each type of device, starting with Windows and Mac.
👉 Keep scrolling — you won’t want to miss our top app recommendations, pro tips, and troubleshooting fixes at the end.
💡 Pro Tip: Bookmark this guide now so you can refer back anytime you switch devices!
🔥 Don’t forget to share this post with anyone who needs a simple way to record their screen.
It could save them hours of frustration.
📢 Want more tutorials like this? Subscribe to our newsletter for exclusive tips and free resources!
🔷 How to Record Screen on Windows PC (Step-by-Step Guide)
Whether you’re working on a tutorial, recording gameplay, or capturing a business meeting, learning how to record screen on Windows PC is incredibly useful.
Windows offers multiple ways to record your screen—using built-in tools, as well as powerful third-party screen recorder apps that add more flexibility and features.
This section will guide you step-by-step through both free and advanced methods, making it easy to choose what works best for your recording needs.
🖥️ Method 1 – Using Xbox Game Bar (Built-in Windows Tool)
If you’re using Windows 10 or Windows 11, you already have a built-in screen recording tool called Xbox Game Bar.
Despite its name, this tool works for more than just games—it’s perfect for capturing apps, browsers, and even PowerPoint presentations.
✅ How to Record Screen with Xbox Game Bar (Step-by-Step)
- Press Windows + G on your keyboard
This will launch the Xbox Game Bar overlay. - Click the “Capture” button
(🎥 It looks like a small circle icon in the top-left corner). - Choose your recording options
You can record mic audio or mute it. - Click “Start Recording” or press Windows + Alt + R
The screen will begin recording instantly. - To stop recording, press Windows + Alt + R again
A notification will appear confirming that your video has been saved. - Find your recording in this folder:
📁 C:\Users\Your Name\Videos\Captures
📝 Pros and Cons of Xbox Game Bar
Pros:
- ✅ Already built into Windows
- ✅ Easy to use and quick to access
- ✅ Records in HD quality
- ✅ Allows audio toggle and basic mic settings
Cons:
- ❌ Cannot record desktop or File Explorer
- ❌ Limited to one window at a time
- ❌ No editing tools included
🧰 Method 2 – Use Third-Party Screen Recorder Apps for Windows
If you need advanced features like editing, webcam overlay, annotations, or multiple window recording, you’ll need a dedicated screen recorder app.
Here are a few of the best free and premium screen recording tools for Windows in 2025:
💻 Recommended Screen Recorder Apps for Windows
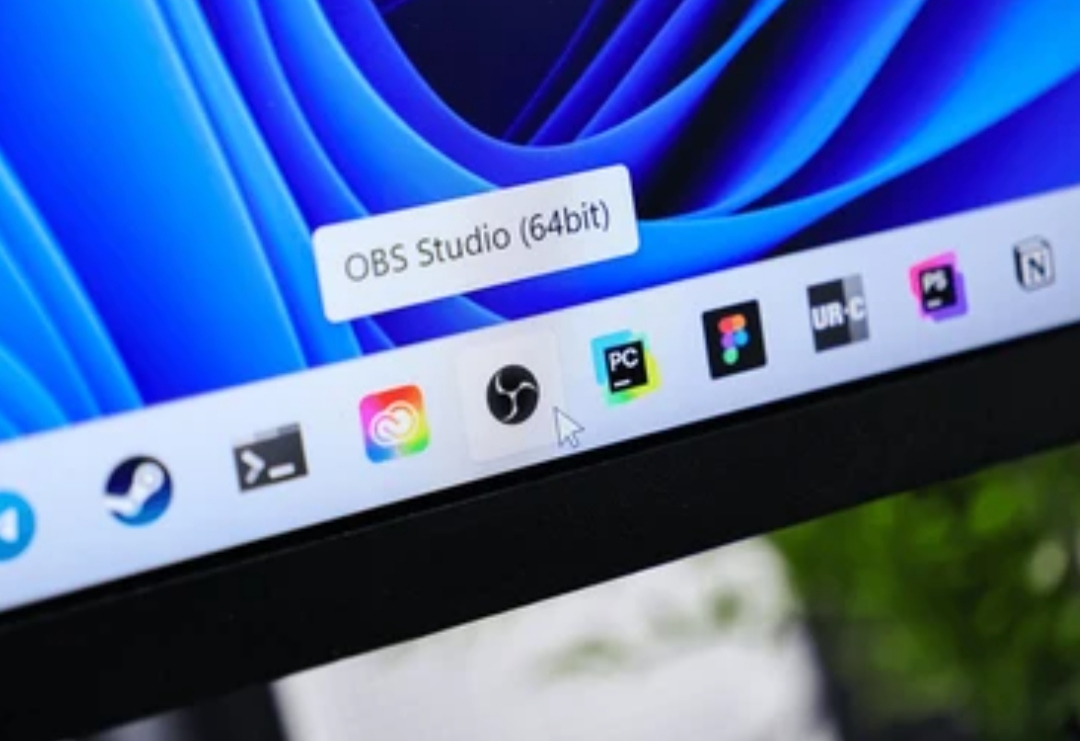
- 🎬 OBS Studio(Free & Open Source)
- Professional-grade screen recorder
- No watermark, unlimited recording
- Stream live or record locally
- Steeper learning curve but very powerful
- Professional-grade screen recorder
- 📽 Bandicam(Freemium)
- Lightweight and user-friendly
- Offers compression and HD recording
- Free version has watermark
- Lightweight and user-friendly
- ✂️ Camtasia(Premium)
- All-in-one screen recorder and video editor
- Perfect for tutorials and presentations
- Free trial available
- All-in-one screen recorder and video editor
- 🌐 Loom(Free & Cloud-Based)
- Great for team communication and feedback
- Records screen + camera
- Share videos with a simple link
- Great for team communication and feedback
🛠 How to Record with OBS Studio (Quick Guide)
(for advanced users)
- Download and install OBS Studio from obsproject.com
- Launch the app and click on “+” under the Sources tab
- Choose “Display Capture” for full-screen recording
- Set up audio input/output devices
- Click “Start Recording”
- Hit “Stop Recording” when done
- Your video will be saved in the Videos folder
🎯 Tips for High-Quality Screen Recording on Windows
To make your screen recordings look professional and polished, follow these expert tips:
- 🎧 Use a good quality microphone for voice-over
- 🖼 Record in full-screen mode for clarity
- 📶 Close unnecessary apps to avoid lag
- 🖋 Use annotation tools to highlight key points
- 💡 Adjust resolution settings (1080p or higher for HD)
📌 Troubleshooting Common Screen Recording Issues on Windows
Problem: Xbox Game Bar not launching
→ Solution: Go to Settings > Gaming > Xbox Game Bar and ensure it’s toggled ON.
Problem: No sound in recording
→ Solution: Check your mic and audio settings in the Game Bar or app settings.
Problem: Laggy recording or frame drops
→ Solution: Lower the resolution or frame rate, close background apps, or upgrade your system hardware.
🔥 Want a Screen Recording App Without Watermarks or Limits?
👉 Try OBS Studio or Loom today — 100% free and perfect for beginners!
🔷 How to Record Screen on Mac (Step-by-Step Guide)
If you’re a Mac user looking to create tutorials, capture gameplay, record video calls, or save online content, then understanding how to record screen on Mac is a must-have skill.
The great news?
You don’t need to install anything fancy.
Apple provides a powerful built-in screen recorder, and for those who want advanced features, there are excellent third-party screen recorder apps for Mac you can explore.
In this section, you’ll learn how to record screen on Mac using both free and pro tools—no tech skills required!

🍎 Method 1 – Use QuickTime Player (Built-In Mac Screen Recorder)
Apple’s QuickTime Player is more than just a media player—it’s also a free screen recorder app built right into macOS.
It’s fast, simple, and perfect for basic screen recording needs.
✅ How to Record Screen Using QuickTime Player (Step-by-Step)
- Open QuickTime Player
Navigate to Applications > QuickTime Player and launch it. - In the menu bar, click File > New Screen Recording
- A small control window will appear.
Click the red record button to begin. - Choose to record the entire screen or just a portion.
Click anywhere on the screen to start recording the whole display.
Or, drag to select a specific area. - To stop recording, click the stop button in the menu bar (top right).
Alternatively, press Command + Control + Esc. - The recording will automatically open in QuickTime for preview.
- Save it by clicking File > Save and choose your destination folder.
📝 Pros and Cons of QuickTime Player for Screen Recording
Pros:
- ✅ Built into all macOS devices
- ✅ Simple and lightweight
- ✅ Great for basic tutorials or demos
- ✅ Can also record external audio via mic
Cons:
- ❌ No built-in internal audio recording
- ❌ No editing tools or webcam support
- ❌ Limited export format options
🚀 Method 2 – Use macOS Screenshot Toolbar (macOS Mojave and Later)
Starting from macOS Mojave (and continuing in Ventura & Sonoma), Apple added a new screen recording feature directly accessible through a shortcut.
🎯 How to Use Screenshot Toolbar to Record Screen on Mac
- Press Command + Shift + 5
This opens the Screenshot Toolbar. - You’ll see two screen recording options:
- Record Entire Screen
- Record Selected Portion
- Record Entire Screen
- Click either option and then press “Record”
- When you’re done, click the stop icon in the top menu bar.
- Your recording will appear as a thumbnail in the lower right corner.
Click it to open, trim, or save the video.
🧰 Method 3 – Best Third-Party Screen Recorder Apps for Mac
While QuickTime and Screenshot Toolbar are great for simple recordings, they lack advanced features like webcam overlay, annotations, or internal audio.
That’s where third-party screen recorder apps come in.
📦 Top Screen Recorder Apps for macOS in 2025
- 🎞 ScreenFlow(Premium)
- All-in-one screen recorder and video editor
- Great for YouTubers, educators, and course creators
- Adds effects, transitions, and callouts
- All-in-one screen recorder and video editor
- 🧼 CleanShot X(Paid, One-time Purchase)
- Clean interface with powerful tools
- Records screen, GIFs, and scrolling content
- Includes a built-in annotation editor
- Clean interface with powerful tools
- 🎥 Loom for Mac(Free + Pro Options)
- Ideal for teams, remote workers, and client feedback
- Instantly share screen recordings with a link
- Option to include your webcam face cam
- Ideal for teams, remote workers, and client feedback
- 🎙 OBS Studio for Mac(Free & Open Source)
- Professional-grade with high customization
- Records screen, audio, webcam simultaneously
- Ideal for gamers, streamers, or tutorial makers
- Professional-grade with high customization
💡 Pro Tips for High-Quality Screen Recording on Mac
If you want studio-quality screen recordings, follow these expert tips:
- 🎧 Use an external mic for clear voice narration
- 🖥 Close unused apps to reduce system lag
- 📲 Enable “Do Not Disturb” to avoid notification popups
- 🎬 Record at 1080p or higher for HD results
- ✂️ Use a video editor (like iMovie or ScreenFlow) for clean cuts and transitions
🛠 Fixing Common Mac Screen Recording Issues
Issue: No internal audio recorded
→ Fix: Use BlackHole or Loopback virtual audio drivers to route system sound.
Issue: Recording is laggy or choppy
→ Fix: Lower resolution, clear memory-heavy apps, or restart your Mac.
Issue: QuickTime not saving video
→ Fix: Ensure you have write permissions in the save folder and enough disk space.
🔥 Want to Record Like a Pro on Mac?
👉 Try ScreenFlow or CleanShot X for premium-quality screen captures and editing — ideal for content creators and professionals!
🔷 How to Record Screen on Android Devices (Step-by-Step Guide)
Android smartphones are incredibly versatile, and one of the most useful features for creators, students, and professionals is the ability to record your screen directly from the device.
Whether you’re saving a TikTok tutorial, sharing a game clip, or walking someone through an app setup, knowing how to record screen on Android devices gives you a massive productivity boost.
In this section, you’ll learn how to record using built-in screen recorders (available on most Android 10+ phones) and the best screen recorder apps for Android in 2025.
Let’s break it all down 👇
🤖 Method 1 – Use the Built-In Android Screen Recorder (Android 10 & Above)
If your device runs Android 10, 11, 12, or later, it likely has a built-in screen recorder—no need to download anything!
✅ How to Record Screen Using Android’s Built-In Tool (Step-by-Step)
- Swipe down from the top of your screen
Open the Quick Settings menu. - Look for “Screen Record” or “Screen Recorder”
If you don’t see it, tap the pencil ✏️ icon to edit Quick Settings and drag it into your panel. - Tap the Screen Recorder icon
- Choose recording settings:
- 📢 Turn microphone on/off
- 🎙 Choose internal audio or mic audio
- 💬 Toggle touch indicators on or off
- 📢 Turn microphone on/off
- Tap “Start” or “Start Recording”
After a countdown, recording begins! - To stop recording, tap the red stop button in the status bar.
- Find your video in the Gallery or Photos app under “Screen recordings.”
📱 Pros and Cons of Android’s Built-In Screen Recorder
Pros:
- ✅ Free and requires no installation
- ✅ Easy to use with one tap
- ✅ Supports internal audio (on most models)
- ✅ Integrated with system for faster sharing
Cons:
- ❌ Limited editing features
- ❌ May not support recording in apps with DRM protection (like Netflix)
- ❌ Not available on some older devices
🛠 Method 2 – Use Third-Party Screen Recorder Apps for Android
If your device doesn’t have the built-in tool—or if you need more control, editing, or customization—there are plenty of powerful screen recorder apps on the Google Play Store.
These apps are perfect for gamers, vloggers, educators, and mobile professionals who want pro-level screen recording tools.
🎥 Best Screen Recorder Apps for Android (2025 Edition)
- 🎞 AZ Screen Recorder(Free + Pro Features)
- No watermark, no time limit
- Records in HD
- Includes basic video editor
- Supports internal + mic audio
- No watermark, no time limit
- 📹 Mobizen Screen Recorder(Beginner-friendly)
- Intuitive interface
- Ideal for gamers and tutorial creators
- Supports face cam recording
- Watermark removable in premium version
- Intuitive interface
- 🎬 XRecorder by InShot
- Great for social media content
- Clean, ad-free interface
- Records gameplay in high resolution
- Includes built-in editor and music tools
- Great for social media content
- ☁️ Loom for Android(Ideal for teams)
- Cloud-based with instant sharing links
- Records front-facing cam and screen
- Excellent for feedback and communication
- Cloud-based with instant sharing links
🔎 How to Use AZ Screen Recorder (Step-by-Step)
- Install AZ Screen Recorder from Google Play Store
- Open the app and allow permissions
- Tap the floating widget on your screen
- Tap the record icon to begin
- Use the stop button in the notification bar to end the recording
- Trim, crop, or add background music using the in-app editor
- Save or share your video instantly
💡 Tips to Improve Screen Recording on Android Devices
- 📵 Enable Do Not Disturb to block notifications during recording
- 🎙 Use headphones with mic for clearer voice recording
- 🧼 Clean your screen before recording to avoid popups and clutter
- 📲 Keep your battery charged—screen recording consumes power
- 🎥 Choose 60 FPS and 1080p resolution for smooth, sharp videos
❗️ Common Issues & Quick Fixes on Android Screen Recording
Issue: Internal audio isn’t recorded
→ Fix: Use a screen recorder app that supports internal sound (like AZ Screen Recorder).
Issue: Screen recording button is missing
→ Fix: Edit Quick Settings and drag the screen recorder tile back into the panel.
Issue: Recording stops automatically
→ Fix: Ensure sufficient storage and RAM. Close other heavy apps.
Issue: Laggy or choppy video
→ Fix: Lower the recording resolution or frame rate in settings.
🔥 Want the Best Free Android Screen Recorder With No Watermark?
👉 Download AZ Screen Recorder or Mobizen now and start creating viral content today!
🔷 How to Record Screen on iPhone or iPad (iOS Devices)
With Apple’s ongoing innovation in mobile devices, recording your screen on an iPhone or iPad has never been easier.
Whether you’re capturing gameplay, tutorials, Instagram Reels, or walkthroughs for your business app, knowing how to record screen on iPhone or iPad is a must-have digital skill in 2025.
The best part?
You don’t need to download anything—Apple provides a built-in screen recorder that’s reliable, easy to use, and completely free.
This section will walk you through every step, from activating the tool to recording with sound and accessing your video, plus the best screen recorder apps for iOS if you want more features.
🍏 Method 1 – Use the Built-In iOS Screen Recorder (No App Needed)
Since iOS 11, all iPhones and iPads include a native Screen Recording feature, making it fast and hassle-free to start recording.
✅ How to Enable & Use Screen Recording on iPhone or iPad (Step-by-Step)
- Go to Settings > Control Center
- Scroll down and tap the green “+” next to Screen Recording
This adds the recording icon to your Control Center. - Swipe down from the top-right corner (Face ID)
or swipe up from the bottom (Touch ID) to open Control Center. - Tap the record button (⏺️ circle icon)
After a 3-second countdown, the recording will begin. - Want to include sound?
Press and hold the record button → tap Microphone On before starting. - To stop recording, tap the red bar at the top of your screen → tap Stop
- Your video is automatically saved to the Photos app under Screen Recordings
🎯 Tips to Improve iOS Screen Recordings
- 🎙 Turn on Microphone Audio to narrate tutorials or commentary
- 📵 Enable Do Not Disturb to prevent notifications during recording
- 🧼 Close unused apps to reduce lag or distraction
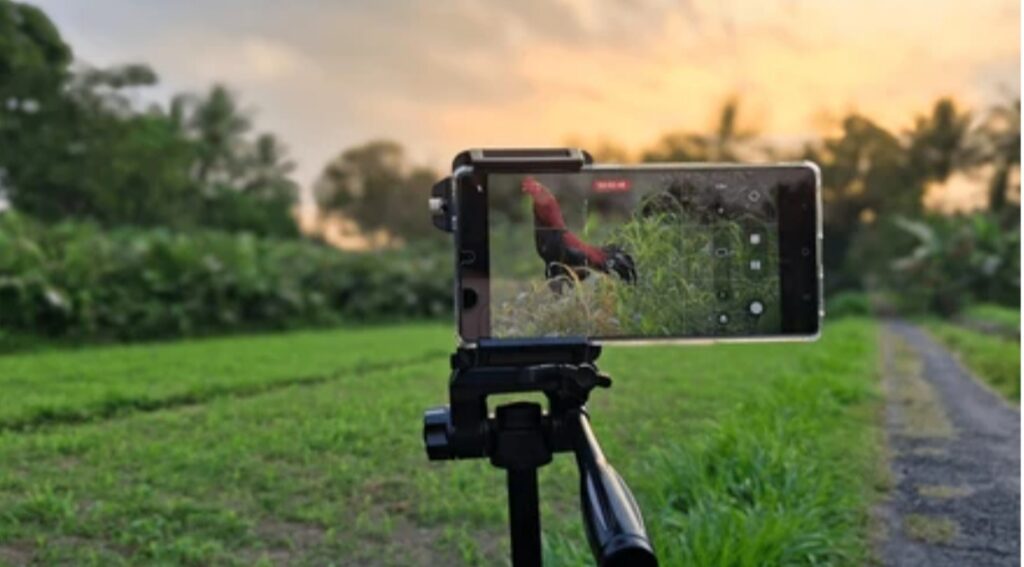
- 📱 Hold the device steady or use a phone stand
- 🖼 Record in landscape mode for widescreen-friendly videos (great for YouTube)
🧰 Method 2 – Use Screen Recorder Apps for iOS (For More Features)
Although the built-in iOS recorder works well, it lacks editing tools, webcam overlays, and other pro-level options.
That’s where third-party screen recorder apps come in handy—especially if you’re creating content for social media, YouTube, or clients.
📲 Top Screen Recorder Apps for iPhone & iPad (2025)
- 🎬 Record It! Screen Recorder(Free + Pro)
- Add reactions with face cam
- Edit and trim clips
- Upload directly to YouTube
- Add reactions with face cam
- 📹 DU Recorder(Free with optional upgrades)
- Livestream + screen record
- Watermark-free with clean UI
- Includes video editing features
- Livestream + screen record
- 📷 TechSmith Capture(Free companion to Camtasia)
- Ideal for professionals or course creators
- Securely syncs videos to desktop
- Works with TechSmith’s full suite
- Ideal for professionals or course creators
- 🌐 Loom for iOS(Cloud-based recorder)
- Record screen + front cam
- Share via instant links
- Great for remote teams and tutorials
- Record screen + front cam
🎞 How to Use “Record It!” Screen Recorder App (Quick Guide)
- Download Record It! from the App Store
- Open the app and allow necessary permissions
- Tap Start Recording → Choose your source (screen + mic)
- Press Home Button to exit → your screen recording starts immediately
- To stop, go back to the app or tap the red bar → then tap Stop
- Edit, trim, or add webcam reactions within the app
⚠️ Common iOS Screen Recording Issues & Fixes
Problem: No sound in recording
→ Fix: Make sure Microphone is turned ON in Control Center
Problem: Screen recording not saving
→ Fix: Check iPhone storage in Settings > General > iPhone Storage
Problem: Screen recorder button missing
→ Fix: Go to Settings > Control Center and re-add it
Problem: Recording stopped automatically
→ Fix: Close heavy apps and restart your phone if needed
🔥 Want Better Control Over Your iPhone Recordings?
👉 Try Record It! or DU Recorder today for high-quality, no-watermark screen captures — perfect for TikTok, YouTube, and more!
🔹 How to Record Screen on Chromebook (Step-by-Step Guide)
If you’re a Chromebook user, you’re in luck. Google has made it easier than ever to record your screen with its built-in screen recording tool and third-party screen recorder apps.
Whether you’re a student creating a school project, a teacher recording a lesson, or a professional working remotely, learning how to record screen on Chromebook will save you time, boost productivity, and simplify sharing.
This section will cover everything you need to know to record your Chromebook screen, from using the native tool to powerful Chrome extensions for advanced users.
📄 Method 1 – Use Built-In Screen Recorder (Chrome OS 89+)
Since Chrome OS 89, all modern Chromebooks come with a pre-installed screen recording tool located within the Screen Capture menu.
✅ How to Use the Chromebook Built-In Screen Recorder
- Press Shift + Ctrl + Show Windows key (□)
The Show Windows key is typically located above the number 6. - The Screen Capture toolbar will appear at the bottom of your screen.
- Click the video icon (for screen recording) instead of the camera icon (for screenshots).
- Choose your recording area:
- Full screen
- Partial screen
- Specific window
- Click Record to begin
- To include microphone audio:
- Click the gear icon (⚙)
- Toggle on “Record microphone”
- To stop recording:
- Click the Stop button on the shelf (bottom right corner)
- Your video is saved to Downloads folder or My Files
📈 Tips to Optimize Your Chromebook Screen Recordings
- 🔁 Restart your device before recording for better performance
- ⛔ Turn on Do Not Disturb to block pop-ups or notifications
- 🎙 Record in quiet environments when using mic
- 🔠 Use external mic for clearer voiceovers
- 💾 Regularly transfer recordings to Google Drive to free up space
📅 Method 2 – Use Chrome Extensions (For More Features)
If you need editing, webcam overlay, or annotations, Chrome extensions can offer robust alternatives to the built-in tool.
👉 Best Screen Recorder Apps for Chromebook (Extensions)
- 🔗 Screencastify(Free + Premium)
- Record screen + webcam
- Built-in editor and export to Google Drive
- Popular among educators and content creators
- 🔗 Loom(Free + Pro)
- Quick sharing with instant links
- Clean UI with webcam + screen combo
- Great for teams, tutorials, and client demos
- 🔗 Nimbus Capture(Free + Advanced Plan)
- Record, screenshot, annotate
- Upload to cloud or download locally
- Good for tutorials and visual explainers
✅ How to Use Screencastify (Step-by-Step)
- Install Screencastify from the Chrome Web Store
- Pin it to your toolbar (click the puzzle piece icon)
- Click the Screencastify icon > Grant permissions
- Choose:
- Screen only
- Screen + Webcam
- Webcam only
- Select your mic, hit Record
- Click Stop when done
- Use built-in editor to trim, annotate, or export
🌍 Pro Tip: Use ChromeOS Screencast App
Chromebooks now offer a Screencast app, especially useful for educators.
- Create lessons with audio narration + on-screen drawing
- Auto-generates a transcript for accessibility
- Sync directly with Google Drive
To access: Press the Everything Button, search for Screencast, and launch.
🚀 Need More Editing Tools or Webcam Options?
👉 Try Screencastify or Loom — the top-rated screen recorder apps for Chromebook with game-changing features!
🔹 Best Free Screen Recorder Apps for Any Device
Whether you’re on Windows, macOS, Android, iOS, or Chromebook, finding the best free screen recorder app can be a game-changer for productivity, content creation, and tutorials.
These screen recording tools are not only beginner-friendly but also offer essential features like screen capture, webcam overlay, audio input, and basic editing without costing a dime.
Here are the top free screen recorder apps that work across various platforms:
✨ 1. OBS Studio (Windows, macOS, Linux)
- Completely free and open-source
- Unlimited recording time and full customization
- Supports screen + webcam + audio
- Ideal for streamers, YouTubers, and advanced users
📹 2. Loom (Windows, macOS, Chromebook, iOS, Android)
- Free version includes up to 5-minute recordings
- Webcam + screen + audio
- Instant sharing with a link
- Great for quick tutorials and team updates
🏡 3. Screencast-O-Matic (Windows, Mac, Chromebook)
- Easy to use and intuitive interface
- Free version includes watermark
- Webcam + mic + screen capture
- Fast uploads to cloud or YouTube
📼 4. Xbox Game Bar (Windows 10/11)
- Built into Windows, no need to install anything
- Press Win + G to launch
- Best for gameplay and app recording
- Includes audio + mic + performance tracking
📰 5. AZ Screen Recorder (Android)
- Highly rated and ad-free
- Record internal audio (Android 10+)
- Features basic editing, trimming, and live streaming
🔧 6. QuickTime Player (macOS)
- Built-in on all Mac devices
- Screen + mic recording
- Simple and reliable
- Great for Apple ecosystem users
🔹 7. Nimbus Capture (Chrome Extension)
- Works on any device with Chrome browser
- Record browser tab, webcam, and audio
- Annotate while recording
- Perfect for teachers and presenters
📅 Bonus Tip: Match the Tool to Your Needs
When choosing a screen recorder app, consider:
- Device compatibility (Windows, Android, etc.)
- Recording quality and max resolution
- Audio input options (mic/internal)
- Storage: local save vs. cloud upload
📈 Pro Tip: Most free apps have premium versions – test the free version first to ensure it meets your needs.
🚀 Want the Best Free Screen Recorder for Your Workflow?
👉 Try OBS Studio, Loom, or Screencast-O-Matic today and start creating stunning screen captures for free!
Tips for Better Screen Recording
Want to take your screen recordings from basic to professional-grade?
Whether you’re using a screen recorder app on Windows, macOS, Android, or Chromebook, applying the right techniques can significantly improve your video quality, clarity, and effectiveness.
Here are powerful, proven tips to help you record screen on any device with polished results:
🎧 Always Test Your Audio First
Bad audio is one of the quickest ways to lose viewers.
- Use a high-quality microphone whenever possible — even a budget external mic is better than your built-in one.
- Record in a quiet room and minimize background noise (turn off fans, close windows).
- Always do a 10-second test recording to check volume and clarity before recording the full session.
- Avoid echo by placing soft items (pillows, rugs, curtains) in the room.
🎬 Plan Your Screen Flow in Advance
Jumping between windows or fumbling through tabs will confuse your viewers and increase your editing time.
- Create a script or bullet list of what you’ll cover.
- Close all unrelated tabs, apps, and popups.
- Keep only relevant windows open and positioned for easy switching.
💡 Highlight Mouse Clicks and Keystrokes
For tutorials or walkthroughs, it’s crucial that your audience follows your actions on screen.
- Use screen recorders that allow you to highlight mouse clicks, like Screencastify or OBS Studio.
- Turn on on-screen keyboard display if explaining shortcuts or typing steps.
This keeps the viewer engaged and informed without needing verbal repetition.
🖥️ Record in HD (or Higher)
Blurry videos kill engagement. Always aim to record in at least 1080p resolution.
- Most screen recorder apps offer resolution settings — set to 1080p or 4K (if supported).
- Don’t record in fullscreen mode unless necessary; a focused window view usually works best.
🚫 Eliminate Notifications & Distractions
Imagine recording a training video and suddenly a personal email pops up. Not only embarrassing, but also unprofessional.
- Enable Do Not Disturb mode or Airplane mode (on mobile).
- Mute notifications from messaging apps, email clients, and browser popups.
- Turn off auto-updates temporarily to avoid system interruptions.
🧹 Clean Up Your Desktop Before You Hit Record
Visual clutter can distract your viewers and ruin the aesthetic.
- Move files into a folder or hide desktop icons during recording.
- Choose a clean wallpaper background.
- Resize and align windows neatly for a clean visual flow.
📂 Organize Your Recordings
After recording, it’s easy to lose track of files — especially when recording multiple clips.
- Rename your recordings clearly (e.g., How_to_use_Canva_Part1.mp4).
- Move them into project folders immediately after recording.
- Back them up to Google Drive or Dropbox for easy access and sharing.
📢 Bonus Tip: Use Captions & Callouts
If you’re creating content for a broader audience, especially online tutorials, adding text overlays or subtitles can increase viewer retention.
- Many free editors (like Clipchamp, Kapwing, or Canva Video Editor) let you add captions and visual callouts.
- Callouts like arrows, circles, and labels help highlight important actions.
✅ Final Word: Small Tweaks, Big Difference
When learning how to record screen on any devices, the little things matter most.
From testing audio to cleaning up your desktop, these simple best practices will elevate your content and make your screen recordings professional, engaging, and clear.
🔥 Pro Tip: Practice makes perfect. The more you record, the smoother your workflow becomes.
💥 Ready to Create Flawless Tutorials or Demos?
➡️ Use Loom or OBS Studio to turn your ideas into stunning screen recordings that hook and convert!
Your audience deserves clarity — and now you know how to deliver it.
Final Thoughts on How to Record Screen on Any Devices
Recording your screen has become an essential digital skill — whether you’re a teacher creating tutorials, a gamer streaming gameplay, or a business professional delivering presentations.
The great news?
You don’t need expensive tools or complex setups.
With this step-by-step guide, you’ve now learned exactly how to record screen on any devices, including:
- Windows PCs
- Mac (macOS)
- Android phones and tablets
- iPhones and iPads
- Chromebooks
- And the best screen recorder apps for all devices!
🎯 The key is to choose a method that matches your needs, comfort level, and content goals.
Some prefer built-in tools, others opt for third-party screen recorder apps with more features like annotations, webcam overlay, and internal audio capture.
✅ Whether you’re using free tools like OBS Studio, native recorders like iOS Screen Recorder, or browser-based options like Loom, the goal remains the same — to communicate clearly and effectively through visuals.
⚡ Power Tips Recap:
Here’s a quick summary to boost your success:
- 🛠 Use lightweight apps for low-end devices
- 🎤 Always test audio quality before recording
- 🧠 Plan your script or workflow ahead of time
- 💾 Save files in MP4 format for better compatibility
- ✂️ Use built-in or external video editors to enhance your recordings
- ☁️ Store or share your videos easily via cloud services
💡 Now It’s Your Turn!
Don’t wait.
Start creating awesome screen recordings today — whether it’s for YouTube, training your team, helping a friend, or documenting a bug.
🎥 Hit record, share your story, and make your message matter.
💥 🔥 Ready to Start? Try These Free Tools Now!
👉 Download OBS Studio — professional and open-source
👉 Install Loom — easy, browser-based screen recording
👉 Try Screencastify — great for Chromebook users
📣 Don’t Keep This to Yourself!
➡️ Share this guide with your friends, team, or anyone who struggles with screen recording.
Together, we can make the digital world more visual, more helpful, and way more awesome.
You might also like :