🖥️ Introduction : Speeding Up Your Windows 11 PC
Is your Windows 11 PC running slower than usual? 🐢
You’re not alone.
Many users have reported performance issues even on relatively new machines running Windows 11.
From unnecessary background apps to bloated startup programs and outdated drivers, there are several reasons your system might not be performing at its best.
That’s exactly why you need to learn how to speed up Windows 11 using proven, effective, and up-to-date optimization techniques.
In this comprehensive guide, we’ll walk you through the most powerful yet easy-to-follow PC optimization tips that work in 2025 and beyond.
🛠️ Whether you’re a casual user, a gamer, or a remote worker who relies heavily on their PC, these Windows performance hacks will help breathe new life into your system—without needing to be a tech expert.

🚀 Why You Should Optimize Windows 11 Now
Windows 11 is packed with stunning visuals, smooth animations, and smart features that enhance productivity.
But those very features can sometimes come at a cost—reduced system speed and responsiveness.
If your PC is taking longer to boot, lagging when opening files, or constantly displaying the spinning wheel of frustration, you need to take action today, not tomorrow.
Don’t wait until your system becomes unusable.
Taking a few minutes now to implement Windows 11 speed tweaks can make a massive difference in how your PC behaves.
In fact, after applying these tips, many users report faster boot times, smoother multitasking, and better gaming performance.
These aren’t generic suggestions—they’re real, practical, and tested strategies backed by tech experts and the latest updates from Microsoft’s support documentation.
🔍 What This Guide Will Cover
This isn’t just another fluff article that repeats the same old advice.
Instead, we’ll cover:
✅ Exactly how to tweak your Windows 11 settings for performance
✅ Which services and features to disable for maximum efficiency
✅ What apps to remove (and how to do it safely)
✅ Free and built-in tools that can clean and optimize your PC
✅ The latest Windows performance hacks that actually work in 2025
This post is meticulously crafted to offer you a complete, well-researched content that solves your problems quickly and thoroughly.
You’ll learn how to:
- Speed up Windows 11 by adjusting settings most users overlook
- Apply practical PC optimization tips without expensive software
- Perform simple tweaks that even beginners can follow easily
- Understand the “why” behind each recommendation for smarter PC maintenance
We’ve included step-by-step instructions, expert insights, and modern optimization methods that are specifically tailored for Windows 11’s unique architecture and features.
🧠 What You’ll Gain From This Guide
By the time you finish reading, you’ll have everything you need to:
✅ Make Windows 11 run faster without upgrading your hardware
✅ Eliminate unnecessary apps and bloatware that hog memory
✅ Improve performance for gaming, work, and everyday use
✅ Extend the lifespan of your PC through smart system management
And the best part?
Every tweak we recommend is safe, reversible, and beginner-friendly.
No risky registry edits.
No shady third-party tools.
Just solid, practical advice for people who want to make the most of their device without spending a dime.
🧩 Who Is This Guide For?
- 🧑💼 Remote workers who rely on a snappy system for productivity
- 🧒 Students who can’t afford a new laptop but need better performance
- 🎮 Gamers who want to eliminate lag and boost FPS
- 🛠️ Tech tinkerers looking to fine-tune every aspect of their setup
- 💻 Everyday users who are tired of slow startup times and sluggish apps
Whether you’re using a budget laptop or a high-end desktop, this guide is tailored to all types of users—because speed matters to everyone.
💡 Before You Dive In…
⚠️ Warning: Some outdated blog posts still recommend tweaks that no longer apply to Windows 11, like disabling core system services that are now essential.
This guide is fully updated with tips that are still effective in 2025 and verified to work with the latest Windows 11 build.
If you’re looking for a step-by-step system performance guide that actually delivers results, you’re in the right place.
So grab your favorite drink ☕, bookmark this page, and let’s begin the journey to supercharging your PC.
Ready to transform your sluggish Windows 11 into a lightning-fast machine?
Let’s dive into the top 10 tweaks that will boost your PC’s performance instantly!
🔄 1. Keep Windows and Drivers Updated
One of the simplest yet most powerful PC optimization tips is also the most overlooked: keeping your Windows 11 system and drivers fully updated.
Updates aren’t just about new features—they’re critical for fixing bugs, improving system stability, and enhancing performance across the board.
Let’s explore why this matters and how to do it right.

🧠 Why Updates Matter More Than You Think
If you’re wondering how to speed up Windows 11 without making complicated changes, this should be your first step.
Many users ignore updates because they seem unnecessary or time-consuming, but in reality, Microsoft regularly releases performance patches and security improvements through Windows Update.
Similarly, your system’s hardware drivers—especially GPU, chipset, and network drivers—directly affect performance.
Outdated drivers can cause:
- System lag
- App crashes
- Freezes
- Slow boot times
- Poor gaming performance
👉 Think of drivers as the bridge between your hardware and the Windows 11 OS. When they’re outdated, that bridge becomes unstable.
⚙️ How to Update Windows 11 for Maximum Performance
Here’s a step-by-step guide to ensure your Windows 11 is always up to date:
🛠️ Step-by-Step: Update Windows
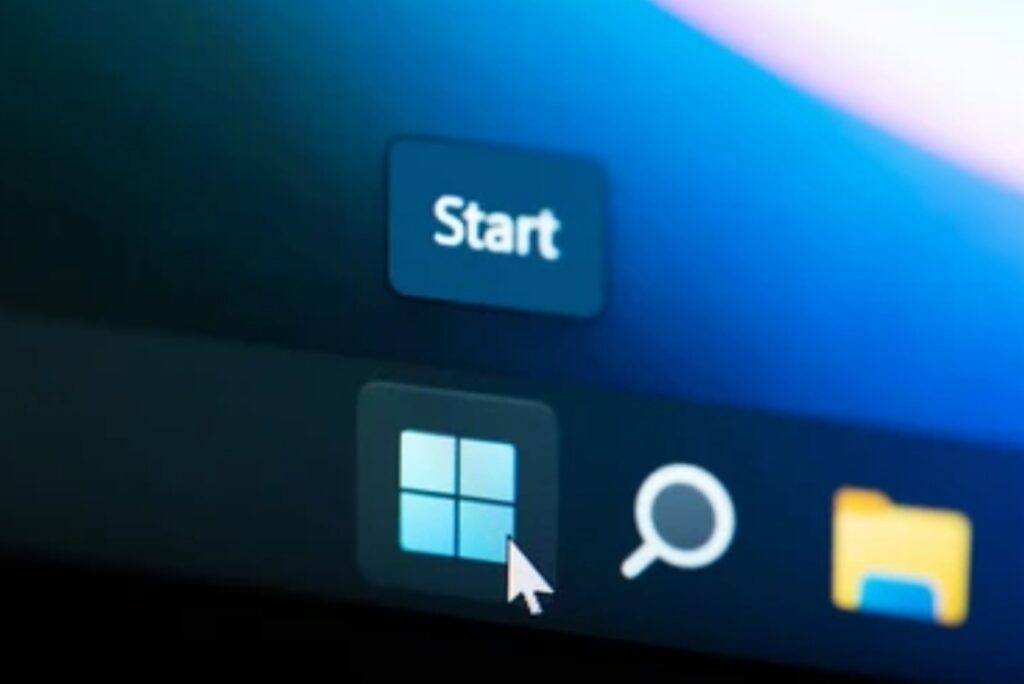
- Click the Start Menu and open Settings ⚙️
- Navigate to Windows Update on the left panel
- Click Check for updates
- If updates are available, click Download & Install
- Restart your PC when prompted
💡 Tip: Set your PC to automatically update by enabling the “Receive updates for other Microsoft products” option.
🔍 Update Device Drivers the Right Way
Drivers are just as important as the OS itself—especially for components like:
- Graphics Card (NVIDIA, AMD, Intel)
- Chipset
- Audio Devices
- Network Adapters
- Bluetooth
You can update drivers in two main ways:
📌 Option 1: Use Windows Device Manager
- Right-click the Start Button → Click Device Manager
- Expand the category (e.g., Display adapters)
- Right-click the device → Select Update driver
- Click Search automatically for drivers
This method checks Windows’ driver database. However, it’s often limited.
🚀 Option 2: Use Manufacturer Tools
To get the latest drivers, always download directly from the manufacturer’s website or use their auto-update tools:
- NVIDIA GeForce Experience – for NVIDIA GPUs
- AMD Adrenalin Software – for AMD GPUs
- Intel Driver & Support Assistant – for Intel components
- Dell/HP/Lenovo support tools – for brand-specific updates
🧩 Pro Tip: Always restart your PC after a major driver update to apply changes and clear out any memory cache.
💬 Still Experiencing Lag? Double-Check These Hidden Update Settings
Sometimes performance issues persist because optional updates are ignored.
Here’s how to install them:
- Go to Settings → Windows Update → Advanced options
- Click Optional updates
- Check for any available driver updates or firmware patches
- Install and restart
These updates often fix driver-level issues not resolved by automatic updates.
✅ Benefits of Keeping Everything Updated
By consistently updating your system and drivers, you’ll experience:
- ⚡ Faster app load times
- 🎮 Improved gaming performance and FPS
- 🔒 Better security and protection against vulnerabilities
- 💻 Stability improvements for multitasking and heavy apps
- 🔄 More compatibility with new software and games
This is one of the easiest ways to speed up Windows 11—yet it provides significant results.
🎯 Quick Recap: Key Takeaways
📌 Don’t skip updates. Windows 11 patches frequently improve speed and stability.
📌 Outdated drivers can seriously slow you down. Always keep them fresh.
📌 Use official tools. Manufacturer update software is more accurate than Windows alone.
📌 Optional updates matter too. They’re hidden but highly valuable.
Take 5 minutes right now to update your system and drivers.
You’ll likely feel a noticeable speed boost within minutes.
Click here to get the latest driver tools instantly!
❌ 2. Disable Startup Apps and Background Processes
Does your PC take forever to start?
Are you constantly waiting for your desktop to become usable?
Chances are, too many apps are launching at startup and running silently in the background, draining system resources.
To dramatically speed up Windows 11, one of the most effective PC optimization tips is to stop these unnecessary processes from eating up memory and CPU power.
Let’s explore how.

🔍 Why Startup Apps Slow You Down
When Windows 11 boots up, it automatically loads several programs in the background.
Some are essential—like your antivirus or audio drivers.
But many are completely unnecessary and resource-hungry, including:
- Cloud storage sync tools
- Chat and meeting apps (like Teams or Skype)
- Browser extensions that preload tabs
- Adobe auto-updaters and media tools
- Game launchers (Steam, Epic Games, etc.)
Each of these adds seconds—or even minutes—to your boot time.
Worse, they continue running even when you’re not using them, silently hogging memory and slowing down other applications.
🛠️ How to Disable Startup Programs in Windows 11
Here’s how to stop unwanted apps from launching at startup:
⚙️ Method 1: Use Task Manager
- Press Ctrl + Shift + Esc to open Task Manager
- Click on the Startup apps tab
- Review the list of enabled items
- Right-click any unnecessary app → Click Disable
💡 Tip: Look at the Startup impact column—apps marked as “High impact” are slowing your boot time the most.
Disable them unless absolutely necessary.
⚙️ Method 2: Use Windows Settings
- Open Settings
- Go to Apps → Startup
- Toggle off any app you don’t want to auto-launch
This list shows you which apps are slowing down your PC and gives you an easy toggle to control them.
🚫 Kill Unnecessary Background Processes
Even after disabling startup programs, some background processes may still consume resources.
Here’s how to manage them:
✅ Step-by-Step: End Tasks via Task Manager
- Press Ctrl + Shift + Esc to open Task Manager
- Click the Processes tab
- Look for apps using high CPU, Memory, or Disk
- Right-click on any unnecessary app → Click End Task
⚠️ Caution: Don’t end system or Windows processes. Stick to third-party apps you recognize.
🧠 What Types of Apps to Disable Safely
To optimize your PC performance, disable these types of apps unless you use them every day:
- 💬 Chat apps (e.g., Slack, Teams, Zoom)
- 🔍 Search indexers or duplicate finders
- 🎮 Game launchers
- ☁️ Cloud syncing services (e.g., Dropbox, OneDrive, Google Drive)
- 🎨 Creative suite launchers (Adobe CC, Corel)
Disabling them at startup won’t uninstall them—you can still launch them manually when needed.
🧩 Pro Tip: Use Autoruns for Advanced Control
If you want deeper control over hidden background tasks, download Microsoft Autoruns.
This free tool shows you everything that launches with your PC, including scheduled tasks and hidden services.
With it, you can:
- Disable silent background updaters
- Find hidden third-party startup entries
- Monitor scheduled tasks that may be unnecessary
⚡ Benefits of Disabling Background Processes
- 🔄 Faster boot times (often by 30–60 seconds)
- 🧠 More available memory for important tasks
- 🚀 Smoother multitasking and quicker response times
- 🛡️ Fewer apps running without your permission
- 🔋 Better battery life on laptops
These Windows performance hacks are especially helpful on older or budget PCs with limited RAM or slower CPUs.
📌 Recap: Actionable Tips
✔️ Disable high-impact startup apps via Task Manager
✔️ Toggle off unnecessary apps in Windows Settings
✔️ End background processes hogging memory
✔️ Use Microsoft Autoruns for deeper cleanup
✔️ Only keep essential apps running on startup
Ready to slash your PC’s boot time in half?
Start by disabling unnecessary startup programs now—you’ll feel the difference immediately.
Download Microsoft Autoruns or open Task Manager and take control of your system!
⚡ 3. Adjust Power Settings for Performance
If you’re using your PC with default settings, you’re not unlocking its full potential.
By default, Windows 11 balances between performance and energy efficiency, which is great for battery life—but not ideal if you want raw speed.
To truly speed up Windows 11, you need to switch your system to a high-performance power plan or create a custom one that prioritizes speed.
Let’s break down exactly how this works and how you can apply it for instant results.

🔋 What Are Windows Power Plans?
Power plans in Windows 11 are preset configurations that manage how your computer uses energy.
They control critical settings like:
- CPU speed and scaling
- Sleep behavior
- Display brightness
- Hard drive timeout
- PCI Express and USB settings
By default, most Windows 11 systems use the “Balanced” plan, which conserves energy by limiting performance during idle or low-demand states.
But if your priority is to boost speed, you’ll want to shift away from that.
💨 Switch to High Performance or Ultimate Performance Mode
Changing your power plan is one of the fastest ways to improve overall system responsiveness, especially on desktops or high-end laptops.
⚙️ How to Change Your Power Plan
- Press Win + R, type control, then hit Enter to open Control Panel
- Go to Hardware and Sound → Power Options
- Select High Performance from the list
- If you don’t see it, click “Show additional plans”
- If you don’t see it, click “Show additional plans”
🧨 Unlock the Hidden “Ultimate Performance Plan”
This plan is designed for power users who need every ounce of speed:
- Press Win + X → Click Windows Terminal (Admin)
2. Paste the following command:
powercfg -duplicatescheme e9a42b02-d5df-448d-aa00-03f14749eb61
- Press Enter
- Go back to Control Panel → Power Options and select Ultimate Performance
⚠️ Note: This plan may not appear on laptops without plugging into power.
⚙️ Create a Custom Power Plan for Balanced Boost
Want a middle ground between performance and battery life?
You can create your own custom power plan tailored to your needs:
- Open Control Panel → Power Options
- Click Create a power plan
- Choose High Performance as a base
- Name your plan (e.g., “Speed Mode”)
- Set screen-off and sleep preferences
- Click Create → Go to Change advanced power settings
- Tweak settings like:
- Processor power management (set minimum to 100%)
- Disable hard disk turn-off
- Disable USB selective suspend
- Set cooling policy to active
- Processor power management (set minimum to 100%)
✅ Result: You’ll enjoy faster performance without maxing out power usage 24/7.
🔧 Optimize Additional Power Settings in Windows 11
Go beyond just switching plans—tweak these for added boost:
- System cooling policy → Set to Active
- Minimum processor state → 100%
- Maximum processor state → 100%
- Graphics power settings → Maximize performance for both battery and plugged-in modes
These small changes ensure Windows isn’t throttling performance unnecessarily.
🧠 Why Power Plans Matter for Performance
Windows dynamically adjusts CPU speed and background services based on your selected power plan.
If you’re on Balanced mode, you may experience:
- Sluggish app launches
- Longer processing times
- Lower FPS in games
- Slower multitasking
When you switch to High Performance, these symptoms usually disappear immediately.
It’s one of the most underrated Windows performance hacks out there.
📌 Quick Recap: Actionable Steps
✔️ Switch to High Performance power plan
✔️ Unlock and enable Ultimate Performance Mode
✔️ Create a custom plan with CPU and graphics set to max
✔️ Tweak advanced power settings for aggressive performance
✔️ Avoid “Battery Saver” mode unless absolutely necessary
Want instant speed gains without upgrading hardware?
⚡ Change your power plan to High Performance or Ultimate Mode right now — and unleash your PC’s full potential.
Try it, and thank yourself later!
Click here to unlock Ultimate Performance Mode 🔥
🧹 4. Clean Up Disk Space and Junk Files
Is your Windows 11 PC feeling sluggish?
One of the most overlooked ways to speed up Windows 11 is by regularly cleaning up disk space and removing junk files.
Over time, your system accumulates:
- Temporary files
- Cached data
- Windows update leftovers
- App installers
- Recycle bin clutter
- Thumbnails, logs, error reports
All these contribute to slower performance, reduced storage, and even occasional system glitches.
Let’s dive into how you can reclaim space, optimize performance, and keep your PC running like new.

🗑️ Why Junk Files Hurt Performance
Junk files aren’t just wasted storage—they also:
- Slow down file access speeds
- Cause fragmentation on HDDs
- Make system scans and backups take longer
- Lead to disk overload errors
- Limit space for essential programs and Windows updates
If your C: drive is near full, Windows 11 can start lagging, freezing, or failing to boot updates.
That’s why cleaning up your hard drive is one of the most crucial PC optimization tips.
⚙️ How to Use Windows’ Built-In Storage Cleanup Tools
Windows 11 has powerful tools built-in. Here’s how to use them efficiently.
🧰 Method 1: Use Storage Sense
- Press Win + I → Open Settings
- Go to System → Storage
- Toggle on Storage Sense
- Click Configure Storage Sense or run it now
- Set it to auto-delete:
- Temp files
- Recycle bin content
- Downloads older than X days
- Temp files
- Click Run Storage Sense now
💡 Pro tip: Schedule this monthly to automate your disk cleaning routine.
🧹 Method 2: Use Disk Cleanup Utility
Disk Cleanup is still one of the most powerful tools hidden in Windows.
- Press Win + S, search for Disk Cleanup
- Right-click → Run as Administrator
- Select your system drive (usually C:)
- Check boxes for:
- Temporary Internet Files
- Windows Update Cleanup
- Delivery Optimization Files
- Thumbnails
- Recycle Bin
- Temporary files
- Temporary Internet Files
- Click OK → Then confirm Delete Files
🛠️ For even more cleanup:
Click “Clean up system files” → It will scan for deeper-level junk including previous Windows installations.
🧽 Method 3: Third-Party Tools (Optional but Powerful)
If you want a more aggressive and user-friendly option, use:
- 🧼 CCleaner – Cleans browser cache, registry errors, and system clutter
- 🦾 BleachBit – Open-source and privacy-focused alternative
- 🚀 CleanMyPC – Deep clean with performance optimization features
✅ Reminder: Always download from official sites. Avoid cracked or pirated software!
📦 What Files to Clean for Maximum Speed Boost
Here’s a checklist of files you can safely delete:
- ✔️ Windows temporary files
- ✔️ Thumbnail cache
- ✔️ Old Windows update files
- ✔️ System error memory dumps
- ✔️ Software installers (.exe)
- ✔️ Microsoft Defender logs
- ✔️ Browser cache and cookies (if not needed)
This frees up several gigabytes of space, which boosts read/write speeds—especially on HDDs.
🔄 Enable Automatic Disk Cleanup
To ensure long-term performance:
- Enable Storage Sense to auto-run
- Set Downloads folder cleanup to 30–60 days
- Auto-empty Recycle Bin every 7–14 days
📈 This keeps your disk space healthy and your PC responsive, without lifting a finger.
📌 Quick Recap: What You Should Do Now
✔️ Use Storage Sense to automate cleanup
✔️ Run Disk Cleanup monthly for system-level junk
✔️ Consider third-party cleaners for deeper cleaning
✔️ Delete unnecessary update files, logs, and installers
✔️ Free up 5–20 GB of space with just a few clicks
Your hard drive is holding you back.
Take 5 minutes to clean up junk files now and instantly boost your PC’s speed.
Click here to download CCleaner or use Windows Disk Cleanup to see results today! 💻✨
🧯 5. Uninstall Unnecessary Apps and Bloatware
One of the fastest and most effective ways to speed up Windows 11 is to eliminate what you don’t need.
Yes, we’re talking about bloatware, pre-installed apps, outdated software, and programs that run silently in the background eating up your CPU, RAM, and disk resources.
These apps might look harmless, but they can dramatically drag down performance, increase boot times, and reduce available memory—especially on budget or mid-range PCs.
Let’s fix that with a smart cleanup strategy.
❓ What Is Bloatware? And Why Is It a Problem?
Bloatware refers to unnecessary software that often comes pre-installed by PC manufacturers, or apps you installed once but no longer use.
They include:
- Free trials (McAfee, Norton, Office 365 trials)
- Manufacturer apps (HP Support Assistant, Dell Update Tools)
- Game launchers you never use
- Duplicate media players or tools
- Useless widgets and extensions
- “Helper” programs that start with Windows
⚠️ These apps consume background resources, drain battery, and clutter your Start menu—without adding any real value.
🧰 How to Uninstall Apps on Windows 11 Properly
There are multiple ways to remove apps—some are more effective than others.
🔧 Method 1: Use Windows Settings
- Press Win + I → Open Settings
- Go to Apps → Installed Apps
- Sort by Install Date or Size
- Click the three dots next to apps you don’t need
- Select Uninstall
💡 Tip: Focus on apps you don’t recognize, never use, or haven’t opened in months.
🗑️ Method 2: Use PowerShell to Remove Built-in Bloatware
For stubborn Microsoft apps like Xbox Game Bar, OneNote, or News:
- Open Windows Terminal (Admin)
Use this command to remove an app (example: Xbox):
Get-AppxPackage *xboxapp* | Remove-AppxPackage
- Repeat for any app using its package name
✅ Note: Use this with caution. You can reinstall later via the Microsoft Store if needed.
🧼 Method 3: Use Third-Party App Uninstallers
Some apps leave leftover files and registry entries.
For a deep, clean uninstall, use:
- 🧽 Revo Uninstaller – Removes all traces of uninstalled apps
- 💣 IObit Uninstaller – Batch uninstalls bloatware with 1 click
- 🔍 Bulk Crap Uninstaller – Free and powerful for advanced users
These tools clean up leftover files, broken registry keys, and empty folders that Windows misses.
🧾 Which Apps Are Safe to Remove?
Here’s a list of common software you can typically uninstall safely:
- Candy Crush, Solitaire Collection
- 3D Viewer, Paint 3D
- Cortana (if not used)
- Tips, Feedback Hub
- Xbox Console Companion
- Skype (if unused)
- Manufacturer tools (OEM support apps)
- Trial antivirus software
📌 Caution: Avoid uninstalling core system tools like Windows Security, .NET Frameworks, or Microsoft Visual C++ Redistributables.
🤖 Disable Apps from Running in the Background
You can speed up Windows 11 further by stopping apps from running when you’re not using them.
Here’s how:
- Go to Settings → Apps → Installed Apps
- Click an app → Advanced Options
- Under Background apps permissions, set to Never
⛔ This prevents unused apps from quietly using RAM and internet bandwidth.
🔄 Turn Off Startup Programs Too
Some uninstalled apps still leave startup entries.
Clean them like this:
- Press Ctrl + Shift + Esc to open Task Manager
- Go to the Startup tab
- Disable anything with high impact that you don’t need at boot
This reduces your boot time and frees up RAM for more important tasks.
📌 Quick Recap: What You Should Do Now
✔️ Uninstall unnecessary apps via Settings or PowerShell
✔️ Use third-party uninstallers for complete cleanup
✔️ Remove pre-installed manufacturer bloatware
✔️ Stop background apps from running
✔️ Disable startup apps that slow boot time
Stop letting junk software slow you down!
Uninstall bloatware and unnecessary apps now to reclaim speed and memory.
Try Revo Uninstaller or clean it up yourself using PowerShell — your PC will thank you 🔥💻
🚫 6. Disable Startup Programs That Drain Resources
Do you ever wonder why your Windows 11 PC takes forever to boot up, even though it’s relatively new or recently updated?
The culprit is often startup programs—apps that launch automatically when Windows starts.
These programs run in the background, slowing down boot time, consuming RAM, and reducing overall system performance.
If you want to speed up Windows 11, disabling unwanted startup programs is one of the easiest and most powerful Windows performance hacks.
❓ What Are Startup Programs? Why Are They a Problem?
Startup programs are applications that are configured to run automatically every time your computer boots.
Some are useful—like antivirus software or cloud storage sync apps—but many are unnecessary, especially if you don’t use them daily.
Examples include:
- Game launchers (Epic Games, Steam, Riot)
- Auto-updaters (Adobe, Java, browser extensions)
- Support tools (printer software, OEM support apps)
- Productivity apps you rarely open (Skype, Zoom, Microsoft Teams)
The more apps that launch during startup, the longer your PC takes to become usable.
They not only delay boot time, but they also eat up system resources like CPU, memory, and bandwidth, even when you’re not using them.
⚙️ How to View and Disable Startup Programs in Windows 11
Disabling startup apps is simple and 100% reversible.
💻 Method 1: Use Task Manager
- Press Ctrl + Shift + Esc to open Task Manager
- Click the Startup apps tab
- Look at the Startup impact column (High, Medium, Low)
- Right-click on any unnecessary app → Click Disable
💡 Pro Tip: Focus on apps with “High impact” and ones you don’t use daily.
Disabling them won’t uninstall the app—it just stops it from starting automatically.
🔧 Method 2: Use Windows Settings
- Press Win + I → Open Settings
- Go to Apps → Startup
- Toggle off the switch next to apps you want to disable
This is more beginner-friendly and shows CPU usage impact.
🛠️ Method 3: Use Autoruns for Deep Control
For advanced users:
- Download Autoruns by Microsoft
- Launch as Administrator
- Go to the Logon tab
- Uncheck entries you don’t want to load at boot
⚠️ Warning: Only disable items you recognize. This tool is powerful but not beginner-friendly.
🧾 Which Startup Programs Should You Disable?
Here’s a list of programs that are usually safe to disable:
- 💬 Microsoft Teams (if unused)
- 🎮 Xbox Game Bar, Xbox Services
- 📦 OneDrive (if you don’t sync files)
- 🖨️ Printer support software
- 📋 Clipboard tools, PDF readers
- 🔒 Third-party updaters (Adobe Updater, Java Updater)
- 🛠️ OEM software (Lenovo Vantage, Dell Update Utility, HP Smart)
🚫 Do not disable:
- Windows Security
- Audio/sound drivers
- Display drivers (Intel, AMD, NVIDIA)
- Touchpad software on laptops
🔄 Benefits of Disabling Unnecessary Startup Apps
When you streamline your startup:
- 🚀 Faster boot time—get to the desktop in seconds
- 🧠 More free RAM and CPU for games and work
- 🔋 Better battery life on laptops
- ⚙️ Less background activity, which means fewer slowdowns and crashes
Even high-end PCs benefit, but on mid-range or older machines, the difference is night and day.
📌 Quick Recap: What You Should Do Now
✔️ Open Task Manager or Settings
✔️ Identify apps with high startup impact
✔️ Disable any that aren’t essential
✔️ Reboot and enjoy a noticeable performance boost
✔️ Use Autoruns if you want to go deeper
Stop wasting time every time you boot your PC!
Disable startup bloat now to launch into productivity faster than ever.
Open Task Manager or grab Autoruns and take back control of your system’s speed! ⚡🖥️
🎨 7. Adjust Visual Effects for Best Performance
While Windows 11 looks modern and elegant with its animations, transparency effects, and visual flourishes, all that eye candy comes at a cost—your PC’s speed.
These visual effects consume RAM, GPU cycles, and CPU power—especially on older hardware or low-spec laptops.
If you want to speed up Windows 11, turning off or adjusting these effects can deliver an instant and noticeable performance boost.
Let’s fine-tune your system for power and speed over appearance.

❓ Why Do Visual Effects Slow Down Windows 11?
Visual features like:
- ✨ Transparency effects
- 💨 Animations
- 📦 Shadows under windows
- 💫 Smooth font rendering
- 🔍 Taskbar thumbnail previews
All look great, but they require processing power from your graphics card and memory.
On a powerful gaming rig, this might be fine.
But on a budget laptop or older desktop, these effects can cause lag, stutter, or general system sluggishness.
Turning them off can be a game-changer—especially if you’re using Windows for work, productivity, or low-latency tasks like gaming.
⚙️ How to Adjust Visual Effects in Windows 11
You don’t need to disable every effect—Windows gives you full control.
Here’s how to do it:
🔧 Method: Adjust for Best Performance
- Press Win + S, type “View advanced system settings”, and press Enter
- In the System Properties window, under Performance, click Settings
- You’ll see a list of visual effects
- Select “Adjust for best performance” (this disables all effects)
- Or manually check only the ones you need (e.g., keep smooth fonts)
- Click Apply → then OK
💡 Pro Tip: Want a balance between looks and speed? Select “Custom”, then check:
- Show thumbnails instead of icons
- Smooth edges of screen fonts
- Show windows contents while dragging
🪟 Turn Off Transparency Effects and Animations via Settings
For additional performance tuning:
- Press Win + I to open Settings
- Go to Accessibility → Visual effects
- Turn off the following:
- Transparency effects
- Animation effects
- Transparency effects
🔋 This alone can give your laptop a noticeable battery and performance boost.
🖼️ Disable Background Motion and Extra Visuals
You can also reduce background motion, which saves GPU load.
Here’s how:
- Go to Settings → Personalization → Background
- Set it to Solid color instead of slideshow or picture
- Avoid animated lock screens and dynamic wallpapers
🎯 Result: A faster, smoother, distraction-free desktop experience.
🔄 How Does This Help Speed Up Windows 11?
When you disable or reduce visual effects:
- ✅ Your system uses less RAM and fewer GPU resources
- 🚀 App switching and multitasking become faster
- 🧠 CPU has more headroom for demanding tasks
- 💼 Ideal for work laptops, school PCs, and older machines
Even if you have a newer device, this tweak maximizes efficiency and is especially helpful when running on battery power.
🧠 Quick Recap: Visual Effects Settings to Change Now
✔️ Go to Performance Options → Set to Best Performance
✔️ Customize to keep font smoothing or thumbnails if needed
✔️ Turn off Transparency and Animation effects under Settings
✔️ Use a solid color background instead of pictures or slideshows
✔️ Enjoy a smoother, faster, more responsive system
Don’t let flashy visuals slow you down!
Turn off unnecessary effects today to unleash your system’s true speed.
Head into System Properties and adjust for best performance—you’ll feel the difference instantly ⚡🖥️
🔌 8. Manage Power Settings for Optimal Performance
One of the most overlooked ways to speed up Windows 11 is adjusting your power settings.
By default, Windows often uses the “Balanced” or even “Power Saver” mode—especially on laptops.
While these modes are designed to preserve battery life, they also limit your CPU speed, reduce system responsiveness, and may even throttle background processes.
If you want to unlock your PC’s full potential, switching to a High Performance or Ultimate Performance plan is one of the simplest yet most effective Windows performance hacks.

⚡ Why Power Settings Matter for Performance
Your PC’s power plan controls:
- 🔋 CPU maximum and minimum performance state
- 🌡️ How aggressively Windows manages hardware throttling
- 🧠 Background task processing
- 🖥️ Display brightness and disk usage behavior
On “Balanced” mode, your system is trying to conserve power—meaning it may not use 100% of available CPU power even when needed.
On “Power Saver”, it’s even worse.
You’ll get longer battery life, but the tradeoff is a slower, laggier system.
This is fine when you’re checking emails—but not when you’re gaming, video editing, multitasking, or just want a snappy experience.
⚙️ How to Change Power Settings in Windows 11
🔋 Method 1: Switch to High Performance Mode
- Press Win + S and search for Control Panel
- Go to Hardware and Sound → Power Options
- Click Show additional plans
- Select High performance
💡 Note: On some devices, this plan may be hidden by default. You can manually enable it if needed.
⚡ Method 2: Use the Ultimate Performance Plan
The Ultimate Performance Plan is designed for power users and high-performance machines.
To enable it:
- Press Win + X → Windows Terminal (Admin)
- Type the following command:
powercfg -duplicatescheme e9a42b02-d5df-448d-aa00-03f14749eb61
- Press Enter
- Now go to Power Options, and you’ll see Ultimate Performance
✅ Use this mode if you want maximum speed with no power restrictions.
⚠️ Not recommended for laptops on battery—best used while plugged in.
🔧 Method 3: Adjust Power Settings via Settings
- Press Win + I to open Settings
- Go to System → Power & battery
- Under Power mode, choose Best performance
This is a simplified version ideal for laptop users who want a quick boost without diving deep into Control Panel.
📈 Benefits of Optimizing Power Settings
Switching to a performance-focused power plan results in:
- 🚀 Faster app loading and smoother multitasking
- 🧠 More responsive UI with minimal input lag
- 🎮 Improved gaming performance with better FPS
- 💼 Boosted productivity for demanding workloads
- ⚡ Full utilization of CPU/GPU resources
This is a critical step in any list of PC optimization tips, and it’s completely free.
🧠 Quick Recap: Optimize Your Power Plan Today
✔️ Go to Control Panel → Set plan to High Performance
✔️ Use Ultimate Performance for desktops and plugged-in laptops
✔️ Choose Best Performance from Settings for a quick win
✔️ Avoid “Power Saver” unless you’re trying to extend battery at all costs
✔️ Enjoy a snappier, more powerful Windows 11 experience
Why settle for a slow, throttled PC?
Flip the switch on your power plan and supercharge your Windows 11 machine in seconds!
Head to your settings or run the powercfg command now to unlock full system performance. ⚡🔋
🧼 9. Clean Up Junk Files and Free Up Storage Space
Over time, your Windows 11 PC collects unnecessary clutter—temporary files, system cache, logs, leftover update data, error reports, and more.
These junk files not only take up valuable disk space but also slow down your system’s performance, cause lag, and make your PC feel sluggish.
By cleaning up these files regularly, you’re removing digital gunk that’s dragging your system down—making this one of the most essential PC optimization tips you can apply.

❗ Why Disk Cleanup Is Crucial to Speed Up Windows 11
Think of your computer like a car.
When your hard drive gets cluttered with digital debris, it’s like driving with your trunk full of bricks.
This buildup can:
- 🐌 Slow down app and file loading times
- ❌ Cause system update failures
- 🔄 Increase boot time
- 💣 Lead to crashes or freezing
- 💾 Fill up SSD space, which reduces read/write speed dramatically
Cleaning junk files is a foundational Windows performance hack—and best of all, it’s quick and free.
🧰 Tools to Clean Junk Files on Windows 11
1. 🧹 Use Built-In Disk Cleanup
- Press Win + S, search for Disk Cleanup, and open it
- Select your system drive (usually C:)
- Check the boxes for:
- Temporary files
- Thumbnails
- Recycle Bin
- Windows error reports
- Delivery Optimization files
- Previous Windows installations (if present)
- Temporary files
- Click OK → then Delete Files
💡 Pro Tip: Click “Clean up system files” for a deeper clean
2. ⚙️ Use Windows 11’s Storage Sense
Storage Sense is an automated feature that helps you keep your PC clean effortlessly.
To activate:
- Go to Settings → System → Storage
- Toggle on Storage Sense
- Click “Run Storage Sense now” or set it to run on schedule
- Choose cleanup options like deleting temp files, Recycle Bin items, and Downloads folder content
✅ This ensures ongoing maintenance without manual work.
3. 🚀 Use Command Line for Advanced Cleanup
If you’re a power user, try this:
- Open Windows Terminal (Admin)
- Type:
cleanmgr /sageset:1
- Choose cleanup options, then run:
cleanmgr /sagerun:1
This advanced Disk Cleanup scans deeper for system-level files.
4. 🧽 Clear Browser Cache and App Data
Browsers like Chrome, Edge, and Firefox hoard cached images, cookies, and autofill data.
- Open your browser → Go to Settings → Privacy → Clear Browsing Data
- Select Cached images, Cookies, and Site data
- Clean it for all time to free up more GBs
📱 Also uninstall unwanted apps and games from Settings → Apps → Installed apps.
📊 How Much Space Can You Expect to Free Up?
Depending on how long it’s been, users have reported freeing:
- 💽 2–10 GB with basic cleanup
- 💾 10–30+ GB with deep system cleanup
- 🚮 40+ GB if removing old Windows installs after upgrades
And it’s not just about storage—it’s about boosting system responsiveness.
✅ Quick Recap: Clean Up & Speed Up
✔️ Run Disk Cleanup to remove system clutter
✔️ Enable Storage Sense for automatic maintenance
✔️ Clear your browser cache and app data
✔️ Use command-line cleanup for deeper optimization
✔️ Remove unused programs, large files, and system leftovers
Don’t let hidden junk files rob your PC of speed!
Run a full cleanup right now and reclaim valuable storage and performance instantly.
Your system will thank you with faster speeds, smoother apps, and a better user experience 💨🧼
📛 10. Disable Background Apps and Startup Programs You Don’t Need
Is your Windows 11 PC taking forever to boot up or feeling slow right after startup?
Chances are, you have too many background apps and startup programs running in the background—most of which you probably never use.
These hidden processes consume CPU, RAM, and disk resources, leading to a sluggish system and unnecessary delays.
Disabling them is one of the quickest ways to speed up Windows 11, and it requires no extra software or advanced skills.
🧠 What Are Startup Programs and Background Apps?
- Startup Programs: Apps that automatically launch when you turn on your PC.
Examples: OneDrive, Spotify, Teams, Adobe apps, update checkers. - Background Apps: Programs that keep running invisibly, consuming resources even if you’re not using them.
Many of these aren’t essential.
Unless you need them active all the time, they’re just resource hogs holding your system hostage.
🔍 Why Disabling Them Speeds Up Windows 11
Turning off unnecessary apps at startup or in the background can:
- 🚀 Drastically improve boot-up time
- 🧠 Free up RAM and CPU, reducing lag
- 🔋 Extend battery life on laptops
- 💨 Make Windows more responsive from the moment you log in
- 🛡️ Reduce vulnerabilities from apps that stay connected to the internet
This is one of the most powerful Windows performance hacks that delivers instant results.
🔧 How to Disable Startup Programs in Windows 11
💡 Method 1: Use Task Manager
- Press Ctrl + Shift + Esc to open Task Manager
- Click the Startup apps tab
- Review the list and disable programs you don’t want at startup
- Right-click → Disable
💡 Look for apps marked as “High impact”—these slow your boot time the most.
🔌 Method 2: Use Windows Settings
- Go to Settings → Apps → Startup
- Toggle off apps you don’t need when your PC starts
✅ This is especially helpful for users who prefer a more user-friendly interface than Task Manager.
🚫 How to Stop Background Apps in Windows 11
- Open Settings → Apps → Installed apps
- Click the three-dot menu next to the app → Advanced options
- Under Background apps permissions, select Never
Repeat this for apps that don’t need to run silently, like Xbox Game Bar, Feedback Hub, and Cortana.
📌 You can also go to:
Settings → Privacy & security → Background apps, and turn off permissions globally or app by app.
🛠️ Use Autoruns for Deep Control (Advanced Users)
Autoruns by Microsoft Sysinternals is a free utility that shows everything that starts with Windows—including services and hidden processes.
- Download Autoruns
- Run as administrator
- Carefully uncheck entries you don’t need
⚠️ Be cautious here—don’t disable system-critical services.
🔁 Quick Recap: Clean Startup, Faster PC
✔️ Use Task Manager or Settings to disable startup apps
✔️ Stop unnecessary background activity in Privacy settings
✔️ Try Autoruns for in-depth startup control
✔️ Focus on apps with High startup impact
✔️ Enjoy faster boots, smoother performance, and better resource usage
Your PC doesn’t need to start with 15 apps dragging it down!
Take back control and disable the bloat today.
Click into Task Manager now and clean house—you’ll instantly boost speed and reduce load time. 💻⚡
❓ FAQs: Speed Up Windows 11 and Boost PC Performance
This FAQ section addresses the most searched user questions related to improving Windows 11 speed, offering direct and concise answers

💬 How can I speed up my Windows 11 PC?
To speed up your Windows 11 PC, follow these proven steps:
- Disable unnecessary startup programs
- Turn off background apps
- Use Storage Sense to delete junk files
- Optimize performance settings
- Keep Windows and drivers updated
- Defragment your hard drive (if using HDD)
- Upgrade to an SSD and increase RAM if possible
These PC optimization tips deliver both instant and long-term performance improvements.
💬 What is the best way to clean up Windows 11?
The best way to clean up Windows 11 includes:
- Using Disk Cleanup or Storage Sense
- Uninstalling unused apps and bloatware
- Clearing browser cache and temp files
- Removing large, duplicate, or outdated files
- Running third-party tools like CCleaner or CleanMyPC
Cleaning your system regularly is a critical Windows performance hack to keep things running smoothly.
💬 Why is my Windows 11 PC running slow?
Common reasons for Windows 11 running slow include:
- Too many startup programs and background apps
- Outdated drivers or Windows updates
- Limited RAM or storage space
- Malware or viruses
- Cluttered temporary files and cache
- Visual effects and animations consuming system resources
A mix of manual tweaks and automated tools can restore your system’s speed.
💬 Can disabling background apps improve performance in Windows 11?
Yes!
Disabling background apps can significantly improve performance by reducing CPU, RAM, and battery usage.
Most apps don’t need to run in the background—especially messaging, game launchers, and telemetry tools.
Go to Settings → Apps → Installed Apps → Advanced Options to turn them off.
💬 Does upgrading to SSD help speed up Windows 11?
Absolutely!
Upgrading from an HDD to an SSD (Solid State Drive) is one of the most effective ways to speed up Windows 11.
Benefits include:
- 5x to 10x faster boot times
- Instant app launches
- Better system responsiveness
- Lower power consumption (for laptops)
This is a hardware-based performance hack that delivers massive speed improvements.
💬 How often should I clean junk files in Windows 11?
It’s recommended to clean junk files:
- Every 1–2 weeks if you use your PC daily
- Before and after major Windows updates
- When you’re running low on disk space
- If you notice performance slowdowns
Use Disk Cleanup, Storage Sense, or a trusted cleanup tool to maintain your PC.
💬 Which services can I safely disable to make Windows 11 faster?
Here are services you can consider disabling (⚠️ be cautious):
- Xbox Services (if you don’t game)
- Print Spooler (if no printer is connected)
- Remote Registry
- Touch Keyboard and Handwriting Panel (if not using touch input)
- Windows Search (only if you don’t use it regularly)
Use Services.msc, but always research each one before disabling.
💬 Is it safe to use third-party PC optimization tools?
Yes—if you choose trusted options like:
- CCleaner
- Advanced SystemCare
- Glary Utilities
- BleachBit
Stick to reputable tools, avoid anything that offers “registry cleaning miracles,” and always backup your data before running deep scans.
💬 Can I boost performance without upgrading hardware?
Absolutely.
You can speed up Windows 11 without buying new hardware by:
- Disabling startup/background apps
- Cleaning junk files
- Adjusting visual effects
- Updating drivers
- Switching to performance mode in Power Settings
- Using lightweight antivirus software
These no-cost performance hacks can breathe new life into older machines.
Still struggling with slow performance
Try applying these expert-level tweaks today or explore affordable SSD upgrades or RAM kits for instant results.
Start small, and your system will feel brand new. 💻⚡
🏁 Final Conclusion: Speed Up Windows 11 and Reclaim Peak Performance
By now, you’ve seen just how many simple yet powerful tweaks can dramatically speed up Windows 11—without needing to be a tech expert or spend a single dollar.
From disabling unnecessary startup programs and background apps, to adjusting visual effects, removing bloatware, and using tools like Storage Sense or ReadyBoost, these PC optimization tips aren’t just theories—they’re proven methods that thousands of users rely on to unlock better performance.
Your PC doesn’t have to feel sluggish or outdated.
With the right Windows performance hacks, you can breathe new life into your system—even if it’s a few years old.
🧩 What You’ve Learned
Here’s a quick recap of key performance-boosting actions:
- ✅ Disable startup programs to improve boot time
- ✅ Turn off background apps to free up CPU and memory
- ✅ Use Disk Cleanup or Storage Sense for automated junk removal
- ✅ Uninstall bloatware that slows you down
- ✅ Adjust power settings and visual effects for maximum efficiency
- ✅ Keep your system updated with the latest drivers and Windows patches
- ✅ Upgrade to SSD or add more RAM for dramatic gains
- ✅ Enable ReadyBoost for low-cost acceleration
- ✅ Utilize Task Manager to monitor and manage system usage
Each of these steps is designed to help you not only optimize performance, but also extend the life of your Windows 11 PC.
🔥 Final Word: Small Tweaks, Big Wins
Don’t underestimate the power of small performance hacks.
Even just disabling a handful of background apps or switching your power mode can deliver noticeable improvements in speed and responsiveness.
This isn’t about becoming a tech wizard.
It’s about taking control of your digital environment so your PC works for you—not against you.
And remember: optimization isn’t a one-time fix—make it a habit.
Schedule cleanups, keep your system lean, and stay proactive with updates.
🛠️ Want Even Faster Results?
Ready to push your PC to the next level?
Check out our recommendations for the best SSDs for Windows 11, budget-friendly RAM upgrades, and top-rated PC tune-up software.
These upgrades can boost your speed by up to 10x, especially when paired with the tweaks you’ve just learned.
Don’t settle for slow. Take action now, and transform your Windows 11 PC into the speed machine you deserve.
➡️ Get Started with Your First Optimization Tool Here ⚡
🔍 Let’s Keep the Momentum Going
If you found this guide helpful:
- 🔁 Share it with friends or colleagues frustrated by slow PCs
- 💬 Leave a comment or feedback on what worked best for you
- 📩 Subscribe to our newsletter for weekly PC performance tips
- 🛒 Check out our recommended tools and hardware upgrades here
You might also like :