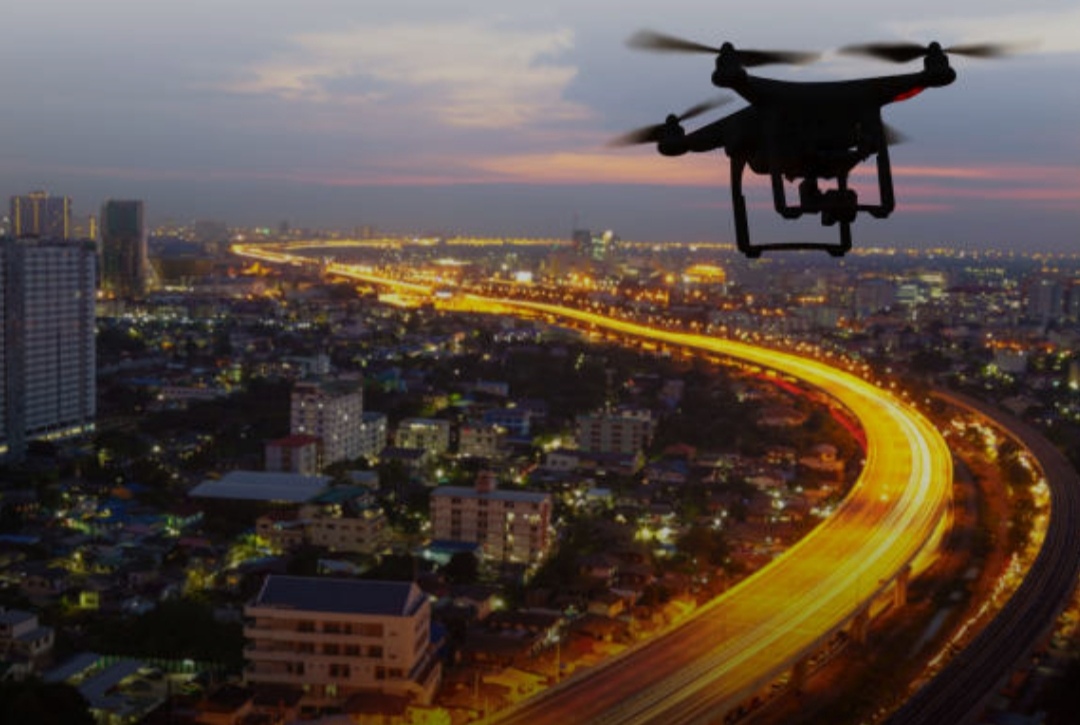
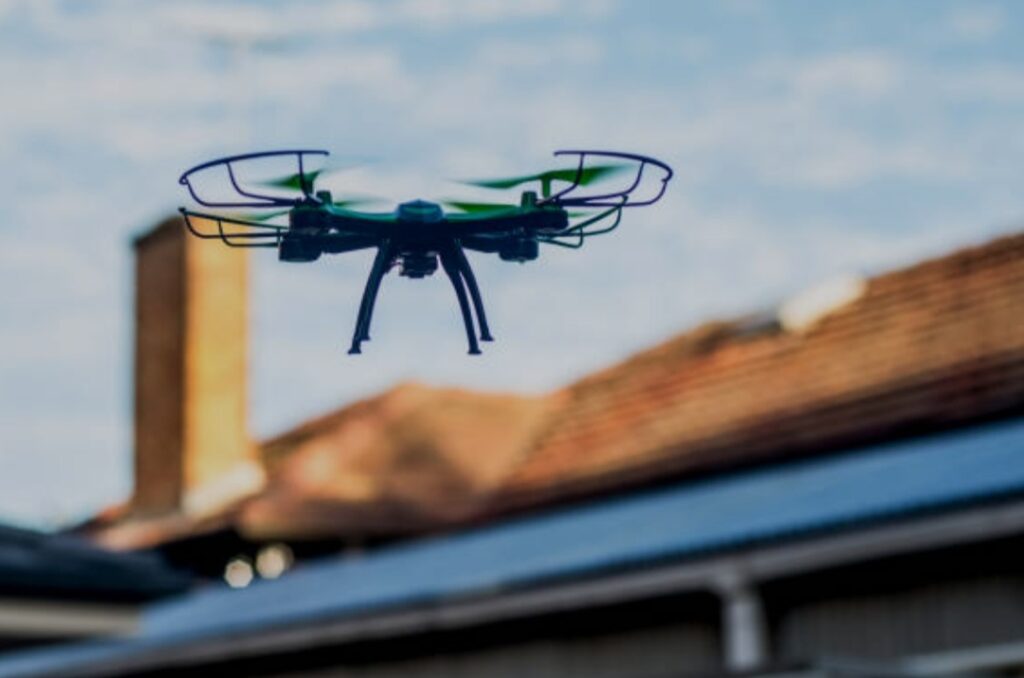
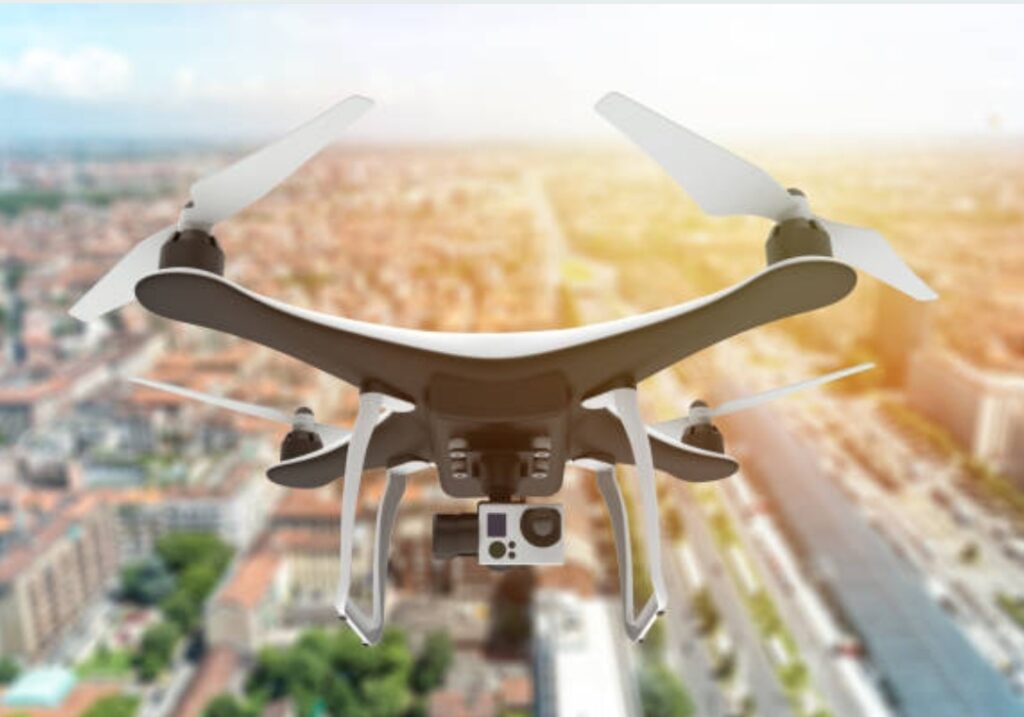
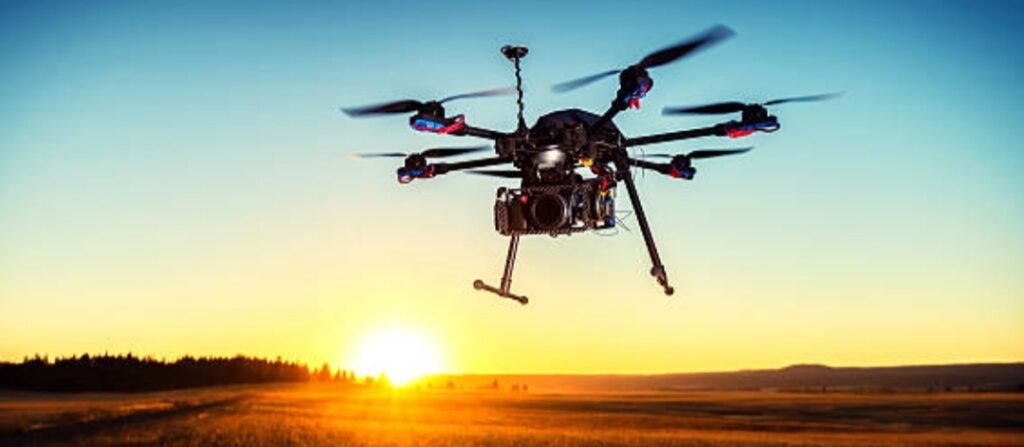
✈️ Discover How to Use a Drone for Capturing Travel Photography Like a Pro
Travel photography has dramatically evolved over the past decade, and one of the biggest game-changers is the use of drones.
Today, if you want to create jaw-dropping travel visuals that truly capture the essence of a place, mastering how to use a drone for capturing travel photography is absolutely essential.
Thanks to rapid technological advancements, drones are now more accessible, user-friendly, and packed with professional-grade camera capabilities.
Whether you’re exploring hidden beaches, hiking through mountainous terrains, or wandering ancient cities, drones empower you to capture stunning aerial shots that simply weren’t possible before. 📷
➡️ In this comprehensive guide, we’ll dive deep into everything you need to know about using a drone for travel photography — from choosing the perfect drone to mastering flight techniques, following global regulations, enhancing your photography skills, and editing your images like a pro.
More importantly, this guide is crafted to help you not just learn the basics, but to excel at drone travel photography and create breathtaking visual stories that will captivate any audience.
With drones, the sky isn’t the limit anymore — it’s the starting point. 🚀

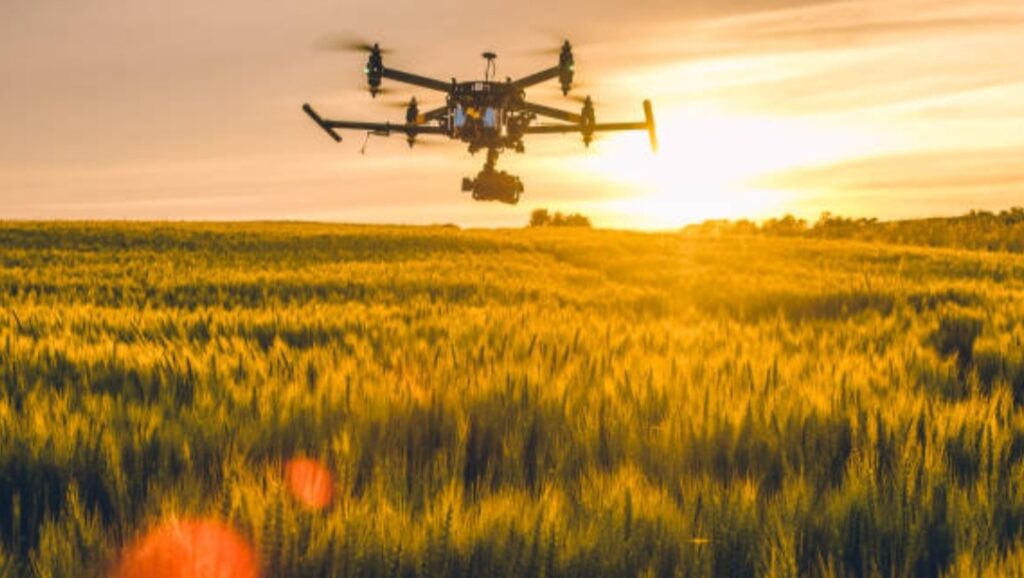
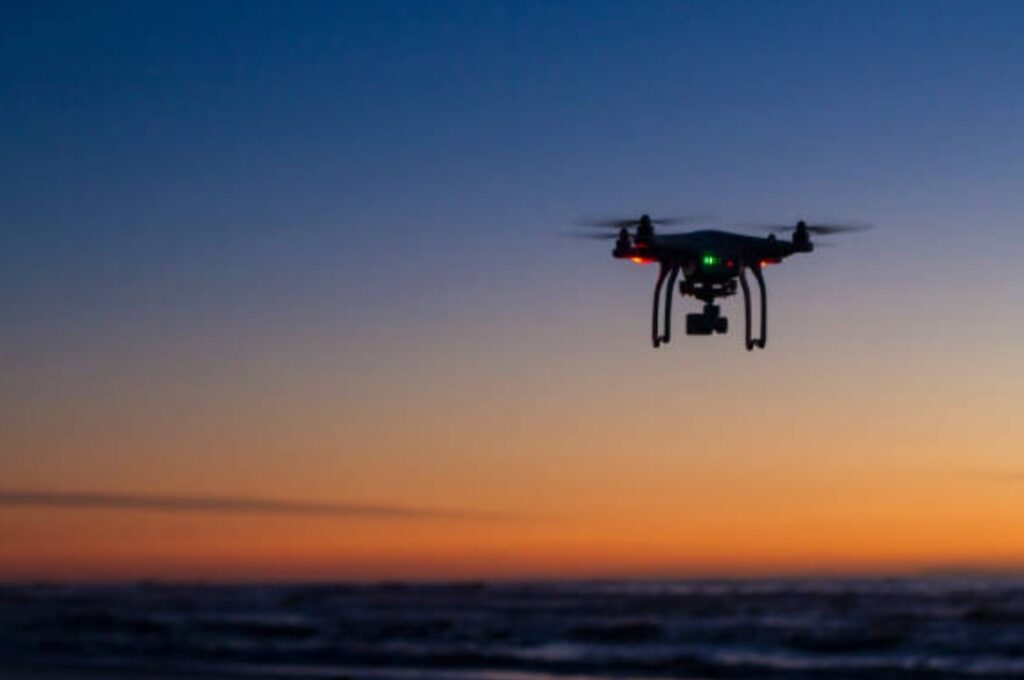
📷 Why Drones Have Revolutionized Travel Photography
Over the years, aerial travel photography has transitioned from an expensive hobby reserved for professionals to a thrilling passion available to everyday travelers.
Today’s drones — like the DJI Mini 4 Pro and the Autel Robotics EVO Nano+ — fit neatly in a backpack yet offer cinematic 4K video, obstacle avoidance, and GPS tracking, making them the ultimate tool for any travel enthusiast.
Not only do drones enable you to shoot majestic landscapes from bird’s-eye perspectives, but they also let you tell richer, more immersive travel stories.
Instead of simply capturing what you see at ground level, a drone helps you showcase an entire environment — cliffs, waterfalls, vast deserts, or busy city squares — in a way that transports viewers right into your adventure. 🌎
If you’re serious about upping your travel photography game, knowing how to use a drone for capturing travel photography effectively could be the secret weapon that sets you apart.
Imagine flying your drone over vibrant tropical coastlines at sunrise, soaring above a bustling night market in Asia, or gliding through majestic canyons in the American Southwest — the visual possibilities are truly limitless.
✨ What You Will Learn in This Guide
In this ultimate resource, you will discover:
✓ The best drones for travel photography based on weight, camera quality, and durability.
✓ Essential travel drone photography tips for capturing flawless aerial shots.
✓ Flight safety basics and international drone regulations you must know before traveling.
✓ Mastering camera settings for stunning high-resolution images.
✓ Editing techniques that make your drone photos pop and stand out on social media.
✓ How to maintain and transport your drone safely while traveling.
✓ Common mistakes to avoid that could save your drone — and your trip.
By the time you finish this guide, you’ll be fully equipped to unleash your creative potential and dominate the skies with confidence. 🌟
🚀 Why You Should Start Learning How to Use a Drone for Capturing Travel Photography Today
If you’ve ever looked at those mesmerizing drone shots on Instagram, YouTube, or travel blogs and thought, “I wish I could do that” — the truth is, you absolutely can.
Today’s market offers beginner-friendly drones with smart features like automated flying modes, object tracking, and easy-to-use mobile apps that simplify the learning curve dramatically.
Waiting too long to start could mean missing out on incredible opportunities to document your travels in ways few others can.
As drone technology continues to boom, knowing how to use a drone for capturing travel photography will not only boost your personal creativity but also open up potential career paths — from becoming a content creator to working with brands, tourism boards, and travel publications.
Start today, and transform your travel memories into masterpieces that inspire others! 🌍✨
➡️ Ready to take off? Scroll down and unlock the secrets to breathtaking drone travel photography that everyone will be talking about! 🚁💨
🚁 Why Drones Are Essential for Modern Travel Photography
When it comes to documenting your travel adventures, traditional photography methods are no longer enough to truly capture the spirit and grandeur of the places you visit.
Today, knowing how to use a drone for capturing travel photography has become an indispensable skill for any serious traveler, influencer, or storyteller.
Drones open up creative dimensions that handheld cameras simply cannot achieve — from soaring over ancient castles to sweeping across crystal-clear oceans or navigating between mountain peaks.
If you want your travel content to stand out in today’s visually saturated world, embracing drone technology is absolutely essential.
Let’s explore why.
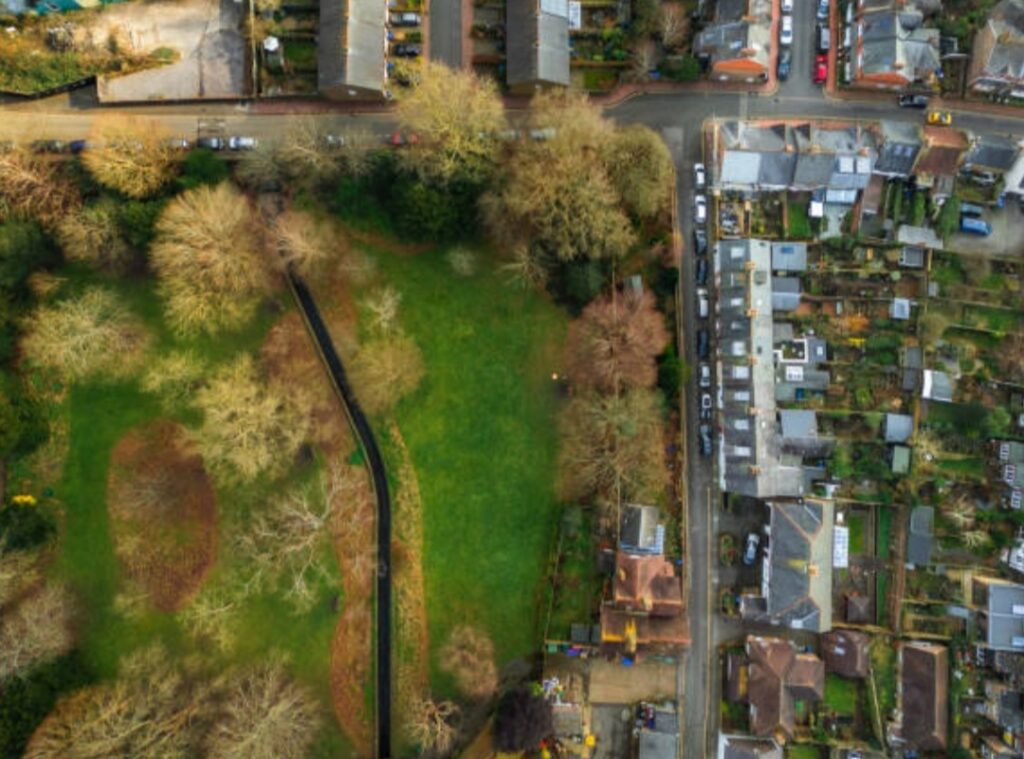
🌍 Unlock Unique Perspectives That Ground-Level Cameras Cannot Match
One of the most powerful reasons drones are revolutionizing travel photography is their ability to capture jaw-dropping aerial views that simply aren’t possible with a handheld device.
Whether you’re hovering above a lush tropical rainforest, flying low over a vineyard at sunset, or circling an ancient temple, a drone helps you tell a bigger, more immersive story.
Instead of shooting from one angle, you can now showcase landscapes from spectacular bird’s-eye views, revealing patterns, textures, and environments invisible from the ground.
✅ Fun Fact: Studies show that drone photos receive up to 30% more engagement on social media compared to standard travel images!
Learning how to use a drone for capturing travel photography isn’t just a cool skill — it’s your gateway to creating truly unforgettable visual experiences.
✈️ Elevate the Emotional Impact of Your Travel Content
Emotion is the driving force behind every great photograph.
When you capture soaring footage of a cliffside sunset or an endless desert horizon, you’re not just showing a place — you’re inviting viewers to feel what it’s like to be there.
Drones amplify emotional storytelling by adding drama, depth, and a cinematic quality to your shots that traditional cameras often struggle to deliver.
Examples:
- Slow drone flyovers create a sense of awe and grandeur.
- Fast, swooping shots inject energy and excitement into your videos.
- Gentle orbits around a landmark add a feeling of serenity or wonder.
Incorporating travel drone photography tips like these into your shoots ensures your audience stays connected and emotionally engaged.
➡️ Learn more drone storytelling techniques here!
📷 Boost Your Social Media Presence and Brand Visibility
If you’re a travel blogger, content creator, or digital nomad, drone photography is a powerful tool for building your brand.
With drone shots becoming highly sought-after on platforms like Instagram, TikTok, and YouTube, having high-quality aerial footage gives you a serious competitive edge.
Here’s why:
⭐ Drone footage looks professional, even if you’re a beginner.
⭐ Unique aerial views stand out in crowded newsfeeds.
⭐ Brands and tourism boards often prioritize drone creators for partnerships and collaborations.
Knowing how to use a drone for capturing travel photography professionally can open doors to sponsored trips, collaborations, and even freelance opportunities in travel journalism.
Power Tip: Always optimize your drone content with relevant hashtags like #DroneTravel, #AerialPhotography, and #TravelWithDrones to boost discoverability! 🚁✨
📜 Meet the Modern Traveler’s Need for Dynamic Content
Today’s audiences crave dynamic, engaging content.
Static images are great, but nothing pulls someone into a story quite like cinematic drone footage combined with storytelling captions or narrations.
Think about it:
➡️ A sweeping aerial shot of the Grand Canyon paired with a personal travel anecdote.
➡️ A majestic coastline drone video paired with soft background music.
➡️ A slow-motion clip of colorful street markets buzzing with life.
By combining movement, emotion, and perspective, drone travel photography creates immersive content that today’s digital consumers love — and algorithms reward. 📈
Adding these elements naturally enhances the value of your blog, social media posts, and even travel vlogs.

🚁 Practical Benefits of Drones for Travel Photography
Besides the creative perks, there are practical reasons why every traveler should learn how to use a drone for capturing travel photography:
🔹 Lightweight and Portable: Modern drones like the DJI Mini 4 Pro weigh under 250 grams, making them easy to pack without heavy gear restrictions.
🔹 Ease of Use: Auto-pilot modes, obstacle avoidance, and smart return-to-home features make drones beginner-friendly.
🔹 Versatility: Drones can be used for photography, videography, mapping, and even live streaming.
🔹 Adaptability: Whether it’s bright sun, cloudy skies, or rugged landscapes, drones adapt to various environments with adjustable camera settings.
Pro Tip: Always travel with extra batteries and propellers to avoid missing out on once-in-a-lifetime shots! 🔋🚁
💡 Quick Overview — Why You Can’t Ignore Drone Photography for Travel
Here’s a fast breakdown of why learning how to use a drone for capturing travel photography is a must:
✅ Capture breathtaking aerial perspectives.
✅ Tell deeper, more emotional travel stories.
✅ Build a stronger social media presence.
✅ Open professional opportunities with brands and tourism boards.
✅ Create dynamic, immersive travel content.
✅ Enjoy lightweight, easy-to-use technology perfect for globetrotters.
In short: If you want to stand out, captivate audiences, and future-proof your travel photography skills, a drone is not a luxury — it’s a necessity. 🚀🌎
➡️ Ready to find out how to pick the perfect travel drone and master the skies? Keep reading — the next section will show you everything you need to know! ✈️
🚁 How to Choose the Best Drone for Travel Photography?
Choosing the right drone can be overwhelming — especially with so many options on the market.
But if you’re serious about mastering how to use a drone for capturing travel photography, selecting the best drone tailored to your needs is the first critical step.
Not all drones are created equal, and the wrong model could mean blurry footage, limited flight time, or frustrating travel restrictions.
To help you avoid costly mistakes, this guide breaks down everything you need to consider before buying your first (or next) travel photography drone.
Let’s dive into the must-know criteria to ensure you pick a drone that delivers epic aerial shots, performs reliably, and fits your travel lifestyle perfectly.
📦 1. Portability & Size Matter — Lightweight is Key
When you’re on the move — hopping flights, hiking trails, or squeezing gear into a backpack — size and weight are everything.
A bulky drone may offer high-end specs but will slow you down, add extra baggage fees, and even attract airport security hassles.
That’s why most travel photographers prefer ultra-portable drones that are compact, foldable, and under 250 grams.
🧳 Pro Tip: Drones under 250g, like the DJI Mini 4 Pro, often don’t require registration in many countries, making travel smoother.
✅ Ideal Travel Drone Traits:
- Foldable arms and compact body
- Weighs less than 250g (0.55 lbs)
- Comes with a lightweight controller
- Easy to pack with other camera gear
Choosing a lightweight drone ensures you’re always ready to fly — whether you’re scaling cliffs or capturing sunset over a city skyline.
📷 2. Camera Quality — Capture Crisp, Cinematic Shots
Your drone’s camera is the heart of your aerial travel photography.
If it can’t shoot sharp, colorful, stabilized footage, it doesn’t matter how small or fast it is.
Look for these minimum camera specs if you’re serious about content creation:
📸 Essential Camera Specs for Travel Photography:
- 4K resolution at 30fps or higher
- 1/1.3″ sensor or larger for better low-light performance
- 3-axis gimbal stabilization
- RAW image capture support
- HDR and D-Cinelike color profiles
- Adjustable aperture for exposure control
Bonus: Some drones like the DJI Air 3 offer dual-lens systems — perfect for wide-angle landscapes and zoomed-in details in one flight.
Pro Tip: RAW photos give you greater control during editing, especially for dramatic landscapes or sunset skies.
If you’re aiming for stunning aerial travel content that captures emotion and environment, never compromise on camera quality.
🔋 3. Flight Time & Battery Life — Stay in the Air Longer
Longer flight time = more opportunities to get the perfect shot.
Most beginner drones offer 20–30 minutes of flight time, but wind and GPS usage can reduce this in real conditions.
To stay ahead:
🔋 Look for drones with:
- At least 30-minute advertised flight time
- Quick-swap battery systems
- Extra battery bundles (get them here)
Pro Tip: Always carry at least two backup batteries to avoid running out of juice mid-adventure.
Drones like the DJI Mini 3 Pro can stay airborne up to 47 minutes with extended battery options — ideal for sunset-to-night transitions.
🌍 4. GPS & Obstacle Avoidance — Fly Safer, Smarter
When you’re flying in foreign countries or unfamiliar terrain, safety is critical.
Modern drones now include built-in GPS, auto-return-to-home (RTH), and multi-directional obstacle sensors that protect your gear — and the people around it.
✅ Must-Have Smart Safety Features:
- GPS tracking for precise location and return
- Return-to-Home (RTH) auto activation during signal loss or low battery
- Obstacle sensors (forward, downward, backward)
- Beginner flight modes like Cine or Tripod mode for smooth control
Learning how to use a drone for capturing travel photography safely isn’t just about camera skills — it’s about being a responsible pilot.
Pro Tip: Always calibrate your drone’s compass before flying in a new country or region.
🛰️ 5. Intelligent Flight Modes — Let the Drone Do the Work
Today’s top drones offer autonomous flight modes that make complex shots super easy — even for beginners.
Whether you’re solo traveling or creating cinematic reels, these features help automate your creativity.
🎥 Smart Flight Modes to Look For:
- Follow Me — drone tracks your movement
- Point of Interest (POI) — orbits around a subject
- Waypoint Flight — pre-programmed routes
- Rocket, Boomerang, Dronie — instant social-media-ready shots
- Hyperlapse/Time-lapse — for creative storytelling
Using these modes transforms average footage into epic travel content that captivates.
➡️ Explore drones with smart flight modes here!
💰 6. Price vs. Performance — Get the Best Bang for Your Buck
You don’t need to break the bank to get a high-performing drone.
There are amazing budget-friendly drones under $500 — and premium models over $1000 with pro features.
📈 Entry-Level Picks (Under $500):
- DJI Mini 2 SE – Lightweight, 2.7K video, great for beginners
- Potensic Atom SE – Affordable alternative with GPS and 4K
💼 Mid-Range Picks ($600–$999):
- DJI Mini 3 Pro – 4K HDR video, vertical shooting, extended battery
- Autel Evo Nano+ – 1/1.28” CMOS sensor, obstacle avoidance
🎬 Pro-Level Picks ($1,000+):
- DJI Air 3 – Dual camera, excellent for cinematic work
- DJI Mavic 3 Classic – 4/3 CMOS sensor, unmatched detail and dynamic range
Choose based on your content goals, budget, and how often you travel.
📑 7. Local Regulations & Compatibility
Some countries ban certain drone brands, restrict flights over heritage sites, or require registration.
Before buying a drone for travel:
📋 Check if the drone is:
- Compliant with FAA, EASA, or local regulations
- Below the registration threshold (under 250g)
- Capable of geofencing (to avoid no-fly zones)
Bonus Tip: Some drones offer built-in geofencing systems to alert you before flying into restricted airspace.
✅ Quick Drone Buying Checklist
Before you buy, make sure your travel drone checks these boxes:
✔️ Under 250g for global travel ease
✔️ 4K camera with a large sensor and gimbal stabilization
✔️ 30+ minutes flight time with extra batteries
✔️ Obstacle sensors and smart GPS features
✔️ Intelligent flight modes
✔️ Compatible with your smartphone or controller
✔️ Budget-aligned with room for accessories
The right drone should feel like a travel companion — not just a gadget.
🎯 Choose a Drone That Matches Your Travel Goals
Whether you’re a casual explorer or aspiring content creator, the best drone is the one that helps you capture your journey clearly, creatively, and safely.
Start small with an easy-to-fly model or invest in a powerful machine — either way, learning how to use a Drone for capturing travel photography becomes much easier with the right gear in hand.
➡️ Ready to fly high? Check out our next section where we break down flight preparation, pre-shoot planning, and must-know safety tips for every destination! ✈️🌍
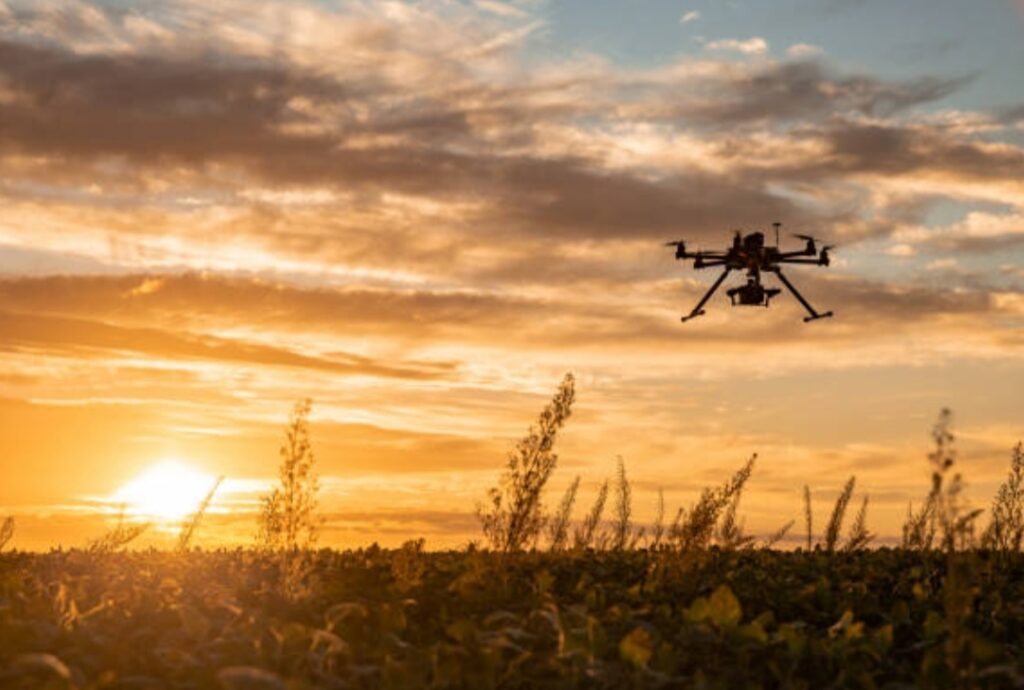
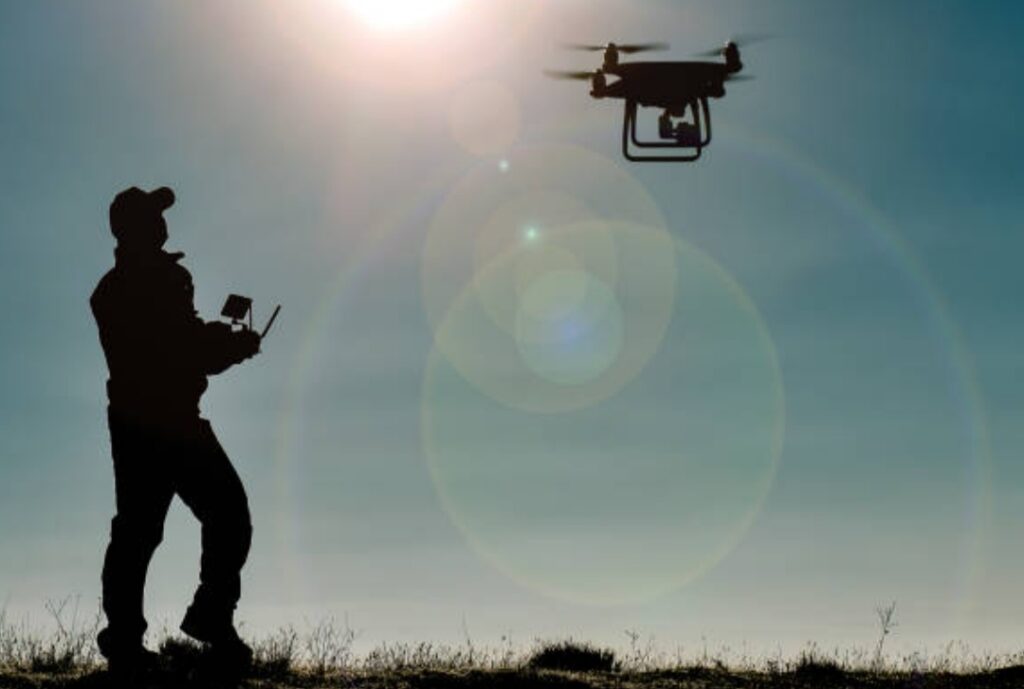
🚀 Mastering Drone Flight Techniques
If you want to truly stand out in the world of aerial travel photography, owning a drone isn’t enough.
You must master drone flight techniques to capture buttery-smooth footage, cinematic angles, and epic stills that hook viewers instantly.
Understanding how to use a drone for capturing travel photography starts with learning how to control your drone confidently, smoothly, and creatively — no jerky movements, no aimless flying.
Let’s break down the core flight skills, advanced maneuvers, and pro tips that can transform you from a beginner into a sky-surfing storyteller.
🎮 1. Get Comfortable with the Basics — Practice Makes Perfect
Before chasing waterfalls or mountains, start small.
Practice in open fields or your backyard to build foundational skills.
🛠️ Basic Flight Skills to Master First:
- Takeoff and landing smoothly
- Hovering steadily at different altitudes
- Basic forward, backward, side, and yaw movements
- Altitude control and braking gently
📌 Pro Tip: Always fly in Beginner or Cine Mode first — it slows down all inputs, giving you cinematic, steady shots with less risk.
Remember: Smooth is cinematic. Fast and jerky? That’s amateur.
🌀 2. Learn Smooth Camera Movements for Cinematic Travel Shots
Great drone shots aren’t just about the location — they’re about movement.
To master how to use a drone for capturing travel photography, you need to think like a filmmaker.
🎥 Smooth Movement Techniques:
- Dolly In/Out: Fly forward or backward slowly to reveal or zoom into a subject.
- Orbit (POI): Circle around a landmark while keeping it centered in the frame.
- Crane Shot: Ascend or descend vertically while keeping your camera focused on a subject.
- Pan with Yaw: Slowly rotate the drone left/right while moving forward for parallax motion.
🎯 These techniques add depth, motion, and drama to your shots — essential for captivating travel content.
Pro Tip: Use the gimbal tilt wheel to slowly adjust the camera angle mid-flight for even more cinematic movement.
🧠 3. Use Intelligent Flight Modes to Automate Complex Moves
You don’t always have to fly manually to get professional results.
Modern drones include intelligent flight modes that allow you to automate stunning shots with the tap of a button.
✨ Top Modes to Master:
- Follow Me: Perfect for solo travelers capturing hikes or bike rides.
- Point of Interest (POI): Automatically circle around a focal subject.
- Dronie: Fly up and backward to reveal yourself in an epic setting.
- Rocket: Vertical ascent with camera facing down.
- Helix or Boomerang: Spiraling shots around a subject — cinematic and fun.
🛎️ Explore drones with these intelligent modes here!
📌 Bonus Tip: Master when not to use automated modes — tight spaces or wind-heavy areas can confuse sensors.
🌬️ 4. Understand Wind and Weather Conditions
Nature doesn’t play fair — especially when you’re flying a drone.
Understanding and adapting to changing weather is one of the most overlooked yet essential flight skills.
💨 Drone Tips for Wind & Weather:
- Avoid flying in winds over 15–20 mph
- Don’t fly near rain, mist, or snow (moisture kills drones)
- Higher altitudes = stronger winds — adjust your elevation accordingly
- Use “Sport Mode” if stuck in high winds (faster but drains battery)
📲 Use weather apps like UAV Forecast or Windy to check wind speeds before takeoff.
Pro Tip: Always fly upwind first, so you have battery power for a smooth return.
🧭 5. Maintain Line of Sight and Situational Awareness
Flying your drone like a pro means more than smooth moves — it means safe, legal flying.
Always keep your drone within visual line of sight (VLOS) and avoid flying too far or behind obstructions.
🎯 Situational Awareness Checklist:
- Know the terrain and obstacles around you
- Watch for birds, power lines, trees, and drones
- Avoid flying over people or crowds (often illegal)
- Stay clear of airports, military zones, and restricted airspace
📌 Tip: Use the drone map view to maintain GPS awareness if you’re exploring unfamiliar locations.
Knowing how to use a drone for capturing travel photography responsibly is just as important as flying creatively.
🎯 6. Practice These Pro-Level Techniques for Travel Mastery
Once you’re confident with the basics, it’s time to fly like a true aerial storyteller.
🔥 Pro Drone Techniques to Level Up:
- Reveal Shots: Hide the subject behind a tree, rock, or structure, then slowly rise or pan to reveal it.
- Leading Lines: Fly along roads, rivers, or fences to create cinematic visual direction.
- Low Fly-Bys: Fly close to the ground or water for dynamic perspective shots.
- Combination Moves: Combine orbit + gimbal tilt + yaw for layered motion.
These shots aren’t just impressive — they tell a story.
🛠️ Get a gimbal protector and ND filters to ensure cinematic color and motion in sunny locations.
✅ Final Thoughts — Mastery = Consistency + Creativity
To become a master of drone flight in travel photography, there’s only one secret: consistent practice with a creative eye.
Use your drone not just as a camera — but as a flying brush painting stories in the sky.
Whether you’re gliding over turquoise oceans or capturing temple rooftops at golden hour, the more flight skills you master, the more unforgettable your content becomes.
➡️ Up next: Learn how to edit your drone travel photos and videos like a pro, even if you’re a beginner!
🌍 Preparing for Your First Drone Travel Photography Shoot
Ready to take off on your first adventure with your drone?
Before you head out, it’s crucial to prepare properly — or you could risk missing the perfect shot, or worse, damaging your drone.
When it comes to learning how to use a drone for capturing travel photography, preparation is half the battle.
A well-prepared drone pilot can focus on creativity instead of troubleshooting problems on location.
Here’s your ultimate, step-by-step guide to getting ready for your very first drone travel photography mission!
🧳 1. Make a Complete Pre-Flight Checklist
Nothing kills the excitement faster than forgetting an essential item.
Create (and actually use) a detailed checklist before every trip.
✅ Essential Items to Pack for Drone Travel Photography:
- 🎮 Drone and Remote Controller
- 🔋 Extra Batteries (at least 2–3 spares)
- 🎒 Lightweight Drone Backpack
- 📱 Smartphone or Tablet with Control App
- ☀️ ND Filters (for sunny conditions)
- 💾 Extra MicroSD Cards (high-speed recommended)
- 🧹 Cleaning Kit (lens wipes and brush)
- 🔌 Charging Cables and Power Bank
- 📜 Drone Registration/License (if required)
🛠️ Check out the best drone travel gear here!
📌 Pro Tip: Always double-check that firmware updates are completed before you leave, especially for new destinations.
🌎 2. Research Drone Laws and Regulations for Your Destination
Drone laws vary massively from country to country — and even between regions within a country.
Knowing where and how you can fly legally is non-negotiable.
🔍 Key Research Points Before Your Trip:
- Is drone flying allowed for recreational or commercial use?
- Do you need a permit or registration?
- What are the no-fly zones? (e.g., airports, military bases)
- Are there altitude limits (commonly 120 meters/400 feet)?
- Are insurance requirements mandatory?
📲 Download apps like B4UFLY, AirMap, or UAV Forecast for instant legality checks.
Pro Tip: Always carry printed copies of your drone license or permits if applicable — it saves headaches at checkpoints.
🗺️ 3. Scout and Plan Your Locations in Advance
Location scouting isn’t just for Hollywood filmmakers — it’s critical for drone travel photographers too.
🧭 Location Planning Tips:
- Use Google Earth to find epic landscapes and wide-open spaces.
- Look for unique features like winding rivers, cliff edges, and cultural landmarks.
- Check the golden hour times (sunrise and sunset) for best lighting.
- Plan your shots ahead — know which angles and heights might work best.
Pro Tip: Save coordinates or pin maps for offline use if traveling to remote areas with no internet access.
🌤️ 4. Monitor Weather and Environmental Conditions
A successful drone shoot hinges on good weather and clear visibility.
🌦️ Key Weather Factors to Check:
- Wind Speeds (ideal < 15mph for beginners)
- Rain or Storm Forecasts (never fly in moisture)
- Sun Position (for golden hour lighting)
- Visibility (avoid haze or heavy mist)
📲 Best Weather Apps for Drone Flyers:
- UAV Forecast
- Windy.com
- AccuWeather
Pro Tip: Always have a backup indoor or low-altitude plan in case weather conditions change unexpectedly.
🔋 5. Prepare Your Gear for Travel
Flying internationally with drone gear requires some careful preparation — especially concerning batteries.
✈️ Important Gear Travel Tips:
- Always carry drone batteries in hand luggage (not checked bags).
- Use battery fireproof bags for airline safety compliance.
- Detach propellers and store separately if needed for compactness.
- Make sure your drone is securely cushioned inside a protective case.
- Bring travel adapters if flying internationally (especially for charging).
🛡️ Find the best fireproof battery bags and drone travel cases here!
🎯 6. Set Your Drone and Camera Settings Before Shooting
Don’t waste precious battery time fiddling with settings in the field.
Best Default Drone Settings for Beginners:
- Photo Mode: RAW + JPEG (for better editing flexibility)
- Video Resolution: 4K at 30fps or 24fps (cinematic standard)
- White Balance: Set manually based on lighting conditions (Auto can shift unpredictably)
- Gimbal Sensitivity: Set to “Smooth” or “Cinematic” for travel footage
- Obstacle Avoidance: Turn on unless you’re shooting in very tight spaces
Pro Tip: Format your SD card and fully charge all batteries before the shoot day.
🛠️ 7. Create a Shot List or Storyboard
Wandering aimlessly wastes battery and daylight.
Having a shot plan lets you work efficiently and creatively.
📝 Sample Drone Travel Photography Shot List:
- Wide sweeping landscape shot (intro)
- Overhead vertical of unique location
- Orbit a major landmark
- Tracking shot following a path or river
- Reveal shot from behind trees/mountains
- Sunset silhouette shot
Pro Tip: Sketch simple storyboards if you’re creating a travel video montage — it helps you capture everything you need.
🧠 8. Mentally Prepare: Stay Flexible and Patient
Travel drone photography is exciting but can also be frustrating.
Sometimes the weather turns, permits fall through, or you crash (it happens).
Mental preparation is just as important as packing your drone.
💡 Mindset Tips:
- Stay patient and flexible. Conditions change fast.
- Expect a few shots to go wrong — it’s normal.
- Be respectful of locals, especially in culturally sensitive areas.
- Have fun and enjoy the process! The magic is in the adventure.
✅ Final Checklist Before Leaving for Your Shoot
🚀 Quick Travel Drone Prep Recap:
- ✔️ Drone fully charged and updated
- ✔️ Batteries packed in fireproof bag
- ✔️ Permits/licenses printed and ready
- ✔️ Weather forecast checked
- ✔️ Flight locations researched and mapped
- ✔️ Camera settings pre-adjusted
- ✔️ Shot list or storyboard prepared
Pro Tip: Always tell someone where you’re going if flying solo — safety first!
🎒 Ready to launch your first unforgettable drone photography adventure?
Don’t leave it to chance — make sure you have the best travel drone gear with you and soar into the skies with confidence!
📸 Capturing Stunning Travel Photos with Your Drone
Once you’ve mastered how to use a drone for capturing travel photography, it’s time to shift your focus from technical flying to creative artistry.
Your drone isn’t just a flying camera — it’s a storytelling tool, offering you breathtaking angles and perspectives that ground-based photographers can only dream of.
In this section, we’ll break down actionable strategies, expert techniques, and insider tips to help you consistently capture jaw-dropping drone photos during your travels.
Let’s make your next drone shot go viral! 🌍✨
🏞️ 1. Understand and Use Composition Techniques
Even from hundreds of feet in the air, classic photography principles still apply.
Mastering composition will transform your drone shots from “okay” to “award-winning.”
📐 Top Composition Techniques for Drone Photography:
- Rule of Thirds: Place points of interest along the gridlines or intersections.
- Leading Lines: Use rivers, roads, or coastlines to naturally draw the viewer’s eye into the scene.
- Symmetry and Patterns: Seek out repetitive shapes like farmlands, city grids, or forests.
- Negative Space: Embrace wide-open skies or oceans to highlight your subject.
- Framing: Capture scenes through arches, trees, or cliffs from above.
🎯 Pro Tip: Turn on your drone’s gridlines — it makes applying the rule of thirds much easier while flying!
🌅 2. Chase the Perfect Lighting: Golden Hour and Blue Hour
Lighting can make or break your travel photos.
Midday sun often creates harsh shadows and washed-out colors.
Instead, aim to shoot during the Golden Hour and Blue Hour.
🕒 Best Times to Capture Stunning Drone Shots:
- Golden Hour (after sunrise, before sunset): Soft, warm, and cinematic lighting.
- Blue Hour (just before sunrise or after sunset): Cool tones with magical city lights.
📲 Use apps like PhotoPills or Golden Hour One to predict these times at your location.
💡 Pro Tip: Plan morning flights if you want calm winds and fewer crowds!
🗺️ 3. Elevate Your Angles: Experiment with Perspectives
One huge advantage of drone photography is the ability to shoot from dynamic, mind-blowing angles.
🚀 Creative Drone Angles to Try:
- Top-Down (Nadir) Shots: Shoot straight downward for abstract patterns.
- Low-Altitude Flyovers: Fly just a few meters above the ground for immersive depth.
- Reveal Shots: Start hidden behind an object (like trees or cliffs) and rise for a dramatic reveal.
- Orbiting Subjects: Circle a point of interest smoothly to create cinematic motion.
Pro Tip: Slightly tilt your gimbal (camera) forward while flying to include more horizon and depth.
🎨 4. Adjust Camera Settings for Maximum Quality
Don’t just rely on “Auto” mode!
Manually setting your drone’s camera ensures you capture the sharpest, most vibrant, and professional-quality images.
⚙️ Ideal Drone Camera Settings for Travel Photography:
- Shoot in RAW Format: This preserves maximum data for editing.
- Lower ISO: Keep ISO between 100–400 to avoid noise.
- Manual Exposure: Adjust shutter speed and aperture manually to avoid overexposure.
- White Balance: Set manually based on lighting conditions (Daylight, Cloudy, etc.)
- Bracketing (AEB Mode): Take multiple exposures to blend for HDR images later.
📸 Pro Tip: Slightly underexpose bright scenes to protect highlights.
🖼️ 5. Think Like a Storyteller
Drone photography isn’t just about snapping pretty pictures — it’s about telling a story.
📖 Tips for Storytelling Through Drone Photos:
- Capture sequences that show beginning, middle, and end.
- Show human elements (tiny hikers, boats, houses) for scale.
- Highlight contrasts: old vs new, city vs nature, desert vs oasis.
- Think of emotion — is the scene serene, adventurous, powerful, lonely?
🎯 Pro Tip: Frame your shots to hint at a journey or a mystery, inviting viewers to imagine the story behind the scene.
🏖️ 6. Edit Your Drone Photos Like a Pro
The magic often happens in post-processing.
Even a fantastic photo can look ordinary without thoughtful editing.
🖥️ Basic Editing Tips for Drone Photos:
- Adjust exposure, contrast, and white balance for natural tones.
- Enhance colors subtly without over-saturating.
- Sharpen details carefully — especially for landscape textures.
- Crop with purpose — reinforce composition techniques like rule of thirds.
- Remove lens distortion or chromatic aberration if needed.
🛠️ Recommended Editing Software:
- Adobe Lightroom (best for photo editing)
- Luminar AI (beginner-friendly AI-powered edits)
- Snapseed (great mobile editing app)
💡 Pro Tip: Keep a consistent editing style to build a recognizable visual brand.
🎯 7. Safety First, Always
Chasing epic shots is thrilling, but safety must always come first.
🚫 Important Safety Tips:
- Avoid flying near wildlife (especially protected species).
- Respect privacy — no flying near private properties without permission.
- Monitor battery life carefully — never push it too close to zero!
- Know when to abort: strong winds, low signal warnings, unexpected obstacles.
Bold Reminder: No photo is worth risking your drone or anyone’s safety.
🚁 Ready to take your drone travel photography from good to jaw-dropping?
Start implementing these techniques today and watch your portfolio soar — and don’t forget to gear up with the best drone photography tools and editing apps for next-level results!
🎨 Enhancing Your Photos Through Post-Processing
When you learn how to use a drone for capturing travel photography, you quickly realize that snapping the photo is only half the journey.
Post-processing is where your images truly come alive — it’s the secret sauce that transforms a good shot into a breathtaking work of art.
In this section, we’ll explore powerful editing techniques, expert tools, and step-by-step workflows that will elevate your travel drone photography to a professional level.
Get ready to make your drone photos absolutely irresistible! 🚀✨
🖥️ 1. Why Post-Processing is Essential for Drone Photography
Even if you capture a fantastic shot straight out of your drone, raw images often look flat due to the camera sensor limitations.
Editing allows you to bring back details, correct colors, enhance contrast, and highlight your artistic vision.
✅ Benefits of Post-Processing Drone Photos:
- Recover lost shadows and highlights.
- Correct distortion, vignetting, and chromatic aberration.
- Fine-tune white balance for accurate color representation.
- Apply creative effects like mood, warmth, or coolness.
- Improve sharpness and texture, especially for landscapes.
💬 Pro Tip: Think of editing as polishing a gem — the photo already has beauty; you’re just revealing it fully.
🛠️ 2. Best Software Tools for Drone Photo Editing
Choosing the right tools is critical for effective editing.
Fortunately, you don’t need a full Hollywood studio setup to create stunning edits!
🧰 Top Drone Photo Editing Software:
- Adobe Lightroom: Industry-standard for professional photo editing; perfect for color grading and RAW adjustments.
- Photoshop: Best for detailed corrections, retouching, and advanced compositing.
- Luminar Neo: AI-powered editing software for quick yet impressive results (great for beginners).
- Snapseed: Free mobile app with powerful editing tools for on-the-go corrections.
- Affinity Photo: Affordable alternative to Photoshop with professional-grade features.
💡 Pro Tip: For best results, always shoot in RAW format so you can take full advantage of editing flexibility.
🎨 3. Essential Editing Techniques for Drone Travel Photos
Let’s dive into the actual process of enhancing your travel drone shots.
Follow these techniques to ensure your images pop with life and emotion:
🔥 Adjust Exposure and Contrast First
- Bring out hidden details in shadows without overexposing highlights.
- Boost contrast slightly to give the image depth and dimension.
🌈 Correct White Balance
- Set the right temperature for natural colors.
- Fix overly blue or yellow casts, especially in sunrise/sunset photos.
🎯 Fine-Tune Colors and Vibrancy
- Increase vibrancy (not saturation) to enhance subtle colors naturally.
- Use the HSL (Hue, Saturation, Luminance) panel to target specific colors.
🖼️ Sharpen and Add Clarity
- Apply slight sharpening to bring out texture in mountains, beaches, or cityscapes.
- Boost clarity to make details crisper — but avoid going overboard, or your image will look harsh.
🏞️ Crop for Stronger Composition
- Refine your composition by cropping to align better with the rule of thirds.
- Remove distracting elements at the edges of the frame.
🎯 Pro Tip: Always zoom in to 100% when sharpening to avoid unnatural edges!
🧹 4. Advanced Editing: Go Beyond the Basics
Once you’re comfortable with essential edits, it’s time to add a professional touch.
🔮 Advanced Editing Ideas for Drone Photos:
- Dodge & Burn: Brighten highlights and darken shadows selectively for a 3D effect.
- Split Toning: Add subtle color shifts to highlights and shadows for cinematic moods.
- Gradient Filters: Apply gradual exposure or color changes across parts of the image (perfect for enhancing skies!).
- Sky Replacement: If the original sky looks dull, some software (like Luminar Neo) lets you replace it easily.
- Lens Corrections: Remove barrel distortion caused by wide-angle drone lenses.
💡 Pro Tip: Less is more — aim for natural enhancements, not artificial overprocessing.
📦 5. Batch Processing for Travel Shoots
When you return from a trip with hundreds (or thousands!) of drone photos, editing each one individually is exhausting.
That’s where batch processing saves the day.
🚀 What is Batch Processing?
Editing one photo and applying the same adjustments to a group of similar shots automatically.
Benefits of Batch Editing:
- Saves hours of work.
- Creates a consistent style across your travel album.
- Speeds up your publishing workflow for blogs, social media, or print sales.
📸 Pro Tip: Use presets in Lightroom to apply your signature style with one click!
⚡ 6. Exporting Your Drone Photos Correctly
You’ve finished editing — now don’t ruin it by saving incorrectly!
📥 Best Export Settings for Drone Travel Photography:
- Resolution: Always export at maximum resolution for prints.
- Format: Use JPEG (for web) or TIFF (for high-quality prints).
- Compression: Keep quality above 80% for web sharing to avoid pixelation.
- Sharpen for Output: Add output sharpening specifically for screen or print.
🎯 Ready to take your travel drone photos from decent to breathtaking masterpieces?
Unlock the full potential of your shots by mastering these professional post-processing tools and presets!
Start today and build a portfolio that stuns the world!
🚫 Common Mistakes to Avoid When Using a Drone for Travel Photography
Even if you know how to use a drone for capturing travel photography, small mistakes can cost you the perfect shot, your drone, or worse — get you into legal trouble.
Avoiding these common pitfalls will not only protect your gear but also improve your photography quality dramatically.
Let’s break down the major errors travelers and beginners often make — and how you can avoid them like a pro. 💡
❌ 1. Ignoring Drone Laws and Local Regulations
One of the biggest mistakes drone photographers make is assuming it’s legal to fly anywhere they want.
🛑 Did You Know?
Many countries and even specific tourist attractions ban drone flights or require permits. Flying in restricted zones can lead to fines, drone confiscation, or even criminal charges.
✅ What to Do Instead:
- Research drone laws before visiting a destination.
- Use apps like AirMap or B4UFLY to check for real-time flight restrictions.
- Always carry your drone license or registration paperwork if needed.
🗺️ Pro Tip: Keep a printed and digital copy of your drone insurance and permits — especially when traveling internationally.
⚙️ 2. Not Updating Firmware or Calibrating Sensors
Flying a drone with outdated firmware or uncalibrated sensors is like driving a car with faulty brakes.
🚨 Consequences:
- GPS drift
- Inaccurate altitude
- Sudden loss of signal
- Unexpected crashes
✅ Checklist Before Flying:
- Update your drone and controller firmware before your trip.
- Calibrate the compass and IMU at each new location.
- Check the propellers, battery levels, and SD card storage.
🧰 Pro Tip: Use a pre-flight checklist app to avoid missing critical safety steps.
🌬️ 3. Flying in Bad Weather Conditions
Many beginners underestimate how sensitive drones are to weather.
Strong winds, rain, or fog can disorient the drone or cause damage to its electronics.
🚫 Avoid Flying When:
- Wind speeds exceed 15–20 mph (unless using a pro-grade drone)
- It’s raining, snowing, or visibility is poor
- There’s magnetic interference or heavy cloud cover
✅ What to Do:
- Use weather apps like UAV Forecast to plan your flights.
- Always check wind speed at flying altitude — it’s usually higher than ground level.
- If the weather looks questionable, wait it out. A grounded drone is better than a lost one.
🎒 4. Not Packing Properly or Running Out of Batteries
You’ve reached the perfect cliffside viewpoint — but your drone battery’s dead.
Ouch. This happens more often than you think.
🧳 What Travelers Forget to Pack:
- Extra batteries (minimum 3)
- ND filters for different lighting conditions
- Power bank or portable drone battery charger
- Lens wipes and cleaning cloths
- SD cards (always carry spares!)
📦 Pro Tip: Pack your drone in a compact, padded travel case that fits airline carry-on standards.
🎯 5. Poor Composition and Rushed Shots
Owning a drone doesn’t automatically make your shots stunning.
The difference between a good photo and a scroll-stopper often comes down to composition and planning.
❌ Mistakes to Avoid:
- Shooting from too high or too far
- Ignoring the rule of thirds
- Capturing without purpose or story
- Flying and shooting in a rush due to pressure or time limits
✅ What to Do Instead:
- Scout your location (in-person or via Google Earth) before flying
- Map out a flight path and shot list in advance
- Focus on storytelling: what’s the subject? The emotion?
📷 Pro Tip: Take multiple shots from different heights and angles — you’ll be glad you did during editing.
📶 6. Losing Connection or Flying Out of Sight
New drone users often lose track of how far the drone is — until it’s too late.
🚨 Common Mistakes:
- Flying beyond visual line of sight (illegal in many places)
- Losing GPS signal behind cliffs, trees, or buildings
- Forgetting to set Return to Home (RTH) function
✅ Best Practices:
- Keep your drone in sight at all times
- Set altitude limits and geofencing in the app
- Always calibrate the home point before each flight
📡 Pro Tip: Use the “Find My Drone” feature in case of an emergency landing or disconnect.
📉 7. Overediting or Using Overly Gimmicky Effects
It’s tempting to go wild with editing — but adding too much saturation, fake lens flares, or extreme filters can ruin an otherwise amazing shot.
❌ Editing Mistakes to Avoid:
- Over-sharpening or high contrast
- Unrealistic sky replacements
- Using heavy vignettes or unnatural HDR
- Inconsistent color grading across a travel series
✅ What Works Best:
- Enhance realism, not fantasy
- Stick to one editing style per photo series
- Compare your edit with the original to avoid losing natural beauty
🎯 Pro Tip: Get feedback from other photographers before posting or publishing.
⚠️ 8. Ignoring Storage and Backup
Imagine losing your drone AND the amazing footage it captured.
💾 Mistakes to Avoid:
- Not backing up footage daily
- Deleting files before creating a second copy
- Using cheap or slow SD cards that may corrupt data
✅ Pro Backup Workflow:
- Use high-speed SD cards from reputable brands like SanDisk or Lexar
- Carry a small external SSD or backup to cloud storage solution each night
- Don’t rely solely on your drone’s internal memory
💬 Pro Tip: Label and organize files by location and date to streamline your editing process later.
By understanding what not to do, you instantly get ahead of 90% of new drone users.
Avoiding these common mistakes could save your footage, your drone, and even your trip.
✅ Want to level up your drone travel photography even further?
Check out this expert gear guide and editing toolkit for insider tools used by pro aerial creators!
Don’t wait — take control of your drone journey and create travel stories that fly above the rest.
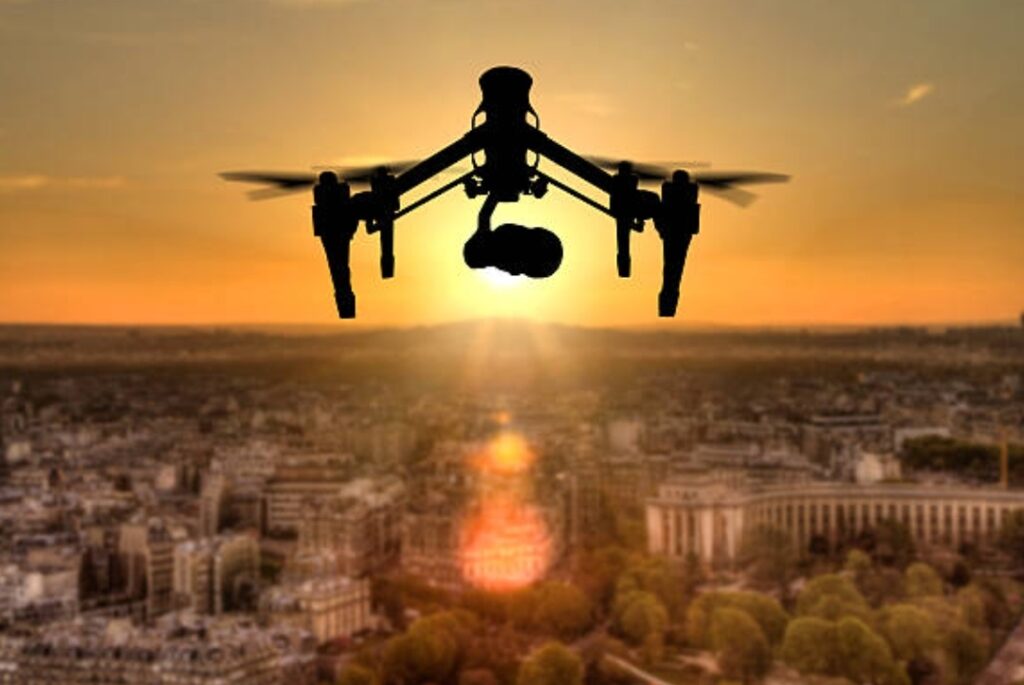
🌍 Legal and Ethical Considerations When Flying Drones Abroad
Flying a drone while traveling the world is incredibly exciting. But before you take off, you need to understand the legal and ethical responsibilities that come with it.
If you’re serious about learning how to use a drone for capturing travel photography — and want to do it legally, respectfully, and safely — this section is essential reading.
🛑 Not following drone regulations abroad can lead to hefty fines, confiscated equipment, or even bans from entering a country again. Yikes!
Let’s walk through what you must know — and do — to fly responsibly no matter where your adventures take you.
📜 1. Know the Drone Laws in Every Country You Visit
Every country has its own set of drone laws. Some are drone-friendly, while others have strict no-fly zones or require government-issued permits.
Example Scenarios:
- In Japan, you can’t fly drones over 150 meters or near people without permission.
- In India, flying without registering your drone can result in seizure.
- Morocco outright bans drones — you can’t even bring them through customs.
✅ What You Should Do:
- Research laws on government aviation authority websites before traveling.
- Use trusted resources like Drone Laws by Country to get up-to-date info.
- Check for restricted zones, altitude limits, and licensing requirements.
Tip: Some countries require you to apply weeks in advance. Don’t leave it last-minute!
📄 2. Register Your Drone if Required
Some countries mandate drone registration or require a UAS operator license. Skipping this step can lead to serious trouble.
Countries That Commonly Require Registration:
- USA (with the FAA)
- Canada
- Australia
- UK
- Most of the EU
✅ Steps to Register Your Drone:
- Visit the country’s aviation authority portal.
- Complete the registration process.
- Print and carry proof of registration.
- Attach your registration number to your drone.
📌 Always keep digital and paper copies of your permit when traveling.
🌐 3. Understand Airspace Restrictions & No-Fly Zones
Just because an area looks remote doesn’t mean it’s legal to fly there.
Drone-restricted areas are often near:
- Airports ✈️
- Military bases
- National parks
- Power stations or government facilities
✅ Smart Tools to Use:
- AirMap or Drone Assist to visualize restricted zones.
- DJI FlySafe or Geo Zone map for DJI drone users.
- Google Maps satellite view to pre-plan flights safely.
🗺️ Tip: Stay at least 5 miles (8km) away from airports unless authorized.
👥 4. Respect Privacy and Cultural Sensitivity
Just because you can fly somewhere doesn’t mean you should.
Common Mistakes to Avoid:
- Flying over private property without permission
- Hovering over people at beaches or festivals
- Capturing religious sites or sacred grounds without consent
- Flying around wildlife (this could stress or endanger animals)
✅ Best Practices:
- Ask permission before flying over homes or farms
- Avoid flying near children or large crowds
- Learn cultural norms — what’s fine in one country might be offensive in another
🌏 Golden Rule: If someone asks you to stop filming — respect their request immediately.
🧾 5. Get Insurance for Your Drone
Many countries require liability insurance for drone flights.
This protects you financially if your drone injures someone or damages property.
✅ Types of Drone Insurance to Consider:
- Liability insurance (often mandatory)
- Hull insurance (for accidental damage)
- Travel insurance riders (to cover theft or loss while abroad)
Check if your drone is covered under your general travel insurance — if not, this drone-specific insurance provider is a good starting point.
📑 Tip: Some countries (like Germany) won’t allow drone flights unless you show proof of insurance.
🧠 6. Follow Ethical Guidelines Even When It’s Legal
Even if flying is legally allowed, responsible drone travel photographers should follow ethical practices.
What Ethical Drone Use Looks Like:
- Limiting drone noise pollution in quiet natural areas
- Not interrupting sacred or religious ceremonies
- Avoiding flights that may disturb local life or wildlife
- Respecting the peace and solitude of fellow travelers
✅ Ask Yourself Before Launching:
- Am I interrupting nature or someone’s personal experience?
- Would I be annoyed if someone flew a drone over me right now?
- Is this shot worth the potential disruption?
🧭 Ethical travel is sustainable travel.
You’ll gain more respect from locals — and your content will reflect that.
✈️ 7. Customs & Border Control – Can You Bring a Drone In?
Many travelers get surprised at airport security when they’re asked to surrender their drone.
Countries Known for Confiscating Drones at Customs:
- Morocco
- Egypt
- Cuba
- Saudi Arabia
- Kenya (requires declaration)
✅ What to Do:
- Declare your drone if required by law
- Carry documentation showing the purpose of travel (e.g., photography work)
- If in doubt, ship your drone via courier with insurance to your hotel
🚫 Don’t try to sneak your drone through customs — you risk permanent confiscation or fines.
Understanding the legal and ethical side of drone travel photography isn’t just about avoiding fines — it’s about becoming a responsible, respected creator.
✨ The best drone photographers are also the most mindful ones.
Ready to fly smart and capture jaw-dropping travel shots?
Start your journey with the right tools and legal peace of mind — check out this drone travel toolkit for must-have resources.
Don’t risk your footage, drone, or reputation — fly the right way from Day 1.
🎒 Essential Drone Accessories for Travel Photography
When planning to capture jaw-dropping travel photography using a drone, having just the drone itself isn’t enough.
To get the most out of your aerial adventures, you need to equip yourself with essential drone accessories that improve your shooting experience, enhance your results, and protect your gear.
If you’re learning how to use a drone for capturing travel photography, don’t overlook this must-know section — your gear checklist can make or break your entire trip.
Let’s explore the drone accessories that every travel photographer should pack before takeoff.

⚡ 1. Extra Batteries — Stay in the Air Longer
Most drones only fly for 20–30 minutes per charge. That’s nowhere near enough when you’re out in the wild trying to capture a perfect golden hour or a scenic coastal view.
✅ Why It’s a Must-Have:
- Extends your shooting time without waiting for recharges
- Crucial when you’re far from power sources (like in remote mountains or islands)
- Gives peace of mind when you’re mid-flight and need backup power
📦 Pro Tip: Carry at least 3 extra batteries, especially for full-day shooting.
Check best-rated drone battery packs here
🔋 2. Portable Charging Hub or Power Bank
When you’re on the go, you won’t always find an outlet. That’s why a multi-port charging hub or high-capacity power bank is non-negotiable.
✅ What to Look For:
- 20,000mAh+ power banks with fast USB-C output
- Solar-powered charging banks for eco-travel
- Compact hubs that can charge 3–4 batteries simultaneously
🌍 Ideal for remote locations or van life photography.
🌞 3. ND Filters (Neutral Density Filters)
ND filters are like sunglasses for your drone’s camera. They reduce light entering the lens, allowing for cinematic motion blur and balanced exposures, even in harsh sunlight.
✅ Why You’ll Love Them:
- Perfect for sunrise/sunset shots and capturing moving water
- Reduces glare and overexposure
- Helps maintain proper shutter speed for smoother video
🎥 Want cinematic travel footage? ND filters are your best friend.
Find the right ND filter set for your drone model here
🎒 4. Durable & Waterproof Drone Backpack
You’ll be hiking, flying, and moving through all kinds of environments — don’t risk damaging your drone gear in a cheap bag.
✅ Look For:
- Water-resistant shell and shock-proof padding
- Compartments for batteries, props, controllers, and laptop
- Comfortable straps and ventilation for long treks
🌧️ A reliable backpack keeps your gear safe in unpredictable weather.
Check out top-rated travel drone backpacks
📡 5. Extra Propellers and Propeller Guards
It’s common for propellers to get damaged during travel or rough landings. Always carry extra propellers to avoid being grounded.
✅ Why They Matter:
- Quick replacement on the go
- Keeps your drone stable and safe
- Guards add protection in crowded or confined areas
🛠️ Also pack a small tool kit for on-the-spot repairs.
Add extra propeller set to your travel kit here
📱 6. Smartphone/Tablet Mount
A stable, adjustable mount for your phone or tablet improves your control and visibility during flight.
✅ Benefits:
- Larger screen = better framing for photography
- Reduces hand strain and allows precise control
- Pairs well with sunshades for glare-free viewing
📲 Pair with a sun hood for clear viewing in bright conditions.
Find universal controller mounts here
🧼 7. Lens Cleaning Kit & Microfiber Cloths
Dust, fingerprints, or salt spray can quickly ruin your aerial shots. A compact cleaning kit ensures your lens stays spotless no matter where you shoot.
✅ Recommended Items:
- Lens wipes
- Air blower
- Anti-static cleaning solution
- Microfiber cloths
🧽 Clean gear = clear footage. Never shoot with a smudged lens!
📡 8. Signal Range Extenders
If you’re flying in wide open areas or valleys, you might face weak signals. Signal extenders enhance your drone’s range and reliability.
✅ Why They’re Useful:
- Prevents lost connection in remote areas
- Ideal for long-range landscape or ocean shots
- Easy to attach and lightweight
📶 Keep your drone connected — even at a distance.
Compare signal booster kits
☁️ 9. Weather Protection Accessories
Wind, rain, and sand can be your drone’s worst enemy.
Don’t leave your gear unprotected.
✅ Must-Have Protection Gear:
- Silicone drone sleeves for rain protection
- Propeller guards for windy weather
- Anti-fog inserts for high humidity areas
🌪️ Always check the weather before each flight. Use UAV Forecast App for real-time conditions.
🧰 10. Landing Pad
Landing pads are more than just cool-looking mats. They protect your drone during takeoff and landing — especially in rough or dirty terrain.
✅ Why You Need One:
- Prevents debris from entering motors
- Visible surface helps GPS calibration
- Foldable and easy to pack
🚀 Especially useful in gravel, sand, or grassy locations.
Check foldable landing pads here
✅ Quick Drone Travel Photography Accessory Checklist
Here’s a quick checklist so you don’t miss anything important:
✅ Extra Batteries
✅ Portable Charging Hub or Power Bank
✅ ND Filters
✅ Waterproof Drone Backpack
✅ Extra Propellers + Guards
✅ Smartphone/Tablet Mount
✅ Lens Cleaning Kit
✅ Signal Range Extenders
✅ Weather Protection
✅ Foldable Landing Pad
📌 Pro Tip: Use packing cubes or accessory pouches to stay organized on the go.
You’ve got the skills. You’ve got the drone. Now make sure you’ve got the gear to match.
🛫 The right accessories don’t just support your drone — they elevate your travel photography experience to a whole new level.
Ready to upgrade your gear?
Explore the ultimate drone travel accessory bundle to set yourself up for success wherever your adventures take you.
✨ Don’t risk missing the perfect shot because you forgot a simple tool.
📤 Editing and Sharing Your Drone Travel Photos
So, you’ve flown your drone across scenic cliffs, golden beaches, and bustling cities — and now you have some incredible aerial shots ready to wow the world.
But wait — your work isn’t done yet.
To truly make your drone photos pop, and ensure they get the attention they deserve, you need to master the editing and sharing process.
This section walks you step-by-step through how to edit and share drone travel photos like a pro, so your visuals get the recognition, reach, and engagement they’re worthy of.
It’s one of the most overlooked aspects of learning how to use a drone for capturing travel photography, but it’s where good photos become unforgettable.
🖥️ Step 1 — Choose the Right Editing Software
Editing starts with picking the right tool. There are dozens of apps out there, but your choice should be based on your editing goals, skill level, and device preference.
✅ Top Drone Photo Editors:
- Adobe Lightroom (Desktop & Mobile): Professional-grade photo editing with full control over exposure, color, and detail.
- Snapseed (Mobile): Beginner-friendly with powerful tools like selective editing and filters.
- Luminar Neo: AI-based desktop software that enhances skies, sharpens details, and removes noise automatically.
- Lightroom Mobile Presets: Great for quick editing on the go using travel photography presets.
🧠 Pro Tip: Always shoot in RAW format if your drone supports it. This gives you maximum flexibility during editing and better image quality.
🎨 Step 2 — Basic Editing Workflow for Drone Photos
Follow this proven drone photo editing flow to enhance your images without making them look fake or over-processed:
- Crop & Align
Straighten horizons, center the subject, or try creative crops for storytelling. - Adjust Exposure
Fine-tune highlights, shadows, and contrast for a balanced look. - Enhance Colors
Use vibrance and saturation sparingly — make skies pop without making greens look radioactive. - Sharpen & Reduce Noise
Apply clarity and texture to make details stand out. Use noise reduction if shooting in low light. - Use Graduated Filters
Great for skies, water, or foreground enhancement. Mimics real lens filters.
🔍 Optional: Use AI tools to replace skies, remove distractions, or highlight key elements in your photo.
🔄 Use Presets for Faster Edits
Presets are like filters, but more powerful. They help you apply a consistent style across all your drone travel photos.
✅ Why Use Presets:
- Save time editing in bulk
- Achieve a professional, cohesive look
- Create your own branding style
Find trending drone photo presets here 🎨
🌐 Step 3 — Export Photos for Web & Social Media
Once your photos are edited, it’s time to export them correctly.
Different platforms require different image dimensions, quality settings, and file sizes.
🖼️ Recommended Export Settings:
- File Type: JPEG or PNG
- Resolution: 2048px on the long side for web
- Quality: 80–90% (for social media, web upload speed)
- Sharpening: Standard for screen
📌 For printing, use 300 DPI and TIFF format.
📲 Step 4 — Share Your Drone Travel Photos Like a Pro
Don’t just post your photo and hope for likes.
Use a platform-specific strategy to get the visibility your work deserves.
✅ Top Platforms to Share On:
- Instagram: Use high-res, vertical crops + location hashtags like #DroneTravel, #DroneAdventure, #AerialView
- Pinterest: Great for driving blog traffic. Share vertical “pin-style” drone shots with travel tips.
- 500px & Flickr: Community-driven sites where drone photographers get discovered.
- Facebook Travel Groups: Share in drone-specific or travel-centric groups for engagement.
- Your Blog/Website: Showcase collections, add SEO-rich text, and use internal links to drone gear recommendations.
📣 Add an Engaging Caption:
Tell a story. Ask a question. Mention your drone model.
Example: “Shot this with my DJI Mini 4 Pro while exploring the fjords of Norway. Would you dare to fly over these icy cliffs?”
🧩 Pro Tips to Maximize Engagement
⭐ Use Hashtags Strategically
Mix popular (e.g., #dronephotography) with niche (e.g., #djimavicair2travel) hashtags.
🕒 Post at Optimal Times
Each platform has peak hours — research and schedule accordingly.
🔁 Repurpose Content
Turn drone photos into Instagram reels, blog banners, or even YouTube B-roll.
📧 Build an Email List
Offer a free travel photo wallpaper pack in exchange for email sign-ups. Insert link to your opt-in here
📈 Measure Performance & Grow Your Audience
Use analytics tools to understand how your photos are performing and how your audience is growing.
- Instagram Insights for engagement tracking
- Pinterest Analytics for pin impressions and click-throughs
- Google Analytics for website traffic from blog photo galleries
📊 Adjust based on which posts perform best. Look at likes, shares, comments, and saves.
Editing and sharing your drone travel photos is just as important as capturing them.
It’s the final step that turns your hard work into inspiration for the world to see.
🧲 Want more reach, engagement, and visual impact?
Make sure your editing is clean, your style is consistent, and your posts are made to connect.
🎯 Ready to level up your photo editing game?
Download the best Lightroom presets for drone photography and start building your signature look.
💥 Don’t let your epic drone shots stay hidden in your memory card. Show the world what your drone sees.
🗺️ Inspiring Drone Travel Photography Destinations
When exploring how to use a drone for capturing travel photography, location is everything.
The perfect destination transforms a good aerial shot into an award-worthy masterpiece.
But not all destinations are drone-friendly, visually dynamic, or legally accessible for drone pilots.
This section unveils breathtaking, drone-approved travel destinations from around the world — curated for aerial photographers — while offering essential tips on where, when, and how to fly your drone safely and creatively.
These locations aren’t just visually stunning — they’re practically built for drone storytelling.
🌋 Iceland – Land of Fire and Ice
Why it’s epic for drone photography:
- Endless contrasts: black sand beaches, glowing volcanoes, icy glaciers
- Waterfalls like Skógafoss and Gullfoss viewed best from the sky
- Wide-open skies for cinematic aerial panoramas
✅ Drone Tip: Fly early morning or golden hour to catch low-angle sunlight dancing across the rugged terrain.
📌 Rules: Iceland allows drone use in many areas but permits are needed in national parks. Respect wildlife and distance limits.
🕌 Morocco – Vibrant Culture from the Skies
The colorful medinas, desert dunes, and blue city of Chefchaouen create a mosaic of textures and tones when viewed from above.
Top drone spots:
- Sahara Dunes at sunrise
- Aït Benhaddou fortress
- Atlantic Coast (Essaouira)
✅ Visual Strategy: Use your drone to create symmetry and highlight architectural repetition.
📌 Rules: Drone laws are strict in Morocco. Check customs regulations — drones are often confiscated on arrival unless pre-approved.
🌊 Philippines – 7,000+ Tropical Islands
If you’re after turquoise waters, lush cliffs, and hidden lagoons, the Philippines is a drone paradise.
🏝️ Top drone-friendly locations:
- El Nido, Palawan
- Siargao’s coastline
- Chocolate Hills, Bohol
✅ Pro Tip: Use polarizing ND filters when filming over water for crystal-clear results.
📌 Rules: Register your drone with CAAP. Flying over crowded beaches is prohibited without a permit.
🏞️ United States – Diverse & Drone-Ready
From Grand Canyons to cityscapes, the U.S. is a goldmine for every drone traveler.
Iconic drone destinations:
- Utah’s Monument Valley
- Oregon Coastline
- NYC skyline (observe NFZ boundaries)
✅ Pro Tip: Use topographic contrast — deserts, mountains, and urban scenes — for variety in your portfolio.
📌 Rules: Follow FAA Part 107 rules. Download apps like B4UFLY to check flight zones.
⛰️ Switzerland – Alpine Majesty
Snow-capped peaks, green valleys, and pristine lakes create a dreamlike aerial canvas in Switzerland.
Must-fly locations:
- Lauterbrunnen Valley
- Lake Brienz
- Matterhorn region
✅ Visual Hook: Capture the interplay of fog, water, and sun for ethereal mood shots.
📌 Rules: Switzerland is drone-friendly, but flying near airports and in nature preserves requires authorization.
🕌 United Arab Emirates – Futuristic Skylines and Desert Drama
Whether you’re drawn to Dubai’s modern marvels or the vast red dunes of the desert, UAE offers a bold visual palette.
Top picks:
- Downtown Dubai skyline
- The Empty Quarter (Rub’ al Khali)
- Palm Jumeirah (mind the NFZ)
✅ Lighting Strategy: Golden hour works beautifully with glass skyscrapers and long dune shadows.
📌 Rules: Strict drone laws. Pre-registration with GCAA is mandatory for both hobbyists and professionals.
🧭 Hidden Gems Worth Exploring
💡 Lesser-known but drone-worthy spots around the world:
- Faroe Islands: Rugged cliffs and seascapes, perfect for dramatic aerials.
- Georgia (Europe): Mountains, ancient castles, and rich culture — highly drone-accessible.
- Sri Lanka: Tea plantations, coastlines, and wildlife reserves ideal for storytelling.
- Albania: Underrated Balkan coastlines with minimal tourist crowding.
✅ These are ideal for content creators looking to go viral with fresh locations not over-saturated on Instagram.
✈️ How to Research Drone Laws Before Traveling
Before packing your drone, always research local regulations. Countries differ wildly in how they treat drones at borders and in public airspace.
Tools to check drone laws by country:
- Drone Laws by Country – UAVCoach
- DroneMate App (for offline access while abroad)
- Local civil aviation authority websites
📌 Avoid Confiscation: In countries like Morocco or Egypt, declare your drone upfront or ship it in advance through a legal channel if possible.
🧳 Packing Tips for Drone Travelers
🎒 Whether you’re heading to the Arctic or the Amazon, here’s how to pack smart:
- Use a drone backpack with padded compartments
- Carry extra propellers and ND filters
- Store batteries in LIPO-safe bags in your carry-on
- Bring a power bank or solar charger for remote flying
- Back up footage daily using a portable SSD drive
🧠 Bonus Tip: Label your drone and controller with your contact info in case of loss.
💡 Let the Destination Inspire the Story
The world looks entirely different from above — and drones give you the freedom to share that new perspective with others.
Don’t just shoot what’s trending. Chase your curiosity. Let your drone tell stories of lesser-known places, intimate moments, and wild horizons.
🌍 Your next travel destination could be the next viral aerial masterpiece.
Pack wisely, fly safely, and always shoot with purpose.
❓ FAQs – How to Use a Drone for Capturing Travel Photography
Have burning questions about how to use a drone for capturing travel photography?
You’re not alone.
Here are the most frequently asked questions that travelers and aspiring drone photographers often search for.
✅ Do I need a license to fly a drone while traveling internationally?
Yes — in most cases.
Drone laws vary by country, and many destinations require licensing, permits, or registration before you can legally fly.
- In the United States, you need an FAA Part 107 certificate if flying commercially.
- In Europe, most countries follow the EASA drone categories (Open, Specific, Certified).
- Countries like India, Egypt, and Morocco may ban or heavily restrict drone usage.
🧭 Always check the destination’s aviation authority website before your trip.
📌 Pro Tip: Use the DroneMate App or UAVCoach’s global drone laws directory to stay updated on local rules.
📸 What’s the best drone for travel photography beginners?
Some top travel-friendly drones for beginners include:
- DJI Mini 4 Pro – lightweight, under 250g (avoids many regulations), 4K video, obstacle avoidance
- Autel EVO Nano+ – compact, with a larger sensor for low-light scenes
- DJI Air 3 – for those ready to invest more, with dual cameras and cinematic controls
Look for features like:
- 3-axis gimbal stabilization
- GPS lock
- 4K+ video and RAW photo capture
- Intelligent flight modes (e.g., Follow Me, Orbit)
💼 Don’t forget to consider portability, battery life, and controller range when choosing your drone.
🌦️ Can I fly my drone in rainy or windy weather?
It’s not recommended.
Drones are sensitive to:
- Rain: Moisture can damage electronics and motors
- Strong wind (>20 mph): Causes flight instability or loss of control
- Fog: Reduces visibility and increases condensation risk
🛑 Unless your drone is weatherproof-rated, flying in harsh conditions can lead to crashes and voided warranties.
💡 What drone settings should I use to capture stunning travel shots?
Start with these base settings for high-quality aerial travel photos:
- Photo Mode: RAW + JPEG
- White Balance: Set manually (avoid Auto in changing light)
- ISO: Keep it low (100–400) for clearer shots
- Shutter Speed: Adjust for movement — 1/60 to 1/200 for landscapes
- Aperture (if adjustable): f/2.8 – f/5.6 for sharpness
🎥 Bonus for video: Use ND filters to get cinematic motion blur (shutter speed = 2x frame rate).
✈️ How do I travel with drone batteries safely on airplanes?
✔️ Always pack drone batteries in carry-on luggage, not checked bags.
They are considered lithium-ion hazardous items.
Key tips:
- Store batteries in a LIPO-safe fireproof bag
- Use terminal covers or tape over battery contacts
- Keep batteries at 30–50% charge during travel
- Most airlines limit battery size to 100Wh (check your model specs)
💡 Bring a printed copy of airline policy to avoid confusion at security.
🌍 Can I fly drones in UNESCO Heritage Sites or National Parks?
In most cases, no — unless you have special filming permits.
- UNESCO sites usually have strict no-drone policies due to preservation rules.
- National Parks (e.g., US NPS) typically ban drones entirely.
- Some locations allow professional use with an application and permit fee.
📌 Always check local authority websites before flying.
Illegal drone usage may lead to fines or confiscation.
🧠 How can I improve my drone photography skills faster?
Here’s how you can grow quickly and confidently:
- Practice regularly in safe, open spaces
- Watch YouTube drone tutorials and study cinematography techniques
- Join drone communities on Reddit, Facebook Groups, or DroneU
- Study great drone photographers (look at framing, lighting, composition)
- Take online drone courses for structured learning
📷 Bonus Tip: Analyze your own footage regularly to spot mistakes and improvements.
🚫 What are common beginner mistakes in drone travel photography?
Avoid these costly and frustrating pitfalls:
- Flying without checking laws
- Ignoring weather conditions
- Using Auto Mode only – Manual gives better creative control
- Over-editing photos in post
- Flying too high or too fast – subtle movement = cinematic shots
- Not formatting SD card before shoots
- Forgetting extra batteries or chargers
🛠️ The key is preparation, patience, and practice.
💬 Still Have Questions About Drone Travel Photography?
If you’re still unsure about how to use a drone for capturing travel photography, don’t worry — it’s a journey.
💬 Leave your question in the comments — we answer every one!
🏁 Conclusion: Elevate Your Travel Stories with Drone Photography
In today’s digital age, knowing how to use a drone for capturing travel photography isn’t just a trend — it’s a transformational skill that lets you share your adventures from breathtaking new perspectives.
With the right drone, techniques, and preparation, you can turn ordinary travel moments into cinematic storytelling experiences — ones that captivate your audience and elevate your brand, blog, or personal portfolio.
From choosing the perfect destination to mastering post-processing, this guide has walked you through every essential step to becoming a confident, legal, and creative drone travel photographer.
🚀 Now It’s Your Turn to Take Flight
Whether you’re a travel blogger, digital nomad, hobbyist, or aspiring content creator, the sky isn’t the limit — it’s just the beginning.
✅ Ready to get started?
Here’s what to do next:
- 🛒 Get Your Travel Drone Today – Start with beginner-friendly options like DJI Mini 4 Pro or Air 3.
- 📚 Download our FREE Drone Photography Toolkit – Includes a packing list, cheat sheet on global drone laws, and bonus editing presets.
- 💬 Leave a comment below with your favorite drone destination or questions — we love connecting with our readers.
- 💌 Subscribe to our newsletter for exclusive drone tips, deals, and inspiration straight to your inbox.
✨ Final Thought:
“The best view comes after the hardest climb — or the smoothest drone flight.”
Capture it. Share it. Inspire with it. 🌍📸🛸
✅ Make sure to bookmark this guide for your next trip.
📤 Share it with friends who are just getting into drone photography.
You might also like :