
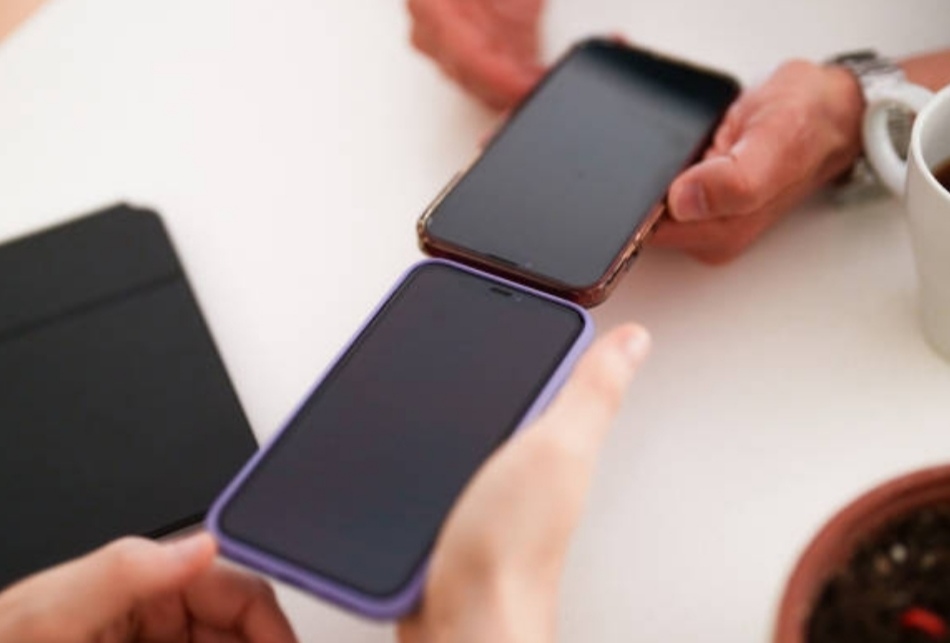
Transferring Data Between Old and New Smartphones Easily
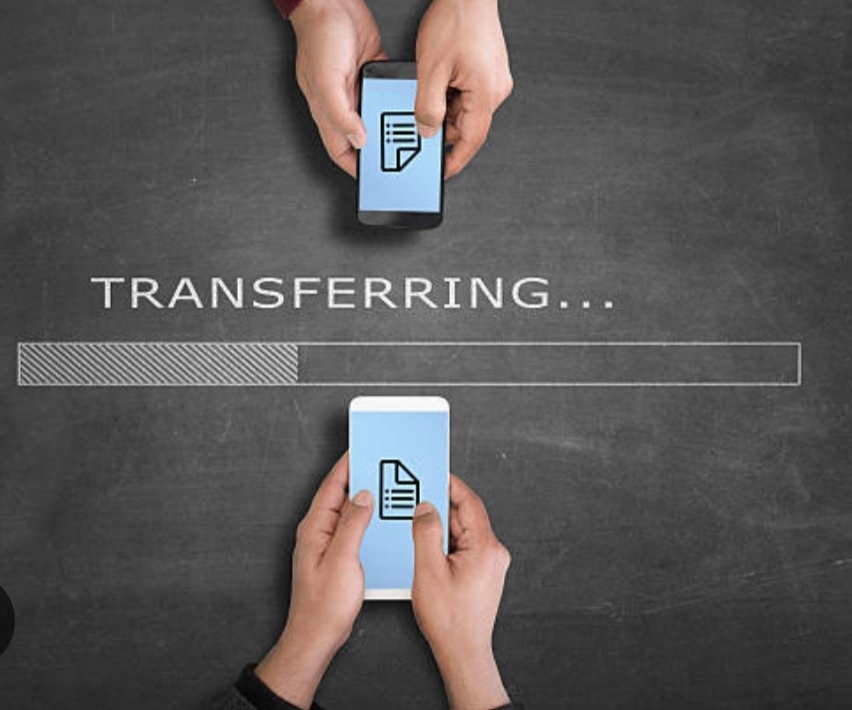
The Importance of Seamless Data Transfer Between Smartphones
Switching to a new smartphone can be exciting, but it’s also a critical process that requires careful planning.
When you upgrade to a new device, transferring your existing data is essential to maintain access to your contacts, messages, photos, apps, and personal settings.
Imagine starting fresh with a new phone, only to realize your cherished memories and essential files are stuck on your old device.
This situation can quickly become frustrating and inconvenient.
A seamless data transfer process ensures that your transition to a new smartphone is smooth and stress-free.
It also saves you from the hassle of manually downloading apps, restoring contacts, and configuring settings from scratch.
The significance of transferring data goes beyond convenience. It’s also about preserving important information that defines your daily digital life, from work-related documents to personal notes, fitness data, and even saved passwords.
Common Challenges in Data Transfer Between Smartphones
Despite the availability of advanced tools, transferring data between smartphones is not always a straightforward process.
Many users encounter various challenges that can complicate the transition.
Here’s a closer look at some of the most common issues:
- Device Compatibility Issues
- One of the biggest hurdles is the compatibility between different operating systems.
- Transferring data from Android to iOS or vice versa can be tricky due to differences in file formats and platform-specific apps.
- Even transferring data between two Android devices or two iOS devices can sometimes be problematic if they are running on vastly different versions of the operating system.
- Loss of Data
- Data loss is a real concern during the transfer process.
- This can occur due to interruptions during the transfer, incomplete backups, or using unreliable transfer methods.
- Important files like photos, videos, and app data are often at risk.
- Time-Consuming Processes
- Some transfer methods can take a significant amount of time, especially if you have a large volume of data.
- Manually transferring data or waiting for cloud services to sync can test your patience.
- Security Risks
- Transferring sensitive information over unsecured connections can expose you to security threats.
- Without proper encryption and secure networks, your personal data might be at risk during the transfer process.
- Learning Curve for New Methods and Tools
- While modern smartphones offer various transfer tools, not everyone is familiar with how to use them.
- This can lead to confusion and errors during the process.
Why a Proper Data Transfer Strategy Matters
A well-planned data transfer strategy not only reduces the risks mentioned above but also ensures that you can start using your new phone without any delays or complications.
Here are some benefits of a smooth data migration process:
- Time-Saving: You can avoid manually re-entering your information.
- Data Security: Reduces the chance of data loss or exposure to security threats.
- Improved Experience: Your new device will feel like a continuation of your old one, minimizing the learning curve.
Pro Tip: Always backup your old smartphone before starting the transfer process.
This will act as a safety net in case something goes wrong, allowing you to recover your data.
Preparing for Data Transfer
When preparing to transfer data between smartphones, a bit of planning can save you from potential headaches later.
It’s crucial to ensure your data is backed up properly and to check the compatibility between devices before starting the process.
In this section, we’ll discuss how to back up data on both Android and iOS devices and explain why checking device compatibility is a vital step for a successful data migration.

Backup Essentials – Safeguard Your Data First
Backing up your data is the most important step before you begin transferring anything to your new smartphone.
This ensures that your files are safe even if something goes wrong during the data transfer process.
Without a backup, there’s always a risk of losing essential information, such as contacts, photos, messages, and app data.
Here’s why creating a backup is critical:
- It protects you from data loss due to transfer interruptions or errors.
- You can restore the backup on your new device if the transfer fails.
- It offers peace of mind, knowing that your files are safe and retrievable at any time.
How to Back Up Data on Android Devices
Backing up your Android data is a straightforward process, thanks to Google’s built-in backup feature.
You can also use external storage or third-party apps to create a complete backup of your phone.
Step-by-Step Guide to Back Up Data on Android:
- Use Google Backup:
- Go to Settings > System > Backup.
- Turn on Backup by Google One.
- Ensure that options like App Data, Contacts, Photos & Videos, and SMS are enabled.
- Tap Back Up Now to start the process.
- Back Up Photos and Videos:
- Open the Google Photos app.
- Enable Backup & Sync in the app settings.
- Choose the upload quality (High Quality or Original) to store your media files in the cloud.
- Manual Backup to External Storage:
- Connect your phone to a computer via USB.
- Copy essential files and folders to your PC or an external drive.
- Use Third-Party Backup Apps:
- Consider apps like Helium Backup or Super Backup & Restore for additional backup options.
How to Back Up Data on iOS Devices
Apple makes it simple to back up data using iCloud or iTunes (on a Mac or PC).
Regular backups are essential for protecting your valuable information.
Step-by-Step Guide to Back Up Data on iOS:
- iCloud Backup:
- Go to Settings > Your Name > iCloud > iCloud Backup.
- Turn on iCloud Backup and tap Back Up Now.
- Ensure that Photos, Contacts, Notes, and other important data are included in the backup.
- Backup with Mac or PC:
- Connect your iPhone to your computer using a Lightning cable.
- Open Finder (Mac) or iTunes (PC).
- Select your device and choose Back Up Now.
- Use Third-Party Apps for Local Backups:
- Apps like iMazing or AnyTrans can offer more control over your backup process.
Assessing Compatibility – Ensuring a Smooth Transfer
Before transferring data, you need to make sure your new smartphone is compatible with your current one.
Why is Compatibility Important?
- Operating System Differences: Transferring data between Android and iOS requires specific tools and methods due to their different operating systems.
- Software Version Mismatches: If your devices are running outdated software, certain features may not work during the transfer process.
- File Format Issues: Some file types, such as app-specific data, may not be directly transferable between Android and iOS.
How to Check Device Compatibility
- Check Operating System Versions:
- Ensure both devices are running the latest version of their respective operating systems.
- For Android, go to Settings > System > System Update.
- For iOS, go to Settings > General > Software Update.
- Determine the Transfer Method:
- If both devices are from the same ecosystem (Android to Android or iPhone to iPhone), use the built-in tools like Google Backup or iCloud.
- For cross-platform transfers (Android to iOS or vice versa), use Move to iOS or third-party apps like SHAREit.
- Verify Storage Capacity:
- Ensure your new smartphone has enough storage space to accommodate the data you plan to transfer.
- Check the available storage in Settings > Storage.
Pro Tip: Always keep both devices fully charged or connected to power during the transfer process to avoid interruptions.
Preparing your devices properly for data transfer is crucial for a hassle-free experience.
By backing up your data and ensuring compatibility between smartphones, you can significantly reduce the risk of errors or data loss.
Up next, we’ll explore the best methods to transfer data between smartphones, including step-by-step guides for Android and iOS devices.
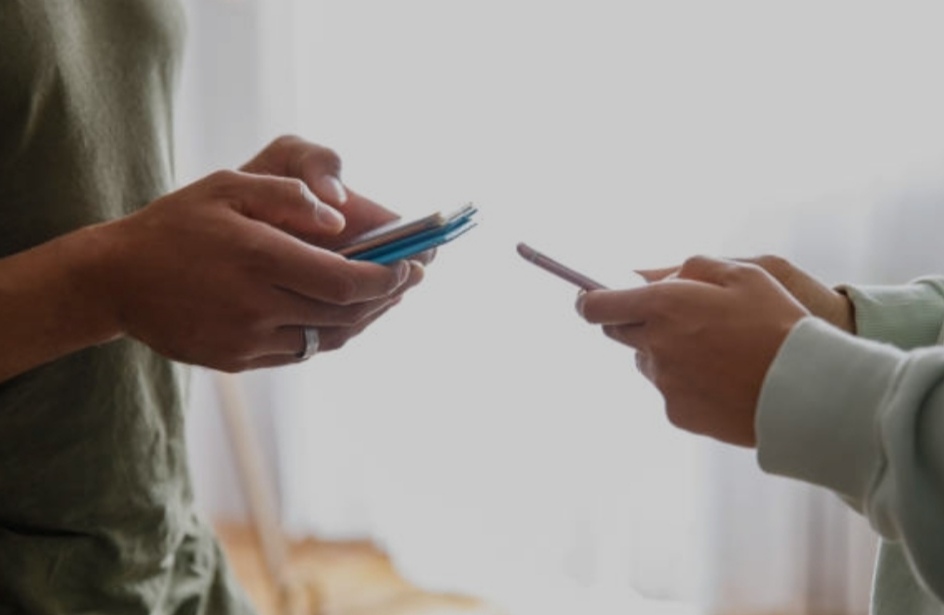
Methods to Transfer Data Between Smartphones
Transferring data between smartphones can be done in multiple ways, depending on the devices you are using and your preferences.
Whether you’re switching from Android to Android, iOS to iOS, or even between Android and iOS, there are simple and effective methods available.
In this section, we’ll walk you through built-in features, third-party applications, and cloud services for seamless data transfer.
Using Built-in Features
Most smartphones come with built-in tools that simplify data transfer, especially if you’re moving data between devices within the same ecosystem.
Android to Android – Google’s Data Transfer Tool
Google’s Data Transfer Tool is a built-in feature on most Android devices that allows you to transfer contacts, messages, photos, apps, and other essential data from your old phone to your new one.
It’s a reliable option, and since it’s directly integrated into Android, you don’t need to install any extra apps.
Step-by-Step Guide to Use Google’s Data Transfer Tool:
- Turn on Your New Android Device:
- During the setup process, you’ll be prompted to transfer data from another device.
- Select “Copy Your Data”:
- Choose the option to copy data from your old phone.
- Connect Devices:
- Use a USB cable for a faster and more secure transfer.
- Alternatively, connect both devices to the same Wi-Fi network and transfer wirelessly.
- Select the Data You Want to Transfer:
- You’ll be given options to transfer contacts, photos, videos, messages, apps, and more.
- Complete the Transfer:
- Wait for the process to finish. This may take a few minutes, depending on the size of your data.
iOS to iOS – Apple’s Quick Start Feature
Apple’s Quick Start feature makes transferring data between iPhones a breeze.
It uses Bluetooth and Wi-Fi to migrate your data from one device to another without needing a computer.
Step-by-Step Guide to Use Apple’s Quick Start:
- Place Your New iPhone Near the Old One:
- Ensure that both devices are powered on and have Bluetooth enabled.
- Follow the On-Screen Instructions:
- A screen will appear on your old iPhone, prompting you to set up the new device.
- Use your old iPhone to scan the animation on the new iPhone.
- Choose What Data to Transfer:
- You’ll be given the option to transfer apps, settings, photos, messages, and more.
- You can also choose to transfer your Apple ID and Face ID setup.
- Wait for the Transfer to Complete:
- This process may take some time, depending on the amount of data being transferred.
Pro Tip: Keep both devices plugged into power during the transfer to avoid interruptions.
Third-Party Applications
When switching between Android and iOS, or if the built-in tools don’t meet your needs, third-party apps can offer a practical solution.
Here are some of the best third-party apps for data transfer:
SHAREit
SHAREit is a popular app for transferring data between devices.
It supports multiple file types, including photos, videos, music, apps, and documents.
The transfer happens over a local Wi-Fi network, which is faster than Bluetooth and doesn’t consume mobile data.
How to Use SHAREit:
- Download and install SHAREit on both devices.
- Open the app and choose “Send” on the old device and “Receive” on the new device.
- Select the files you want to transfer.
- Connect the devices using the app’s built-in Wi-Fi connection and start the transfer.
Xender
Xender offers a fast and convenient way to transfer data wirelessly.
It supports cross-platform transfers between Android and iOS, making it ideal for users switching between ecosystems.
Key Features:
- Transfer large files quickly without cables.
- Supports group sharing for multiple devices.
SuperBeam
SuperBeam uses Wi-Fi Direct for ultra-fast file sharing between devices.
It’s particularly useful for transferring large files like videos and high-resolution photos.
How to Use SuperBeam:
- Install the app on both devices.
- Select the files you want to share and generate a QR code.
- Scan the QR code with the receiving device to start the transfer.
Cloud Services
Cloud services like Google Drive, iCloud, and Dropbox offer an excellent way to transfer and back up your data.
They provide a secure, always-accessible storage solution, especially for photos, documents, and other essential files.
Google Drive
Google Drive is a versatile cloud storage solution for Android and iOS.
It allows you to upload your files and access them from any device with an internet connection.
How to Use Google Drive for Data Transfer:
- Install the Google Drive app on your old phone.
- Upload the files you want to transfer.
- On your new phone, sign in to the same Google account and download the files.
iCloud
For iOS users, iCloud offers seamless integration for backing up and restoring data.
You can use iCloud to transfer photos, contacts, messages, and more.
How to Use iCloud for Data Transfer:
- Go to Settings > Your Name > iCloud on your old iPhone.
- Turn on iCloud Backup and tap Back Up Now.
- On your new iPhone, sign in with the same Apple ID and restore from the iCloud backup during setup.
Dropbox
Dropbox is another excellent option for cloud-based file sharing.
It’s compatible with both Android and iOS and offers easy file synchronization.
How to Use Dropbox for Data Transfer:
- Upload files to Dropbox on your old phone.
- Install Dropbox on your new device and log in with the same account.
- Download the files you need.
Pro Tip: Cloud services are great for long-term storage and accessibility, but they require an internet connection and sufficient storage space.
Ensure you have enough storage in your cloud account before starting the transfer process.
By using the methods outlined above, you can easily transfer data between smartphones without losing any important information.
In the next section, we’ll cover troubleshooting tips to help you solve common issues during the transfer process.
Step-by-Step Guides for Different Scenarios
When switching devices, the method you choose to transfer data between smartphones depends on the platforms involved.
In this section, we’ll explore detailed, step-by-step guides for different scenarios: transferring data between Android devices, moving from Android to iOS, and vice versa.

Transferring Data from Android to Android
Android users have multiple options for transferring data between devices.
Here, we’ll walk you through using a USB cable and Wi-Fi Direct, both of which offer fast and secure ways to migrate your important files.
Using a USB Cable
Transferring data using a USB cable is one of the most reliable and secure ways to move data between Android devices.
This method ensures a stable connection and faster transfer speeds, making it ideal for transferring large files like videos or complete backups.
Step-by-Step Guide:
- Connect Both Devices with a USB Cable
- Use a USB-C to USB-C cable or a USB-A to USB-C adapter, depending on the devices you’re using.
- Enable File Transfer Mode
- On the old device, go to Settings > Connected Devices > USB Preferences and select File Transfer.
- Your new phone should automatically detect the connected device.
- Select the Data to Transfer
- Open your File Manager or Google’s Data Transfer Tool on the new device.
- Choose the types of data you want to transfer—such as photos, videos, documents, and apps.
- Start the Transfer Process
- Tap Start to begin the transfer.
- Depending on the size of your data, this could take a few minutes to an hour.
- Verify the Transfer
- Once the process is complete, check your new device to ensure all files have been successfully transferred.
Pro Tip: For the fastest results, ensure both devices are fully charged and use a high-speed USB cable.
Using Wi-Fi Direct
Wi-Fi Direct is a wireless solution for transferring data directly between Android devices without requiring internet access.
It’s a faster alternative to Bluetooth and ideal for sharing large files.
How to Transfer Data Using Wi-Fi Direct:
- Enable Wi-Fi Direct on Both Devices
- Go to Settings > Network & Internet > Wi-Fi and tap on Wi-Fi Direct.
- Pair the Devices
- The devices will automatically search for each other.
- Once detected, select the device you want to connect to and confirm the pairing request.
- Transfer Files
- Use the File Manager app to select the files you want to transfer.
- Tap Share > Wi-Fi Direct, then choose the receiving device.
- Complete the Transfer
- Once the transfer is complete, you’ll see a confirmation message on both devices.
Transferring Data from iOS to Android
Switching from iOS to Android requires a bit more effort, but Google’s “Move to iOS” app simplifies the process.
Here’s how you can use it to transfer your contacts, messages, photos, and more.
Using ‘Move to iOS’ App
Apple’s Move to iOS app is designed specifically to help users transfer data from Android to a new iPhone.
It supports transferring essential data such as contacts, message history, photos, videos, and email accounts.
Step-by-Step Guide:
- Download and Install ‘Move to iOS’
- On your Android device, visit Google Play Store and download the Move to iOS app.
- Set Up Your iPhone
- Turn on your new iPhone and start the setup process.
- When you reach the Apps & Data screen, select Move Data from Android.
- Connect Devices
- Open the Move to iOS app on your Android device and tap Continue.
- A six-digit code will appear on your iPhone—enter this code on your Android device.
- Choose the Data to Transfer
- Select the types of data you want to transfer: contacts, message history, photos, and more.
- Start the Transfer
- The devices will connect over a private Wi-Fi network and begin the transfer.
- This process may take some time, depending on the amount of data.
- Complete the Setup
- Once the transfer is complete, finish setting up your iPhone.
Note: The Move to iOS app does not transfer apps, music, or PDFs. You’ll need to manually download these on your new device.
Transferring Data from Android to iOS
When switching from Android to iOS, you can still use Move to iOS, but the process will be slightly different compared to transferring from iOS to Android.
Using ‘Move to iOS’ App
The Move to iOS app is also effective for moving your essential data from Android to an iPhone.
Follow these steps for a seamless transition.
Step-by-Step Guide:
- Prepare Your Devices
- Make sure both devices are fully charged and connected to Wi-Fi.
- Install the Move to iOS app on your Android device.
- Set Up Your iPhone
- Turn on your new iPhone and start the setup.
- When you reach the Apps & Data screen, select Move Data from Android.
- Enter the Code
- A unique code will appear on your iPhone. Enter it into the Move to iOS app on your Android device.
- Select What to Transfer
- Choose the data you want to migrate, such as contacts, photos, and calendars.
- Begin the Transfer
- The devices will connect and start the transfer process.
- This might take a while, so be patient.
- Finish the Setup
- Once the transfer is complete, continue setting up your iPhone.
Pro Tip: Always back up your Android data before initiating the transfer.
Final Thoughts
Transferring data between smartphones can seem daunting, but with the right tools and guides, it’s easier than you think.
Whether you’re moving from Android to Android, iOS to Android, or Android to iOS, there’s a method to suit every need.
Ready to make the switch?
Follow these detailed guides, and you’ll have your new device up and running with all your important data in no time!
Tips to Ensure a Smooth Data Transfer
Successfully transferring data between smartphones requires more than just selecting the right method.
Proper preparation can save you from unnecessary delays, corrupted files, or incomplete transfers.
Follow these essential tips to ensure your data transfer goes smoothly and efficiently.
Stable Internet Connection
A reliable internet connection plays a crucial role in many data transfer methods, especially when using cloud services like Google Drive, iCloud, or apps such as Move to iOS.
Why a Stable Internet Connection is Important
- Speed and Efficiency: A strong connection ensures that the transfer process completes faster without interruptions.
- Data Integrity: An unstable connection can result in partial or corrupted transfers, especially when moving large files.
- Cloud-Based Transfers: Cloud services require continuous internet access to back up and restore data on your new device.
Tips for Ensuring a Stable Connection
- Use Wi-Fi Over Mobile Data: Wi-Fi is generally more stable and offers higher speeds compared to mobile data.
- Check Your Network Speed: Use a speed test tool to ensure you have sufficient bandwidth for the transfer.
- Avoid Public Wi-Fi: Public networks can be slower and less secure, increasing the risk of failed transfers or security breaches.
- Restart Your Router: If you experience slow speeds, a simple router restart can often resolve the issue.
Pro Tip: If you’re transferring data using cloud services, make sure you have unlimited data or are connected to an unmetered Wi-Fi network to avoid unexpected charges.
Sufficient Battery Life
Low battery levels during data transfer can cause interruptions, which may result in data loss or corruption.
It’s essential to ensure both devices are adequately charged before starting the process.
Why Battery Life Matters During Data Transfer
- Prevents Interruptions: If a device shuts down mid-transfer, you may have to restart the process from scratch.
- Protects Data Integrity: Sudden shutdowns can corrupt transferred data or cause errors in system settings.
- Ensures Stable Connection: Low battery levels can sometimes reduce device performance, impacting Wi-Fi or USB connections.
Battery Tips for Smooth Transfers
- Charge Both Devices to at Least 80%: This will give you enough power to complete the process without interruptions.
- Use a Power Bank: If you’re transferring data on the go, a power bank can ensure your devices stay powered.
- Disable Battery-Saving Mode: Some battery-saving features can limit performance and interfere with the transfer process.
- Plug in During Transfer: For longer transfers, keep your devices connected to a power source.
Pro Tip: Wireless data transfer methods can drain the battery faster, so monitoring your battery level during the process is essential.
Updated Software
Keeping both devices updated with the latest software version ensures a smoother and more compatible transfer experience.
Software updates often include bug fixes, performance improvements, and compatibility enhancements for data transfer tools.
Why Software Updates are Crucial
- Compatibility: Older software versions may not support the latest transfer tools or protocols.
- Improved Stability: Updates often fix known bugs that could disrupt the transfer process.
- Enhanced Security: Updates protect your devices from vulnerabilities, ensuring a secure transfer.
- New Features: Some updates may introduce more efficient transfer options or improve existing ones.
Steps to Check for Software Updates
- For Android Devices:
- Go to Settings > System > Software Update.
- Tap Check for Updates, then follow the on-screen instructions to install the latest version.
- For iOS Devices:
- Go to Settings > General > Software Update.
- If an update is available, tap Download and Install.
- Backup Before Updating:
- Always back up your data before updating your device to avoid data loss in case something goes wrong.
Pro Tip: Schedule your updates at a convenient time, as some updates may take longer and require a device restart.
Final Thoughts
Ensuring a smooth data transfer between smartphones is all about preparation.
With a stable internet connection, fully charged devices, and updated software, you’ll avoid common pitfalls and make the process quick and hassle-free.
Ready to get started?
Follow these tips and enjoy a stress-free transition to your new device!
If you want to learn more about specific transfer methods or tools, feel free to check out our detailed guides on each transfer scenario!
Troubleshooting Common Issues
Even with the best preparation, issues can arise when trying to transfer data between smartphones.
These problems can range from failed transfers to incomplete data migration.
Understanding the most common challenges and how to troubleshoot them can help you avoid frustration and save time.
Data Transfer Failures
A data transfer failure can be frustrating, especially when moving important information to a new device.
Here are the most common causes and how to resolve them.
1. Insufficient Storage on the New Device
One of the most common reasons for data transfer failure is a lack of available storage on the target device.
If your new phone doesn’t have enough space, the transfer process may stop midway or fail to begin at all.
Solution:
- Check Storage Space: Before starting the transfer, check the available storage on your new device.
- Delete Unnecessary Files: Remove unused apps, media, or documents to free up space.
- Use Cloud Storage: Consider uploading files to cloud services like Google Drive or OneDrive to reduce the amount of data you need to transfer.
2. Compatibility Issues
Not all transfer methods work seamlessly between different brands or operating systems.
For example, transferring data from an iOS device to an Android may require third-party apps or special tools.
Solution:
- Use the Right App: For iOS to Android transfers, use apps like Move to iOS or Samsung Smart Switch for Android to Android transfers.
- Update Software: Ensure both devices are running the latest software version for maximum compatibility.
- Check File Formats: Some file types may not be compatible between operating systems. Convert or back up these files separately.
3. Connection Problems
An unstable connection is a common culprit in failed transfers, especially when using wireless methods like Wi-Fi Direct or cloud services.
Solution:
- Switch to a Wired Connection: If possible, use a USB cable for a more reliable and faster transfer.
- Restart Devices and Router: Restarting your devices and router can resolve temporary connectivity issues.
- Move Closer to the Router: For wireless transfers, ensure both devices are close to the router to maintain a stable connection.
Incomplete Data Migration
Sometimes, the transfer completes, but not all data is successfully migrated.
This can include missing contacts, photos, or app data, which can be confusing and inconvenient.
1. Contacts or Messages Not Transferred
Contacts and messages are crucial, but they may be overlooked during the transfer.
Solution:
- Sync with Cloud Services: Use Google Contacts or iCloud to ensure your contacts are backed up and synced.
- Manually Export and Import: If the transfer fails, export your contacts as a .vcf file and import them to the new device.
- Use Messaging Apps: For SMS, use apps like SMS Backup & Restore to transfer your text messages.
2. Missing Photos and Videos
Large media files like photos and videos are often the first to be left out in incomplete transfers.
Solution:
- Transfer in Batches: Break your media files into smaller batches to avoid overwhelming the transfer process.
- Use Cloud Storage Services: Upload your photos and videos to cloud services like Google Photos or Dropbox and download them on the new device.
- Check File Location: Some transfer methods only move files from specific folders, so ensure your photos and videos are stored in the right locations.
3. Lost App Data
Many users expect their apps and related data to transfer seamlessly, only to find missing settings or saved progress.
Solution:
- Backup App Data: Use app-specific backup tools like Samsung Smart Switch or Helium for Android devices.
- Check for Cloud Sync Options: Many apps, especially games and productivity tools, offer cloud sync options. Enable these before switching devices.
Final Tips for Troubleshooting
- Restart the Process: Sometimes, simply restarting the transfer can resolve minor glitches.
- Check for System Updates: Outdated software can cause compatibility issues, so always keep your devices updated.
- Contact Support: If problems persist, reach out to customer support for your device or the app you’re using.
Experiencing issues while transferring data between smartphones is common, but most problems have simple solutions.
By understanding the causes and applying these troubleshooting tips, you can avoid delays and ensure a smooth transition to your new device.
Don’t let small glitches stop you!
Prepare your devices, follow the steps, and troubleshoot like a pro.
Ensuring Data Privacy and Security
When you transfer data between smartphones, protecting your personal information is crucial.
Failing to take the necessary precautions can expose sensitive data, such as contacts, photos, and financial information, to unauthorized access.
By following best practices for data privacy and security, you can ensure a safe and secure transfer process.
In this section, we’ll explore how to maintain security during data migration by using secure connections and encryption methods.

Secure Connections: The Foundation of Safe Data Transfer
Using a secure connection during data transfer is essential to prevent data breaches and unauthorized access.
Data transmitted over unprotected or unstable connections is vulnerable to interception by hackers or malicious software.
Whether you’re transferring data wirelessly or via a cable, choosing the right connection type plays a major role in protecting your privacy.
1. Avoid Public Wi-Fi Networks
Public Wi-Fi networks are convenient, but they pose a significant security risk.
Hackers can easily intercept data sent over these networks, exposing your personal information.
Why Public Wi-Fi is Risky:
- Lack of encryption leaves your data exposed.
- Hackers can set up fake Wi-Fi hotspots to steal information.
- Malware infections are more common on public networks.
Solution:
- Use a private, password-protected Wi-Fi network when transferring data.
- If you must use public Wi-Fi, consider using a VPN service to encrypt your connection.
- Alternatively, use your mobile data connection, which is more secure than public Wi-Fi.
2. USB Cable Connection: A More Secure Option
Transferring data between devices using a USB cable is generally safer and more reliable than wireless methods.
A wired connection reduces the risk of unauthorized access and ensures a stable data transfer process.
Benefits of Using a Cable:
- Faster transfer speeds compared to wireless methods.
- No dependence on network stability.
- Minimized risk of data interception.
Pro Tip: Always use the original USB cable provided by the manufacturer to avoid compatibility issues and potential data corruption.
3. Enable Two-Factor Authentication (2FA)
If your devices support it, enabling two-factor authentication (2FA) adds an extra layer of security.
2FA requires a second form of verification, such as a code sent to your phone, making it harder for unauthorized users to access your accounts.
How to Enable 2FA:
- Go to your account security settings on your device.
- Select “Two-Factor Authentication” and follow the setup instructions.
- Use an authenticator app like Google Authenticator or Authy for added security.
Data Encryption: The Key to Protecting Your Information
Encryption is one of the most effective ways to protect your data during the transfer process
It ensures that your information is converted into a secure format that unauthorized users cannot read.
1. What Is Data Encryption?
Encryption is the process of converting data into a coded format, which can only be accessed with a decryption key.
Even if a hacker intercepts the encrypted data, they won’t be able to read or use it without the key.
Types of Encryption:
- End-to-End Encryption: Ensures data is encrypted from the source device to the target device.
- Device-Level Encryption: Encrypts all data stored on your smartphone, making it accessible only after unlocking the device.
2. Use Encrypted Transfer Tools
Many tools and apps offer built-in encryption to ensure a secure data transfer.
When selecting a tool, choose one that supports encrypted data transmission.
Recommended Tools:
- Samsung Smart Switch: Uses encrypted channels for secure transfers between Samsung devices.
- Move to iOS: Offers secure and encrypted data migration for switching from Android to iPhone.
- Google Drive and iCloud: Both services use strong encryption protocols to protect your backups and data during transfers.
3. Encrypt Your Backup Before Transferring
If you’re transferring data through a backup file, encrypt it before the transfer to prevent unauthorized access.
Most smartphones offer built-in encryption for backups, which you can enable in the settings.
How to Encrypt Your Backup:
- iPhone: Use iTunes and enable “Encrypt Backup” when creating a local backup.
- Android: Use third-party tools like Titanium Backup (for rooted devices) or rely on the built-in encryption feature in your phone’s settings.
Final Tips for Maintaining Data Privacy
- Always Update Your Devices: Keeping your device’s software up-to-date ensures you have the latest security patches.
- Disable File Sharing After Transfer: Once the data transfer is complete, turn off file-sharing features to reduce security risks.
- Use Strong Passwords: Protect your devices and backups with strong, unique passwords.
When it comes to transferring data between smartphones, security should be a top priority.
By using secure connections and encryption, you can protect your sensitive information and ensure that it stays out of the wrong hands.
Remember: A little extra effort in securing your data goes a long way in protecting your personal information
Take action today and ensure your next data transfer is as safe as possible!
FAQs About Transferring Data Between Smartphones
In this section, we’ll address the most commonly asked questions about how to transfer data between smartphones, ensuring that all your doubts are cleared.
These frequently asked questions will help you navigate the data migration process with ease and avoid potential pitfalls.
If you’re ready to transfer your data safely and efficiently, keep reading for solutions, tips, and insights on everything from secure connections to compatible tools.
1. Can I Transfer Data Between Smartphones with Different Operating Systems (Android to iPhone or Vice Versa)?
Yes, it’s entirely possible to transfer data between smartphones running different operating systems, such as Android and iOS.
However, the process differs depending on the type of data and the tools you use.
Here’s a breakdown:
- Contacts, Messages, and Photos: Apps like Move to iOS, Google Drive, or Samsung Smart Switch can help with this.
- Apps: Most apps will need to be re-downloaded from the respective app store, and their data may not always transfer.
- Media Files: Use cloud services like Google Photos or iCloud to transfer photos and videos.
- Calendars and Notes: These can be synced via cloud services like Google Calendar or Microsoft Outlook.
Pro Tip:
When moving from Android to iPhone, use Move to iOS, which supports transferring messages, contacts, and photos automatically.
For iPhone to Android, Google Drive Backup works best for migrating contacts, calendar events, and media files.
2. What Is the Fastest Way to Transfer Data Between Smartphones?
The fastest method depends on the type and size of data you’re transferring.
- Wired Connection: For large files or complete phone backups, a USB cable provides the fastest transfer speeds.
- Wireless Transfer (Wi-Fi Direct): Ideal for smaller transfers like contacts and text messages. Apps like SHAREit or Xender use Wi-Fi Direct for quick file sharing.
- Cloud Services: Services like Google Drive or iCloud allow you to back up and restore data, though this may take longer depending on internet speed.
Pro Tip:
For speed and security, use a wired connection with the manufacturer’s official transfer tool (such as Samsung Smart Switch) whenever possible.
3. How Do I Ensure My Data Is Secure During the Transfer Process?
Data security is crucial when transferring personal information.
Follow these tips to protect your data:
- Use a Private Network: Avoid public Wi-Fi; it’s best to use your home network or mobile data connection.
- Enable Encryption: Many transfer tools offer encryption features to secure your data.
- Backup Your Data: Always create a backup before starting the transfer process to prevent data loss.
Pro Tip:
Check the privacy policy of the app or tool you’re using to ensure it doesn’t store or share your data without permission.
4. Why Is My Data Transfer Taking So Long?
Several factors can affect the speed of your data transfer:
- Connection Type: Wired connections are faster than wireless ones.
- File Size: Large files or full backups take longer to transfer.
- Device Performance: Older devices may experience slower transfer speeds.
- Network Stability: A weak or fluctuating Wi-Fi connection can slow down wireless transfers.
Solution:
- For large transfers, opt for a wired connection.
- Ensure your Wi-Fi signal is strong and stable.
- Restart both devices and close background apps that might slow down the process.
5. What Data Can’t Be Transferred Between Smartphones?
Not all data can be transferred directly between smartphones, especially when switching between different operating systems.
Here’s a list of common limitations:
- App Data: Some apps don’t support cross-platform data transfer (e.g., WhatsApp chat history from iPhone to Android requires third-party tools).
- System Settings: Device-specific settings like wallpapers, ringtones, and Wi-Fi passwords won’t transfer.
- Licenses and DRM-Protected Content: Music and videos with DRM protection may not work on the new device.
Pro Tip:
Manually back up app data and settings when switching devices, and check for third-party tools that might help with specific data types.
6. How Do I Transfer WhatsApp Data Between Android and iPhone?
Transferring WhatsApp data between Android and iPhone is slightly more complicated but possible.
For Android to iPhone:
Use the Move to iOS app, which now supports WhatsApp data transfer. Follow the on-screen instructions to migrate chats, media, and account info.
For iPhone to Android:
Samsung users can use Smart Switch to migrate WhatsApp data during device setup.
For other Android brands, WhatsApp’s built-in transfer feature works, provided both devices are connected via USB.
Pro Tip:
Always back up your WhatsApp data to Google Drive (Android) or iCloud (iPhone) before attempting a transfer.
7. How Do I Transfer Data Between Smartphones Without Using the Internet?
If you want to transfer data without using the internet, there are several offline options available:
- USB Cable: Connect both devices via a USB cable and use file transfer tools.
- Wi-Fi Direct: Apps like SHAREit and Xender allow offline file sharing using Wi-Fi Direct technology.
- SD Card: Transfer files to an SD card from one device and insert it into the other.
Pro Tip:
For the safest and fastest offline transfers, use a USB cable along with the manufacturer’s official transfer tool.
8. What Should I Do If the Transfer Fails?
Failed data transfers can be frustrating, but there are ways to troubleshoot the issue.
Common Causes:
- Insufficient storage on the target device.
- Incompatible file formats.
- Interrupted connection (e.g., Wi-Fi disconnection or cable issues).
Solutions:
- Check Storage Space: Ensure the target device has enough storage for the incoming data.
- Restart Devices: Sometimes, a simple restart can resolve transfer issues.
- Try a Different Tool: If the transfer fails repeatedly, try using another transfer tool or method.
Pro Tip:
Before retrying, clear cache files on both devices to free up space and improve performance.
These FAQs should help you navigate common challenges and ensure a smooth, secure data transfer process.
Whether you’re moving from Android to iPhone or transferring data between two Android devices, staying informed is the key to success.
Remember: Always back up your data, prioritize security, and choose the best transfer method for your needs.
Ready to get started? Take the next step and transfer your data confidently today!
Conclusion
Successfully transferring data between smartphones doesn’t have to be a complex or overwhelming task.
Whether you’re switching to a new device or simply backing up important data, understanding the best practices and tools for safe and efficient data migration is essential.
In this article, we’ve covered everything you need to know to ensure your data transfer is smooth and secure.
Let’s recap the key takeaways and explore some final tips to help you confidently manage the data transfer process.
Recap of Key Points
When transferring data between smartphones, remember to:
- Choose the Right Method:
Use wireless transfer tools for small files or cloud services for easy access across devices.
For larger files, opt for wired connections or official manufacturer tools like Samsung Smart Switch or Move to iOS for seamless transfers.
- Prioritize Security:
Always use secure networks and enable encryption during data transfer.
Avoid using public Wi-Fi when handling sensitive data.
- Back Up Your Data:
This step is critical to prevent data loss.
Use reliable backup options such as Google Drive, iCloud, or external storage devices.
- Stay Updated with the Latest Tools and Methods:
New apps and updates are regularly introduced to make data migration easier and faster.
Stay informed to ensure you’re using the most efficient and secure solutions.
Why It’s Important to Get Your Data Transfer Right
In today’s digital world, our smartphones contain a wealth of personal and professional information, including contacts, photos, important documents, and even business-related data.
Losing this data—or exposing it to security risks—can be costly and stressful.
By taking the time to understand the transfer process and using the right tools, you can save yourself time, effort, and the frustration of potential data loss.
Switching devices is an exciting moment, and it should remain stress-free when it comes to transferring your data between smartphones.
Tips for a Hassle-Free Data Transfer Experience
If you want to make your data migration process as seamless as possible, follow these practical tips.
- Check Storage Availability: Ensure your new device has enough space to accommodate the data being transferred.
- Organize Your Data: Before starting the transfer, delete unnecessary files to speed up the process and reduce storage requirements.
- Use Manufacturer Tools: Official tools from brands like Samsung, Apple, and Google are often the most reliable and secure.
- Test the New Device: After the transfer, check if all your important files and apps have been moved successfully.
- Keep Your Software Updated: Updated software can improve compatibility and reduce the chances of errors during the transfer process.
When to Seek Help
While most data transfers are straightforward, there may be instances where things don’t go as planned.
Here’s when you should consider getting expert assistance:
- The Transfer Fails Repeatedly: Persistent errors may require professional diagnosis.
- Incompatibility Issues: If your devices don’t support direct transfers, a tech expert can recommend alternative solutions.
- Complex Data Migration Needs: Transferring large amounts of business or personal data might require specialized tools.
Embrace the Ease of Modern Data Transfer Tools
Transferring data between smartphones has never been easier, thanks to the wide range of modern tools and cloud services available today.
With the right preparation, you can quickly move everything from contacts and photos to apps and messages without losing a thing.
The key is to choose the most suitable method for your situation, ensuring that security and efficiency are always prioritized.
Ready to make your data transfer smooth and hassle-free?
Start by selecting the best transfer tool for your needs and ensuring your data is backed up securely.
Take action today to protect your personal information and enjoy a seamless transition to your new device!
Click here for a step-by-step guide on how to transfer your data now!
By following these tips, you can rest assured that your valuable data will be safely transferred without any issues.
So, don’t wait—start your data transfer journey today and enjoy the peace of mind that comes with knowing your information is in safe hands!
You might also like :