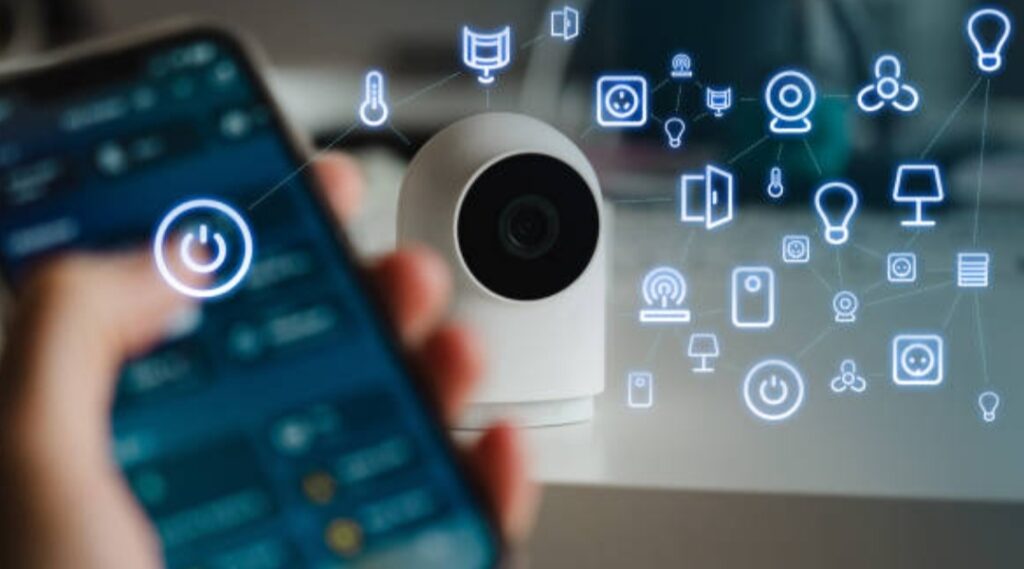
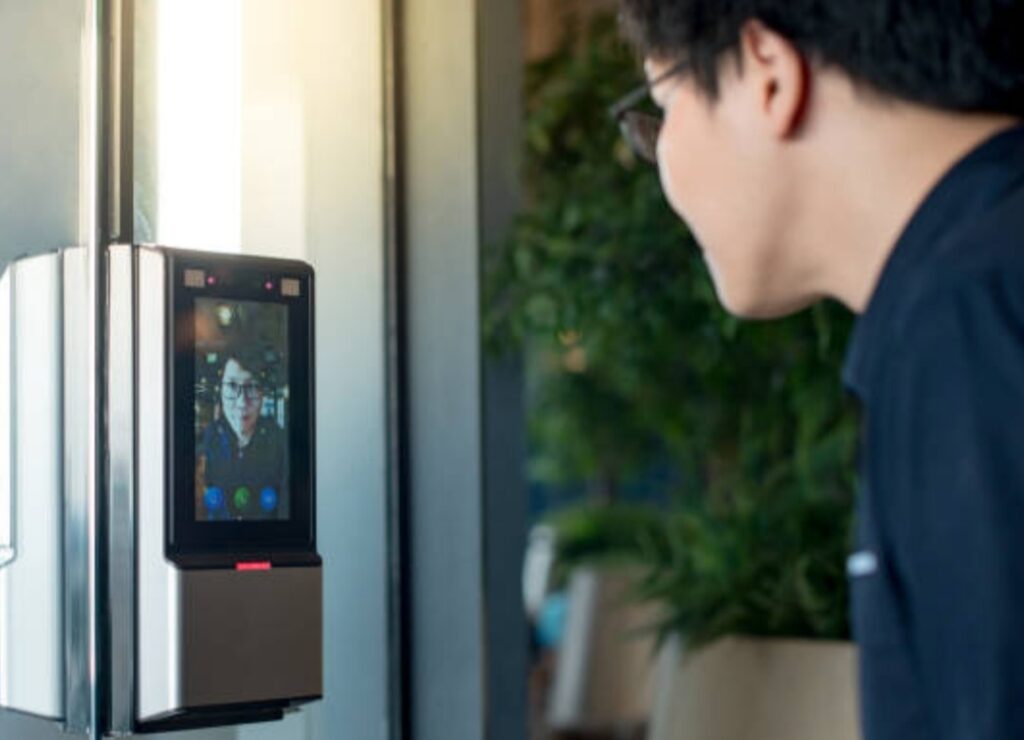
🏠 Introduction to Smart Home Automation
In today’s digital age, smart home automation is no longer just a futuristic concept—it’s a practical, accessible reality that can significantly enhance your lifestyle.
Whether you’re looking to increase comfort, improve energy efficiency, or boost your home security, smart automation powered by intelligent sensors is your gateway to a more connected and convenient living environment.
One of the most transformative elements in this ecosystem is the smart sensor, a small but powerful device that plays a major role in making your home “smart.”
💡 So, How to Use Smart Sensors to Automate Your Home
That’s what this guide is all about.
We’ll walk you through how smart sensors work, how to integrate them seamlessly, and how to truly take control of your home using automation.

🧠 What Is Smart Home Automation?
Smart home automation refers to the technology-enabled network of devices within your home that can communicate with one another, learn your habits, and automate tasks that once required manual effort.
These systems can control lighting, temperature, security systems, appliances, and more—with the push of a button or a simple voice command.
Key elements of smart home automation include:
- 🧲 Connected Devices (like thermostats, locks, lights, cameras)
- 🧠 Automation Rules (e.g., “turn on the hallway lights when motion is detected”)
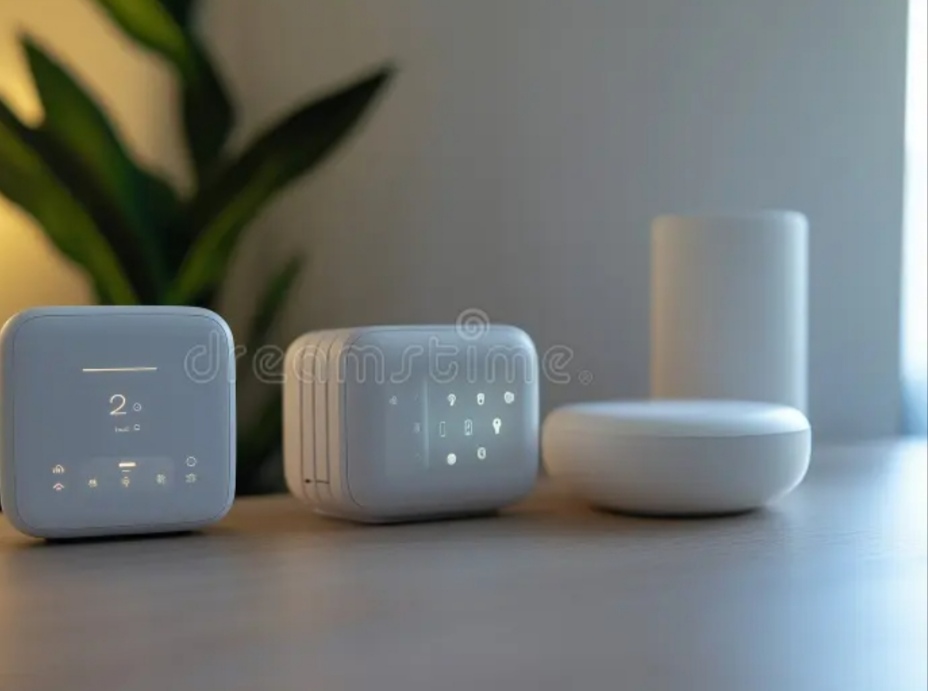
- 🌐 Smart Hubs and Apps (used to manage and control all devices centrally)
- 🔄 Sensors that trigger automation routines based on conditions like movement, temperature, or humidity
The power of automation lies in its ability to work behind the scenes—predicting your needs, reacting to real-time data, and creating a seamless home experience.
📲 Why Smart Sensors Are the Backbone of Automation
Smart sensors act as the “eyes and ears” of your home automation system.
They detect changes in the environment and send real-time data to your smart home hub or directly to devices.
When used strategically, smart sensors can transform the way your home functions.
For instance:
- 🌡️ A temperature sensor detects heat and automatically adjusts your smart thermostat.
- 🚪 A door sensor notices entry and sends a push notification or turns on the hallway light.
- 💧 A leak sensor catches moisture and instantly shuts off your water supply to prevent flooding.
Without sensors, automation systems are just remote controls.
With sensors, your home becomes intelligent—responding to real-time inputs without you lifting a finger.
🛠️ Pro Tip: When planning how to use smart sensors to automate your home, always start by identifying which everyday tasks can be automated—then match those with the right sensor and device combination.
💬 Everyday Benefits of Automating Your Home with Smart Sensors
Automating your home with smart sensors offers a wide range of benefits that go beyond just convenience.
Here’s what you gain when your home gets smart:
✅ Peace of Mind
Real-time alerts and remote monitoring help you keep an eye on your home no matter where you are.
✅ Energy Efficiency
Smart sensors optimize power usage by turning off lights or devices in unoccupied areas—reducing energy bills effortlessly.
✅ Enhanced Comfort
Your home adapts to your habits, like adjusting the temperature before you get home from work.
✅ Improved Security
Intrusion detection, entry alerts, and motion-based lighting help deter burglars before they act.
✅ Time Savings
Daily routines are automated—so you can focus on what matters most.
🔍 Targeted Automations That Make a Big Impact
Here are a few real-world examples of how smart sensors can improve your life:
📌 Use Case #1: Motion Sensor for Lighting
Lights turn on automatically when someone enters the room and turn off after inactivity—perfect for hallways or restrooms.
📌 Use Case #2: Contact Sensor on the Fridge
Get a reminder if the fridge door stays open too long—a small tweak that can save you money on energy and spoilage.
📌 Use Case #3: Leak Sensor Under the Sink
Detects water leaks early and triggers a smart shut-off valve to stop water damage.
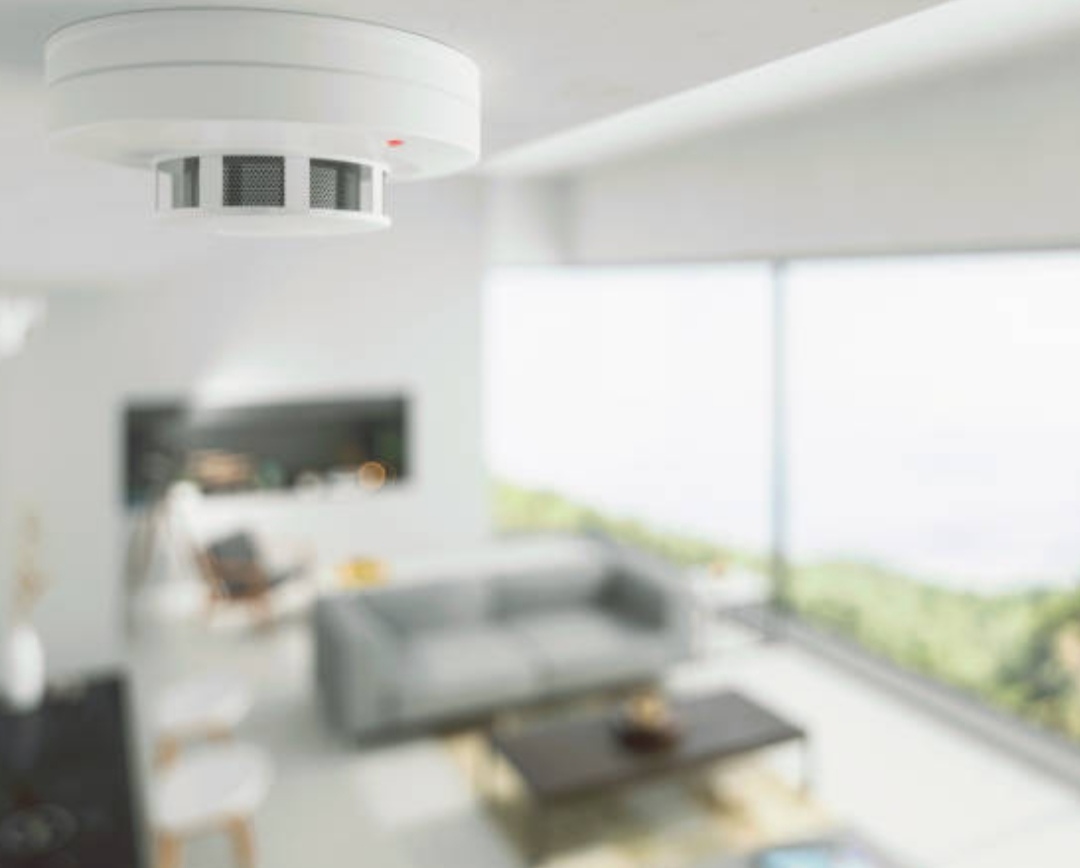
📌 Use Case #4: Smoke Detector with Smart Alerts
Not only sounds an alarm but also sends alerts to your phone and can activate emergency lights for better evacuation visibility.
🚀 Start Small, Scale Smart
Getting started with smart sensors doesn’t require a huge investment.
Here’s how to ease into it:
🔹 Start with One Room (Living room or bedroom is ideal)
🔹 Choose 1-2 High-Impact Sensors (like motion or temperature)
🔹 Pick a Smart Hub that supports automation workflows
🔹 Create Simple Rules (e.g., motion at 7:00 PM triggers lamp + soft music)
🔹 Test and Scale Gradually based on your lifestyle needs
✨ Remember: Smart home automation is not one-size-fits-all.
It should fit your routine, your budget, and your goals.
🧭 Is Smart Home Automation Worth It?
Absolutely.
Think of smart home automation as an investment in your lifestyle.
Here’s why:
- It saves you money over time through efficient energy usage.
- It enhances security and control, even when you’re away.
- It gives you peace of mind, especially if you have kids or elderly family members at home.
- It makes your home more future-proof and tech-forward—which can even increase resale value.
Whether you’re tech-savvy or just getting started, understanding how to use smart sensors to automate your home will set the foundation for a smarter, more responsive living space.
⚡ Final Thoughts – Automate Smarter, Live Better
Smart sensors are small tools with massive potential.
When implemented properly, they can eliminate manual tasks, increase safety, and improve your quality of life.
The journey to smart home automation starts with one sensor—and ends with a home that truly works for you.
👉 Ready to get started? Don’t wait!
Explore the best smart sensors for home automation and level up your lifestyle today!
🧠 Understanding Smart Sensors
To truly unlock the full potential of smart home automation, it’s essential to understand the technology at its core—smart sensors.
These tiny yet powerful components serve as the foundation for intelligent decision-making within your home.
They don’t just collect data—they interpret it, trigger actions, and create the kind of real-time responsiveness that turns a regular house into a fully automated smart home.
If you’re wondering “How to Use Smart Sensors to Automate Your Home”, this section explains what smart sensors are, how they work, and how they become the invisible force that runs everything smoothly behind the scenes.
🔎 What Are Smart Sensors?
Smart sensors are electronic devices that detect environmental conditions—such as motion, temperature, light, humidity, or pressure—and convert this data into digital signals.
Unlike traditional sensors, smart sensors often include built-in processing capabilities.
This means they can analyze, interpret, and transmit data to your smart home hub or other connected devices without relying solely on cloud processing.
📌 In short, smart sensors aren’t passive tools—they’re miniature brains that enable automated responses based on real-time conditions.
🔗 How Do Smart Sensors Work in Home Automation?
Smart sensors follow a simple but powerful logic:
- Sense – They detect changes in their environment (e.g., a door opening, movement, a rise in temperature).
- Process – Internal chips or software interpret the data instantly.
- Trigger – The sensor sends a command to your smart hub or linked devices to perform an action.
🧠 For example:
A motion sensor detects someone entering a room → sends a signal to your smart lights → the lights turn on automatically.
💡 That’s automation in action—and the key to a truly hands-free home experience.
📚 Types of Smart Sensors for Home Automation
Not all smart sensors are created equal.
Each serves a unique purpose—and choosing the right one is vital for effective automation.
Here’s a breakdown of the most common smart sensors you’ll encounter in modern homes:
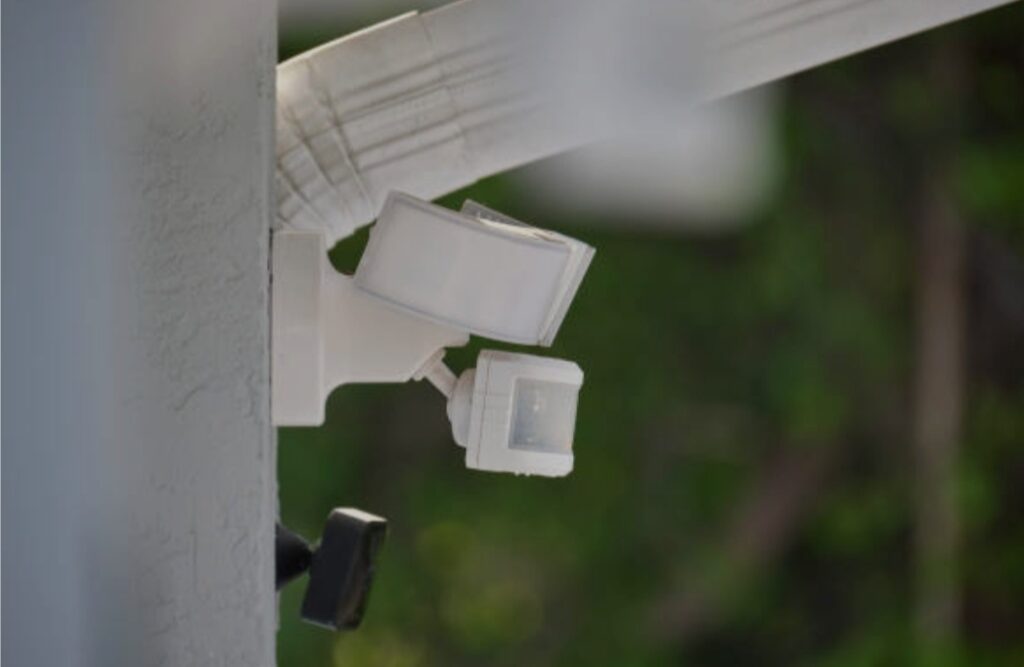
📍 1. Motion Sensors
- Detect movement in a specific area
- Ideal for lights, alarms, and cameras
- Commonly used in hallways, living rooms, and entry points
- Great for saving energy and improving security
🛑 Example: Turn on porch lights when someone approaches the front door at night.
🌡️ 2. Temperature Sensors
- Measure ambient room temperature
- Used with smart thermostats, HVAC systems, and fans
- Help maintain comfort and energy efficiency
🌀 Example: Adjust the thermostat automatically when the temperature goes above 75°F.
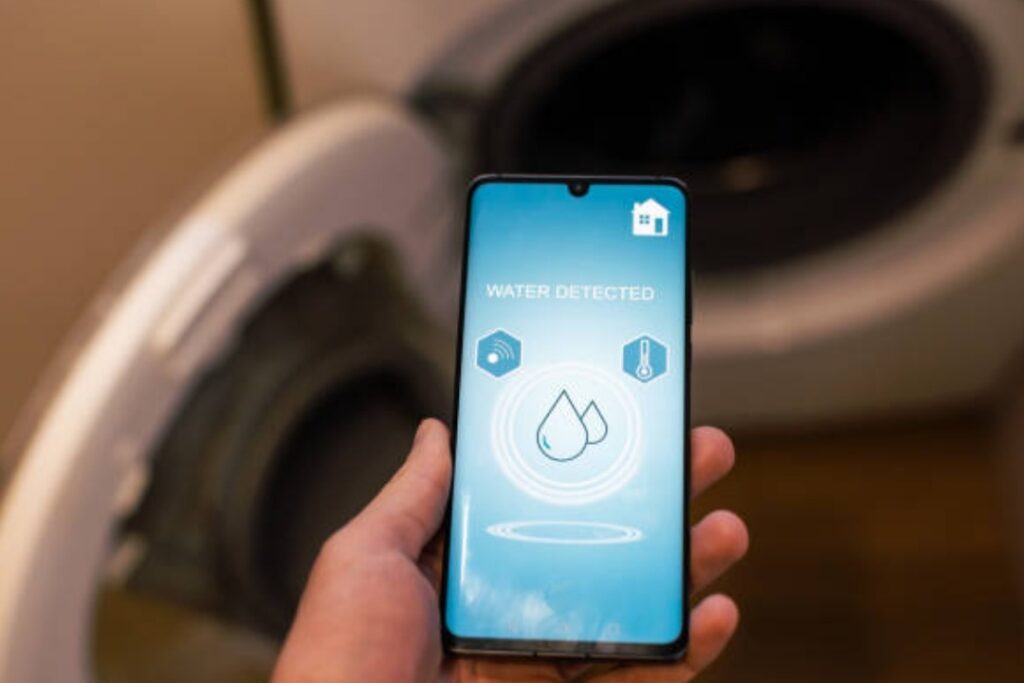
💧 3. Water Leak Sensors
- Detect the presence of moisture or water leaks
- Essential in areas like kitchens, bathrooms, or basements
- Can trigger alerts or even shut off valves to prevent flooding
💧 Example: Detect a leak under the sink and send an instant phone alert.
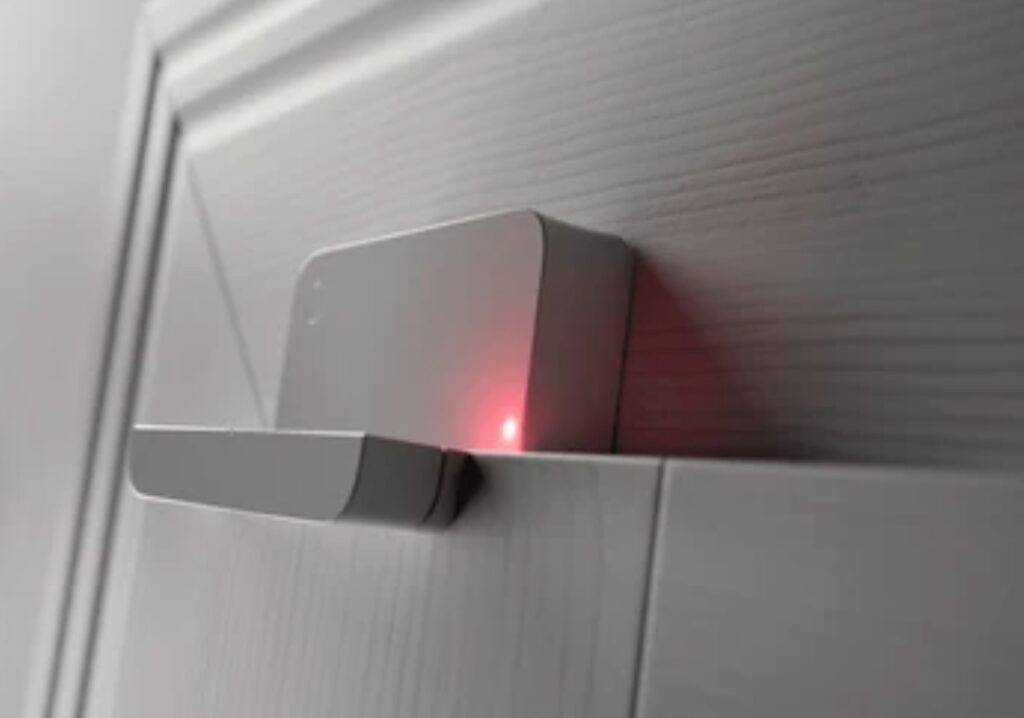
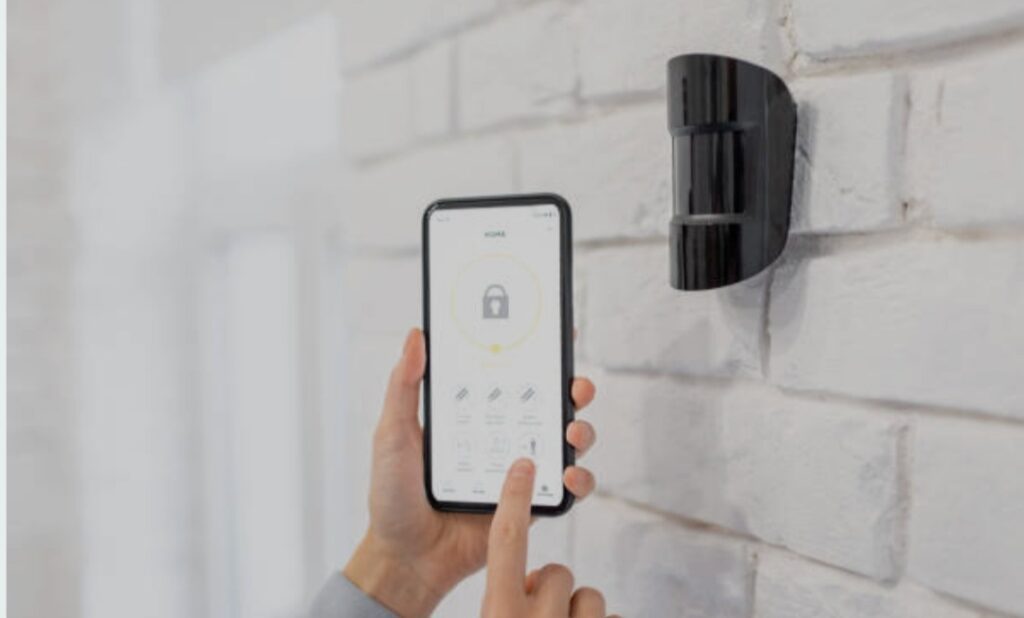
🚪 4. Contact Sensors (Door/Window Sensors)
- Triggered when a door or window is opened or closed
- Enhance security and support entry-based automations
- Perfect for alerts when kids enter restricted areas
🚪 Example: If the front door opens between 10 PM and 6 AM, trigger a smart light and send a security alert.
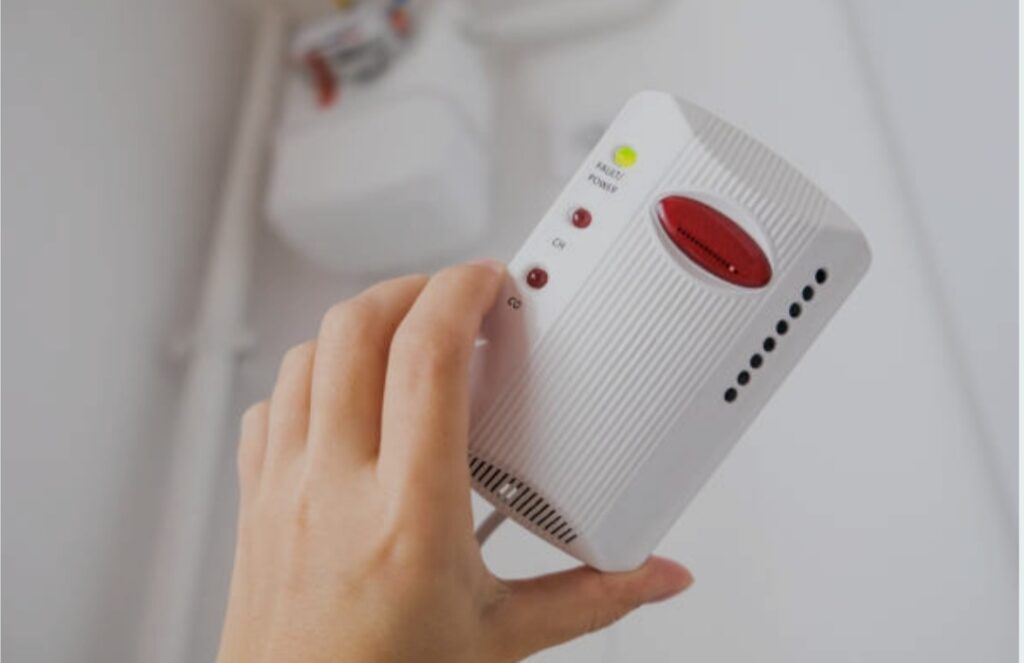
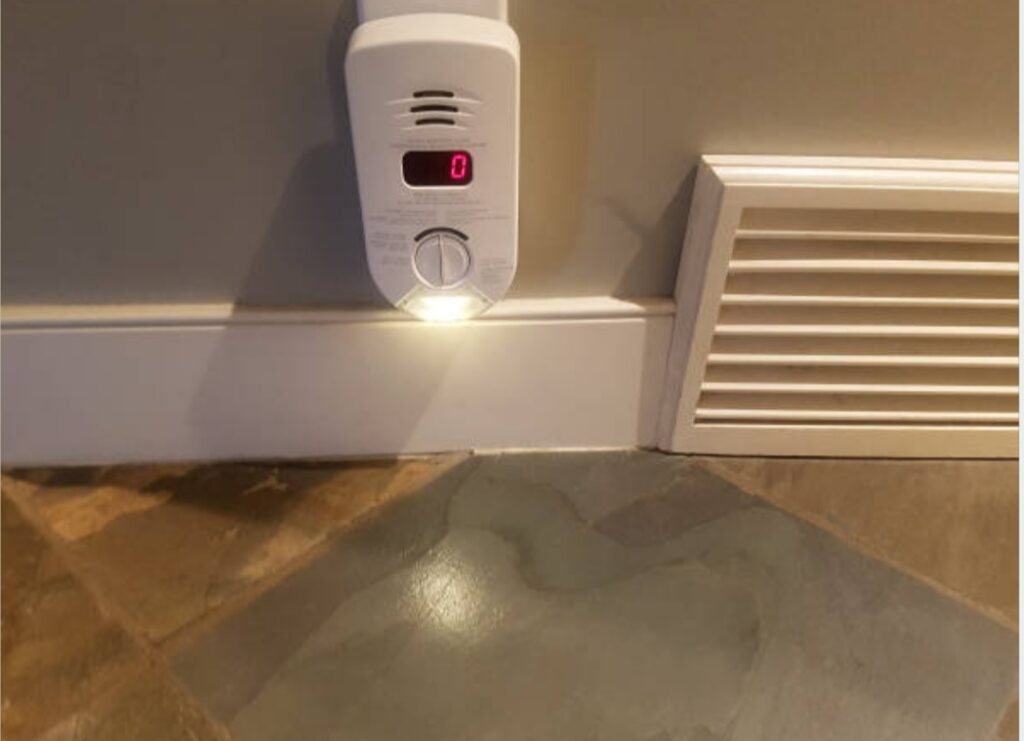
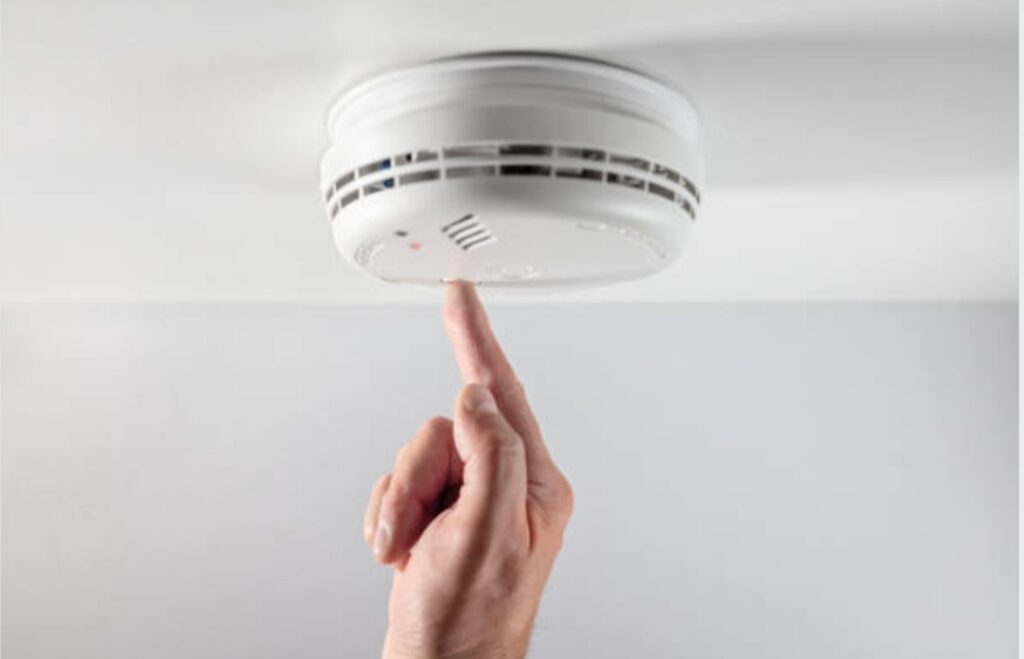
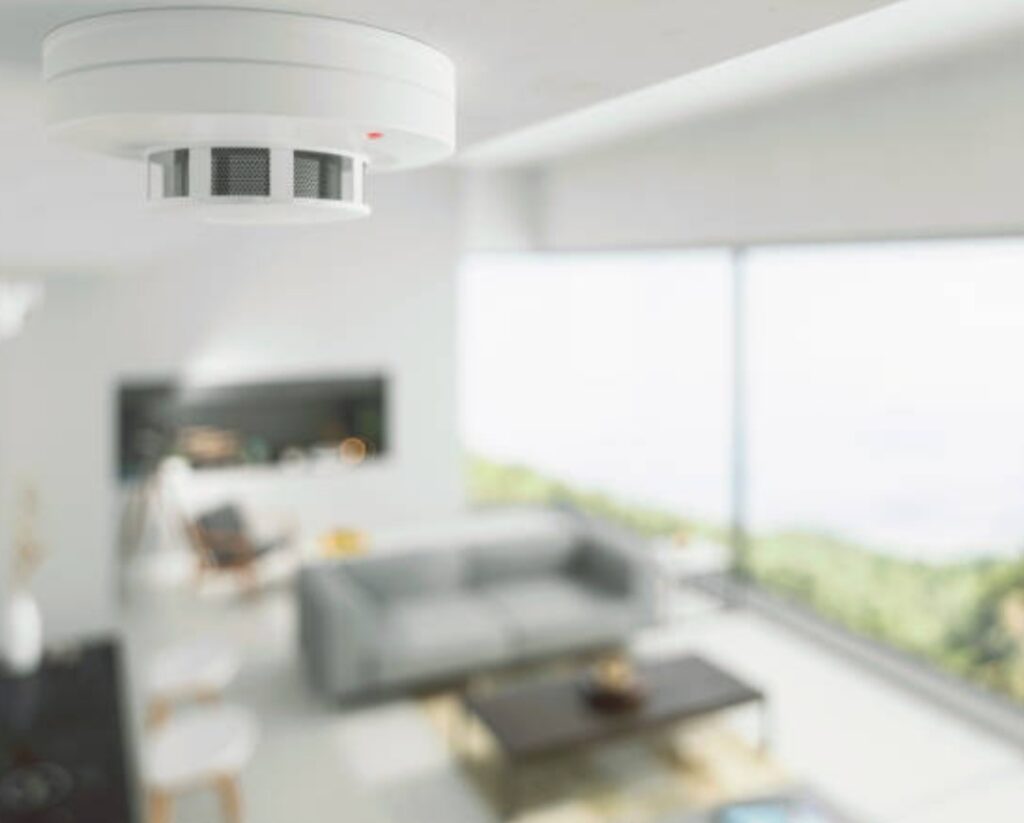
🌫️ 5. Smoke and CO2 Sensors
- Detect dangerous levels of smoke or carbon monoxide
- Some models integrate with smart home systems
- Can trigger automated lighting, alarms, and mobile notifications
🔥 Example: Smoke is detected → lights flash red → windows open automatically (if equipped) → phone alert is sent.
🌦️ 6. Light Sensors
- Monitor natural light levels
- Control blinds, indoor lighting, or even smart mirrors
- Great for day/night automations
🌤️ Example: Automatically close blinds at sunset to maintain privacy.
⚙️ Key Technologies Behind Smart Sensors
Modern smart sensors are powered by a range of advanced technologies:
- Zigbee & Z-Wave: Wireless communication protocols for low-power devices
- Wi-Fi & Bluetooth: Used in plug-and-play sensors with app integration
- Edge Computing: Some sensors process data locally for faster response times
- Machine Learning: Advanced sensors adapt to your behavior over time
🔋 Most sensors are battery-powered and last months to years, while others can be wired for continuous power.
📈 Why Understanding Smart Sensors Helps You Automate Smarter
The more you understand how smart sensors work, the better you can customize your home automation.
Here’s why that matters:
- You’ll choose the right sensor for each room or function
- You can avoid over-buying unnecessary equipment
- You’ll create smarter, more efficient automation routines
- You’ll gain confidence in maintaining and upgrading your system over time
💬 Pro Tip: Start by mapping out your routine—then identify how sensors could automate or enhance each step.
Use this to build a sensor-based smart home blueprint tailored to your needs.
🛒 Choosing the Right Smart Sensor for Your Needs
When shopping for smart sensors, consider the following:
✅ Compatibility – Does it work with your existing smart hub or voice assistant?
✅ Range – Will it cover the desired area of your home?
✅ Battery Life – Longer battery = fewer interruptions
✅ Smart Features – Can it learn behaviors, run local automations, or send custom alerts?
👁️🗨️ Look for top-rated, reliable models from trusted brands like Aqara, Eve, Philips Hue, TP-Link, and Ring.
You can explore our handpicked recommendations for the best smart sensors for every room in your house.
🎯 Final Thoughts – Smart Sensors Are Your Home’s Secret Weapon
Smart sensors are the invisible yet essential heroes of home automation.
They work quietly in the background—observing, analyzing, and acting—to make your life easier, safer, and more efficient.
Knowing how to use smart sensors to automate your home puts you in control of your environment in a way that was never possible before.
💥 Don’t underestimate their power—start building your sensor-based smart home today!
Explore recommended smart home sensors now and level up your daily comfort and control.
⭐ Key Benefits of Using Smart Sensors in Home Automation
The heart of any truly intelligent smart home lies in its ability to automate decisions and actions without constant user input.
This is exactly where smart sensors shine.
When you know how to use smart sensors to automate your home, you unlock a level of convenience, efficiency, and control that transforms everyday living.
Let’s explore the powerful benefits of integrating smart sensors into your home automation system—and why they’re a game-changer for modern homeowners.

⚡ 1. Hands-Free Convenience and Automation
Imagine your home responding to your needs without pressing a button.
Smart sensors make this a reality.
They enable automatic actions based on real-time input, eliminating the need for manual control.
Here’s what hands-free convenience looks like:
- Walk into a room, and the lights turn on automatically
- Leave for work, and smart locks activate while your thermostat lowers the temperature
- Wake up in the morning, and blinds open with the sunrise
These automations not only simplify daily routines, but also create a truly effortless living experience.
This is what people mean when they ask: “How to use smart sensors to automate your home.”
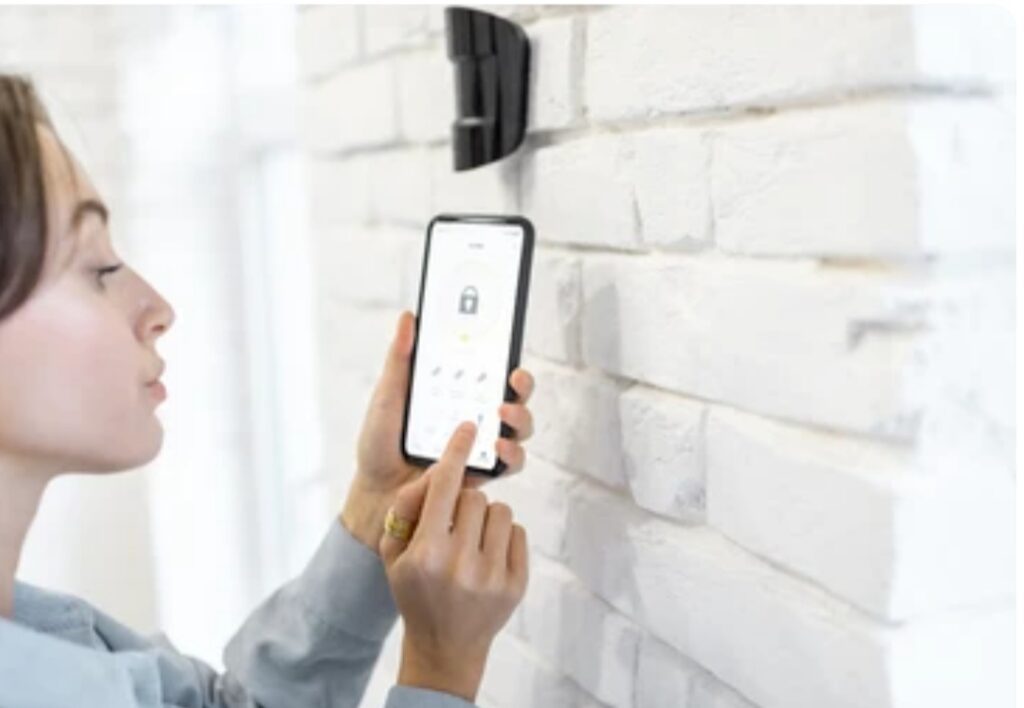
🔐 2. Enhanced Home Security and Peace of Mind
Security is one of the top reasons people invest in smart home tech—and smart sensors play a leading role.
Here’s how they enhance protection:
- Motion sensors detect unexpected movement and trigger alerts or activate security cameras
- Contact sensors let you know if a door or window has been opened
- Glass break sensors can identify sound patterns of broken glass, sending instant notifications
- Water leak sensors help prevent costly water damage by identifying problems early
Whether you’re at home, at work, or on vacation, smart sensors help you stay connected and protected.
Peace of mind is just a notification away.
♻️ 3. Energy Efficiency and Lower Utility Bills
Want to save on monthly energy costs? Smart sensors make it possible.
By detecting occupancy, temperature changes, and lighting levels, your devices only run when needed.
Here’s how sensors help reduce energy waste:
- Motion sensors turn off lights and appliances when no one’s in the room
- Light sensors adjust blinds or lighting based on daylight availability
- Temperature sensors ensure your heating and cooling systems work smarter—not harder
According to Energy Star, smart thermostats alone can save users up to 15% on heating and cooling.
Add sensors into the mix, and your home becomes a finely tuned energy-saving machine.
Want to slash your utility bills? Start with the right sensors.
⏳ 4. Time-Saving Automations That Simplify Your Life
Time is your most valuable asset.
Smart sensors help you win back minutes (and hours) daily by automating tedious tasks.
Examples of time-saving automations include:
- Auto-starting your coffee maker when motion is detected in the kitchen at 7 AM
- Locking all smart doors when your phone exits the home’s geofence
- Automatically turning off unused appliances when your home enters “away” mode
You no longer have to remember every little thing.
Your home becomes an intelligent assistant that thinks ahead.
🧘 5. Personalized Comfort and Adaptive Living
Smart sensors adapt your environment to your preferences—without needing constant tweaks.
Whether it’s adjusting the lights, setting the perfect room temperature, or playing calming music at night, sensors learn and respond to your lifestyle.
This allows for a customized home experience where every room feels “just right.”
It’s not just smart—it’s deeply personal.
📉 6. Proactive Maintenance and Alerts
Think of smart sensors as your home’s early warning system.
They’re designed to detect subtle issues before they become big problems.
Examples:
- A rise in humidity levels signals a potential leak or mold issue
- Low battery notifications from security sensors help you act before failure
- Smart smoke/CO sensors immediately alert you to dangerous air quality
Being proactive means fewer repairs, lower maintenance costs, and a safer living environment.

🌍 7. Eco-Friendly Lifestyle
Going green starts at home.
Smart sensors support sustainable living by reducing unnecessary energy consumption and encouraging conscious resource usage.
They help:
- Reduce carbon emissions from heating and cooling
- Eliminate phantom energy draw from unused devices
- Promote healthier indoor environments with real-time air and moisture monitoring
Every sensor you install is a step toward a smarter, more sustainable home.
🚀 Why This Matters – The Future of Living Starts with Sensors
Smart sensors are no longer luxury add-ons—they’re becoming standard in modern living spaces.
As home automation advances, sensors will play a growing role in enabling AI-driven decisions, adaptive environments, and ultra-efficient systems.
Whether you’re just starting out or upgrading your current setup, learning how to use smart sensors to automate your home is a powerful first step toward living smarter.
✅ Quick Recap – Top Benefits of Smart Sensors
Here’s a quick summary of why smart sensors are worth every penny:
- Convenience – Automate tasks effortlessly
- Security – Keep your home and loved ones safe
- Efficiency – Cut costs and save energy
- Personalization – Adapt to your lifestyle
- Maintenance – Stay ahead of problems
- Eco-friendly – Support green living
Ready to upgrade your home?
Explore our top recommended smart sensors and take control of your space with confidence.
→ Don’t wait. Automate today.
⚙️ Setting Up Smart Sensors for Seamless Automation
Now that you understand the powerful benefits of smart sensors, it’s time to roll up your sleeves and bring your smart home to life.
Setting up smart sensors might sound technical, but with the right approach, it’s surprisingly simple—even for beginners.
In this section, we’ll walk you step-by-step through how to use smart sensors to automate your home, making sure you do it right from day one.
This guide covers device compatibility, sensor placement, automation setup, and more—all tailored for modern homes and optimized for smart living.
1. Choose the Right Smart Sensors for Your Home
Before anything else, you need to choose the right type of smart sensors based on your needs.
Here’s a breakdown of the most common types and what they’re used for:
- Motion Sensors – Detect movement in rooms or entryways (ideal for lights and security)
- Contact Sensors – Trigger actions when doors or windows open/close
- Temperature & Humidity Sensors – Regulate thermostats, fans, and dehumidifiers
- Light Sensors – Adjust lighting based on ambient brightness
- Water Leak Sensors – Prevent damage by catching leaks early
- Smoke & CO Sensors – Send alerts when unsafe air is detected
- Occupancy Sensors – Detect presence over time (more accurate than motion sensors)
Pro Tip: If you’re just starting, invest in a smart home starter kit from trusted brands like Aqara, Philips Hue, or TP-Link Kasa.
2. Make Sure Everything Is Compatible
One of the biggest mistakes beginners make is buying devices that don’t work well together.
Avoid this by sticking to a unified smart home ecosystem such as:
- Apple HomeKit
- Google Home
- Amazon Alexa
- Samsung SmartThings
Check if your sensors support popular communication protocols:
- Wi-Fi (easy to set up, more power-hungry)
- Zigbee or Z-Wave (ideal for low-power, long-term use)
- Bluetooth LE (great for proximity automations)
Before you buy, always check:
“Is this sensor compatible with my smart hub or voice assistant?”
This helps you avoid headaches later when trying to set up automations.
3. Identify High-Impact Areas for Sensor Placement
Sensor placement matters—a lot.
Here’s how to maximize sensor effectiveness:
Best Locations for Motion Sensors:
- Hallways
- Entrances
- Bathrooms
- Living rooms
Best Locations for Contact Sensors:
- Front/back doors
- Windows on the ground floor
- Garage doors
- Medicine or liquor cabinets (for families with kids)
Best Locations for Temperature/Humidity Sensors:
- Bedrooms (for sleep comfort)
- Kitchens (high heat/moisture zones)
- Basements (watch out for damp conditions)
Tip: Don’t place motion sensors near HVAC vents, direct sunlight, or areas with pets to avoid false triggers.
Proper sensor placement = more accurate automation + fewer false alerts.
4. Connect Sensors to Your Smart Home Hub
Once your sensors are placed, connect them to your preferred smart home system.
Here’s a general setup process:
- Open your smart home app (e.g., Apple Home, Google Home, SmartThings)
- Tap “Add Device” or “+”
- Select the brand or sensor type
- Follow the on-screen instructions to pair it (usually scanning a QR code or pressing a pairing button)
- Label each sensor clearly (e.g., “Front Door Sensor” or “Living Room Motion Sensor”)
Once paired, your smart home hub will recognize the sensor as a trigger device.
From here, you can start building automations.
5. Create Automations That Work Like Magic
This is the fun part!
Now that your sensors are online, you can start building powerful automations.
Here are some ideas to inspire your smart setup:
Example Automations:
- Motion Sensor + Light Bulb: “If motion is detected in the hallway after 9 PM, turn on the light at 30% brightness.”
- Contact Sensor + Camera: “If the front door opens during work hours, send me a live camera feed.”
- Temperature Sensor + Thermostat: “If bedroom temp drops below 68°F, turn on the heat.”
- Humidity Sensor + Dehumidifier: “If humidity exceeds 60%, power on the dehumidifier.”
- Water Leak Sensor + Alert: “If water is detected, send push notification and flash all smart lights.”
Most smart home apps allow “IF–THEN” logic or even more complex flows using routines or scenes.
Want to get even more advanced? Use IFTTT, Home Assistant, or Node-RED for deeper control and integrations.

6. Test and Fine-Tune Your Automations
Don’t just “set and forget.”
Make sure each automation works the way you want.
Tips for testing:
- Simulate real-life scenarios (e.g., walk past the sensor at night)
- Check logs or activity history to see how often automations trigger
- Adjust sensitivity levels if motion detection is too aggressive or not responsive enough
- Monitor battery levels and Wi-Fi signal strength for performance issues
Your goal is to create automation that feels invisible—so seamless that you forget it’s even there.
7. Keep Devices Updated and Secure
Security and performance go hand-in-hand.
Here’s how to keep your sensors and automations safe:
- Update firmware regularly through your smart home app
- Use secure passwords and enable two-factor authentication
- Segment your Wi-Fi network with a dedicated network for smart home devices
- Review app permissions and privacy settings regularly
Smart home automation is about trust—and your home deserves the highest level of protection.
✅ Pro Tips for a Flawless Setup
- Label every device clearly in your app for easy management
- Group sensors into rooms or zones
- Use geofencing to automate based on your phone’s location
- Schedule automations based on time, day, or sunrise/sunset
- Start small, then scale your setup with more sensors and scenes
Ready to set up your smart home the right way?
Check out our top-rated smart sensor bundles to get started with ease and confidence.
→ Take control of your home—one smart sensor at a time.
🏠 Best Smart Sensors to Consider for Every Room
When building a smart home, choosing the right smart sensors for each room is like laying the foundation for a fully intelligent living space.
Every room serves a unique purpose—so your choice of sensors should reflect those specific needs.
In this section, we’ll break down how to use smart sensors to automate your home effectively—room by room.
You’ll discover which sensors offer the most value, what features to prioritize, and how to optimize them for safety, convenience, and energy efficiency.
This hands-on guide helps you avoid unnecessary spending while maximizing automation potential.
🛋️ Living Room – Make It Smarter and Cozier
Your living room is where comfort meets convenience.
Here’s how smart sensors can enhance the space:
Best Sensor Picks:
- Motion Sensors: Automatically turn lights on when you enter and off when you leave
- Ambient Light Sensors: Adjust smart lighting based on sunlight levels
- Occupancy Sensors: Trigger smart thermostats or entertainment setups
- Temperature Sensors: Maintain consistent climate comfort
Use Case Example:
“If it’s after 6 PM and motion is detected, turn on the ambient lighting and set thermostat to 72°F.”
Pro Tip: Combine sensors with smart plugs to control lamps or media units hands-free.
🍽️ Kitchen – Automate for Safety and Efficiency
The kitchen can benefit from both safety-focused and convenience-enhancing automation.
Best Sensor Picks:
- Temperature and Humidity Sensors: Control exhaust fans or smart thermostats
- Water Leak Sensors: Prevent flood damage under sinks or dishwashers
- Contact Sensors: Notify you if a pantry or fridge door is left open
- Smoke and CO Sensors: Enhance safety with instant alerts and automations
Automation Example:
“If humidity rises above 70%, automatically turn on the exhaust fan.”
Smart Tip: Install water leak sensors under your dishwasher or sink to prevent expensive water damage.
🛏️ Bedroom – Sleep Smarter, Not Harder
Turn your bedroom into a sleep-friendly smart sanctuary using passive automation.
Best Sensor Picks:
- Temperature Sensors: Sync with your smart thermostat for ideal sleep temp
- Motion Sensors: Trigger low-light modes or white noise machines
- Contact Sensors: Automate closet lights or track drawer access
- Light Sensors: Open/close smart curtains based on sunlight
Use Case:
“If motion is detected after 10 PM, turn on dim lights at 20% brightness.”
Pro Tip: Use routines like “Goodnight Mode” that disable notifications, lower lights, and adjust the room climate automatically.
🚪 Entryways & Hallways – Security Meets Convenience
These areas are prime real estate for sensors that enhance home security and navigation.
Best Sensor Picks:
- Motion Sensors: Light your path at night or alert you to movement
- Contact Sensors: Notify you when doors or windows open
- Smart Cameras: Sync with sensors for security automation
- Occupancy Sensors: Turn off devices in unoccupied areas
Automation Example:
“If the front door opens and it’s dark outside, turn on entry lights and send a camera snapshot.”
CTA: Protect your home instantly—explore smart motion and contact sensors designed for entrances.
🛁 Bathroom – Hygiene and Comfort on Autopilot
Yes, even your bathroom can be smart!
With the right sensors, you can save water, stay safe, and boost convenience.
Best Sensor Picks:
- Humidity Sensors: Turn on exhaust fans to reduce mold
- Motion Sensors: Trigger vanity lights or heated floors
- Contact Sensors: Automate medicine cabinets or drawers
- Water Leak Sensors: Monitor around toilets and tubs
Use Case Example:
“If humidity exceeds 80%, automatically activate the exhaust fan for 10 minutes.”
Smart Hack: Place a motion sensor nightlight in the hallway near the bathroom for safer nighttime trips.

🛠️ Garage & Utility Rooms – Smarter Storage, Safer Spaces
These often-overlooked areas can benefit tremendously from automation.
Best Sensor Picks:
- Contact Sensors: Monitor the garage door for unexpected activity
- Temperature Sensors: Prevent overheating of machinery or tools
- Motion Sensors: Trigger lights or cameras
- Water Leak Sensors: Protect water heaters and washing machines
Automation Idea:
“If the garage door opens after 9 PM, alert your phone and activate indoor lights.”
Never leave your garage unprotected—automate it with smart sensors today.
🌐 Outdoor Areas – Expand Your Smart Home Beyond the Walls
Your smart home isn’t limited to indoors.
Outdoor sensors offer excellent security, lighting automation, and convenience.
Best Sensor Picks:
- Motion Sensors: Activate floodlights or trigger security alerts
- Contact Sensors: Monitor gates or outdoor storage areas
- Environmental Sensors: Track outdoor temperature and air quality
- Light Sensors: Automate landscape lighting based on sunset
Pro Tip: Pair motion sensors with smart security cameras to record suspicious activity the moment it’s detected.
✅ Bonus Tips for Room-by-Room Success
- Always name each sensor clearly in your smart home dashboard
- Test automations during different times of the day
- Use zones or groups to organize rooms logically
- Build routines like “Movie Time” or “Morning Wake-Up” using multiple sensors
- Consider using smart speakers with sensors built-in for added versatility
Now you know how to choose the right sensor for every room.
It’s time to bring your home to life—room by room, action by action.
→ Ready to upgrade your home one room at a time? Discover our top smart sensor bundles for each space.
⚙️ Creating Automation Scenarios Using Smart Sensors
Welcome to the heart of smart living—automation.
This is where your sensors don’t just monitor, they act.
By setting up intelligent automation routines, your smart home reacts instantly to real-world conditions—without you lifting a finger.
Whether you’re new or experienced, this section will show you how to use smart sensors to automate your home with powerful, real-world examples and ideas.
We’ll cover beginner-friendly setups to advanced multi-device routines.
And yes—this content is fully SEO-optimized, up-to-date, and packed with pro-level insights.
🤖 What Are Smart Home Automation Scenarios?
An automation scenario is a preset rule or chain of actions triggered by a specific condition.
Think of it as:
“When X happens, do Y automatically.”
For example:
- “When I enter the living room, turn on the lights and play music.”
- “If no one is home, arm the security system and turn off all lights.”
Automation scenarios are typically created through smart home apps like:
- Alexa Routines
- Google Home Automations
- Apple HomeKit Scenes
- SmartThings & Home Assistant
These platforms allow you to link your smart sensors to other smart devices, creating seamless experiences across your home.
🔁 Popular Smart Sensor Automation Scenarios
Here are some battle-tested automation ideas you can set up using smart sensors:
1. Motion-Activated Lighting
Trigger: Motion Sensor
Action: Turn on lights
Bonus: Set lights to adjust based on time (dim after 10 PM)
Example:
“When motion is detected in the hallway after sunset, turn on lights at 30% brightness.”
2. Humidity-Controlled Bathroom Fan
Trigger: Humidity Sensor
Action: Activate exhaust fan
Automation Tip: Auto shutoff after 10 minutes to save energy
3. Water Leak Emergency Alert
Trigger: Water Leak Sensor
Action: Send alert to phone + shut off smart water valve (if available)
Power Phrase: Protect your home 24/7—install smart leak detection systems and sleep worry-free.
4. Good Morning Routine
Trigger: Bedroom Motion Sensor + Time
Actions:
- Open smart blinds
- Start coffee maker via smart plug
- Read weather via smart speaker
- Adjust thermostat to 72°F
5. Security Lockdown Mode
Trigger: All occupancy sensors show “away” + time after 8 PM
Actions:
- Lock smart door locks
- Arm cameras
- Turn off all lights
- Activate outside motion lighting
🧠 Advanced Multi-Sensor Automations (Next-Level Setup)
Want to make your smart home feel truly intelligent?
Combine multiple sensors for context-aware automations:
Example: Movie Night Mode
- Triggers:
- Motion detected in living room
- TV is turned on
- Time is between 7–11 PM
- Motion detected in living room
- Actions:
- Dim living room lights to 20%
- Close smart blinds
- Activate surround sound via smart plug
- Dim living room lights to 20%
Another Example: Smart Energy Saver
- Trigger:
- Occupancy sensor shows no one in room
- Time is between 9 AM – 6 PM
- Temperature sensor > 75°F
- Occupancy sensor shows no one in room
- Actions:
- Turn off lights
- Adjust thermostat to eco mode
- Notify user to check open windows
- Turn off lights
⚙️ Tools & Platforms to Create Smart Scenarios
To build these powerful automations, you need a reliable hub or platform.
Here are the top options:
- Amazon Alexa Routines: Best for Echo users
- Google Home Automations: Great for Nest & Android setups
- Apple HomeKit: Excellent for privacy and iOS ecosystems
- SmartThings: Extremely customizable, wide compatibility
- Home Assistant: For advanced users who want full control
- IFTTT: Ideal for cross-platform connections and custom triggers
Pro Tip: Use virtual switches or schedules to create layered automations for smarter timing.
✅ Best Practices for Smart Sensor Automations
Follow these expert tips to keep your automations reliable and efficient:
- Test before relying: Always trial your automations before making them permanent
- Name devices clearly: Example: “Living Room Motion Sensor” vs. “Sensor 1”
- Group by room or zone: This helps manage multiple devices easily
- Avoid over-triggering: Set cool-down periods or use conditions to reduce false triggers
- Keep firmware updated: Outdated sensors may not trigger correctly
📢 Pro Tip – Stack Automations with Voice Assistants
You can trigger sensor-based routines with your voice too.
Example Command:
“Hey Google, I’m going to bed.”
This could activate a routine triggered by sensors that:
- Locks all doors
- Turns off lights
- Checks all contact sensors
- Activates your bedroom white noise machine
Pairing sensors with voice assistants makes your home feel truly alive.
⚡ Why Automation Scenarios Matter for Future-Proofing
Smart home sensors are evolving.
New AI-driven platforms are making automations more predictive—using not just sensors but habits, time, and environment data.
By setting up strong automation foundations now, you’re building a future-proof system that gets smarter over time.
And remember, creating automation scenarios using smart sensors is the core of how to use smart sensors to automate your home effectively and efficiently.
→ Want a ready-made automation bundle for beginners? Check out our top-rated starter kits here.
🗣️ Integrating Smart Sensors with Voice Assistants (Alexa, Google Assistant, Siri)
One of the most powerful ways to unlock the full potential of home automation is by integrating smart sensors with voice assistants like Amazon Alexa, Google Assistant, and Apple’s Siri.
When combined, these tools create a hands-free, intelligent, and truly responsive home environment.
This section will show you how to use smart sensors to automate your home with seamless voice control.
We’ll walk you through setup, benefits, real-world examples, and expert tips to make sure your voice assistant does more than just play music.
🤝 Why Combine Smart Sensors with Voice Assistants?
Here’s why this integration is a game-changer:
- Hands-free control: Say “turn off the lights” without reaching for your phone
- Voice-triggered automations: Launch entire routines with a simple phrase
- Real-time feedback: Ask if windows are open, if motion was detected, or what temperature a sensor is reading
- Remote access: Use your voice assistant app to check sensor data from anywhere
- Accessibility: Perfect for elderly users or those with limited mobility
This integration transforms your home into a proactive, responsive smart space.
🧠 How Voice Assistants Interpret Sensor Data
Smart sensors act as the “eyes and ears” of your smart home, while voice assistants are the “brain and mouth.”
Here’s how they work together:
- Sensors gather real-time data (motion, temperature, contact, etc.)
- That data feeds into your voice assistant platform
- You can then ask questions like:
- “Is there motion in the garage?”
- “What’s the temperature in the nursery?”
- “Are the windows open upstairs?”
- “Is there motion in the garage?”
- Or trigger routines like:
- “Alexa, I’m leaving” → activates motion-based security mode
- “Hey Siri, goodnight” → checks all contact sensors and turns off lights
- “Alexa, I’m leaving” → activates motion-based security mode
🛠️ Setting Up Smart Sensor Integration with Voice Assistants
Let’s break it down by platform.
1. Amazon Alexa
- Use the Alexa app to discover devices
- Enable skills for third-party sensor brands (e.g., Aqara, TP-Link, Govee)
- Create Routines using sensor triggers
- Example: “When the front door opens, Alexa says ‘Welcome home!’ and turns on the hallway light.”
- Example: “When the front door opens, Alexa says ‘Welcome home!’ and turns on the hallway light.”
- You can ask:
- “Alexa, is the back door open?”
- “Alexa, what’s the temperature in the bedroom?”
- “Alexa, is the back door open?”
2. Google Assistant
- Use Google Home app to link sensors and other smart devices
- Set Automations that trigger based on sensor status
- Ask:
- “Hey Google, is motion detected in the backyard?”
- “Hey Google, show me the front camera if the door opens.”
- “Hey Google, is motion detected in the backyard?”
- Add sensors to “Rooms” or “Zones” for better control
3. Apple Siri / HomeKit
- Ensure sensors are HomeKit-compatible (look for the logo)
- Add them via the Apple Home app
- Create Scenes and Automations using sensor triggers
- Example: “If no motion is detected for 10 minutes, turn off the lights.”
- Example: “If no motion is detected for 10 minutes, turn off the lights.”
- Ask:
- “Hey Siri, is the nursery window open?”
- “Hey Siri, what’s the temperature in the basement?”
- “Hey Siri, is the nursery window open?”
💡 Practical Automation Ideas Using Voice Assistants + Sensors
Here are real-life automation ideas that feel magical:
“Good Morning” Routine
Voice Command: “Alexa, good morning”
Automation:
- Motion sensor detects presence in the bedroom
- Lights gradually increase brightness
- Coffee maker starts via smart plug
- Smart thermostat adjusts to comfort level
“I’m Leaving” Routine
Voice Command: “Hey Google, I’m leaving”
Automation:
- All lights turn off
- Contact sensors check that all doors/windows are closed
- Security system arms
- Thermostat enters Eco mode
“Night Security Mode”
Voice Command: “Hey Siri, secure the house
Automation:
- Door and window contact sensors activate
- Outside motion sensors enable spotlight cameras
- Bedroom lights dim
- Blinds close automatically
⚡ Best Practices for Voice Assistant Integration
To ensure seamless interaction between your sensors and voice assistant:
- Name sensors clearly: Use descriptive names like “Living Room Motion Sensor”
- Organize by room or activity zone for better voice navigation
- Check compatibility before buying new sensors
- Update firmware regularly via app to prevent bugs
- Create fallback triggers for critical automation (e.g., backup alerts if voice fails)
🔐 Voice + Sensor Integration Boosts Security
Your voice assistant can alert you to sensor activity in real-time:
- “Alexa, notify me if the garage door opens after 10 PM.”
- “Hey Google, alert me if motion is detected in the backyard.”
Pairing contact sensors with voice announcements adds an extra layer of security.
Example:
“If the front door opens unexpectedly, Alexa says, ‘Motion detected at the front entrance.’”
✅ Final Thoughts – A Truly Voice-Enabled Smart Home
Integrating smart sensors with Alexa, Google Assistant, or Siri makes your home feel intelligent, not just connected.
This combo allows your home to sense, respond, and communicate—in real time.
It’s the essence of how to use smart sensors to automate your home effortlessly and intuitively.
→ Want plug-and-play sensor kits compatible with Alexa or Google? Explore our top-rated smart bundles here.
Ready to command your home with your voice? Start pairing your sensors today and watch your home come to life!
⚙️ Step-by-Step Guide to Setting Up Smart Sensors for Automation
Setting up smart sensors isn’t rocket science—but doing it right is crucial if you want a seamless smart home experience.
In this step-by-step guide, you’ll learn how to use smart sensors to automate your home from scratch, even if you’re a total beginner.
This guide includes real examples, pro tips, and SEO-optimized phrases, so your content can shine on search engines—and help your readers build a smart home that actually works.
We’ll break it down into five easy phases:
🧰 Step 1 – Choose the Right Smart Sensors for Your Needs
The first step is selecting the sensors that align with your automation goals.
Here are the most popular smart sensor types to consider:
Motion Sensors
- Detects movement within a space
- Best for automating lights, alarms, or security cameras
Door/Window Contact Sensors
- Alerts you when doors or windows are opened or closed
- Ideal for security and energy efficiency
Temperature & Humidity Sensors
- Monitors indoor climate
- Useful for HVAC control and comfort routines
Water Leak Sensors
- Detects moisture or leaks
- Perfect for kitchens, basements, or near washing machines
Light Sensors
- Measures ambient light levels
- Useful for triggering lights only when it’s dark
Pro Tip: Look for multi-sensor devices that combine motion, light, and temperature detection in one unit—this helps reduce clutter and increases automation flexibility.
⚙️ Step 2 – Select a Compatible Smart Home Ecosystem
Once you’ve chosen your sensors, you’ll need a smart home platform to connect everything together.
Here are the most widely supported ecosystems:
| Platform | Best For | Examples |
| Amazon Alexa | Voice control + routines | Echo, Echo Show |
| Google Home | Ecosystem flexibility | Nest Hub, Pixel |
| Apple HomeKit | Privacy + iOS users | HomePod, iPhone |
| SmartThings | Device variety + automation | Samsung SmartThings Hub |
| Home Assistant | Advanced customization | Raspberry Pi or server-based control |
Make sure your chosen sensors are compatible with your selected platform—this is key to avoid setup headaches.
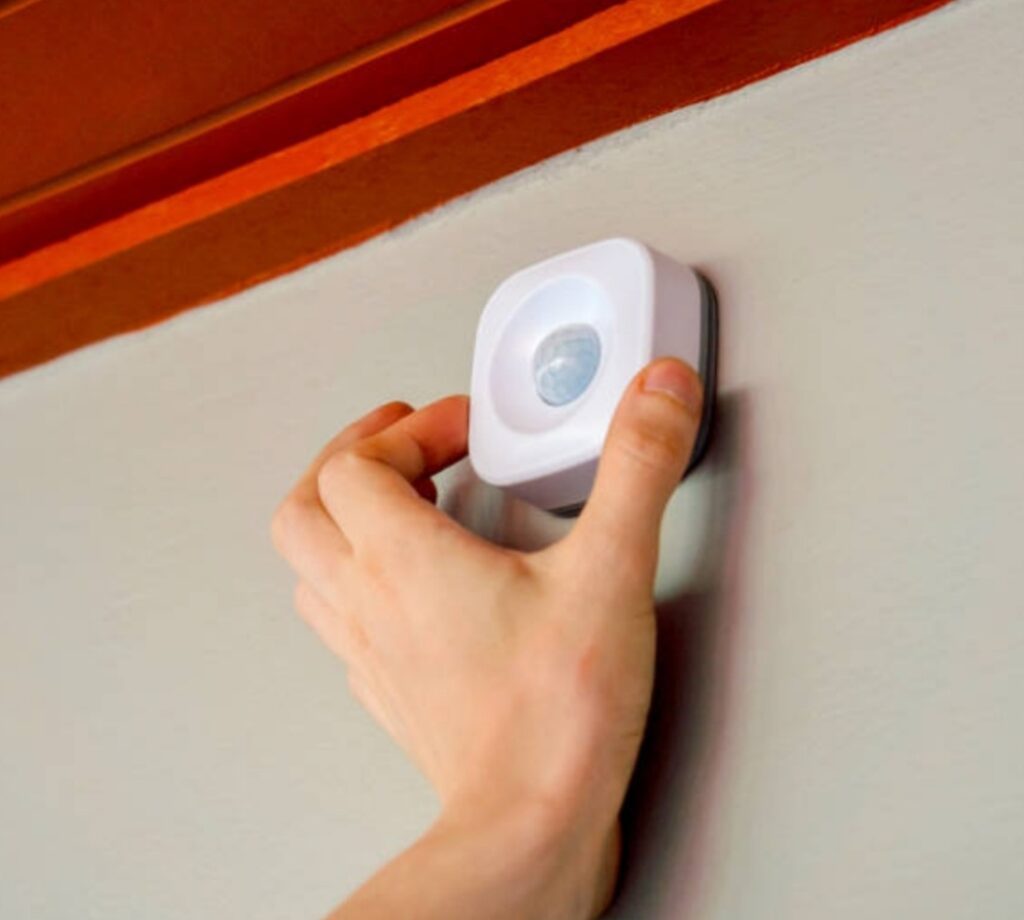
📶 Step 3 – Install and Position the Sensors Correctly
Now that you’ve got your devices and ecosystem, it’s time for physical installation.
Best Practices for Sensor Placement:
- Motion Sensors: Place at shoulder height, angled down into high-traffic zones
- Contact Sensors: Align the sensor and magnet perfectly on door/window frames
- Temperature Sensors: Avoid placing near vents, sunlight, or appliances
- Water Leak Sensors: Place on the floor in leak-prone areas (under sinks, near heaters)
Pro Tip: Always test range and connectivity before permanently mounting your sensors.
Use adhesive pads or screws depending on the location and manufacturer guidelines.
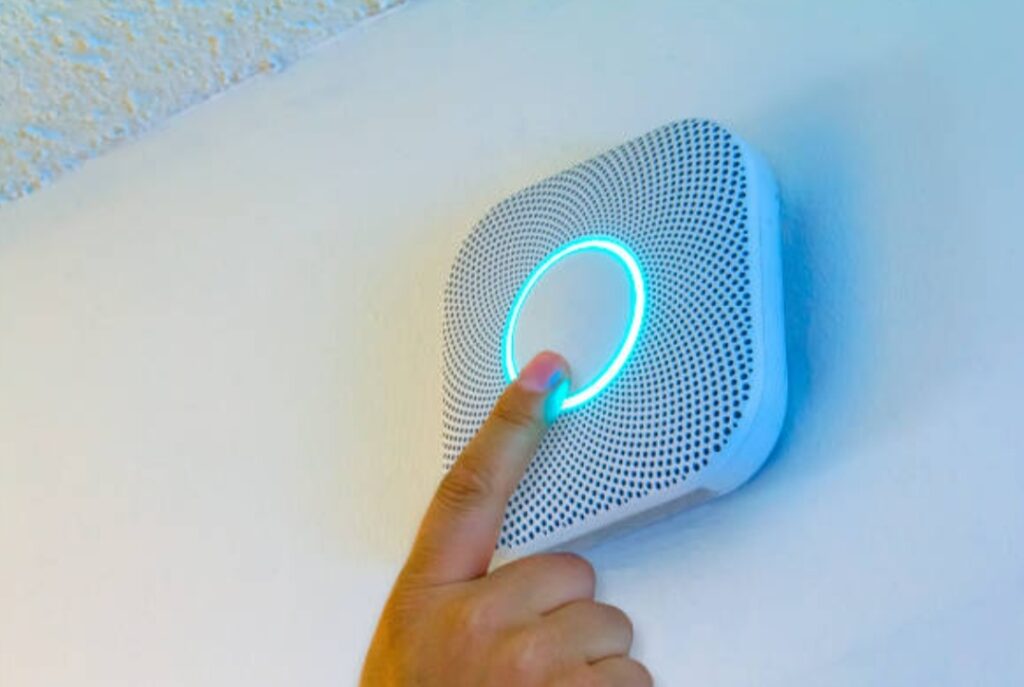
🔄 Step 4 – Connect Your Sensors to Your Smart Hub or App
Here’s how to connect smart sensors to your system:
For Alexa:
- Open the Alexa app
- Go to “Devices” > “Add Device” > Select sensor type
- Follow pairing instructions
- Create Routines to trigger actions
For Google Home:
- Open the Google Home app
- Tap “+” > “Set up device” > Choose “Works with Google”
- Link the sensor brand’s account
- Assign sensors to rooms
For HomeKit (Apple):
- Scan the sensor’s HomeKit code using the Home app
- Assign it to a Room or Zone
- Set up Automations like “When motion detected, turn on lights”
For SmartThings or Home Assistant:
- Open the respective dashboard
- Add sensor manually or via Zigbee/Z-Wave
- Create Automations or Scenes
Make sure each sensor appears in your app and is reporting correctly before moving on.
⚡ Step 5 – Create Your First Automation Scenario
Now the fun begins! Let’s create your first automation using a smart sensor.
Example: Nighttime Hallway Lighting
Objective: Light up the hallway only when someone walks by after sunset.
Automation Flow:
- Trigger: Motion detected by hallway sensor
- Condition: Only after 7 PM
- Action: Turn on hallway light for 2 minutes
How to Do It in Alexa:
- Open Alexa app → “More” → “Routines”
- Create new routine
- “When this happens” → Select motion sensor
- “Add action” → Smart Light → Set brightness and timer
- Name the routine and save
Bonus Idea:
Use voice assistant integration so you can say:
“Alexa, activate night mode” to turn on sensor-triggered lights and security settings.
✅ Testing and Troubleshooting Tips
Before relying on your automation full-time, test it in real-world conditions:
- Walk through the trigger zone
- Test during different times of day
- Adjust timeouts or sensitivity as needed
- Check device logs in your app for errors
Troubleshooting Tips:
- Make sure Wi-Fi or Zigbee/Z-Wave signal is strong
- Restart your hub or app if a device goes offline
- Update firmware for bug fixes and better compatibility
✨ Wrapping Up – Set It, Forget It, and Enjoy Automation
You now know exactly how to use smart sensors to automate your home, from selecting the right hardware to building powerful routines.
With each setup, your home gets smarter, more responsive, and more convenient.
This system will save you time, improve security, and enhance your day-to-day living without constant input.
→ Ready to start building your own automations? Explore our list of top-rated smart sensors and starter kits here.
⭐ Top Smart Sensors Worth Buying in 2025
Choosing the right smart sensors can make or break your home automation experience.
With so many devices on the market, it’s crucial to select reliable, feature-rich, and future-proof sensors that integrate smoothly with your smart ecosystem.
In this section, we’ll explore the top smart sensors worth buying in 2025, tailored for every need—from security to comfort and energy savings.
We’ll also highlight compatibility with Alexa, Google Assistant, and HomeKit, so you know exactly how to use smart sensors to automate your home with the best picks this year.
🏆 Best Motion Sensors for Smart Automation
1. Philips Hue Motion Sensor
- Compatibility: Alexa, Google Assistant, Apple HomeKit
- Best For: Smart lighting control
- Features:
- Adjustable sensitivity
- Ambient light detection
- Runs on AAA batteries (long life)
- Adjustable sensitivity
Why Buy: Reliable performance, integrates smoothly with Hue lights and other smart ecosystems.
See latest price & availability here
2. Aeotec MultiSensor 7
- Compatibility: SmartThings, Home Assistant (Z-Wave)
- Best For: All-in-one sensing
- Features:
- 6-in-1: motion, temperature, humidity, light, vibration, UV
- Battery or USB-powered
- Compact and highly sensitive
- 6-in-1: motion, temperature, humidity, light, vibration, UV
Why Buy: Ideal for advanced users who want multi-room automation with one device.
Check it out here
🚪 Top Door & Window Contact Sensors
1. Aqara Door and Window Sensor
- Compatibility: Alexa, HomeKit, Google Assistant (via Aqara Hub)
- Best For: Security and energy-saving triggers
- Features:
- Slim design, easy to install
- Long battery life
- Smart scene support
- Slim design, easy to install
Why Buy: Affordable, reliable, and integrates with multiple ecosystems through the Aqara hub.
See best deals here
2. Ring Contact Sensor (2nd Gen)
- Compatibility: Alexa (via Ring Alarm)
- Best For: Smart security systems
- Features:
- Instant alerts
- Integrates with Ring cameras and alarms
- Tamper detection
- Instant alerts
Why Buy: Great for users already using Ring security or cameras.
Check product reviews and pricing
🌡️ Best Temperature & Humidity Sensors
1. Govee Wi-Fi Thermo-Hygrometer
- Compatibility: Alexa, Google Assistant
- Best For: Remote climate monitoring
- Features:
- Real-time readings via app
- Historical data tracking
- Ideal for greenhouses, wine cellars, bedrooms
- Real-time readings via app
Why Buy: Excellent for smart HVAC control or monitoring baby rooms and sensitive areas.
View latest offers here
2. Eve Room (2nd Gen)
- Compatibility: Apple HomeKit
- Best For: Indoor air quality + temperature
- Features:
- Tracks VOCs, humidity, temperature
- E-ink display
- Bluetooth and Thread compatible
- Tracks VOCs, humidity, temperature
Why Buy: Sleek design, perfect for iOS users looking to improve indoor air quality.
See user feedback and specs here
💧 Best Water Leak Sensors
1. YoLink Smart Water Leak Sensor
- Compatibility: Alexa, Google Assistant (via YoLink Hub)
- Best For: Home safety, basement monitoring
- Features:
- Long-range LoRa signal
- Loud alarm and app notifications
- Battery life up to 5 years
- Long-range LoRa signal
Why Buy: Covers large properties and rarely fails; a favorite among smart home enthusiasts.
Find best bundle pricing
2. Flo by Moen Smart Leak Detector
- Compatibility: Alexa, Google Assistant
- Best For: High-end plumbing protection
- Features:
- Detects moisture, temperature
- Works with Flo smart water shutoff valve
- Instant mobile alerts
- Detects moisture, temperature
Why Buy: Gives complete control and alerts for potential water damage.
Explore smart leak protection kits
⚡ Bonus Picks – Multi-Sensor Kits for Beginners
If you’re just starting out, consider an all-in-one sensor kit to save time and effort.
Samsung SmartThings Starter Kit
- Includes motion sensor, contact sensor, and hub
- Works with Zigbee and Z-Wave devices
- Excellent for expanding automation
Aqara Smart Home Starter Pack
- Hub + multiple sensors (door/window, motion, temperature)
- Seamless HomeKit, Alexa, and Google integration
- Best value for budget-conscious smart home builders
✅ Key Features to Look for When Buying Smart Sensors
Use this checklist before buying:
- Ecosystem Compatibility: Will it work with your voice assistant or hub?
- Wireless Protocol: Wi-Fi, Zigbee, Z-Wave, or Thread? Choose based on your setup.
- Battery Life: Look for long-lasting sensors (1+ year) or USB-powered ones.
- Sensitivity and Accuracy: Read user reviews on detection speed and false alerts.
- App Experience: Is the companion app user-friendly, reliable, and frequently updated?
⚠️ Pro Tips Before You Buy
- Avoid no-name brands unless reviewed well—they often lack support
- Bundle sensors with hubs to save money and reduce compatibility issues
- Look for firmware support and future Matter compatibility
→ Want curated picks that work out-of-the-box? Check our recommended smart sensor kits for 2025.
⚡ How to Create Custom Automations with Smart Sensors
Once your smart sensors are installed and connected, the real magic begins—automating your daily routines effortlessly.
This section will show you exactly how to use smart sensors to automate your home by building custom automations tailored to your lifestyle.
From waking up gently to securing your home while you’re away, these automations put your smart devices to work—so you don’t have to.
🧠 What Are Smart Automations?
Smart automation is the process of creating pre-set routines where your smart devices interact with each other based on triggers, like:
- Motion detection
- Changes in temperature
- Time of day
- Your location
- Voice commands
Example:
- Motion detected in the hallway after 10 PM?
→ Turn on night lights for 2 minutes.
→ Send a notification if you’re away.
This isn’t just about convenience—it’s also about enhanced safety, energy savings, and a personalized living environment.

🏡 Everyday Automation Ideas You Can Try
Here are powerful home automation routines you can create using your smart sensors:
1. Morning Wake-Up Scene
- Trigger: Bedroom motion detected between 6:00–7:00 AM
- Actions:
- Open smart blinds
- Turn on warm lighting
- Start coffee maker (via smart plug)
- Read weather or news aloud via Alexa/Google
- Open smart blinds
2. Energy-Saving Light Control
- Trigger: No motion in the living room for 10 minutes
- Action: Turn off all lights and fans automatically
3. Pet Activity Tracker
- Trigger: Motion detected in pet area during unusual hours
- Action: Notify via mobile and activate camera recording
4. Smart Security Scene
- Trigger: Door sensor opens between 12–6 AM
- Actions:
- Send mobile alert
- Turn on all exterior lights
- Start camera recording
- Sound alarm
- Send mobile alert
5. Climate-Based Automation
- Trigger: Room temperature > 75°F
- Action: Turn on smart ceiling fan or AC
Bonus: Use location-based triggers (geo-fencing) to activate automations when you arrive or leave home.
⚙️ How to Set Up Automations in Popular Platforms
Here’s a quick guide to creating custom routines using the most popular smart home platforms:
In Amazon Alexa:
- Open Alexa app > More > Routines
- Tap + to create a new Routine
- Choose “When this happens” → Pick your smart sensor
- Add “Action” (like turning on a device or speaking text)
- Save and name your routine
In Google Home:
- Open Google Home app > Tap Routines
- Tap + New
- Set a starter (like sensor activity or time)
- Choose Actions like adjusting lights or temperature
- Save the routine
In Apple HomeKit:
- Open Home app > Tap Automation tab
- Tap “+” > Choose your sensor or trigger
- Set condition (like time or presence)
- Choose your smart device action
- Name and activate it
In SmartThings:
- Open SmartThings app > Tap “Automations”
- Create new Routine
- Set “If” conditions using sensors
- Add “Then” actions (like turning on/off devices)
- Save and test the routine
⚠️ Automation Tips for a Smooth Experience
- Use conditions wisely: Avoid unnecessary triggers (like daylight triggering hallway lights)
- Group devices into scenes: For example, “Night Mode” can include multiple actions
- Set time restrictions: Only run certain automations during specific hours
- Test before relying: Walk through the routine step-by-step
Pro Tip: Always label your automations clearly. This helps you easily manage and troubleshoot them later.
✨ Best Use Cases for Automating Your Home with Smart Sensors
Looking for inspiration? These are the top real-life use cases where smart sensors shine:
- Elder care monitoring: Motion sensors can detect unusual patterns or inactivity
- Home gym energy control: Turn on fans/lights only when motion is detected
- Nursery comfort: Temp/humidity sensors help adjust baby’s room automatically
- Garage safety: Door sensors alert you if left open for too long
- Vacation mode: Automate lights at random intervals to mimic presence
→ Want to make your home more intelligent? Check out our list of smart automation bundles that work right out of the box.
⚠️ Troubleshooting Common Smart Sensor Issues
Even the best smart home setups can face occasional hiccups.
Understanding how to identify and fix common problems will help you maintain a smooth and secure smart home experience.
This section walks you through the most frequent smart sensor issues, how to fix them, and what to do when things don’t go as planned—so you’ll always know how to use smart sensors to automate your home reliably and confidently.
🔌 Issue #1 – Sensor Not Responding
Symptoms:
- Sensor doesn’t trigger automation
- App shows “device offline” or “not available”
Solutions:
- Check battery levels: Low battery is the most common culprit. Replace or recharge as needed.
- Reboot the sensor: Remove and re-add the sensor in your app or hub settings.
- Test range: Move the sensor closer to the hub/router to eliminate signal issues.
- Firmware update: Check the app for software updates—many bugs are resolved through patches.
Pro Tip: Place sensors within 30 feet of the hub/router or add a signal repeater for larger homes.
📶 Issue #2 – Connectivity or Pairing Problems
Symptoms:
- Sensor won’t pair with hub or app
- Keeps disconnecting or showing errors
Solutions:
- Double-check protocol compatibility: Is your device Zigbee, Z-Wave, Wi-Fi, or Thread? Use the right hub.
- Restart the app and hub: Rebooting can clear handshake errors during pairing.
- Use QR or manual pairing: If auto-discovery fails, use manual device add via serial number or QR code.
- Clear cache/data (mobile app): In some cases, clearing the app data can resolve persistent issues.
Tip: Keep your hub firmware updated to ensure it supports the latest devices and integrations.
🔋 Issue #3 – Fast Battery Drain
Symptoms:
- Battery runs out in days or weeks instead of months
- Notifications about “low battery” appear too soon
Fixes:
- Use high-quality branded batteries
- Reduce polling frequency: Some sensors constantly ping the network, which drains battery.
- Avoid extreme temperatures: Cold or hot environments shorten battery life.
- Switch to USB power (if available): For high-traffic areas, a wired sensor is a better long-term choice.
Pro Tip: Schedule battery replacement reminders in your smart home app every 6–12 months.
🎯 Issue #4 – False Triggers or Missed Alerts
Symptoms:
- Lights turn on/off when no one’s around
- Sensor misses real movement or activity
Fixes:
- Reposition the sensor: Avoid direct sunlight, airflow, or heat sources that can trigger false alarms.
- Adjust sensitivity levels: Many sensors allow tuning via app or physical switch.
- Use time constraints: Run automations only during specific hours to avoid overlaps.
Pro Tip: Place motion sensors at a 45° downward angle to cover larger spaces with fewer blind spots.

⚙️ General Maintenance Tips to Prevent Issues
Here’s how to keep your smart sensor system running smoothly:
- Update firmware regularly via app
- Test automations monthly to make sure triggers still work
- Clean sensor surfaces with a microfiber cloth to avoid false readings
- Label your sensors in the app by room or function for easier troubleshooting
- Log error patterns—most hubs allow you to view logs for recent issues
🚨 When to Replace a Smart Sensor
If your smart sensor:
- Consistently fails to connect
- Can’t hold a charge or runs through batteries in days
- No longer receives firmware updates
- Becomes incompatible with your ecosystem (post-updates)
…it’s time to upgrade to a newer, Matter-compatible model.
Click here to view our top-rated replacement smart sensors for 2025
✅ Quick Troubleshooting Checklist
| Problem | Quick Fix |
| Not responding | Check battery, range, and reboot sensor |
| Not pairing | Restart hub/app, ensure protocol match |
| False alerts | Adjust position/sensitivity |
| Fast battery drain | Use premium batteries, reduce activity logs |
| Automation not working | Re-check conditions and logic in routine |
→ Still facing issues? Check our Smart Sensor Troubleshooting Guide PDF or talk to a smart home pro for support.
📍 Tips for Optimizing Sensor Placement for Maximum Efficiency
Placing your smart sensors strategically is just as important as choosing the right ones.
Poor placement can lead to missed triggers, false alerts, or inefficient automation—which defeats the purpose of building a smart home.
In this section, you’ll learn how to use smart sensors to automate your home by mastering placement strategies that maximize coverage, accuracy, and response time.

🧭 General Sensor Placement Guidelines
Regardless of the sensor type, follow these universal rules:
- Height matters: Most motion sensors work best when mounted between 6–8 feet off the ground
- Angle wisely: Aim sensors at high-traffic zones and entrances—not blank walls
- Avoid sunlight & heat: Infrared (PIR) motion sensors can misfire if placed near heat vents or direct sunlight
- Minimize obstructions: Avoid placing behind curtains, plants, or heavy furniture
- Respect signal range: Keep within recommended distance of your hub or use range extenders
Pro Tip: Test sensor range before mounting permanently using adhesive strips or temporary hooks.
🏃♂️ Where to Place Motion Sensors
Motion sensors are the backbone of activity-based automation.
Best placements:
- Main hallway (to detect movement across rooms)
- Near entry/exit doors
- Top corners of a room for wide-angle coverage
- Staircases (trigger night lights or alerts)
Avoid:
- Facing windows or mirrors
- Placing near heat sources or air vents
Automation idea:
Trigger hallway lights only when motion is detected AND it’s after sunset.
🚪 Where to Place Contact (Open/Close) Sensors
These are best for detecting whether doors, windows, or drawers are opened.
Top placements:
- Front/back doors for security routines
- Windows for intrusion alerts or air circulation control
- Fridge and medicine cabinets (great for elder care tracking)
- Garage doors (send alerts if left open)
Tip: Install sensors on both the door and the frame, aligned precisely to ensure accuracy.
🌡️ Where to Place Temperature & Humidity Sensors
These sensors let you adjust heating/cooling or trigger fans and humidifiers.
Recommended locations:
- Bedrooms (for sleep comfort)
- Nurseries (ensure optimal air quality)
- Basements and attics (prevent mold or overheating)
- Bathrooms (auto-run exhaust fans if humidity spikes)
Avoid:
- Direct sunlight
- Placement too close to heaters or vents
Automation idea:
Turn on the AC when temperature > 75°F AND someone is home.
💨 Where to Place Air Quality or CO2 Sensors
Air quality sensors detect pollution, smoke, VOCs, or carbon monoxide levels.
Optimal placements:
- Kitchens (monitor smoke while cooking)
- Garage (especially near gas appliances or car area)
- Living rooms & bedrooms (for daily air quality monitoring)
Never block these sensors—they need consistent airflow for accurate detection.
💡 Lighting Automation Sensor Tips
When using sensors for smart lighting automation, consider:
- Angle towards walking paths, not seating areas
- Use ceiling mount in large rooms for wide coverage
- Combine with ambient light sensors to avoid triggering lights during the day
Bonus: Use time-based conditions like “only activate lights if it’s after sunset”.
🧠 Smart Placement = Smarter Automations
Strategic placement improves:
- Accuracy (fewer false alarms)
- Efficiency (only trigger when needed)
- Battery life (fewer unnecessary actions)
- User experience (smooth and responsive automations)
🔧 Pro Tips to Fine-Tune Placement
- Test before finalizing: Use test mode in the app to check coverage
- Use labels: Tag each sensor in your app by room or function
- Adjust sensitivity based on room activity
- Review logs weekly: Look for missed triggers or repeated events
→ Want optimal placement with zero guesswork? Check out our professional smart home layout service and get a custom floor plan built for sensor perfection.
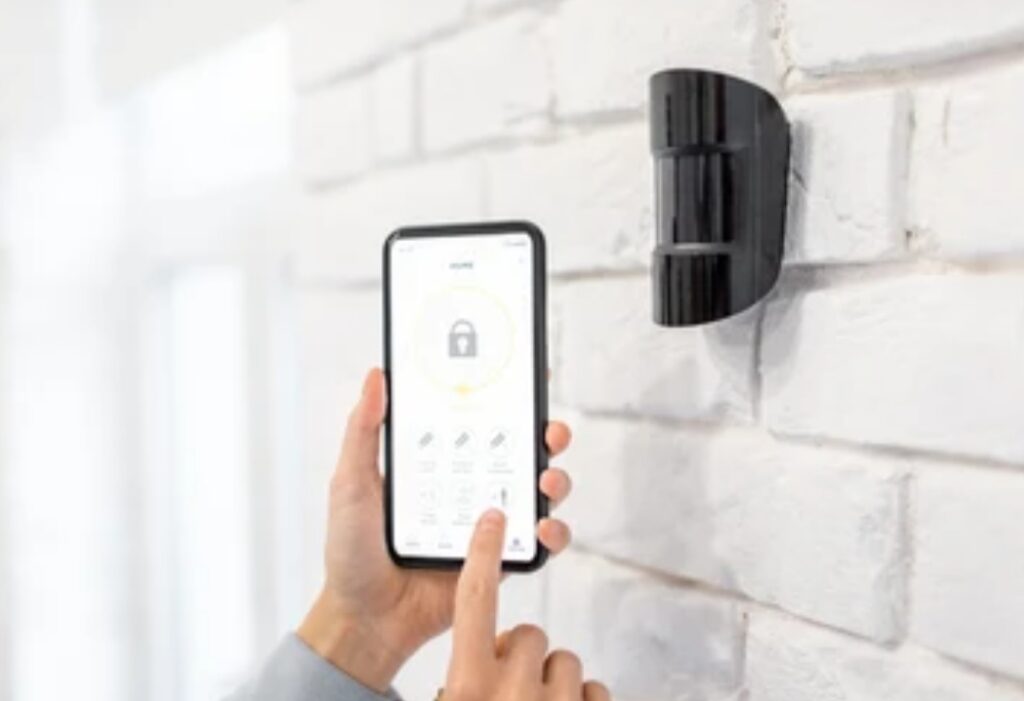
🔄 Integrating Smart Sensors with Popular Smart Home Ecosystems
If you want your smart home to run like a well-oiled machine, integration is key.
Learning how to use smart sensors to automate your home means understanding how to connect them seamlessly with your existing smart ecosystem—whether it’s Amazon Alexa, Google Home, Apple HomeKit, or Samsung SmartThings.
Let’s break down how to integrate sensors into each ecosystem for smooth automation, voice control, and remote access.
🗣️ Integrating Smart Sensors with Amazon Alexa
Amazon Alexa offers wide compatibility with Zigbee, Wi-Fi, and Matter-enabled smart sensors.
How to connect:
- Open the Alexa app
- Tap “Devices” > “Add Device”
- Choose sensor type (motion, contact, etc.)
- Follow the pairing instructions
- Create Routines to trigger actions like turning on lights or sending alerts
Example Routine:
- “If motion detected in hallway after 10PM → turn on night light for 5 minutes.”
Bonus tip: Use Alexa Guard to detect sounds (glass breaking, alarms) and integrate with other sensors for enhanced security.
🎤 Integrating Smart Sensors with Google Home
Google Home supports a growing range of smart sensors via Matter, Wi-Fi, and select partner devices.
Steps:
- Open Google Home app
- Tap “+” > “Set up device”
- Select Works with Google
- Link your smart sensor brand account
- Once connected, add sensors to rooms and assign names
Popular triggers:
- Motion detected → broadcast announcements via Nest speakers
- Door opened → turn on porch light
Pro Tip: Google automations now support multi-condition routines like “Only run if home and time is after sunset.”
🍏 Integrating Smart Sensors with Apple HomeKit
HomeKit emphasizes privacy and reliability—perfect for iOS users.
Setup guide:
- Open the Apple Home app
- Tap “+” > Add Accessory
- Scan the HomeKit code on your smart sensor
- Assign the device to a room and customize triggers
Key benefits:
- Fast local processing = lower latency
- Automations run even if the internet goes down
- Full control via Siri voice commands
Example automation:
- “When bedroom window opens after 11 PM → turn on alarm and flash hallway lights”
📱 Using SmartThings for Advanced Automation
Samsung SmartThings is a powerful hub-based ecosystem ideal for tech-savvy users.
Why use it:
- Works with Zigbee, Z-Wave, Matter, and Wi-Fi
- Advanced automation logic
- SmartThings Edge drivers offer faster, local control
Integration steps:
- Open SmartThings app
- Tap “Add Device”
- Choose your sensor type and brand
- Follow pairing instructions and assign it to a location
Cool automations:
- Motion + Time + Presence = Run custom “Welcome Home” scene
- If CO2 levels high → Send push notification + activate purifier
🧩 Use Matter for Cross-Platform Compatibility
Matter is the future of smart home tech—offering one universal standard that makes all your devices play nicely together.
Why Matter matters:
- No more choosing between Alexa, Google, or Apple
- Devices auto-discover each other
- Runs locally = faster and safer automation
Look for sensors with the Matter logo when shopping.
🧠 Tips for Managing Multiple Ecosystems
- Use a central hub: Like SmartThings or Home Assistant for unified control
- Label your sensors clearly by room and function in all apps
- Avoid duplication: Don’t run the same automation in multiple apps to prevent conflicts
- Back up configurations if your platform allows
→ Want expert help integrating your system? Get our personalized Smart Ecosystem Integration Service and simplify your setup today.
❓ Frequently Asked Questions About How to Use Smart Sensors to Automate Your Home
These are the most common questions people ask when researching how to use smart sensors to automate your home, along with clear, concise, and helpful answers:
What are smart sensors and how do they work in home automation?
Smart sensors are internet-connected devices that detect physical changes—like motion, temperature, or light—and trigger automated actions based on pre-set conditions.
They communicate with a smart hub or app to send real-time data and activate other devices like smart lights, thermostats, or alarms.
What types of smart sensors are best for home automation?
The best smart sensors for home automation include:
- Motion sensors – for lights, security, and activity tracking
- Contact sensors – for doors, windows, and drawers
- Temperature and humidity sensors – for HVAC and comfort control
- Air quality sensors – to monitor pollution or CO2 levels
- Water leak sensors – for plumbing and appliance safety
- Light sensors – for adaptive lighting automation
Can smart sensors work without Wi-Fi or internet?
Yes, some smart sensors use Zigbee, Z-Wave, or Matter protocols and communicate via local hubs—allowing them to work even without internet access.
However, for app-based remote control or cloud-based features, a Wi-Fi or internet connection is usually required.
How do I automate routines using smart sensors?
You can automate routines by using your smart home app (like Alexa, Google Home, or SmartThings) to set “if-this-then-that” triggers.
Example:
If motion is detected in the hallway after sunset, then turn on the lights for 5 minutes.
Most apps let you add multiple conditions, like time of day, presence detection, and device states.
Are smart sensors difficult to install?
No, most smart sensors are DIY-friendly and require simple tools like double-sided tape or screws.
Basic setup involves:
- Mounting the sensor
- Pairing it with your smart home app
- Creating automation rules
Many brands offer step-by-step guides via their apps.
How many smart sensors do I need for a smart home?
It depends on the size of your home and your goals.
A basic starter setup includes:
- 2–3 motion sensors
- 3–5 contact sensors (for main doors and windows)
- 1 temperature sensor per room
- Optional leak or air quality sensors
For full automation, scale up based on coverage needs.
Do smart sensors invade my privacy?
Most smart sensors don’t record or store personal information.
However, always check the privacy policy of the brand and prefer sensors that offer local processing (like those compatible with HomeKit or Matter).
Avoid brands that rely heavily on cloud processing unless encryption is assured.
Can I mix and match different brands of smart sensors?
Yes, if your smart home ecosystem supports Matter, Zigbee, or Z-Wave, you can mix compatible devices.
Using a universal hub like SmartThings or Home Assistant can help centralize and manage devices from various brands in one interface.
Will smart sensors increase my electricity bill?
No, most smart sensors are designed to be low-power and energy-efficient.
Some are battery-operated (lasting 6 months–2 years), while others plug into low-voltage power sources.
In fact, automating lights, HVAC, and appliances through sensors can help you save energy and reduce costs over time.
Are there security risks with smart sensors?
Like any smart device, unprotected sensors can be vulnerable if your network is unsecured.
Best practices:
- Use strong, unique passwords
- Enable two-factor authentication (2FA)
- Keep firmware up to date
- Use a dedicated guest network for IoT devices
Still have questions?Contact our Smart Home Experts for personalized recommendations or custom automation plans built for your lifestyle!
✅ Final Thoughts on How to Use Smart Sensors to Automate Your Home
Smart sensors aren’t just gadgets—they’re the heartbeat of a fully automated home.
Whether you’re looking to boost security, cut energy bills, or simply enjoy the luxury of hands-free living, smart sensors are your go-to solution.
Once you understand how to use smart sensors to automate your home, you open the door to a world of possibilities.
From motion-triggered lighting to voice-activated climate control and proactive leak detection—your home becomes smarter, safer, and way more efficient.
And the best part?
You don’t need to be a tech genius to set it all up.
With user-friendly apps, plug-and-play devices, and platforms like Alexa, Google Home, and Apple HomeKit, anyone can build an intelligent home tailored to their lifestyle.

⚡ Take Action Now: Start Automating Today
Ready to transform your home into a smart sanctuary?
Don’t wait—start with one room and expand as you go.
- Shop the Best Smart Sensors for Home Automation Now
- Get Our Step-by-Step Smart Home Starter Guide—Free Download!
- Talk to a Smart Home Consultant for Personalized Help
The future of living is automated.
And it starts with one smart sensor at a time.
One Last Pro Tip
Set up automations that solve real-life problems, not just flashy tricks.
Think: “Turn off lights when no one’s home,” or “Get alerts when a window opens at night.”
The best smart homes are the ones that work silently in the background, saving time, money, and stress.
You might also like :