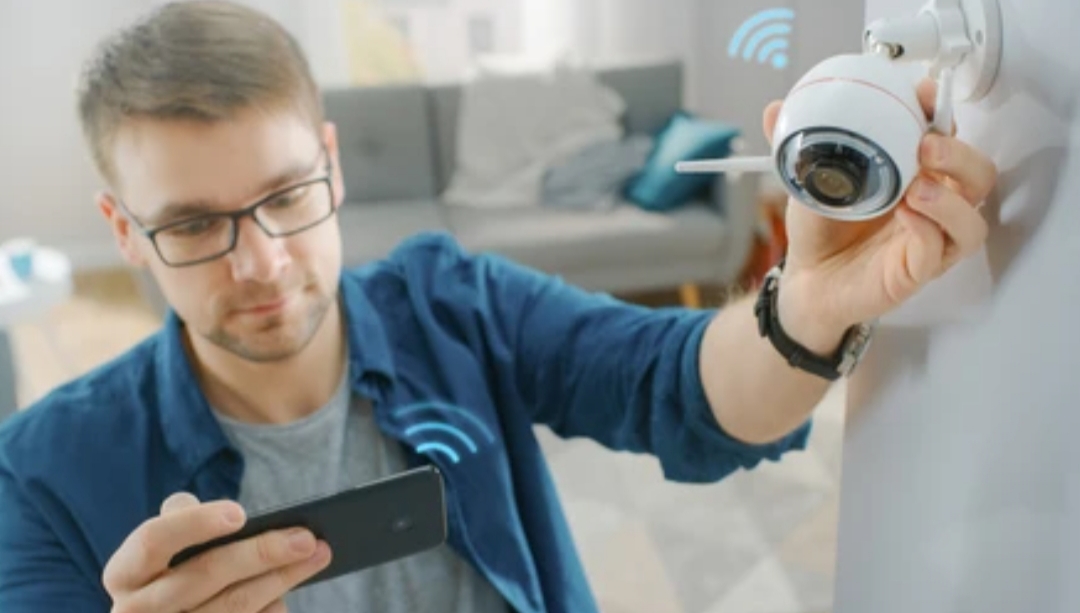
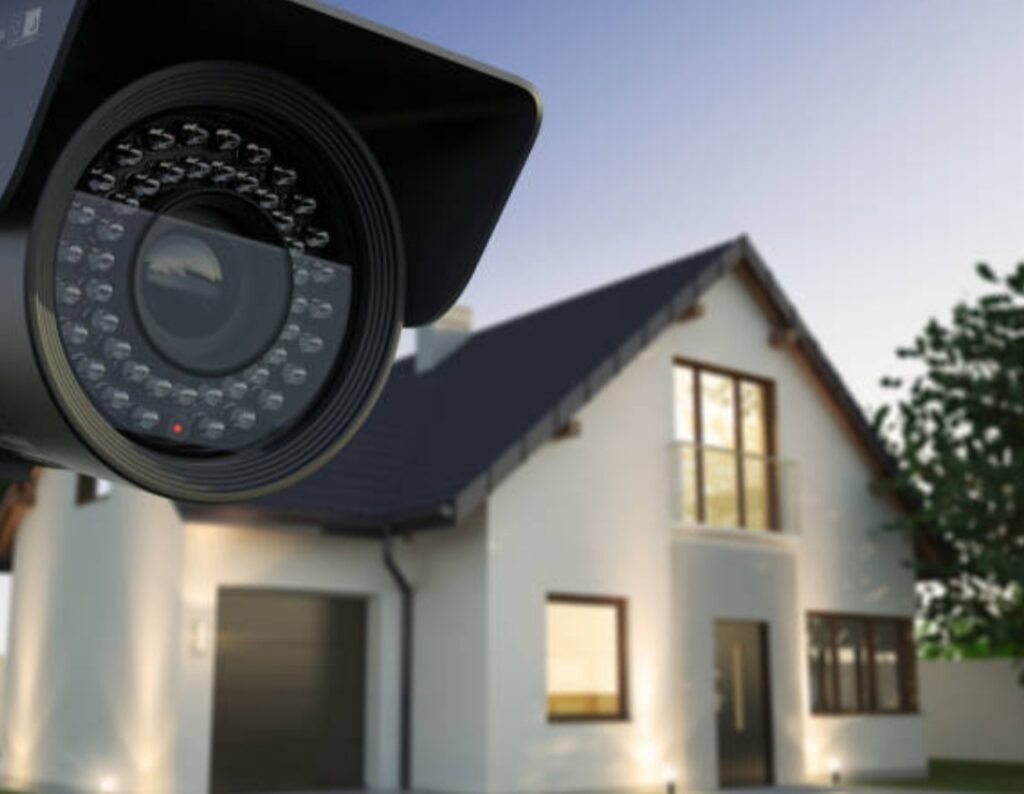
🔐 Introduction – Why Every Modern Home Needs a Smart Camera System
In today’s rapidly evolving digital landscape, home security has shifted from being a luxury to becoming a modern necessity.
Whether you’re concerned about package theft, monitoring your pets while you’re at work, or simply seeking peace of mind during vacations — a smart home camera system setup provides a practical, high-tech solution for 24/7 surveillance and control.
As more homeowners embrace intelligent living, the question has evolved from “Should I get a smart camera?” to “How to set up a smart camera system that’s reliable, user-friendly, and future-proof?”
📷 In this step-by-step guide, we’ll walk you through everything you need to know — from choosing the right devices to installing and configuring them for optimal performance.
We’ll also address important aspects like privacy settings, remote access, integration with voice assistants, and how to avoid monthly subscription traps.
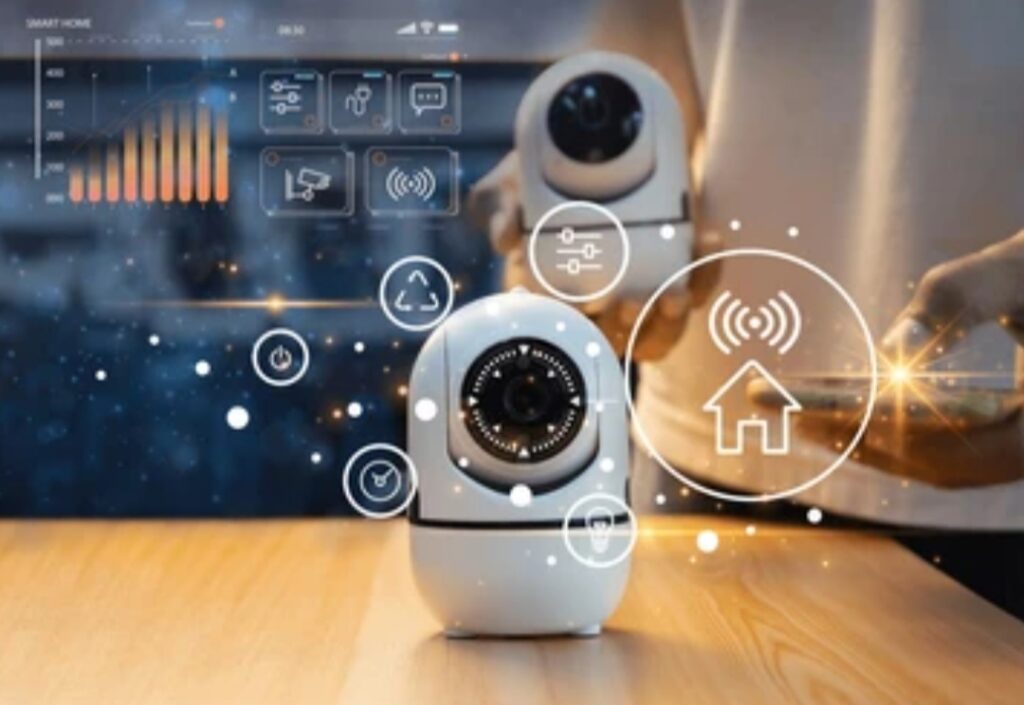
The beauty of a modern smart home camera system setup lies in its customizability and scalability.
Whether you’re setting up a basic indoor cam system or creating an advanced, multi-zone network of security cameras, today’s technology offers plug-and-play simplicity paired with robust, AI-powered functionality.
And the best part? Many of the most powerful features are available even without monthly fees — if you know what to look for.
⚙️ From motion-triggered alerts to cloud recording, local storage options, and real-time app monitoring, you’ll learn how to create a professional-grade surveillance setup — even on a DIY budget.
This blog post is your complete smart camera installation blueprint, designed for both beginners and seasoned smart home enthusiasts alike.
We’ll cover:
- How to choose between wired vs wireless cameras
- What to look for in video resolution, night vision, and two-way audio
- The right way to mount and position your cameras for maximum coverage
- How to connect your smart camera system to your Wi-Fi, router, or smart hub
- How to secure your data and protect your family’s privacy using modern encryption techniques
- Why local storage and edge AI processing are must-haves in 2025 and beyond
📲 Whether you’re using Google Assistant, Amazon Alexa, or Apple HomeKit Secure Video, you’ll discover how to seamlessly integrate your cameras with your existing smart home ecosystem for enhanced automation and smarter alerts.
✅ Pro Tip: Looking for a highly-rated smart camera system under $100? Some of the best budget-friendly models now offer 4K resolution, human detection, and weather resistance without the need for expensive cloud plans.
With real-world insights, insider tips, and product recommendations, this blog aims to answer every question you might have about building your smart surveillance network — and then some.
✅ Bottom Line: If you’re serious about protecting your home, upgrading your lifestyle, and saving money while doing it, you’re in the right place.
👉 Keep reading to discover the best setup practices, expert-recommended configurations, and insider tricks that the pros use.
🛠️ Ready to take control of your home security?
Let’s dive into the ultimate smart camera system setup now!
🔍 Choosing the Right Smart Home Camera System
Before diving into the actual setup process, it’s crucial to choose the right smart camera system that fits your home’s layout, your lifestyle, and your security needs.
This is arguably the most important step in learning how to set up a smart camera system, as the performance and features of your cameras directly impact how effective your setup will be in the long term.
🔑 Whether you’re focused on monitoring your front porch, keeping an eye on kids or pets, or protecting multiple zones around your property, understanding your options is the foundation of a successful smart home camera system setup.
🏡 Assess Your Home Security Needs First
Not all homes — or homeowners — are the same.
That’s why your first step should be to evaluate your individual needs:
- Do you need indoor or outdoor surveillance (or both)?
- Are you looking for real-time alerts, or just video recording for later review?
- Do you want your cameras to integrate with existing smart home platforms like Alexa, Google Assistant, or Apple HomeKit?
- How many areas of your home need coverage? (Front door, driveway, garage, backyard, living room, etc.)
- What’s your budget for initial setup and ongoing storage (cloud vs. local)?
✅ Pro Tip: Make a simple sketch of your home layout and highlight key entry points or vulnerable zones you want to monitor.
This will guide how many cameras you need and where to place them.
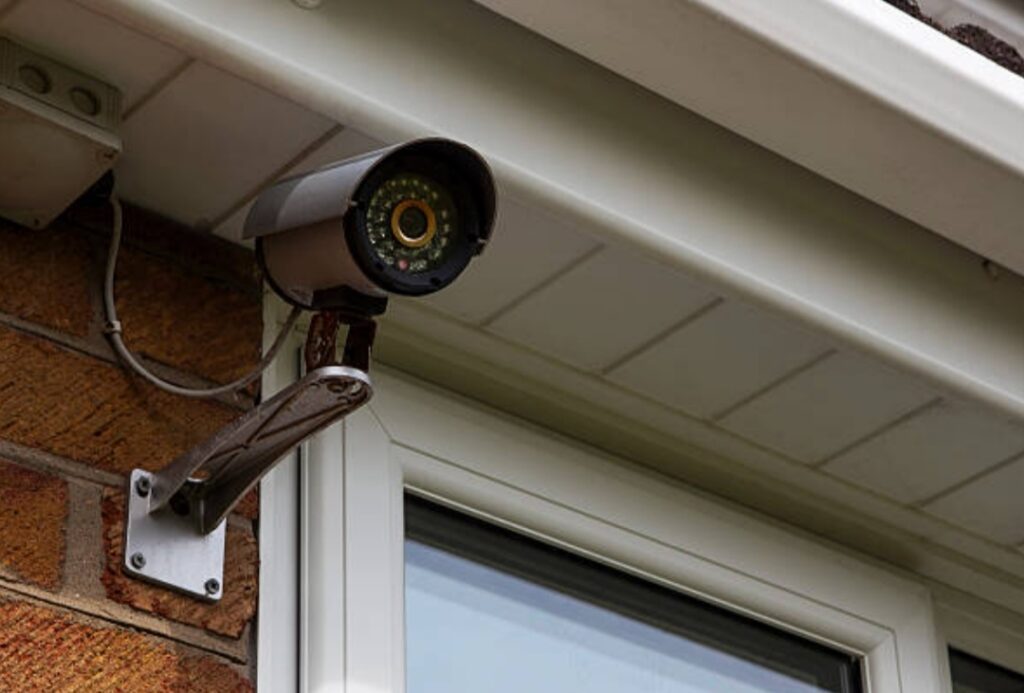
🎯 Wired vs Wireless Cameras – Which One Is Best for You?
One of the biggest decisions in any smart home camera system setup is choosing between wired and wireless cameras.
Here’s how they compare:
| Feature | Wired Cameras | Wireless Cameras |
| Power Source | Requires electrical wiring | Battery-powered or plug-in via adapter |
| Installation | More complex, requires drilling/mounting | Easier, more flexible placement |
| Connectivity | Stable (uses Ethernet) | Wi-Fi dependent (may drop with weak signal) |
| Reliability | Very high | Good but depends on signal & battery |
| Ideal For | Permanent setups, large properties | Renters, small-to-medium homes |
📌 Best of Both Worlds: Some modern systems offer wireless cameras with solar panel support, giving you long-lasting performance without the wiring hassle.
📷 Key Features to Look for in a Smart Home Camera System
When shopping for your ideal smart camera, consider these essential features:
- Resolution: Go for at least 1080p Full HD, but 2K or 4K is best for identifying faces and license plates.
- Night Vision: Make sure the camera offers infrared or color night vision with good range (25–100 feet).
- Field of View: A wider lens (120° to 160°) covers more area with fewer blind spots.
- Two-Way Audio: Talk and listen through the camera via your smartphone — great for deliveries or scaring off intruders.
- Motion Detection & Alerts: AI-powered detection that can tell the difference between people, pets, and vehicles.
- Cloud vs. Local Storage: Choose a camera that supports local SD card storage if you want to avoid monthly fees.
- Smart Integration: Confirm it supports your preferred platform — Google Home, Alexa, or Apple HomeKit.
- Weather Resistance: For outdoor use, ensure the camera is IP65 or IP67 rated to withstand rain, dust, and heat.
🛑 Watch Out For Hidden Costs: Some camera brands lock key features (like person detection or cloud storage) behind a subscription paywall.
👉 Check out this no-subscription smart camera we recommend for complete features without the monthly costs.
🔐 Smart Hub or Standalone System – What’s the Difference?
Some smart cameras work as standalone devices, while others require a hub to function.
Standalone Cameras
- Connect directly to Wi-Fi
- Controlled via app
- Easier setup
- More common in budget-friendly systems
Hub-Based Systems
- Centralized control of multiple cameras
- Typically more secure and reliable
- Ideal for full-home automation setups
- May support local NVR/DVR storage (Network/Video Recorder)
🧠 Smart Decision: If you’re planning to expand your smart home system later, go with a camera that supports hub integration or comes with expandable kits.
🧩 Compatibility with Smart Home Ecosystems
Make sure your cameras play nicely with your existing smart home setup.
✅ Ask yourself:
- Does it work with Amazon Alexa for voice control or video preview on Echo Show?
- Can it send alerts and live feeds to Google Nest Hub?
- Is it certified for Apple HomeKit Secure Video, offering private encryption and iCloud storage?
The more integrated your system, the more automated, efficient, and intelligent your home becomes.
🏷️ Budget vs Performance – Finding the Perfect Balance
It’s easy to get caught up in shiny features — but not all are necessary for every home.
👉 Here’s a smart budget tip:
Choose a camera with expandable add-ons — start with 1 or 2 cameras and add more over time without replacing the whole system.
💡 In 2025, even affordable models come equipped with AI face detection, auto tracking, and cloud-free storage.
✅ Final Thoughts on Choosing Your Smart Camera System
Picking the right smart camera system is about more than just specs — it’s about matching the tech to your unique needs.
💬 Ask yourself:
“What will give me peace of mind every time I leave the house?”
“Can I access my camera feed remotely at any time?”
“Is my video data stored securely?”
Once you’ve answered these questions, you’re well on your way to mastering how to set up a smart camera system that’s reliable, scalable, and tailored to your smart lifestyle.
🔗 Click here to browse our top-recommended camera systems for 2025
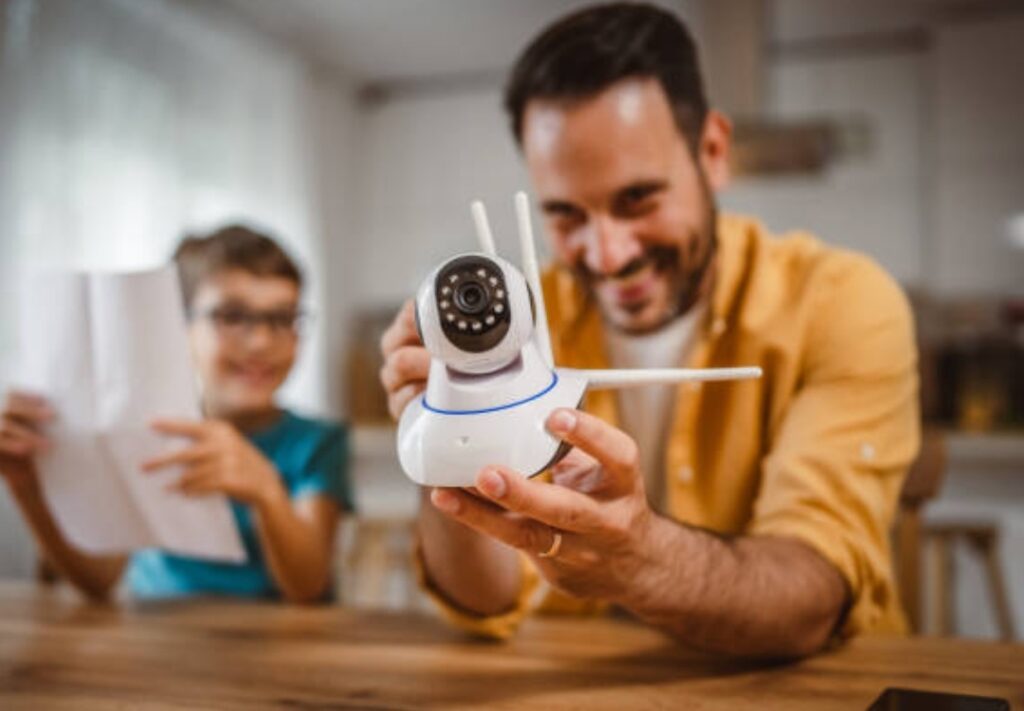
🧰 What You’ll Need Before You Start to Set Up a Smart Camera System
Before jumping into the hands-on steps of your smart home camera system setup, it’s essential to gather all the necessary equipment, tools, and resources.
Preparation not only saves you time and stress but also ensures a smooth, secure, and optimized installation.
Whether you’re installing one camera or building a full-fledged surveillance system, having the right tools and understanding your requirements upfront is the foundation of a successful setup.
In this section, we’ll walk you through everything you need before learning how to set up a smart camera system properly.
📋 Must-Have Items for a Successful Setup
Here’s a comprehensive checklist of what you’ll need before installing your smart cameras:
- ✔️ Smart Cameras — Choose indoor, outdoor, or a hybrid based on your property layout.
- ✔️ Wi-Fi Network — A strong and stable internet connection is essential for real-time alerts and remote access.
- ✔️ Smartphone or Tablet — You’ll need this to download the camera’s app and complete the initial setup.
- ✔️ Camera Mounting Kit — Most kits include wall mounts, screws, anchors, and installation guides.
- ✔️ Power Source — Depending on your camera, this could be batteries, a wall plug, or a solar panel.
- ✔️ Smart Home App — This is the central hub for connecting, controlling, and monitoring your cameras.
- ✔️ Optional: MicroSD Card or Cloud Storage Subscription — Some cameras require storage for video playback.
- ✔️ Optional: Smart Hub or Base Station — Some brands like Arlo or Eufy use a hub for device control and local recording.
🔌 Tip: Before drilling or mounting, test your camera’s placement using your phone to preview the field of view.
📶 Don’t Underestimate the Importance of Wi-Fi
A smart camera is only as “smart” as its connection.
If your Wi-Fi signal is weak at the installation spot, your camera might lag, disconnect, or fail to record events.
✅ Test your Wi-Fi signal strength using your phone at the camera’s planned location.
✅ If the signal is weak, consider installing a Wi-Fi range extender or mesh Wi-Fi system.
🧠 Pro Tip: Cameras streaming at 1080p or higher can consume significant bandwidth. Ensure your router supports your home’s full load of smart devices.
🔐 Security First – Set Up Your Smart Home Network Properly
Before installing your cameras, your home network must be secure. Here’s what we recommend:
- 🔐 Change default router passwords
- 🔐 Use WPA3 or WPA2 encryption
- 🔐 Enable guest networks for visitors
- 🔐 Avoid connecting cameras to open/public networks
Your smart camera system will transmit personal data and footage. Protect it like you would protect your bank account.
📱 Prepare Your Smartphone or Control Device
You’ll need a mobile device to:
- Download the camera’s official app
- Complete the pairing and setup process
- Receive notifications and monitor live feeds
- Control camera settings remotely
Make sure your smartphone/tablet is updated and has enough storage space.
🔗 Download the recommended app here for the best performance and compatibility with your chosen camera model.
🛠️ Tools You Might Need for Installation
Depending on your camera system and where you’re placing your cameras, you may need some basic tools:
- 🔧 Drill and drill bits
- 🔧 Screwdrivers (Phillips and flathead)
- 🔧 Ladder (for high mounts)
- 🔧 Measuring tape
- 🔧 Pencil or marker (for positioning)
- 🔧 Level tool (to make sure your footage isn’t crooked)
- 🔧 Anchors and mounting screws (included with most cameras)
🔨 If your camera is magnetic mount or peel-and-stick, installation can be even simpler — but confirm mounting instructions in your product manual.
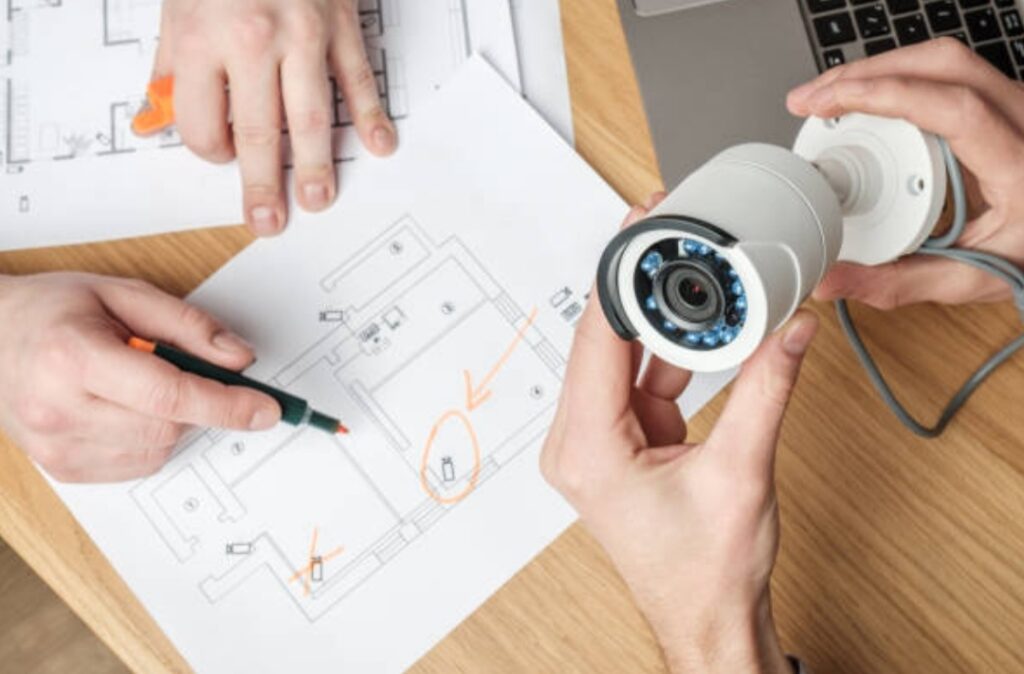
💡 Plan Camera Placement Before Setup
Before mounting any device, make a strategic plan:
- Where do you need visibility the most?
- Are there any blind spots in your yard or hallway?
- Is there a nearby power source or outlet?
- Are you placing indoor cameras on a shelf or ceiling?
📌 Use your camera app’s live view to test angles and field of view before final installation.
✅ Final Prep Checklist
Before you proceed to the installation stage, make sure you’ve completed the following:
🔲 All cameras are unboxed and inspected
🔲 Wi-Fi signal strength is strong where you plan to place each camera
🔲 All mounting tools and accessories are ready
🔲 The smartphone app is downloaded and account is created
🔲 Cloud or local storage options are set up
🔲 Your router and network are properly secured
🧠 Bonus Tip: Label Everything!
If you’re installing multiple cameras, especially in large homes or offices, label each one (e.g., Front Door, Garage Cam, Living Room) in your app for easier management later.
It’ll save you loads of time and confusion during setup and troubleshooting.
💥 Now You’re Ready to Begin Your Smart Home Camera System Setup!
You’ve got the gear, the app, the network, and the plan — now it’s time to take action.
👉 Don’t skip these prep steps — they’re the secret to a hassle-free setup and long-term performance.
🔗 Click here to move on to the step-by-step installation guide
🛠️ How to Set Up a Smart Camera System Step-by-Step
So, you’ve chosen your camera, prepped your space, and gathered the necessary tools — now it’s time to dive into the actual process of how to set up a smart camera system.
This step-by-step guide walks you through the installation and configuration, whether you’re working with a single indoor cam or a full smart home camera system setup with multiple devices.
Our goal is to make this as simple, clear, and actionable as possible, so even beginners can get their system running confidently.
📲 Step 1 – Download and Install the Camera App
The very first step is to download the official app provided by your camera’s manufacturer.
This app will serve as your central control hub, allowing you to view live feeds, receive motion alerts, adjust settings, and even talk through two-way audio (if supported).
✅ Go to the Apple App Store or Google Play Store
✅ Search for your brand (e.g., Arlo, Blink, Ring, Eufy, Wyze, Reolink)
✅ Download and install the correct app
✅ Create an account (use a strong, unique password!)
📌 Tip: Enable push notifications during setup so you get real-time alerts.
🔌 Step 2 – Power Up the Camera
Depending on your model, you’ll power your camera in one of three ways:
- Battery-powered: Insert the batteries or charge the internal battery
- Wired power: Plug the camera into an outlet using the provided adapter
- Solar-powered: Connect to a compatible solar panel and ensure direct sunlight
Let the camera boot up fully. Most devices have an LED indicator that turns solid or blinks once it’s ready for pairing.
🧠 Pro Tip: Use a temporary power source to test placement before mounting permanently.
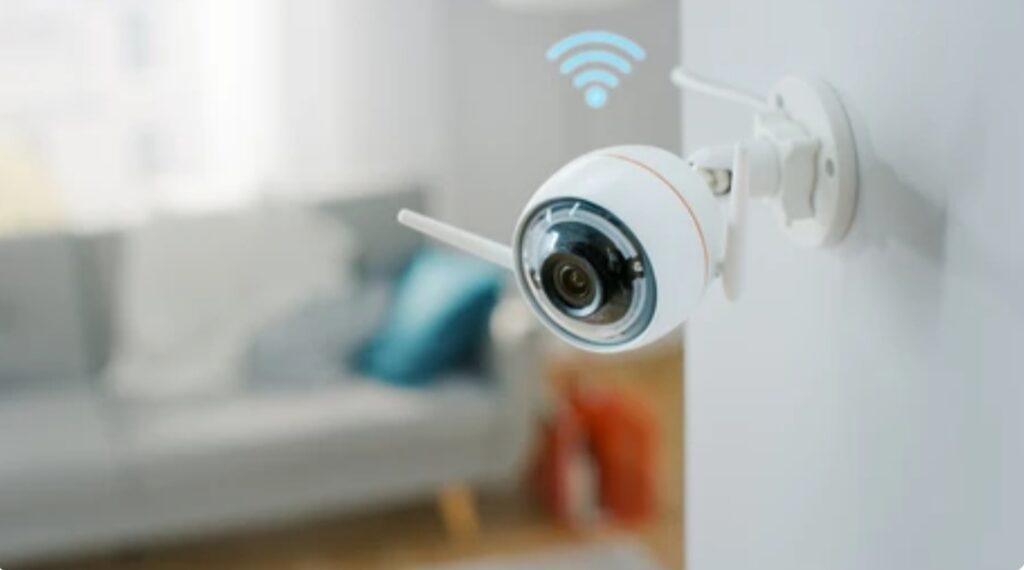
📶 Step 3 – Connect to Wi-Fi
Once powered, the app will guide you to connect the camera to your home’s Wi-Fi network.
- Use a 2.4 GHz network unless your camera supports 5 GHz
- Enter your Wi-Fi password carefully
- Stay close to the router during the initial setup
🔄 The camera will pair to the app via Bluetooth, QR code scan, or hotspot broadcast (based on brand).
✅ Once connected, you’ll typically hear a chime or see a green light confirming successful pairing.
🎯 Step 4 – Test the Camera Placement
Before you mount anything, use the app to test camera placement:
- Check the field of view
- Ensure good lighting during the day and night (IR)
- Look for blind spots or reflections
- Ensure there’s no obstruction blocking the lens
If the view is skewed, move the camera up, down, or sideways until it covers the desired area.
📌 Pro Tip: Place cameras at least 7-9 feet above the ground and angle them down slightly for optimal facial recognition and motion detection.
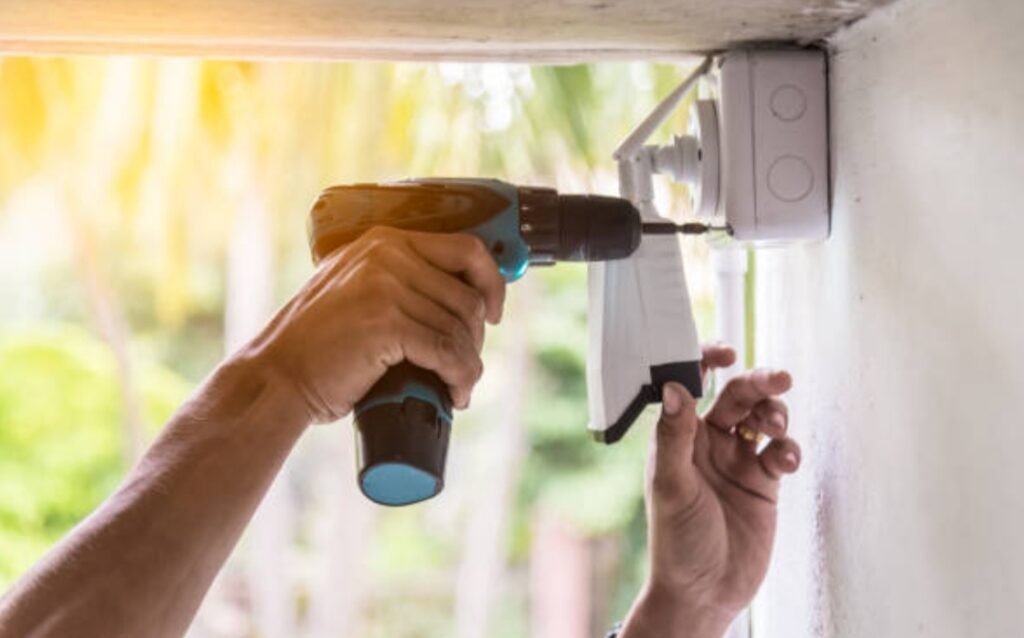
🧱 Step 5 – Mount the Camera
Once the view is perfect, it’s time to mount your camera.
Depending on your setup:
- Use the mounting kit provided
- Mark screw points using the bracket
- Drill holes and insert wall anchors (for drywall or masonry)
- Screw the camera into place securely
- Adjust the angle manually if it’s a tiltable model
⚠️ Make sure cables (if wired) are weatherproofed or routed safely to avoid trip hazards or water damage.
🔧 Step 6 – Configure Camera Settings
Open the app and fine-tune your camera settings for optimal performance:
- Set motion detection zones
- Adjust sensitivity levels to avoid false alerts (e.g., trees blowing in the wind)
- Turn on notifications for motion, sound, or person detection
- Configure night vision or infrared settings
- Set recording schedules if you don’t want 24/7 monitoring
📱 You can also name your cameras (e.g., “Front Door”, “Garage”, “Living Room”) to stay organized.
🔐 Step 7 – Set Up Storage or Cloud Recording
Next, decide where your footage will go:
- Cloud storage: Subscribe to your camera brand’s cloud plan (monthly or yearly)
- Local storage: Insert a microSD card or connect to a hub with USB storage
- NAS (Network Attached Storage): Some advanced systems like Reolink or Amcrest support FTP or RTSP for saving to a local server
💡 Make sure your storage path has enough capacity for 24/7 or motion-triggered recordings.
🌐 Step 8 – Sync with Smart Home Devices
Want to integrate your camera with Alexa, Google Home, or Apple HomeKit?
Open your voice assistant app and add the camera via the integration menu.
Examples:
- “Alexa, show me the front door camera.”
- Use routines like turning on lights when motion is detected.
- Automate alerts via IFTTT for more control.
🧠 Bonus: Create automation scenes — like turning on indoor lights when your outdoor camera senses motion after 8 PM.
✅ Final Setup Checklist
Let’s run through a quick summary to confirm everything’s good to go:
- 🔲 Camera successfully connected to Wi-Fi
- 🔲 Clear field of view with no blind spots
- 🔲 Proper power source installed
- 🔲 Alerts and notifications enabled
- 🔲 Cloud or local storage configured
- 🔲 Camera successfully linked to voice assistant
- 🔲 All firmware is updated
📢 Ready to Protect What Matters Most?
Your smart camera system is now live — and your home is safer than ever.
But don’t stop here.
👉 Upgrade your home security today with advanced options like floodlight cams, doorbell cams, and indoor pet monitoring cameras.
Explore our top-rated recommendations here and secure every corner of your space!
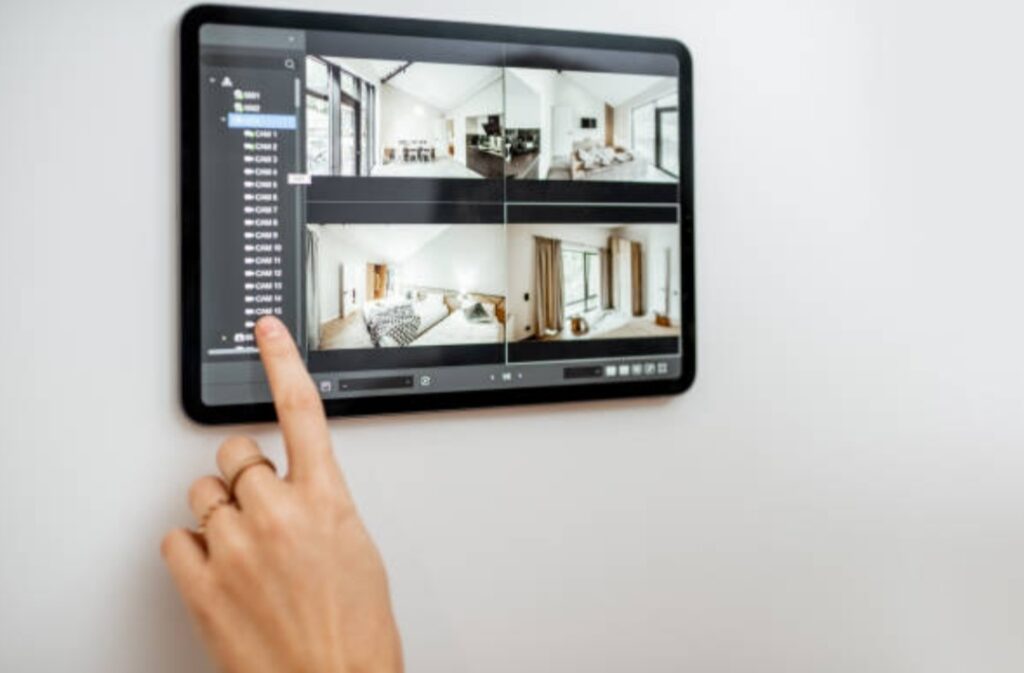
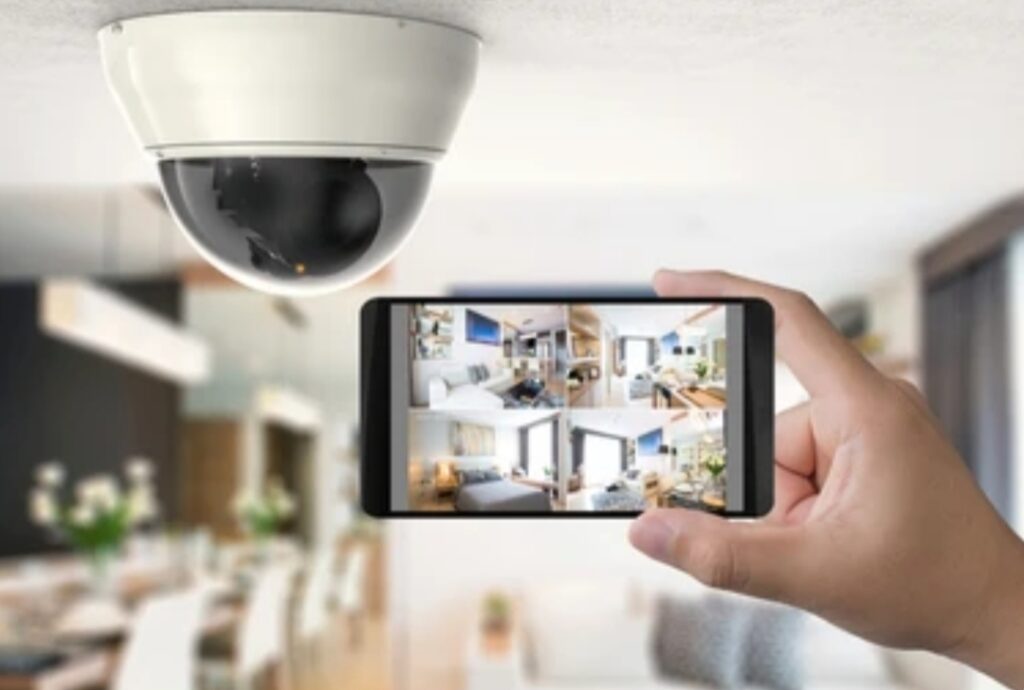
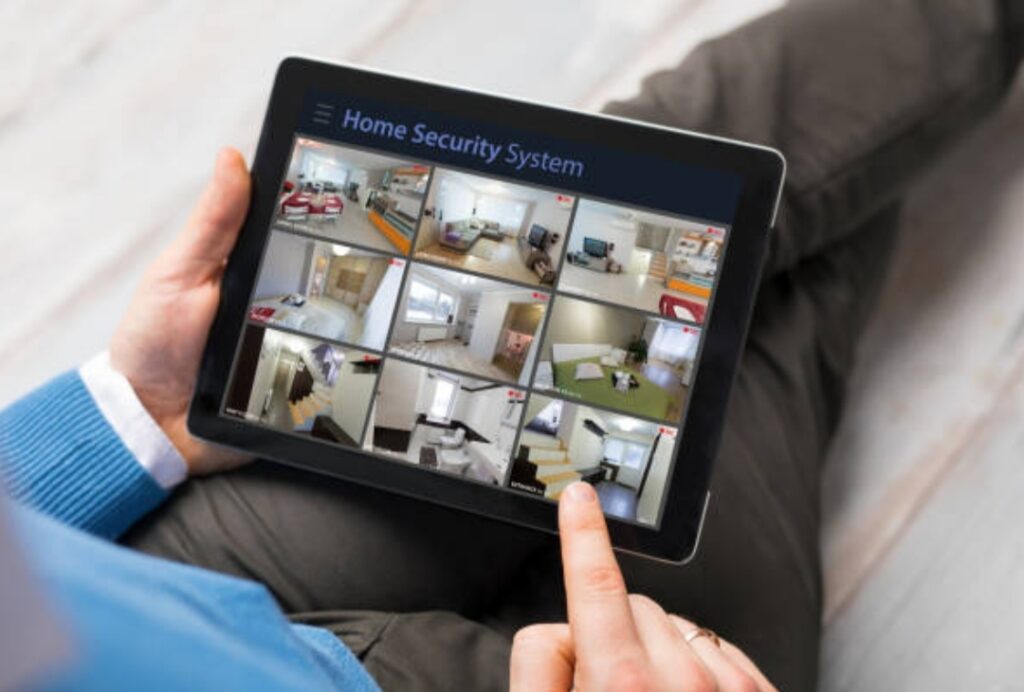
📱 Smart App and Remote Access Setup for Your Smart Camera System
Once your cameras are mounted and powered, the true magic of a smart home camera system lies in your ability to control and monitor everything remotely — anytime, from anywhere.
Setting up the smart app and remote access not only enhances convenience but is essential for real-time alerts, two-way audio, cloud recordings, and motion-triggered automation.
This section walks you through everything you need to know to optimize your smart home camera system setup with mobile and cloud access.
📥 Download the Right Smart App for Your System
Every major smart camera brand has a dedicated mobile app designed for easy integration and management of your devices.
✅ Go to your phone’s app store and search for your brand:
- Ring – Ring App
- Arlo – Arlo Secure
- Eufy – Eufy Security
- Wyze – Wyze App
- Reolink – Reolink App
- Google Nest – Google Home
- Blink – Blink Home Monitor
📲 Download and install the app on both your smartphone and tablet (if you want multi-device control).
🔐 Create an Account and Set Secure Login Credentials
Once installed, you’ll need to create an account with your camera provider.
Make sure you:
- Use a strong password (a mix of letters, numbers, and symbols)
- Enable 2FA (Two-Factor Authentication) if available for extra protection
- Store your credentials securely (preferably in a password manager)
🛡️ Cybersecurity Tip: Never reuse passwords across multiple smart home accounts. Always create unique logins to protect your personal data.
🔗 Link Your Camera System to the Smart App
The setup process typically includes:
- Opening the app and selecting “Add Device” or “+”
- Scanning a QR code on the camera or using Bluetooth pairing
- Following on-screen instructions to complete pairing
- Assigning a location name (e.g., “Front Porch”, “Driveway”, “Kitchen Cam”)
After successful pairing, your camera will appear in the app’s dashboard.
📌 You can now view the live feed, change camera settings, and receive notifications right from your phone.
🌍 Enable Remote Access and Push Notifications
To make the most of your system:
- ✅ Allow remote access when prompted
- ✅ Turn on push notifications to get alerts for motion, sound, or person detection
- ✅ Customize notification schedules (e.g., during night hours or when you’re away)
- ✅ Choose between live view and event-triggered recordings
💡 Tip: You can adjust notification frequency and choose smart alerts that only trigger for humans or pets, depending on your camera’s AI features.
🧠 Set Up Smart Automation and Scenes
Many apps allow you to create automation routines or scenes based on time, location, or sensor input.
For example:
- 🕔 Turn on porch lights when motion is detected at night
- 🏠 Disable cameras when you arrive home
- 🚪 Send an alert when the front door opens and a camera spots movement
Use Alexa Routines, Google Home, or Apple Shortcuts to set up customized responses based on your daily routine.
🌐 View and Control from Anywhere
Once remote access is enabled, you can:
- View real-time footage while at work, traveling, or even abroad
- Talk to visitors at your door via two-way audio
- Manually record or take screenshots during live view
- Review motion-triggered clips saved to the cloud or local storage
- Adjust motion zones and camera settings remotely
This gives you complete control of your home security, even when you’re thousands of miles away.
📱 All of this can be done with just a few taps on your phone.
🛠️ Troubleshooting Common Remote Access Issues
Sometimes remote access may fail due to minor configuration issues.
Here are common fixes:
- 🔄 Ensure the camera firmware and app are up to date
- 📶 Check Wi-Fi strength at the camera’s location
- 🔐 Verify that remote access is enabled in the app settings
- 🔌 Power-cycle your camera and router if you lose connection
- 🔄 Log out and back into the app to refresh access
✅ Final Remote Access Setup Checklist
Let’s make sure everything’s configured correctly:
- 🔲 Smart app downloaded and installed
- 🔲 Account created with strong security
- 🔲 Camera paired and accessible in app
- 🔲 Notifications enabled and tested
- 🔲 Remote live view functioning properly
- 🔲 Scenes or routines activated
- 🔲 Cloud storage (or local backup) enabled if needed
🚀 Ready to Take Full Control of Your Home Security?
Now that your smart app and remote access are fully set up, you’re empowered with 24/7 control, visibility, and peace of mind — all in the palm of your hand.
👉 Upgrade your experience with premium storage plans, AI-powered motion tracking, or smart assistant integrations to unlock even more power.
Don’t just monitor your home — take command of it.
Explore advanced upgrades now 🔐
🔒 Privacy and Data Security Best Practices for Your Smart Home Camera System
Setting up a smart home camera system isn’t just about installing cameras and connecting apps — it’s also about safeguarding your privacy and securing the sensitive data these devices collect.
While smart cameras enhance your home security, they can also become vulnerabilities if not properly secured.
In this section, we’ll walk you through privacy-first configurations, network safety tips, and data protection best practices to ensure your system remains safe from hackers and unauthorized access.
This is a must-read step in any guide on how to set up a smart camera system the right way.
🧠 Why Privacy and Security Matter More Than Ever
With smart cameras constantly recording video, audio, and location data, you’re generating sensitive content 24/7.
Without proper safeguards, that data can be:
- Accessed by hackers via weak passwords
- Shared with third parties unknowingly
- Stored insecurely on cloud servers
- Compromised through outdated firmware
🔐 A single breach could expose your family’s routines, personal conversations, and private footage. That’s why smart home camera system setup must include robust privacy measures.
🛡️ Use Strong, Unique Passwords for All Devices
Passwords are your first line of defense. Weak or reused passwords are among the top causes of smart home device hacks.
✅ Choose a password with at least 12 characters, combining upper and lower-case letters, numbers, and symbols
✅ Never reuse passwords from other accounts (e.g., email, social media)
✅ Change default usernames and passwords immediately after setting up the camera
✅ Use a password manager to securely store your credentials
📌 Pro Tip: Enable auto-password updates on supported devices to refresh credentials regularly.
📲 Enable Two-Factor Authentication (2FA)
2FA adds a second layer of security beyond your password.
Here’s how it works:
- You log in with your password
- You receive a code via SMS, email, or an authentication app
- You enter the code to complete the login
Almost all reputable smart camera brands now support 2FA. Make sure it’s turned on in your app settings for extra protection.
🌐 Secure Your Wi-Fi Network
Because smart cameras transmit data over your home network, securing your Wi-Fi is critical.
🔒 Here’s how to do it:
- Change the default SSID (network name) to something unique
- Use WPA3 or WPA2 encryption on your router
- Disable WPS (Wi-Fi Protected Setup), which can be a security risk
- Create a separate guest network for visitors
- Place all your smart home devices, including cameras, on a segmented IoT network if your router supports it
💡 Bonus Tip: Regularly reboot your router and update its firmware.
🔄 Keep Your Camera Firmware Updated
Outdated firmware is a hacker’s dream. Manufacturers regularly release updates to patch vulnerabilities.
✅ Go to your camera’s settings in the smart app
✅ Turn on automatic firmware updates if available
✅ Manually check for updates every month if needed
This is especially important for budget cameras that may not auto-update by default.
☁️ Manage Cloud Storage and Data Access
If your system uses cloud storage, be mindful of:
- Who has access (limit shared users or family members)
- What data is stored (some services save video, audio, and location)
- How long data is retained (configure automatic deletion timelines)
- Where data is hosted (check if servers are GDPR or CCPA compliant)
🔐 Look for systems that offer end-to-end encryption and clear data privacy policies.
🧾 Review Your Camera’s Privacy Settings
Your smart camera app offers several privacy-focused features — use them!
- Motion zones: Only record in specific areas to avoid unwanted footage
- Privacy modes: Temporarily disable cameras when you’re home
- Notification control: Avoid excessive alerts or data sharing
- Masking features: Blur or block sensitive parts of the camera’s view (e.g., neighbor’s property)
📲 Some cameras even offer a “Do Not Disturb” mode that pauses recordings and notifications when you’re home.
⚠️ Be Cautious with Third-Party Integrations
While connecting your camera with smart assistants and apps (like Alexa, Google, IFTTT, or SmartThings) is convenient, it can also open new security risks.
Before enabling integrations:
- Check if the third-party service has strong encryption and access control
- Read user reviews and privacy policies
- Limit permissions to only what’s necessary
- Disconnect unused integrations to reduce attack surfaces
🔍 Monitor Device Activity Logs
Many camera apps provide access logs that show:
- Login attempts
- IP addresses accessing the feed
- Timestamped events (e.g., motion alerts, live view sessions)
🧠 Regularly reviewing these logs can help you detect unusual activity and take immediate action.
✅ Final Privacy and Security Checklist
Let’s double-check that your system is secure:
- 🔲 Unique, complex passwords are used
- 🔲 2FA is enabled for all camera apps
- 🔲 Router is encrypted and secure
- 🔲 Firmware is up to date
- 🔲 Privacy settings are configured
- 🔲 Cloud storage is limited and encrypted
- 🔲 Third-party apps are trusted
- 🔲 Access logs are reviewed monthly
🚨 Take Control of Your Digital Safety Today!
Don’t let your smart camera become a smart risk.
You’ve done the hard work of installing a smart security system — now make sure it’s truly secure.
👉 Lock down your smart home now with recommended firewalls, privacy-first cameras, and advanced encryption tools.
Protect your family. Guard your data. Stay in control.
🛠️ Troubleshooting Common Setup Problems in Smart Home Camera System Setup
Even with the most advanced smart home camera systems, setup doesn’t always go smoothly. You might face connection issues, app pairing failures, or even inconsistent video streams — and that’s totally normal.
Knowing how to troubleshoot common setup problems will not only save you time but also ensure your system runs smoothly from day one.
In this section, we’ll walk you through the most frequent issues people encounter when learning how to set up a smart camera system, and exactly how to fix them — step by step.
These solutions apply whether you’re using Ring, Arlo, Wyze, Eufy, Blink, Reolink, or another top brand.
📡 Problem 1 – Camera Not Connecting to Wi-Fi
One of the most common issues during a smart home camera system setup is when your device refuses to connect to your wireless network.
Possible Causes:
- Weak Wi-Fi signal at installation spot
- Incorrect Wi-Fi password
- 5GHz Wi-Fi network (many cameras only support 2.4GHz)
- Router too far from the camera
How to Fix It:
✅ Double-check your Wi-Fi password
✅ Ensure you’re connecting to a 2.4GHz network (check your router’s admin page)
✅ Bring the camera closer to the router for initial setup
✅ Reboot both your router and your camera
✅ Reset the camera and try pairing again via the app
💡 Pro Tip: Use a Wi-Fi extender or mesh system to strengthen the signal in weak areas.
📲 Problem 2 – Mobile App Not Detecting the Camera
Sometimes the app fails to discover or pair with the camera during installation.
How to Fix It:
- Make sure Bluetooth is enabled on your phone
- Grant the app the required permissions (location, camera access)
- Update the app to the latest version
- Power cycle the camera and restart the app
- Ensure your phone is connected to the same Wi-Fi network the camera is using
🛑 Still not working? Try uninstalling and reinstalling the app.
🎥 Problem 3 – No Live Video or Blank Screen
If your camera appears online but you see a black screen or can’t stream live video, try these fixes:
✅ Ensure the camera lens isn’t obstructed or covered
✅ Check that your internet speed is strong enough (at least 5 Mbps upload)
✅ Toggle between HD and SD settings
✅ Update your camera’s firmware
✅ Make sure the power source is stable (no blinking LEDs or low battery)
⚠️ Some cameras may pause the live feed automatically during firmware updates — give it a few minutes and try again.
🕵️ Problem 4 – Motion Detection Not Working Properly
A camera that doesn’t detect motion can compromise your entire home security setup.
Possible Causes:
- Motion zones not set correctly
- Sensitivity level too low
- Camera angled poorly or too far from motion source
- Feature temporarily disabled in settings
How to Fix It:
✅ Recheck and redraw your motion zones
✅ Increase motion sensitivity in the app
✅ Adjust the camera angle to point at human-height entry paths
✅ Make sure notifications are enabled in app settings
📲 Some apps let you test motion detection — use this tool before finalizing placement.
🔐 Problem 5 – Can’t Access Feed Remotely
This is frustrating, especially when you’re away from home.
What to Do:
✅ Check if remote access is enabled in the app settings
✅ Test your connection from another device
✅ Make sure your internet is working at home
✅ Ensure your mobile device has stable internet (Wi-Fi or cellular)
✅ Log out and back into your smart app
💡 Also, double-check that port forwarding isn’t blocked by your router (if you’re using an advanced setup or NVR system).
🔄 Problem 6 – Camera Keeps Going Offline
Frequent disconnections can happen due to power interruptions or unstable Wi-Fi.
Fixes:
✅ Plug into a different power outlet
✅ Use a UPS battery backup if you’re in an area with power fluctuations
✅ Update firmware
✅ Consider using a PoE (Power over Ethernet) system if wireless isn’t reliable
📶 If Wi-Fi signal is consistently weak, invest in a dedicated IoT mesh network for smart devices.
🔊 Problem 7 – Two-Way Audio Not Working
You may be able to see the video but not hear or speak through the app.
How to Troubleshoot:
- Check microphone and speaker permissions in your app
- Make sure mute isn’t toggled on by accident
- Adjust volume in both app and phone
- Clean the mic/speaker holes on the camera
- Restart the camera and app
🧠 Some cameras delay activating two-way audio until after the live view is running — wait 3-5 seconds before speaking.
✅ Final Troubleshooting Checklist
- 🔲 Wi-Fi is stable and strong at the camera’s location
- 🔲 App permissions are fully granted
- 🔲 Firmware is up to date
- 🔲 Camera is rebooted after installation
- 🔲 Notifications are enabled and motion zones configured
- 🔲 Remote access tested
- 🔲 Audio and video feeds working properly
🚨 Still Having Issues?
Don’t waste another minute stuck in frustration.
👉 Get back to secure peace of mind with professional support options, troubleshooting video tutorials, or even replacement plans if needed.
You deserve a smart camera system that just works.
Let us help you make that happen today.
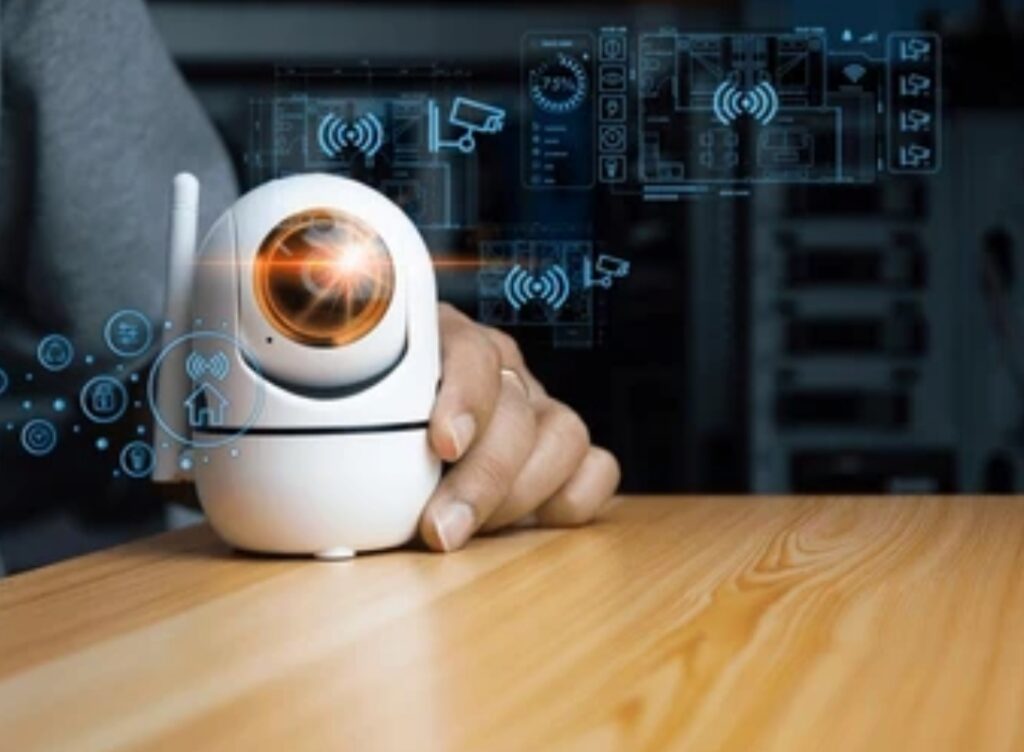
🤖 Integration With Other Smart Devices for a Seamless Smart Home Camera System Setup
One of the biggest advantages of using a smart home camera system is its ability to integrate with your other smart devices — making your home smarter, more secure, and incredibly convenient.
If you’re learning how to set up a smart camera system, don’t stop at just the cameras. Think beyond. By connecting your system with voice assistants, sensors, smart locks, lights, and alarms, you can create a unified, automated ecosystem that works together 24/7.
Let’s break down how you can integrate your camera setup with other smart devices to maximize control, automation, and security.
🔗 Voice Assistants – Hands-Free Monitoring
Amazon Alexa, Google Assistant, and Apple HomeKit are popular voice assistants that can be linked with your camera system.
Once connected, you can:
- 🗣️ Say “Alexa, show me the backyard camera” on your Echo Show
- 🔍 Ask Google Assistant to bring up the front door view on your Chromecast
- 🎙️ Use Siri to activate your HomeKit Secure Video feed
How to Connect:
✅ Open your smart camera’s app
✅ Go to “Smart Integrations” or “Works with…” section
✅ Follow the on-screen prompts to link your voice assistant
✅ Authorize device access and name your cameras for easy voice control
🎯 Target Keyword Tip: Many users don’t realize how easy it is to add voice control when doing a smart home camera system setup — it’s just a few taps away!
💡 Automations with Smart Lights & Sensors
Want to light up your driveway when motion is detected at night?
You can set up automations between your smart camera and smart lighting to instantly illuminate areas when movement is detected. This not only scares off intruders but also helps with clearer nighttime recordings.
Devices to Integrate:
- Philips Hue or Wyze Bulbs
- Ring Pathway Lights
- Motion sensors from Aqara or Samsung SmartThings
- Smart plugs for non-smart lights
Example Automation:
“When the driveway camera detects motion between 10 PM and 5 AM, turn on the porch light for 3 minutes.”
🔧 Most cameras use IFTTT, Alexa Routines, or Google Home Automations to make this possible.
🔐 Syncing with Smart Locks & Doorbells
Imagine this:
You get a motion alert from your front door camera.
You check the live video and see it’s a delivery driver.
With one tap, you unlock the smart lock, tell them to leave the package inside via two-way audio, then lock the door behind them.
That’s the power of integrating your smart camera system with smart locks and video doorbells.
Compatible devices include:
- August Smart Lock
- Yale Assure Lock
- Schlage Encode
- Ring or Nest Doorbells
You can even create routines like:
“If the front door is unlocked and motion is detected, start recording and turn on hallway lights.”
🔒 This adds double-layered security for both your deliveries and family.
🧠 Using Smart Hubs for Centralized Control
If you’re planning a full smart home ecosystem, you might want a hub that brings everything together.
Popular hubs include:
- Samsung SmartThings
- Home Assistant
- Hubitat Elevation
- Amazon Echo Hub
These allow for advanced automations, more secure local control, and low latency communication between devices.
Benefits include:
✅ Automate multiple devices with one trigger
✅ Get real-time status updates in one dashboard
✅ Use advanced logic like “IF/THEN/ELSE” for smarter routines
💡 If you’re setting up multiple devices alongside your smart camera system, using a hub can prevent Wi-Fi overload and ensure your network stays strong.
🔄 Cross-Brand Compatibility Tips
Not all brands play nice with each other.
Here’s how to avoid integration headaches:
- 🛠️ Choose devices that support Matter or Thread – new smart home standards designed for cross-platform compatibility
- 🌐 Check for IFTTT support – a great way to link different brands together
- 📱 Stick to one ecosystem (Google Nest, Amazon Alexa, or Apple HomeKit) for easiest setup
Pro Tip: Before buying any smart gadget, check the “Works With” list in your camera’s app or website to confirm integration support.
📢 Ready to Build a Truly Smart Home?
Why stop at just cameras?
✅ Elevate your security
✅ Automate your comfort
✅ Control it all from your voice, phone, or watch
👉 Explore the best smart accessories to integrate with your camera system now
Unleash the full power of your smart home today.
❓ Frequently Asked Questions About Smart Camera Setup
As more homeowners embrace the smart home camera system setup, it’s natural to have questions—especially if it’s your first time installing or configuring smart security cameras.
To help, we’ve compiled the most frequently asked questions along with clear, easy-to-understand answers to guide you through the process.
Whether you’re wondering how to set up a smart camera system, or how to protect your privacy while using it, this section covers all the bases.
📍 What is the easiest way to set up a smart camera system for beginners?
For beginners, the easiest setup usually involves a Wi-Fi-enabled plug-and-play camera like Ring, Wyze, or Blink.
Here’s a basic 5-step process:
- Download the manufacturer’s app
- Create an account and log in
- Plug in the camera and power it on
- Use the app to scan a QR code on the device
- Connect it to your Wi-Fi network and complete setup
☑️ Tip: Use a 2.4GHz Wi-Fi network and position the camera close to the router for initial setup.
📱 Can I monitor my smart camera remotely?
Yes — remote access is a standard feature of almost all smart cameras.
As long as your camera is connected to the internet and your mobile device has data or Wi-Fi, you can:
- View live video feed
- Access cloud-stored footage
- Receive motion alerts
- Control settings via the app
- Use two-way audio
🔐 Make sure to enable end-to-end encryption and use two-factor authentication for secure remote access.
🔌 What do I need before installing a smart camera system?
Before beginning your smart home camera system setup, make sure you have:
- A reliable Wi-Fi connection
- A compatible smartphone (iOS or Android)
- The correct app installed for your camera
- An outlet or power source nearby (unless using battery-powered units)
- Optional: mounting hardware or drill for outdoor installs
- Cloud or SD card for storage
💡 It’s also smart to sketch a layout of your home and decide on camera positions before mounting anything.
🛜 Do smart cameras need internet to work?
Yes, most smart cameras require an internet connection for full functionality.
However, some models support local storage (SD card or NVR systems), allowing them to record video without the internet. You’ll lose features like:
- Remote viewing
- Live notifications
- Cloud backups
- Voice assistant control
📦 If internet is unreliable in your area, consider a PoE (Power over Ethernet) or local-NVR system for more stability.
🧠 Are smart cameras difficult to set up?
No! Today’s smart cameras are designed for simplicity.
Most users can go from unboxing to live monitoring in under 10 minutes.
Even multi-camera setups with DVRs or NVRs often include step-by-step instructions and QR code scanning to speed things up.
🔧 If you ever feel stuck, most brands offer in-app tutorials or online support communities.
🔐 How can I keep my smart camera secure from hackers?
Privacy and security are top concerns — and rightly so.
Here’s how to protect your system:
- Use strong, unique passwords
- Enable two-factor authentication
- Regularly update your camera’s firmware
- Avoid using default usernames
- Disable remote viewing if you don’t need it
- Use a separate Wi-Fi network (guest/IOT network) for your smart devices
- Turn off your camera when not in use (if privacy shutters are available)
💡 Choosing brands with end-to-end encryption adds another layer of protection.
🏠 Can I connect my smart camera to other devices in my home?
Yes — many smart cameras are compatible with:
- Amazon Alexa
- Google Assistant
- Apple HomeKit
- Smart locks, lights, sensors, and alarms
Once integrated, you can create automation routines like:
“When the door opens, activate the hallway camera and lights.”
This is one of the biggest advantages of a fully-connected smart home ecosystem.
💾 Where is my footage stored? Cloud or local?
It depends on the camera brand and model.
Cloud Storage:
- Convenient access from anywhere
- Often includes smart features (AI motion alerts, thumbnails)
- May require a subscription
Local Storage:
- SD card in the camera
- NVR or DVR system
- One-time cost, but limited remote access
📁 Some systems offer hybrid storage — the best of both worlds.
💬 What should I do if my camera stops working suddenly?
Try these basic steps first:
- Check if the camera is receiving power
- Reboot your router and the camera
- Ensure Wi-Fi hasn’t dropped or changed
- Open the app and check device status
- Update the firmware (if available)
- Factory reset the camera and re-pair
If the issue persists, contact support or consider warranty replacement.
🧩 Can I use multiple smart cameras from different brands?
Yes, but managing them might be less convenient unless they support:
- IFTTT
- Google Home / Alexa routines
- Matter protocol (for cross-platform compatibility)
🧠 For simplicity, it’s ideal to choose all cameras from one ecosystem or use a unified app like Apple Home or SmartThings.
📢 Still Have Questions About Your Setup?
Don’t let confusion delay your security!
👉 Browse our top smart camera recommendations, or contact expert support now to get personal advice on your home setup.
Because a smart home should make you feel safe, not stressed.
✅ Conclusion / Final Thoughts on How to Set Up a Smart Camera System
Setting up a smart home camera system isn’t just about mounting a few devices — it’s about creating a safer, more connected, and more intelligent living space for you and your family.
Whether you’re safeguarding your home while you’re away, checking in on pets, or keeping an eye on deliveries, knowing how to set up a smart camera system the right way can make all the difference.
You’ve now learned:
- 📸 How to choose the right smart camera system for your needs
- 🧰 What tools and preparations you need before starting
- 🛠️ How to go through the step-by-step setup process
- 📱 The importance of smart apps and remote access control
- 🔐 Best practices for privacy and data protection
- 🧠 How to integrate cameras with other smart home devices
- ❓ And answers to the most frequently asked questions
But here’s the truth 👉 Your home deserves more than a basic camera—it deserves a full smart ecosystem.
So if you’re ready to stop guessing and start protecting what matters most…
🚨 It’s Time to Upgrade Your Home Security!
✅ Browse the best smart camera systems here
✅ Check top-rated smart accessories for your setup
✅ Compare Wi-Fi, PoE, and cloud storage camera models now
Don’t wait until it’s too late.
Get the peace of mind you deserve with a smart camera system that watches over your home — even when you can’t.
🧠 Final Tips Before You Go
- Make sure to test your system after installation
- Keep your firmware and apps updated regularly
- Review footage settings weekly to avoid full storage
- If you experience lag, check Wi-Fi signal strength near your cameras
- Use motion zones and AI detection settings to reduce false alerts
And remember, every smart home setup is unique — there’s no “one size fits all.”
But with a little planning, the right devices, and this guide in hand, you’re now fully equipped to build a secure and seamless smart home camera system from start to finish.
🎉 Congratulations! You’ve reached the end of the ultimate guide on “How to Set Up a Smart Camera System” — built for both homeowners and renters, tech-savvy users and total beginners.
🔗 Be sure to bookmark this post, share it with a friend, and revisit it whenever you expand your smart home setup.
🛠️ Safe setup & happy monitoring!
You might also like :