
Introduction – Discover the Hidden Power Behind Android Developer Options 🔓📱
Are you curious about what lies beneath the surface of your Android phone’s settings?
If so, you’re about to unlock a treasure trove of hidden controls that can completely transform how you use your smartphone.
This guide will walk you through how to unlock hidden developer options on Android, explain what these features actually do, and teach you how to use them smartly, safely, and effectively.
We’ll dive deep into Android developer tools, uncover the best Android hidden features, and reveal powerful tweaks that tech enthusiasts, power users, and even developers use daily to enhance performance, boost security, and customize user experience like a pro.
Most Android users have no idea that there’s a secret settings menu tucked away inside their phones.
This hidden menu—called Developer Options—is packed with advanced tools and functionalities that can speed up your phone, improve battery performance, and unlock cool capabilities like USB debugging, animation tweaks, and hidden graphics settings.
Yes, it’s there, and yes, it’s free!
So why is it hidden?
Google doesn’t want casual users accidentally changing low-level system configurations.
But when you know what each feature does (and how to use it wisely), it becomes a powerful toolkit for control and customization.
Whether you’re a developer, a gamer, or simply someone who wants to get the most out of your Android device, unlocking and using these features properly will give you a noticeable edge.
🔥 Pro Tip: Enabling developer options does not void your warranty or damage your device—if used correctly.
Think of it like unlocking God Mode on your smartphone, but with responsibility.
You’ll soon understand how to:
✅ Speed up your device using animation scale hacks
✅ Control background activity for better battery life
✅ Enable USB debugging for advanced tools and file management
✅ Explore hidden features like fake GPS and force dark mode
✅ Unlock developer-exclusive graphics and audio options
By the time you finish this article, you’ll know exactly how to unlock hidden developer options on Android, what they do, and how to use them without messing up your phone.
You’ll also pick up lesser-known Android developer tools that are rarely mentioned—even in top-ranking tech blogs.
So if you’re ready to go beyond basic settings, unleash your inner tech wizard, and supercharge your Android experience, keep reading.
This is the only guide you need to unlock, explore, and harness the hidden powers of Android like a pro.
💡 Don’t just use your phone—master it.
⚡Let’s unlock the door to Android’s secret lab!⚡
What Are Developer Options on Android? 🤔🔧
Before you dive into changing any settings, it’s important to first understand what Developer Options actually are—and why they exist in the first place.
This hidden menu isn’t just some geeky playground.
It’s a powerful set of Android developer tools originally built for app developers, testers, and engineers to fine-tune and test apps, emulate environments, and debug software.
But here’s the game-changer: these tools aren’t just for developers anymore.
Today, every Android user can access these hidden features, and with the right guidance, you can use them to improve performance, extend battery life, and customize your phone in ways you never thought possible.

The Secret Weapon Inside Every Android Phone 💡
The Developer Options menu contains dozens of hidden switches and advanced settings designed to control:
- System animations and transition speeds
- Background process limits
- USB debugging and ADB commands
- Hardware acceleration options
- Network monitoring tools
- Visual feedback for user interface interactions
- Graphics rendering tweaks
- Force dark mode options
- Debugging behaviors for connected devices
These are not your typical Android settings.
They go deep into how Android functions under the hood, offering raw control over processes that are normally automated in the background.
And once you unlock Developer Options on Android, you’ll gain access to all of these advanced features in just a few taps.
📌 Think of it like Android’s version of a “control room” — giving you access to switches and dials that most users never touch.
Who Should Use Android Developer Tools? 👩💻📲
Let’s be clear—you don’t have to be a professional developer to make use of these features.
In fact, many savvy users, tech bloggers, and mobile gamers activate Developer Options for:
- Faster UI transitions
- Better game performance
- Battery-saving tweaks
- Improved multitasking control
- Access to advanced system monitoring tools
Even if you’re a regular Android user, understanding these options can supercharge your mobile experience.
Here’s a quick breakdown of who can benefit the most from using these tools:
✅ Gamers – Enable GPU rendering, tweak frame rates, and reduce lag.
✅ Content Creators – Show taps and pointer location for tutorials and screen recordings.
✅ Power Users – Customize animations, kill unused background apps, fake GPS for testing.
✅ App Testers & Developers – Debug apps, monitor logs, enable strict mode, simulate user environments.
✅ Security Enthusiasts – Monitor running services, check memory usage, and enable advanced debugging.
Common Misconceptions About Developer Options ❌
Let’s address some myths right away:
- “Will unlocking Developer Options brick my phone?”
No! Simply unlocking or using most Developer Options won’t harm your phone if you know what you’re doing. - “Do I need to root my phone first?”
Nope! Unlocking Developer Options does not require root access. Anyone with an Android device can do it. - “Does it void my warranty?”
For most brands, just enabling Developer Options doesn’t affect your warranty. However, flashing custom ROMs or unlocking the bootloader might—so stick to the safe tools we’ll discuss in this guide.
Why Google Hides These Features By Default 🔒
Google keeps this menu hidden to prevent inexperienced users from accidentally altering system-critical settings.
Some options, if misused, can affect how your device performs or behaves.
But don’t worry—this guide will show you which options are safe to use, and how to avoid the ones that could cause issues.
Once unlocked, you’ll see that these aren’t just “developer tools,” but enhancements that any Android user can use smartly for performance, customization, and deeper control.
🔥 Now that you know what Developer Options really are, you’re probably itching to access them, right?
Well, let’s get our hands dirty.👇
How to Unlock Hidden Developer Options on Android (Step-by-Step Guide) 🛠️📱
Ready to dive into the hidden vault of your Android device?
In this section, you’ll learn exactly how to unlock hidden Developer Options on Android in just a few quick steps.
This powerful menu gives you access to Android developer tools and a wide range of Android hidden features that can optimize your phone’s performance, extend its battery life, and give you greater control over how your system runs.
Best of all?
You don’t need root access or third-party apps.
You just need to know where to look—and that’s exactly what you’re about to learn.
💡 Tip: This method works on most Android devices including Samsung, Xiaomi, OnePlus, Google Pixel, Oppo, Vivo, Realme, and more.
📲 Step-by-Step Guide to Unlocking Developer Options
Follow these simple and safe steps to unlock the secret Developer Options menu on any Android phone or tablet:
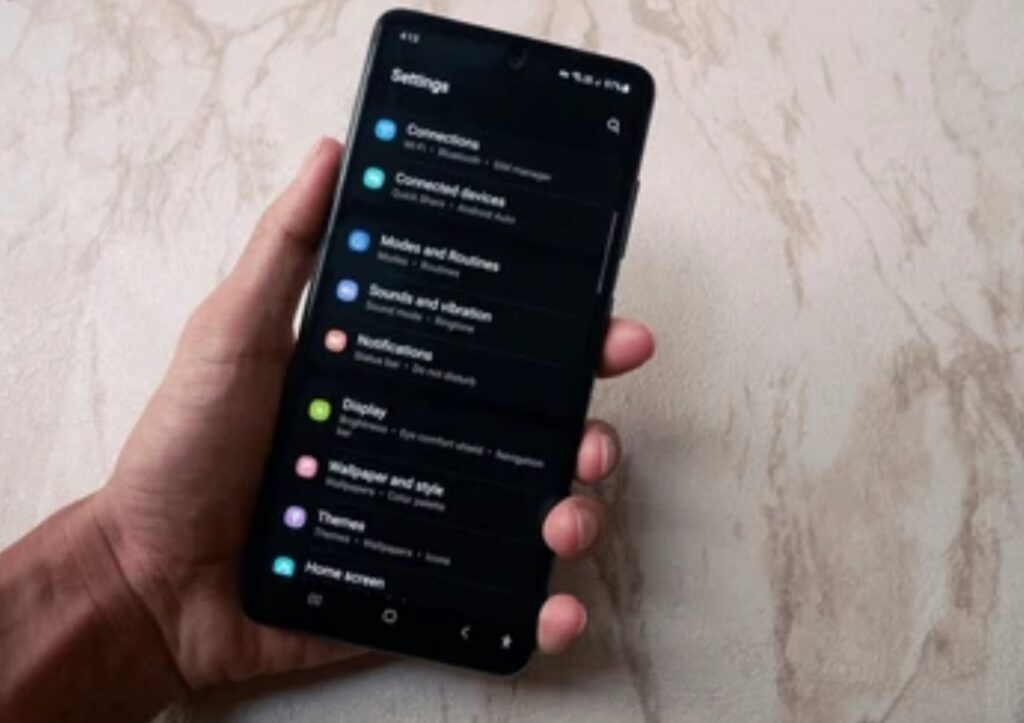
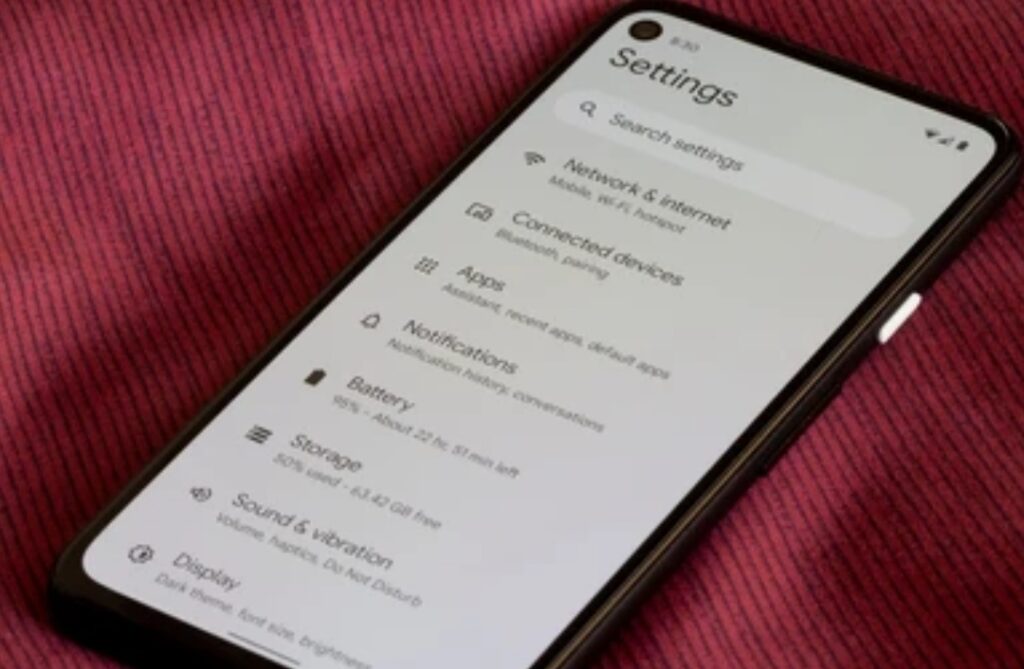
✅ Step 1: Open Your Android Settings
- Unlock your phone and head to the Settings app (the gear icon).
- Scroll down to “About phone” or “About device” depending on your brand.
On some phones, you may need to first go to “System” > “About phone.”
✅ Step 2: Locate the “Build Number”
- In the About phone section, look for an option called Build number.
- On Samsung, it may be found under “Software Information”.
💡 Important: The “Build number” is your key to activating the Developer Mode.
✅ Step 3: Tap the Build Number 7 Times
- Tap on Build number exactly 7 times in a row.
- You’ll start seeing a countdown like: “You are now 3 steps away from becoming a developer!”
🔐 Final Step: After the 7th tap, you’ll see the message:
“You are now a developer!”
If your phone has a lock screen password, you may be asked to enter it before proceeding.
✅ Step 4: Access Developer Options
- Once activated, go back to the Settings main page.
- Navigate to System > Advanced > Developer Options
(In some phones like Samsung, it appears directly under the Settings menu.)
📂 Pro Tip: You can now toggle Developer Options ON/OFF anytime—just flip the switch at the top of the Developer Options screen.
Brand-Specific Navigation Notes 🏷️📱
Some Android phones have slightly different menu structures:
| Brand | Where to Find “Build Number” |
| Samsung | Settings > About Phone > Software Information |
| Xiaomi/POCO | Settings > About Phone > Tap “MIUI Version” |
| OnePlus | Settings > About Device > Build Number |
| Google Pixel | Settings > About Phone > Build Number |
| Realme/Vivo | Settings > About Phone > Software Information |
No matter your brand, the core process is the same—locate Build number and tap it seven times to unlock.
What Happens After You Unlock Developer Options? 🔍
Once activated, you’ll gain access to dozens of new settings like:
- USB Debugging
- Animation scale controls
- Force GPU rendering
- Limit background processes
- Fake GPS location
- Bluetooth audio codecs
- And much more…
These are all part of the Android developer tools that give you precision control over system behavior and performance.
💬 Think of it as gaining admin access to your phone—without the risk of rooting!
Is It Safe to Enable Developer Options? 🛡️
✅ Yes—it’s completely safe to enable and explore Developer Options as long as you don’t change advanced settings blindly.
Stick to the tweaks we’ll cover in the next section, and you’ll only improve your phone’s performance, not harm it.
Even better—if you feel you’ve made too many changes, you can:
- Simply toggle Developer Options OFF
- Or reset settings to default inside the Developer Options menu
🛠️ Power Tip: You can also disable Developer Options completely by going to Settings > Apps > Settings > Clear Data (but this resets all settings).
⚠️ Important Note: Be mindful of settings like OEM unlocking or debugging over Wi-Fi, which can introduce security risks if left on unnecessarily.
🔥 You’ve just unlocked the hidden control center of your Android device.
But now the real fun begins.
In the next section, you’ll learn how to use these developer tools wisely—to boost speed, save battery, and unlock features you didn’t know existed.
👉 Ready to take full control of your Android phone like a pro?
Let’s dive into the smart ways to use Android Developer Tools next.
Smart Ways to Use Android Developer Tools (Without Breaking Things) ⚙️📈
So now that you’ve unlocked the Developer Options menu, it’s time to make it work for you—without causing problems.
While this secret toolbox offers tons of potential, you need to know which features are safe, practical, and actually useful.
This section will show you how to use Android developer tools smartly—for better performance, longer battery life, smoother user experience, and even cool customizations.
We’ll also highlight some of the best Android hidden features that even tech-savvy users often overlook.
🔥 One wrong tap can cause system slowdowns… but the right ones?
They’ll make your phone fly! 🚀
Let’s dive into the most powerful yet beginner-safe features available inside your Developer Options menu.

🚀 Speed Up Your Android Instantly by Disabling Animations
One of the best-known Android tweaks—and one of the easiest to try—is animation scaling.
What It Does:
By reducing or disabling system animations, your phone feels significantly faster when opening apps, switching screens, or navigating menus.
How to Enable:
- Open Developer Options
- Scroll to Drawing section
- Find:
- Window animation scale
- Transition animation scale
- Animator duration scale
- Window animation scale
- Set each of them to:
- 0.5x (for faster)
- Off (for maximum speed)
- 0.5x (for faster)
✅ Recommended Setting: Try 0.5x first—it keeps some smoothness but still makes the phone feel snappier.
💬 Pro Insight: This is one of the easiest ways to boost speed without installing anything or risking battery issues.
🔋 Save Battery by Limiting Background Processes
Android apps love to run in the background—even when you’re not using them.
With Developer Options, you can limit how many processes stay active behind the scenes.
How to Do It:
- Go to Developer Options
- Scroll to Apps
- Tap on Limit background processes
- Choose:
- Standard limit (default)
- At most 4 / 3 / 2 / 1 processes
- No background processes (not recommended unless troubleshooting)
- Standard limit (default)
✅ Recommended for: Users with older devices, weaker RAM, or battery drain issues.
🧪 Enable USB Debugging for Advanced Tools & Safe File Transfers
If you’re planning to use tools like ADB, connect to PC software, or back up data securely, you’ll need USB Debugging.
How to Enable:
- Open Developer Options
- Scroll to Debugging
- Toggle USB Debugging ON
⚠️ Security Tip: Always turn this off after using ADB or connecting to a public computer. Leaving it on can pose a risk.
🔄 Use case: Sideloading apps, file transfer via ADB, using backup tools, testing with Android Studio.
🎮 Improve Gaming Performance with Force GPU Rendering & MSAA
Gamers, this one’s for you!
Certain Developer Options can boost graphics rendering, especially in games that don’t use GPU acceleration by default.
How to Enable:
- Go to Hardware-accelerated rendering
- Turn on:
- Force GPU Rendering
- Force 4x MSAA (Multisample Anti-Aliasing)
- Force GPU Rendering
✅ Caution: May slightly increase battery usage—but the graphics look smoother in many 2D and 3D games.
🌚 Force Dark Mode for Unsupported Apps
Love dark mode but hate how some apps won’t follow?
Developer Options lets you force apps into dark mode, even if they don’t support it natively.
How to Use:
- Scroll to Hardware-accelerated rendering
- Toggle Override force-dark
✅ Works well on many apps.
❌ Some UI elements may look distorted—test before keeping it on permanently.
🎯 Show Touches & Pointer Location – Great for Tutorials & Demos
Creating screen recordings or app tutorials?
Turn on visual touch indicators to show every tap and movement on screen.
Enable These:
- Show taps
- Pointer location (shows coordinates and touch trails)
Great for:
- Educators
- App reviewers
- Tech YouTubers
- UI/UX testers
🎧 Customize Bluetooth Audio with Developer Codec Options
Hidden inside Developer Options is the ability to choose Bluetooth audio codecs for better sound quality.
Steps:
- Go to Networking or Bluetooth Audio Codec
- Choose from:
- SBC (basic)
- AAC (better for iPhones and Android)
- aptX, aptX HD, or LDAC (hi-res codecs)
- SBC (basic)
🎵 Tip: Use LDAC or aptX if your headphones support it for studio-quality audio over Bluetooth.
🔐 Simulate GPS Location (Use With Caution)
Testing a location-based app?
You can fake your GPS location using Developer Options + a mock location app.
How to Do It:
- Install a Mock Location app from Google Play
- Go to Developer Options
- Tap on Select mock location app
- Choose the app you installed
✅ Useful for app developers and digital nomads.
❌ Misuse may violate terms of service for certain apps.
⚠️ What NOT to Touch (Unless You’re a Developer)
❌ OEM Unlocking – Only needed when unlocking the bootloader
❌ Logger Buffer Sizes – Meant for kernel debugging
❌ Strict Mode Enabled – Can cause unnecessary notifications
❌ Stay Awake – Keeps screen on while charging (use only during tests)
🛡️ Best Practice: If you don’t understand what a setting does, don’t change it.
Stick to proven performance tweaks listed above.
💬 Don’t just unlock Developer Options—master them strategically and unlock the full potential of your Android phone.
Advanced Hidden Android Features You Can Try Safely 🕵️♂️📲
Once you’ve mastered the basics of Developer Options, it’s time to take things up a notch.
This is where the real Android power users separate from the average crowd.
In this section, we’ll show you advanced yet safe Android hidden features that you can explore with confidence.
These tools give you the freedom to customize, test, and experiment without rooting your phone or installing risky third-party software.
Whether you’re looking to improve audio quality, fake your location, or force dark mode, these next-level features are built right into your phone—and ready for action.
✅ Important: These are 100% safe to use when handled correctly. No root required. No hacks. Just pure Android power.
🎯 Mock Location – Simulate GPS for Testing or Privacy
This hidden feature allows you to spoof your GPS location without any external tool—perfect for app testing or privacy reasons.
Why It’s Useful:
- Test geo-restricted apps
- Fake check-ins (like for social or fitness apps)
- Use for development or emulator testing
- Protect real location from apps
How to Use:
- Download any Mock Location app from Google Play (like Fake GPS Location)
- Go to Developer Options
- Tap on Select mock location app
- Choose your installed mock app
- Set your preferred location within the app
⚠️ Note: Don’t misuse this feature—it may violate terms on certain apps like dating platforms or games.
🎧 Force High-Quality Bluetooth Audio Codecs
By default, Android picks audio codecs automatically.
But with Developer Options, you can manually select higher-quality Bluetooth codecs like:
- aptX HD
- LDAC
- AAC
- SBC (default, lower quality)
How to Use:
- Connect your Bluetooth headphones
- Go to Developer Options > Bluetooth Audio Codec
- Select the best codec supported by your device and headphones
✅ LDAC and aptX are great for lossless, high-fidelity audio
❌ Not all headphones support advanced codecs—check compatibility first
🎵 Hook: Get the audiophile experience your premium headphones were made for.
🌑 Override Force-Dark – Make Every App Obey Dark Mode
Some apps stubbornly refuse to switch to dark mode.
With this hidden feature, you can force dark theme even in apps that don’t support it natively.
How to Enable:
- Go to Developer Options
- Toggle Override force-dark
Great for:
- Reducing eye strain
- Saving battery on AMOLED screens
- Keeping visual consistency
⚠️ Some app UIs may display incorrectly—test before keeping it on long term.
📶 Stay Awake While Charging – Great for Debugging & Testing
Need your screen to stay on while plugged in?
This is perfect for app testing, file transfers, or when using your phone as a secondary monitor or display.
How to Use:
- Go to Developer Options
- Toggle Stay awake
✅ Your screen won’t turn off while charging
❌ Don’t leave this on permanently—it will drain your screen faster
📈 Show CPU Usage on Screen
Want to monitor your phone’s real-time performance?
This feature displays CPU usage on the top corner of your screen—perfect for:
- App testing
- Benchmarking
- Gaming diagnostics
How to Enable:
- Open Developer Options
- Toggle Show CPU usage
🧠 Geeky Insight: Watch how your CPU spikes during heavy multitasking or gaming.
🧹 Don’t Keep Activities – Kill Apps Immediately After Exit
This setting is mostly for developers testing app lifecycle behaviors—but you can use it to:
- Stop apps from running in the background
- Mimic aggressive RAM management
- Debug performance bottlenecks
How to Use:
- Go to Developer Options
- Toggle Don’t keep activities
⚠️ Only use temporarily—this may affect normal multitasking.
🧪 Debugging Over Wi-Fi – Wireless ADB for Developers
Want to debug your phone wirelessly without USB?
Android 11 and above supports Wireless ADB (Android Debug Bridge) for wireless development.
How to Set Up:
- Enable USB Debugging and Wireless debugging
- Connect to the same Wi-Fi network as your PC
- Use your development environment (e.g., Android Studio) to pair via IP or QR
✅ Perfect for developers or testers who need cable-free debugging
🔄 Background Process Limit – Free Up RAM
If you’re on a low-RAM device, this feature lets you manually restrict how many apps run in the background.
How to Enable:
- Developer Options > Limit background processes
- Choose from:
- Standard limit
- 4 / 3 / 2 / 1 process
- No background processes
- Standard limit
✅ Reduces memory usage
⚠️ May cause app reloads when switching frequently
🛑 Disable Absolute Volume – Separate Bluetooth & Phone Volume
Normally, your phone and Bluetooth headset share the same volume level.
If you prefer separate control, this feature lets you independently adjust volume on both devices.
How to Use:
- Go to Developer Options
- Toggle Disable absolute volume
Great for:
- Audiophiles
- Mixed audio setups
- Devices with poor volume sync
🧠 Pro Insight: These Android hidden features allow you to go far beyond what average users can do—and you don’t even need to root your phone.
💡 Bonus Tip: Test Safely, Tweak Carefully
- Use Developer Options like a pro—start slow and test one change at a time
- Read what each setting does before toggling it
- If you notice performance drops, reset Developer Options to default
🔥 These advanced features are like hidden superpowers in your phone—but only if you know where to look and how to use them.
Developer Options to Avoid (Unless You Know What You’re Doing) ⚠️🚫
Now that you’ve unlocked the power of Android Developer Options, you might feel like a mobile wizard—and you are… but even the best tools can become dangerous if misused.
While most options are safe, there are a few hidden settings that, when activated carelessly, can cause:
- App crashes
- Connectivity issues
- Poor system performance
- Or worse—bootloader vulnerabilities
In this section, we’ll explore the developer options you should avoid, unless you’re an experienced user or know exactly what the setting does.
❗ Important: These aren’t necessarily “harmful,” but they can lead to unintended side effects that are hard to undo without a full reset.

❌ OEM Unlocking – Don’t Touch Unless You’re Flashing ROMs
What It Does:
This setting allows your device’s bootloader to be unlocked—opening the door for flashing custom ROMs, rooting, or installing alternative OS builds.
Why You Should Avoid It:
- Enabling OEM Unlocking can void your warranty
- It exposes your device to security risks if left on
- A wrong step in bootloader unlocking can brick your phone
Only use if: You’re a developer flashing ROMs or installing custom recovery.
❌ Stay Awake – Battery Killer if Left Enabled
What It Does:
Keeps your screen on while charging—handy for testing and development.
Why You Should Avoid It:
- Easily drains screen life and causes overheating
- Can lead to OLED burn-in if screen is static
- Often left on accidentally
✅ Use only for short-term testing.
❌ Disable once done—don’t leave it on overnight.
❌ Enable Bluetooth HCI Snoop Log – Not for Average Users
What It Does:
Logs all Bluetooth traffic for debugging purposes—used for protocol analysis or Bluetooth stack issues.
Why You Should Avoid It:
- Consumes memory and storage
- May capture sensitive personal data
- Logs are hard to read without advanced tools
✅ Only for network engineers or devs working with Bluetooth protocols.
❌ Background Process Limit (No Processes) – Kills Functionality
What It Does:
Lets you cap the number of background apps your phone keeps open.
Why You Should Avoid Setting It to “No Background Processes”:
- Breaks multitasking
- Apps restart every time you switch
- Slows down overall experience
✅ Use moderate limits (e.g., 2-3 apps) instead of cutting background completely.
❌ Strict Mode Enabled – Floods You With Alerts
What It Does:
Alerts developers when apps do things that slow the UI—like long operations on the main thread.
Why You Should Avoid It:
- Causes frequent screen flashes
- Constant system warnings
- Confusing if you’re not debugging an app
✅ Best left for professional developers only.
❌ Show Layout Bounds – Messes With UI Appearance
What It Does:
Outlines all view elements on screen in bright lines—used to debug layout design.
Why You Should Avoid It:
- Makes screen unreadable
- Ruins app and website interfaces
- Not useful unless you’re doing app development
❌ Logger Buffer Sizes – Advanced Debugging Only
What It Does:
Adjusts the log buffer size used for system logs (logcat).
Why You Should Avoid It:
- Useless for casual users
- Can cause memory usage issues
- Misconfigurations can affect log monitoring
✅ Best left at default setting.
❌ GPU Debug Layers & OpenGL Traces
What They Do:
Used to trace rendering pipelines for app graphics.
Why You Should Avoid These:
- Complex to use
- Require external dev tools
- May slow down your phone or cause graphic bugs
🚨 Summary: What to Avoid Unless You’re a Pro
| Dangerous Setting | Why to Avoid |
| OEM Unlocking | Security risk, may void warranty |
| Stay Awake | Battery and screen damage risk |
| Background Process: No Processes | Breaks multitasking and performance |
| Bluetooth HCI Snoop Log | Storage-heavy and privacy-sensitive |
| Strict Mode | Floods screen with debug alerts |
| Logger Buffer Sizes | Advanced only, risks performance |
| GPU Debug Layers/OpenGL Tracing | Not for casual use, slows performance |
⚠️ Warning: These settings are best left alone unless you’re a developer or tester who knows exactly what each one does and why.
💬 Pro Tip: If you think you’ve messed up a setting or your phone starts acting strange, go to Settings > Developer Options > Toggle Off, or reset app settings to restore defaults.
🚫 When in Doubt, Don’t Touch It
Developer Options is a powerful tool—not a toy.
Used wisely, it gives you professional-level control over your device.
Used carelessly, it can lead to instability and unexpected behavior.
Always do your research and stick to safe tweaks unless you’re ready for a deep-dive into development.
🔥 Now that you know what not to do—let’s focus on wrapping it all together with final tips, safety advice, and best practices for using Developer Options like a pro.
FAQs About Android Developer Options ❓📘
You’ve unlocked the Developer Options menu, explored powerful tweaks, and avoided the dangerous stuff—great job!
But if you’re like most curious Android users, you’ve probably still got questions.
Below are the most frequently asked questions about how to unlock hidden developer options on Android, how to use them wisely, and what to watch out for.
These clear, detailed answers will help ensure you feel confident using Android developer tools without the risk of damaging your phone.
🤔 Will Enabling Developer Options Void My Warranty?
Short answer: No.
✅ Simply unlocking or enabling Developer Options will not void your warranty.
However:
- Unlocking the bootloader using OEM unlocking might
- Rooting or flashing custom ROMs definitely can void warranties
🛡️ Safe Tip: Stick to the built-in Developer Options and avoid bootloader unlock unless you’re an advanced user.
🧰 What Are Developer Options Used For, Really?
They’re a set of tools originally designed for:
- App developers to test UI, behaviors, and performance
- Tech testers to simulate different usage environments
- Power users to control animations, background tasks, and system behavior
- Gamers to improve graphics and reduce lag
- Privacy-conscious users to disable background activities
Today, even non-techy users benefit from Developer Options to optimize battery, improve performance, and enhance usability.
⚙️ Can I Use Developer Options Without Rooting My Phone?
Absolutely.
In fact, the beauty of Developer Options is that they:
- Work on all Android phones
- Don’t require root access
- Are built into the operating system
- Are safe if used correctly
This is one of the best ways to access android hidden features without installing third-party tools or modifying your phone.
🛑 Can I Disable Developer Options After Enabling Them?
Yes, and it’s simple.
To disable Developer Options:
- Go to Settings > Developer Options
- Toggle the switch at the top to Off
If you want to completely remove Developer Options from your settings menu:
- Go to Settings > Apps > Settings app > Storage
- Tap Clear Data (This resets all settings—not just Developer Options)
🧼 This option is ideal if you want a completely fresh start.
🔒 Is USB Debugging Safe to Leave On?
Only if you trust the devices you connect to.
USB Debugging allows connected computers to send commands, pull data, or install apps.
✅ Safe when:
- You’re connecting to your own trusted PC
- You turn it off after each use
❌ Risky when:
- Connecting to public or unfamiliar computers
- Left on permanently
Security Tip: Enable only when needed—then disable it again for safety.
🔁 Can I Reset Developer Options Back to Default?
Yes. If you feel you’ve changed too many settings or something went wrong, here are your options:
Option 1: Reset Developer Options Settings
- Toggle Developer Options off, then back on
Option 2: Reset All Settings (System-Wide)
- Go to Settings > System > Reset Options > Reset All Settings
- This resets network, display, and system preferences
🧠 Use Option 1 if only Developer Options are affected. Use Option 2 for a full system cleanup.
📉 Why Is My Phone Acting Slower After Enabling Developer Options?
You may have:
- Set animation scale too high
- Limited background processes too aggressively
- Enabled logging or debug features you don’t need
Fix it by:
- Resetting all animation scale options to 1x
- Returning Background Process Limit to “Standard”
- Disabling Show CPU usage, Strict Mode, or other resource-heavy tools
Pro Fix: Toggle Developer Options off entirely to see if the issue resolves.
🧪 What’s the Difference Between Developer Options and Rooting?
| Feature | Developer Options | Rooting |
| Built-in? | ✅ Yes | ❌ No (manual process required) |
| Requires unlocking bootloader? | ❌ No | ✅ Yes |
| Safe for warranty? | ✅ Yes | ❌ Often voids warranty |
| Risk level | Low if careful | High – possible bricking or security issues |
| Advanced control? | Moderate | Extreme – full system access |
💬 In short: Developer Options = advanced but safe tools. Rooting = full control with higher risk.
👨💻 Should I Leave Developer Options On All the Time?
You can—but you don’t have to.
✅ Keep it enabled if:
- You frequently tweak settings like animation speed or debugging tools
❌ Disable it if:
- You’re done testing and don’t want distractions
- You’re handing your phone to a less tech-savvy user (like kids or family)
Reminder: Turning off Developer Options doesn’t undo your changes—it just hides the menu from plain view.
🧠 Final FAQ Wisdom – Top 5 Quick Facts
- ✅ Enabling Developer Options is 100% legal and safe
- ✅ No root access is needed
- ⚠️ Don’t use options you don’t understand
- 🔄 You can reset or disable Developer Options anytime
- 📲 Use these tools to enhance your phone’s performance, not break it
💬 Still unsure about something?
Drop your question in the comments or contact us here — we’re happy to help Android users make smarter choices.
Final Thoughts – Use Developer Options to Supercharge Your Android 🚀
So, now that you know how to unlock hidden developer options on Android, what will you do with all that extra power?
Most people only use a tiny fraction of what their Android phone is truly capable of.
But you’re not most people.
You’ve now tapped into the secret toolkit that even many tech-savvy users don’t bother exploring—Android Developer Tools.
And that’s a game-changer.

You’re No Longer Just a User — You’re the Pilot of Your Phone 🧠📱
By unlocking Developer Options, you’ve gained control over features that can:
- Make your phone faster by disabling unnecessary animations
- Extend your battery life by limiting background tasks
- Fine-tune graphics and display settings for better gaming
- Speed up USB file transfers and ADB debugging with precision
- Reveal and use powerful Android hidden features designed for developers—but now available to you
You no longer have to settle for lag, bloat, or one-size-fits-all performance.
You now know how to fine-tune your phone like a professional.
💡 Knowledge is power—but applied knowledge transforms your experience.
Don’t Be Afraid to Experiment (Safely!) 🧪
Yes, some Developer Options come with a warning label—but so does every power tool.
The key is understanding what each option does and testing changes one by one.
Stick with the performance tweaks, animation controls, debugging options, and GPU tweaks we discussed earlier.
Avoid things like OEM unlocking, background process limits, or forcing activities to resize unless you’re sure.
🛑 And remember: If anything goes wrong, you can always reset settings or disable Developer Options entirely.
Why You Should Keep Exploring Android’s Secret Features 🧭
The Android OS is constantly evolving.
Each new Android version brings new hidden features, enhanced developer settings, and useful tweaks buried under layers of menus.
That’s why staying informed and curious pays off.
You never know what new gem you’ll uncover that could:
- Boost your phone’s speed
- Improve your mobile gaming experience
- Give you more control over privacy and security
- Or even unlock new productivity workflows most people don’t know about
📌 Bookmark this post or save it to your favorites so you can revisit it after your next Android update!
It’s Time to Take Full Control of Your Device 💪
If you’ve followed this guide step-by-step, congratulations—you’ve officially leveled up as an Android user.
You’re no longer relying on default settings or bloated apps to get the job done.
Now, you control your phone, not the other way around.
✅ Go ahead—explore those hidden Developer Options
✅ Test out a few safe tweaks
✅ Optimize your animations and watch your phone fly
✅ Use these Android developer tools to customize your device to your needs
🔥 Ready to unlock even more Android superpowers?
👉 Click here to discover more hidden Android tricks, hacks, and speed boosts!
In Summary – You’ve Just Unlocked Android’s Secret Weapon 🔓✨
Let’s recap the power you now hold:
- You’ve learned how to unlock hidden developer options on Android
- You’ve discovered how to use Developer Tools smartly and safely
- You’ve mastered ways to optimize, debug, and personalize your phone like a pro
- You’ve gained the ability to access Android hidden features that improve speed, battery life, and more
🌟 You’ve gone from casual user to confident power user—and your phone will never be the same again.
💥 Don’t keep this powerful knowledge to yourself. Share this post with fellow Android users and help them level up too.
👉 Start exploring Developer Options now and unlock your Android’s full potential!
You might also like :