DIY smart home setup, affordable smart gadgets, best smart home devices
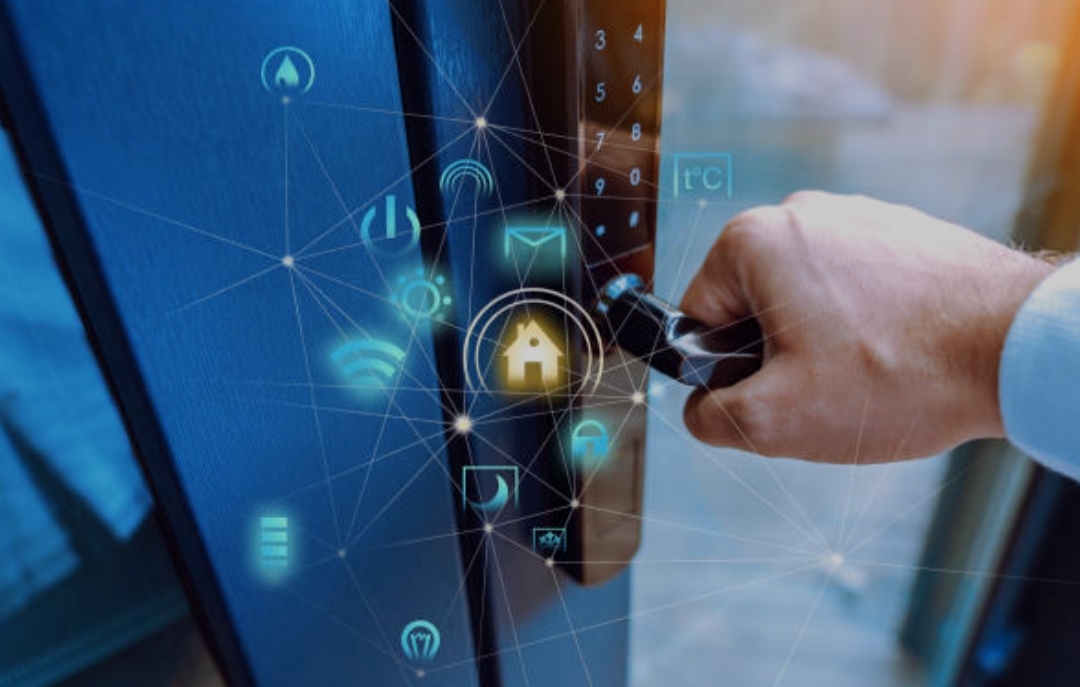
Introduction — Why DIY Smart Home Setup is the Future of Modern Living 🏡💡
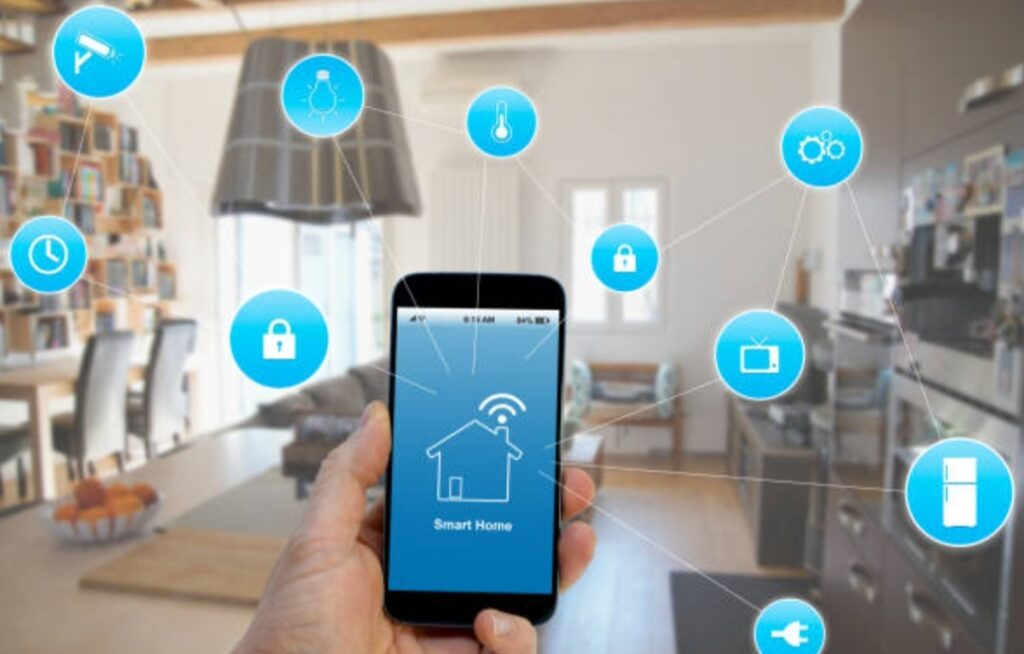
Imagine walking into your home and the lights automatically turn on to your preferred brightness.
The air conditioner adjusts to the perfect temperature.
Your favorite playlist starts playing softly in the background — all without you lifting a finger.
Welcome to the world of DIY smart home setups, where technology meets convenience, comfort, and control.
In today’s fast-paced digital age, more homeowners are turning to affordable smart gadgets to transform their living spaces into intelligent environments that adapt to their needs.
And the best part?
You don’t need to be a tech genius or hire expensive installers — you can set it up yourself in just a few simple steps.
What Exactly is a DIY Smart Home Setup? 🤔
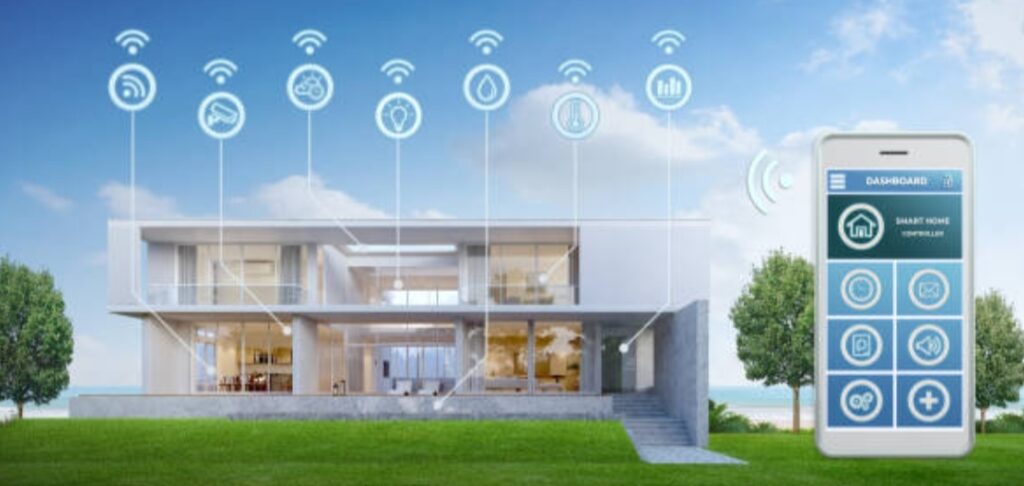
A DIY smart home setup simply means creating a connected home ecosystem using smart devices that you can install and control yourself — without professional help.
These devices connect via Wi-Fi, Bluetooth, or Zigbee networks and can be managed through your smartphone or voice assistant.
From smart plugs and lighting to security cameras and thermostats, everything works together seamlessly to make your daily life smarter and more efficient.
Think of it as building your own futuristic home — one gadget at a time.
This do-it-yourself approach is perfect for modern homeowners, renters, and even students who want to enjoy cutting-edge home automation without spending thousands on installation services.
Why More People Are Turning to Affordable Smart Gadgets 🧠💸
The growing popularity of affordable smart gadgets has completely changed the way we think about home automation.
In the past, smart home systems were expensive and complicated — only accessible to the wealthy.
But now, thanks to budget-friendly and user-friendly technology, anyone can start their own DIY smart home setup for under $100.
Here’s why these affordable smart gadgets are winning hearts everywhere:
- 💰 Cost-Effective: You no longer need a costly central system or technician.
Affordable devices like TP-Link Kasa plugs, Wyze cameras, and Google Nest Minis can easily be installed within minutes. - ⚙️ Easy Installation: Most smart home devices are “plug and play.”
You can set them up using a mobile app or QR code — no wiring, no drilling, no stress. - 📱 Seamless Control: Whether you’re using Amazon Alexa, Google Assistant, or Apple HomeKit, you can control everything with your voice or smartphone — even when you’re away from home.
- 🔒 Enhanced Security: With smart cameras and sensors, you can monitor your home 24/7 in real time — giving you peace of mind wherever you are.
- 🌍 Energy Efficiency: Smart thermostats and lighting help you save electricity by learning your habits and adjusting automatically.
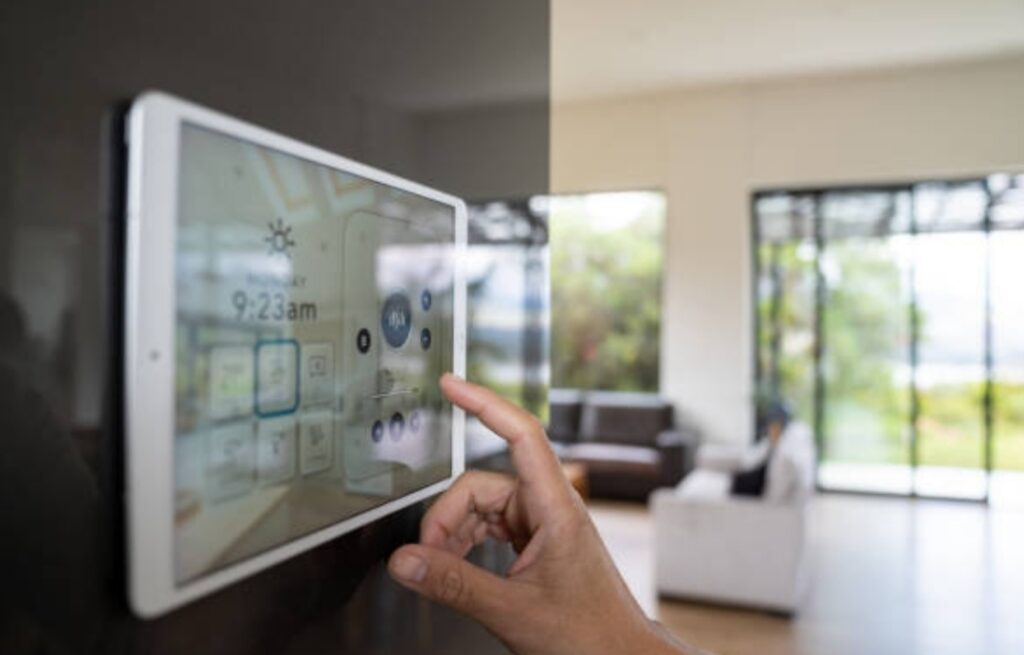
The Power of the Best Smart Home Devices — Convenience at Your Fingertips ⚡📲
When it comes to the best smart home devices, convenience is key.
Imagine having your lights, appliances, and security systems working together harmoniously — responding instantly to your commands or schedule.
The best smart home devices are designed to make your everyday routines effortless.
For instance:
- Wake up to automated curtains that open gradually with the sunrise 🌅
- Use voice commands to make coffee while still in bed ☕
- Receive instant alerts if someone rings your smart doorbell or if motion is detected outside 🚨
With the right combination of affordable smart gadgets and easy-to-install systems, you can create a personalized smart ecosystem that fits your lifestyle — whether you live in a studio apartment or a multi-story home.
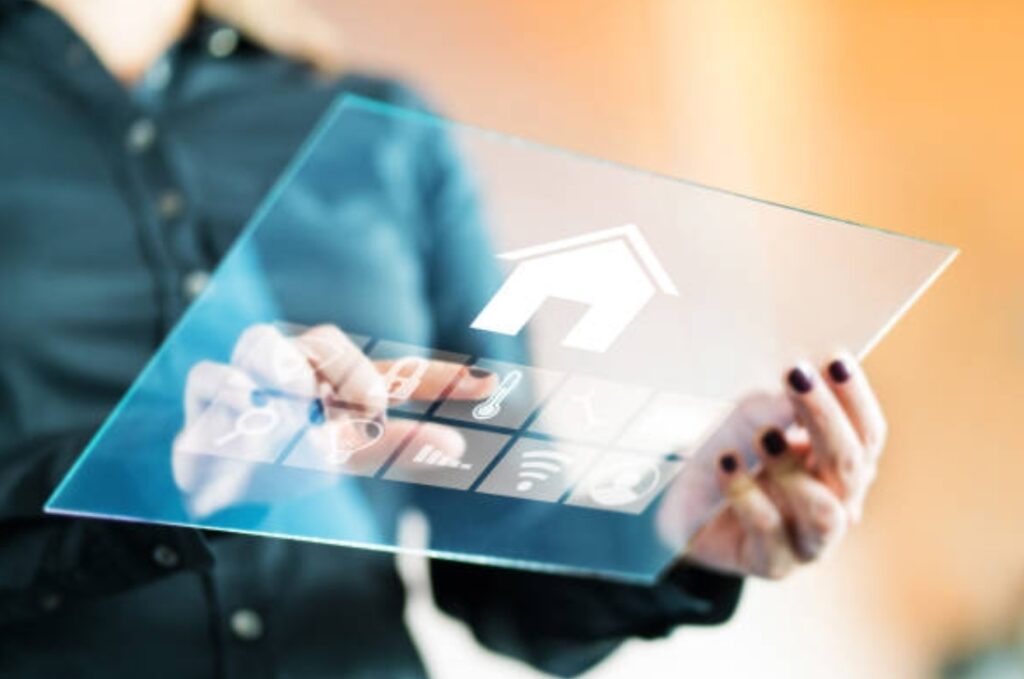
How DIY Smart Homes Empower You to Take Control 🔧🏠
One of the biggest advantages of a DIY smart home setup is the freedom and flexibility it gives you.
You decide what to automate, how to integrate your devices, and how much to spend.
Unlike professionally installed systems that lock you into one brand, DIY smart setups allow you to mix and match devices from different manufacturers.
Here’s how you gain control:
- Start small, scale up: Begin with a single device, like a smart plug or bulb, and expand later as your budget allows.
- Customize your routines: Set schedules like “Good Night Mode” to turn off lights, lower temperature, and lock doors automatically.
- Stay in control anywhere: Use your phone to monitor and manage your home from anywhere in the world.
This approach not only saves money but also builds your confidence in managing and maintaining your own smart home ecosystem.
Why Now is the Best Time to Build a DIY Smart Home 🌐🔥
The global smart home market is booming, and technology has never been more affordable or easier to use.
With brands like Aqara, Wyze, Eufy, Govee, and Tuya Smart, you can now find the best smart home devices that fit any budget or preference.
Recent innovations have made these devices:
- More secure with advanced encryption and two-factor authentication
- More compatible across platforms (Alexa, Google Home, Apple HomeKit)
- More eco-friendly, reducing unnecessary power usage
So, whether you want to enhance comfort, security, or energy savings, there’s never been a better time to start your DIY smart home setup journey.
Get Ready to Experience the Future — Starting Today 🚀
Smart living is no longer a luxury — it’s a lifestyle upgrade that’s within everyone’s reach.
With just a few affordable smart gadgets, you can instantly modernize your home and enjoy the comfort of automation that reacts to your daily habits and preferences.
If you’re ready to embrace a smarter way of living, start small but think big.
Choose compatible devices, plan your setup, and gradually build your connected ecosystem.
👉 Check out the best affordable smart gadgets here to kickstart your smart home journey today.
Transform your space, enhance your convenience, and experience the future of modern living — all from the palm of your hand.
⚡ Power Tip: Always choose smart devices that are compatible with your existing ecosystem (like Alexa or Google Home). This ensures smoother automation, less troubleshooting, and a better user experience overall.
What You Need Before Starting Your DIY Smart Home Setup 🧰⚡
So, you’ve decided to step into the world of smart living — great choice!
Before you start buying affordable smart gadgets and transforming your home into a futuristic space, there are a few essential things you need to prepare.
Setting up a successful DIY smart home setup doesn’t just start with gadgets — it starts with a solid foundation.
Whether you’re a tech enthusiast or a total beginner, understanding the basic requirements will save you time, money, and frustration later on.
Let’s dive deep into what you need to get started with confidence.
1️⃣ A Stable and Reliable Wi-Fi Network — The Heart of Every Smart Home 🌐📶
Every smart home device — from smart plugs to security cameras — relies heavily on your Wi-Fi connection.
Think of your Wi-Fi as the nervous system that keeps everything running smoothly.
Without a strong connection, your devices might disconnect, respond slowly, or even stop working altogether.
Here’s how to make sure your network is ready for a DIY smart home setup:
- Upgrade your router: If your router is more than three years old, consider upgrading to a dual-band or mesh router system.
Mesh Wi-Fi systems like TP-Link Deco or Google Nest WiFi provide full-home coverage and reduce dead zones. - Name your network wisely: Use clear SSIDs for both 2.4GHz and 5GHz bands.
Most affordable smart gadgets (like bulbs and plugs) still operate on 2.4GHz, so make sure it’s available. - Strong password = Strong security: Protect your devices by setting a secure Wi-Fi password to prevent unauthorized access.
- Position your router strategically: Place your router in a central area of your home for balanced coverage.
💡 Pro Tip: Before installing your smart gadgets, test your Wi-Fi speed near the installation areas using apps like “Speedtest” or “Fast.com.”
If your signal is weak, invest in a Wi-Fi extender or reposition your router.
2️⃣ Choose Your Smart Home Ecosystem — Alexa, Google, or Apple? 🤖🗣️
The next major step in setting up your DIY smart home setup is choosing the ecosystem that will control everything.
Your ecosystem acts like the brain of your smart home, helping your devices communicate with each other and with you.
There are three main players in the market today:
🔹 Amazon Alexa
- Works with a vast range of devices, from smart bulbs to TVs.
- Ideal for users who want flexibility and compatibility.
- Devices like the Echo Dot or Echo Show make controlling your gadgets hands-free and seamless.
🔹 Google Home (Google Assistant)
- Best for users already in the Google ecosystem.
- Pairs easily with Nest devices and other smart home brands.
- Voice control is intuitive and natural, with great integration for Android users.
🔹 Apple HomeKit
- Designed for iPhone, iPad, and Mac users who prioritize privacy and security.
- Works perfectly with Siri voice commands and devices like the HomePod Mini.
- While slightly pricier, it offers high stability and encrypted communication.
👉 Pro Tip:
Before purchasing any affordable smart gadgets, always check if they are compatible with your chosen ecosystem.
Some gadgets work across multiple platforms, while others are limited to one.
This ensures smooth integration and avoids frustration down the line.
3️⃣ Smart Home Hubs and Bridges — Do You Really Need One? 🏠🔗
Not every DIY smart home setup needs a hub — but having one can make your system more reliable and responsive.
A smart hub acts as a central controller that connects and manages multiple devices across different brands and protocols.
When you might need a hub:
- If you plan to use Zigbee or Z-Wave devices (many smart sensors and switches use these).
- If you want smoother automation without depending too much on Wi-Fi.
- If you want faster response times and better device synchronization.
Popular Smart Hubs:
- Samsung SmartThings Hub
- Aqara Hub M3
- Amazon Echo (with built-in Zigbee Hub)
- Hubitat Elevation
If you’re starting small with Wi-Fi-enabled affordable smart gadgets, you can skip the hub for now.
But as your system grows, having one will give you more control and flexibility.
4️⃣ Plan Your Smart Home Layout — Don’t Just Buy Random Gadgets 🏗️📝
One common mistake beginners make is buying gadgets without a plan.
A well-organized plan will help you build your DIY smart home setup step-by-step without wasting money on unnecessary devices.
How to plan effectively:
- Identify your goals: Do you want convenience, energy savings, or security?
- Start with key areas: Focus on one room first — like the living room or bedroom.
- List your must-have devices: For example:
- Smart lighting for mood control
- Smart plugs for automation
- Smart camera for security
- Smart lighting for mood control
- Check compatibility: Ensure every new device supports your ecosystem.
- Think future-proof: Choose devices that allow future updates and expansion.
💡 Example:
If your main goal is energy efficiency, start with smart bulbs, smart plugs, and a smart thermostat.
If security is your concern, begin with smart cameras, doorbells, and sensors.
5️⃣ Budget Planning — Building a Smart Home Without Breaking the Bank 💸💡
The good news is you don’t need to spend a fortune to build an impressive smart home.
Thanks to affordable smart gadgets, you can start small and grow over time.
Budgeting Tips for Beginners:
- Set a monthly limit: Spend wisely by upgrading one area at a time.
- Look for bundle deals: Brands like Wyze and TP-Link often offer starter kits.
- Watch for sales: Major events like Prime Day and Black Friday have huge discounts on the best smart home devices.
- Compare brands: Sometimes, cheaper alternatives offer the same functionality at half the price.
💥 Smart Tip:
Make a list of priority items first — for instance, lighting, plugs, and security.
Then, add convenience devices like smart speakers or displays later.
6️⃣ Protect Your Smart Home — Security is Non-Negotiable 🔒🛡️
Before you connect multiple smart gadgets, take time to secure your network.
A smart home is convenient, but it’s only as safe as the system protecting it.
Here are essential cybersecurity tips:
- Use a strong, unique password for each device and app.
- Enable two-factor authentication (2FA) wherever possible.
- Keep your firmware updated regularly.
- Avoid using public Wi-Fi when controlling home devices remotely.
- Create a separate Wi-Fi network (Guest Network) exclusively for your smart gadgets.
Doing this minimizes risks and keeps your data private.
7️⃣ Gather the Right Tools for Installation 🧰🔋
Even though most smart devices are plug-and-play, having a few basic tools will make installation easier.
Basic Tools You Might Need:
- A smartphone or tablet (for app setup)
- Screwdrivers (for mounting cameras or doorbells)
- Extra cables and adapters
- Batteries (for sensors or remotes)
For most affordable smart gadgets, installation takes less than 10 minutes — no professional help required.
Prepare Smart, Build Smarter 🏡✨
Getting your home ready before installing the best smart home devices is like laying the foundation for a dream house.
Once you have a strong Wi-Fi connection, a clear plan, and the right ecosystem, you’re already halfway to building your very own intelligent home.
The next step?
Start exploring affordable smart gadgets that match your goals and budget.
👉 Discover the top-rated affordable smart gadgets here to begin your smart home journey today.
With the right preparation, you’ll save time, money, and frustration — and enjoy the thrill of controlling your home with just your voice or a single tap.
Best Affordable Smart Gadgets You Can Install Yourself 🏠💡
So, your Wi-Fi network is ready, your ecosystem is chosen, and your plan is in place.
Now comes the fun part — choosing and installing the best affordable smart gadgets that will instantly transform your living space into a modern, connected home.
The beauty of a DIY smart home setup is that you can start small, stay within your budget, and still experience the luxury of automation.
You don’t need a technician or a massive wallet — just the right devices, a smartphone, and a few minutes of your time.
Below are the top budget-friendly and easy-to-install smart home devices you can begin with today.

1️⃣ Smart Lighting Systems — Brighten Your Home Intelligently 💡✨
Lighting is usually the first step for anyone starting their DIY smart home setup.
It’s simple, affordable, and offers an instant transformation in comfort and mood.
Smart bulbs are among the most affordable smart gadgets you can buy — and they deliver big impact.
Why Smart Lighting is a Game-Changer
- Control from anywhere: Turn lights on or off using your phone, even when you’re away.
- Voice commands: Use Alexa, Google Assistant, or Siri to control brightness or color.
- Energy efficiency: Smart LED bulbs consume up to 80% less power than traditional lights.
- Set routines: Automate lights to turn on at sunset or dim before bedtime.
Top Affordable Smart Bulbs to Consider
- TP-Link Kasa Smart Bulb — Easy app control, reliable, budget-friendly.
- Wyze Bulb Color — Great color range and integration with Alexa/Google.
- Govee Smart LED Bulbs — Syncs with music, perfect for entertainment rooms.
💡 Pro Tip: Choose bulbs that support both Wi-Fi and Bluetooth for greater flexibility.
You can even pair them with motion sensors to light your path automatically at night.
👉 Explore the best affordable smart lighting options here
2️⃣ Smart Plugs and Power Strips — Make Any Device Smart ⚡🔌
If you want to automate your home without replacing all your appliances, smart plugs are your best friend.
These affordable smart gadgets let you control anything — from coffee makers to fans — through your smartphone or voice commands.
Benefits of Smart Plugs
- Simple installation: Just plug in, connect to Wi-Fi, and control via app.
- Energy tracking: Some models show power consumption to help save electricity.
- Remote access: Turn devices on/off while you’re at work or on vacation.
- Scheduling: Automate your appliances to run only when needed.
Recommended Smart Plugs
- TP-Link Kasa Smart Plug Mini — Compact, reliable, and integrates with Alexa/Google.
- Tapo P100 — Budget-friendly with an intuitive app interface.
- Meross Smart Power Strip — Control multiple devices individually with surge protection.
💥 Bonus Tip: Use smart plugs with your TV, rice cooker, or iron to prevent unnecessary standby energy usage.
👉 See the most affordable smart plugs and strips here
3️⃣ Smart Security Cameras — Keep an Eye on What Matters Most 🔒📷
Home security no longer requires expensive setups or professional monitoring contracts.
Modern smart security cameras are affordable, wireless, and easy to install — making them a must-have for any DIY smart home setup.
Key Benefits
- 24/7 monitoring: Check live feeds from anywhere on your phone.
- Motion alerts: Get instant notifications when movement is detected.
- Night vision: Clear footage even in low-light conditions.
- Cloud or local storage: Choose how to store your recordings securely.
Best Budget Security Cameras
- Wyze Cam v3 — Exceptional performance under $40, with color night vision.
- Eufy Indoor Cam 2K — No subscription needed; works with Alexa and Google Home.
- Blink Mini — Small, powerful, and easy to install in seconds.
🔒 Pro Tip: Place cameras near entry points, driveways, and hallways for maximum coverage.
Always update firmware for enhanced cybersecurity.
👉 Find affordable smart security cameras here
4️⃣ Smart Doorbells — See and Talk to Visitors From Anywhere 🚪📞
If you want to upgrade your home’s security without hiring a technician, a smart video doorbell is a perfect starting point.
It lets you see who’s at your door, speak to them, and even record footage — all from your phone.
Advantages of Smart Doorbells
- Instant alerts: Know when someone rings or approaches your door.
- Two-way communication: Talk to delivery people or guests remotely.
- Motion detection: Receive alerts even if they don’t press the bell.
- Cloud storage options: Store important footage safely.
Top Affordable Picks
- Eufy Security Doorbell 2K (Battery-Powered) — Crisp video, no monthly fees.
- Blink Video Doorbell — Works with Alexa, budget-friendly and wire-free.
- Tapo D230S1 Smart Doorbell — Great image quality and easy installation.
🚨 Safety Tip: Make sure your doorbell is mounted at chest height for optimal face recognition.
👉 Check affordable smart doorbells here
5️⃣ Smart Thermostats — Comfort That Learns Your Habits 🌡️🏠
Want to save on energy bills while keeping your home comfortable all year round?
A smart thermostat is one of the best smart home devices you can install yourself.
Why You’ll Love Smart Thermostats
- Energy savings: Automatically adjusts temperature based on your routine.
- Remote access: Control your home climate while you’re away.
- Integration: Works with Alexa, Google Home, or Apple HomeKit.
- Usage reports: Monitor heating/cooling history to manage costs.
Top Budget Options
- Google Nest Thermostat (2024 Edition) — Sleek, efficient, and learns your preferences.
- Wyze Thermostat — Easy setup and app control under $60.
- Tado Smart Thermostat — Smart geofencing and energy analytics.
🌿 Eco Tip: Use “away” modes when you’re out to reduce unnecessary energy consumption.
👉 Explore smart thermostat deals here
6️⃣ Smart Sensors and Detectors — Safety Meets Intelligence 🚨🧠
Small but mighty, smart sensors protect your home from unexpected dangers — like water leaks, smoke, or motion detection.
They’re crucial for a safe and responsive DIY smart home setup.
Popular Types of Smart Sensors
- Motion Sensors: Trigger lights or alarms when movement is detected.
- Water Leak Sensors: Send instant alerts to prevent costly water damage.
- Smoke & CO Detectors: Notify you instantly of potential fire hazards.
- Door/Window Sensors: Monitor entry points and send alerts when opened.
Recommended Affordable Sensors
- Aqara Motion Sensor P1 — Compact, reliable, and integrates with Alexa.
- Wyze Leak Sensor Kit — Easy setup and affordable for multi-room use.
- Google Nest Protect (2nd Gen) — Premium smart smoke and CO detection.
⚠️ Safety Tip: Always place leak sensors near washing machines, under sinks, and behind toilets.
👉 See top affordable smart sensors here
7️⃣ Smart Speakers and Displays — The Command Center of Your Home 🎤📺
Once you’ve installed your smart gadgets, you’ll want a central way to control them.
That’s where smart speakers and displays come in — they serve as your home’s voice-controlled hub.
Why You Need One
- Voice control: Use simple voice commands to manage all your devices.
- Entertainment hub: Stream music, watch videos, or check recipes hands-free.
- Visual monitoring: Smart displays can show camera feeds or doorbell footage.
- Routine automation: Schedule lights, thermostat, and security tasks with one command.
Best Budget Options
- Amazon Echo Dot (5th Gen) — Compact, powerful, perfect for beginners.
- Google Nest Mini — Excellent voice recognition and integration.
- Echo Show 5 — Add visuals for camera viewing and interactive control.
🎯 Pro Tip: Place your main smart speaker in a central room like the living area or kitchen for the best voice coverage.
👉 Shop for budget smart speakers and displays here
Your Smart Home Journey Starts with One Gadget 🛠️🚀
You don’t need to spend thousands or install complex wiring to enjoy a smart lifestyle.
With just a few affordable smart gadgets, you can start building a home that responds to your voice, saves energy, and keeps your family safe.
Start small, stay consistent, and expand gradually as you discover the true power of DIY smart home setups.
Every new device adds convenience, comfort, and control — putting the future of home automation literally in your hands.
👉 Start building your DIY smart home today with these affordable devices!
Transform your space, simplify your life, and experience the joy of living smarter every day.
How to Connect and Automate Your Smart Home Devices 🔗🤖
Once you’ve chosen your affordable smart gadgets and installed them around your home, the next big step in your DIY smart home setup is connecting and automating them.
This is where the magic happens — when all your devices begin to communicate, sync, and respond automatically to your habits and preferences.
Whether it’s lights dimming at sunset, the thermostat adjusting as you leave home, or music playing when you say “Good Morning,” smart automation transforms convenience into lifestyle.
Let’s go step-by-step and make your devices work together in perfect harmony.
1️⃣ Set Up Your Devices with Companion Apps 📱⚙️
Every smart home device comes with its own mobile app that guides you through setup.
These apps help you connect devices to Wi-Fi, register them to your account, and manage automation features.
General Setup Process
- Download the app from Google Play or the Apple App Store.
- Plug in or power on your device.
- Open the app and follow the on-screen instructions.
- Connect to your Wi-Fi (usually 2.4GHz band).
- Name your device for easy voice control (e.g., “Living Room Lamp” or “Bedroom Fan”).
Popular Smart Home Apps to Know
- Amazon Alexa App – Controls Echo devices and thousands of smart gadgets.
- Google Home App – For Nest, Chromecast, and compatible devices.
- Apple Home App – For HomeKit-enabled smart home setups.
- SmartThings App – Perfect for managing devices from multiple brands.
- Tuya Smart / Smart Life App – Commonly used by budget-friendly gadgets from various manufacturers.
💡 Pro Tip: Once connected, always test each device’s response. Try turning it on/off using your phone or voice command before moving to automation.
👉 Explore compatible apps for your smart home devices here
2️⃣ Connect All Devices Under One Ecosystem for Seamless Control 🌍🗣️
If you’re using multiple brands, managing them under one smart home ecosystem simplifies everything.
Instead of juggling multiple apps, you can control all your best smart home devices using a single interface or voice assistant.
How to Connect Devices to Alexa
- Open the Alexa App → Tap Devices → Add Device.
- Choose the device type (light, plug, camera, etc.).
- Follow the pairing instructions.
- Once added, create groups like “Bedroom” or “Living Room” for easier control.
- Use voice commands like:
- “Alexa, turn on the living room lights.”
- “Alexa, show me the front door camera.”
- “Alexa, turn on the living room lights.”
How to Connect Devices to Google Home
- Open the Google Home App → Tap the “+” icon → Set up device.
- Choose Works with Google.
- Search and link your device brand (e.g., Wyze, TP-Link, etc.).
- Authorize access and assign devices to specific rooms.
- Try voice commands like:
- “Hey Google, turn off all lights.”
- “Hey Google, set thermostat to 24°C.”
- “Hey Google, turn off all lights.”
How to Connect Devices to Apple HomeKit
- Open the Home App → Tap “+” → Add Accessory.
- Scan the HomeKit QR code on your device or packaging.
- Follow prompts to connect and assign it to a room.
- Control using Siri with commands like:
- “Hey Siri, good night.”
- “Hey Siri, lock the front door.”
- “Hey Siri, good night.”
💥 Expert Tip: Stick with one ecosystem to avoid app clutter.
If you’re mixing brands, make sure they support Matter — the new universal smart home standard that allows different devices to work together smoothly.
3️⃣ Create Smart Routines and Automations — Let Your Home Think for You 🧠💫
This is where your DIY smart home setup truly comes alive.
Automation routines make your devices perform tasks automatically based on schedules, triggers, or conditions — no manual input needed.
What Are Smart Routines?
Smart routines are sequences of automated actions that happen when a trigger occurs.
For example:
- When motion is detected, lights turn on.
- When you say “Good Night,” all lights and plugs turn off.
- When you leave home, your thermostat adjusts to save energy.
Examples of Popular Smart Home Automations
💡 Morning Routine:
- Lights turn on gradually at 7 AM.
- Coffee maker starts brewing.
- Weather forecast plays automatically.
🌙 Night Routine:
- Lights dim to warm tone.
- Doors lock automatically.
- Security cameras activate.
🏠 Away Mode:
- Turns off unnecessary lights and plugs.
- Sends alerts if movement is detected.
- Thermostat adjusts for energy saving.
How to Create Routines (Example: Alexa & Google Home)
- Alexa App:
Go to “More” → “Routines” → “Create Routine.”
Choose a trigger (time, voice, or device action) → Add actions → Save. - Google Home:
Open “Automations” → “Add Automation.”
Choose triggers (like “Sunset” or “Leaving Home”) → Add actions → Save.
🧠 Power Tip: Combine multiple gadgets for layered automation.
Example:
When your smart door sensor opens, Alexa can automatically turn on the hallway light and announce, “Welcome Home!”
👉 Learn how to set up advanced smart home routines here
4️⃣ Integrate Third-Party Services for More Flexibility 🔄⚙️
Want even more control?
Integrating third-party platforms like IFTTT (If This Then That) or Home Assistant allows for deeper customization of your smart routines.
Benefits of IFTTT Integration
- Connect devices from different brands easily.
- Create powerful “if-this-then-that” automations (e.g., “If it rains, close the blinds.”).
- Get notifications or trigger social media posts from smart devices.
Using Home Assistant (for Advanced Users)
- Run all your devices locally without cloud dependency.
- Ideal for privacy-conscious users.
- Offers complex automation scenarios beyond standard app limits.
💡 Example IFTTT Automation:
“If my phone leaves the house → Turn off Wi-Fi plugs + Adjust thermostat.”
👉 Connect your smart devices with IFTTT here
5️⃣ Group and Label Your Devices for Organized Control 🏷️📋
As your DIY smart home setup grows, managing dozens of devices can get overwhelming.
Grouping and labeling them properly will keep your control center organized and intuitive.
How to Organize Smart Devices
- Group by room (e.g., “Living Room,” “Bedroom,” “Office”).
- Label by function (e.g., “Lamp,” “Fan,” “TV Plug”).
- Use descriptive names for voice commands (“Alexa, turn on study lamp”).
🗂️ Smart Tip: You can also group actions. For example:
Say “Alexa, movie time” → Lights dim + Curtains close + TV turns on automatically.
6️⃣ Keep Your Devices Updated for Security and Performance 🔒⚡
Automation only works flawlessly when your devices are up to date.
Outdated firmware can cause connection drops or make your network vulnerable.
Quick Maintenance Tips
- Open your device apps weekly and check for firmware updates.
- Reboot devices periodically to refresh connections.
- Remove unused devices from your network to avoid clutter.
- Review permissions and app settings to enhance privacy.
🛡️ Pro Tip: Schedule a monthly “Smart Home Health Check” — test automations, update software, and reset lagging gadgets.
Automate Smart, Live Smarter 🌟🏡
Congratulations! You’ve now taken your DIY smart home setup to the next level by connecting and automating your best smart home devices.
Automation isn’t just about convenience — it’s about enhancing your daily quality of life.
With everything connected, your home becomes intuitive — anticipating your needs and adjusting itself in real time.
From saving energy and boosting security to simplifying daily routines, the power of automation is truly transformative.
👉 Start automating your affordable smart gadgets now and experience a home that works for you — even when you’re not there.
Because the future of modern living isn’t just smart — it’s personalized, connected, and effortless.
DIY Smart Home Setup Tips for Beginners 🏠⚡
So, you’ve got your hands on a few affordable smart gadgets and are ready to build your first DIY smart home setup — but you’re not sure where to start?
Don’t worry.
This section is crafted to walk you through everything — from choosing the right ecosystem to avoiding rookie mistakes that could cost you time (and money).
Even if you’re not tech-savvy, these smart home setup tips will help you create a connected home that’s simple, efficient, and totally manageable on your own.
Let’s dive in! 🚀
1️⃣ Start Small — Don’t Automate Everything at Once 🌱
One of the biggest mistakes beginners make in their DIY smart home setup is trying to automate everything immediately.
You don’t need to control your fridge, window blinds, and doorbell on day one.
Instead, start small — pick two or three devices that give you the most value for daily convenience.
Ideal Starter Smart Home Devices
- Smart Bulbs 💡 – Affordable and perfect for setting the right mood.
- Smart Plugs 🔌 – Great for turning old appliances into smart ones.
- Smart Speakers 🗣️ – Act as your voice assistant hub (Alexa, Google, or Siri).
- Smart Cameras or Doorbells 🔒 – Enhance your home security instantly.
💡 Pro Tip: Begin with one room — for example, your living room — and expand gradually as you get more comfortable with the technology.
👉 Find beginner-friendly smart devices here
2️⃣ Choose a Unified Ecosystem (Alexa, Google Home, or Apple HomeKit) 🌐
Every smart device needs a “brain” — a platform that connects and controls them all.
This could be Amazon Alexa, Google Home, or Apple HomeKit, depending on your preference and device compatibility.
Which Ecosystem Should You Choose?
| Ecosystem | Best For | Compatible Devices | Voice Assistant |
| Amazon Alexa | Budget-friendly, widest device range | 100,000+ | Alexa |
| Google Home | Android users, Google service fans | 80,000+ | Google Assistant |
| Apple HomeKit | Privacy-focused, Apple users | 50,000+ | Siri |
💥 Expert Tip: If you’re mixing devices from different brands, choose products that support Matter — a new industry standard that ensures cross-platform compatibility.
👉 See which devices work best with your chosen ecosystem
3️⃣ Ensure Strong Wi-Fi Coverage 📶🏡
Your entire DIY smart home setup depends on reliable Wi-Fi.
Weak connections cause delays, disconnections, and frustrating errors.
How to Improve Smart Home Connectivity
- Use a dual-band router (2.4GHz + 5GHz) for flexibility.
- Place your router in a central location for maximum coverage.
- Consider a Wi-Fi mesh system (like TP-Link Deco or Google Nest Wi-Fi) if you have a large home.
- Label your smart devices clearly on your network (helps manage and troubleshoot later).
💡 Pro Tip: Keep at least 10–20 Mbps available for each smart camera or hub for smooth video streaming and real-time responses.
👉 Upgrade your home Wi-Fi setup for smart devices here
4️⃣ Secure Your Smart Home Network 🔒🧠
While affordable smart gadgets make life convenient, they also connect to your home network — which means security matters.
Smart Home Security Tips
- Change the default password of every device immediately after setup.
- Use two-factor authentication (2FA) whenever available.
- Update device firmware regularly to fix vulnerabilities.
- Create a separate Wi-Fi network (Guest Network) for all smart devices.
- Avoid connecting unknown or unbranded gadgets to your main network.
💡 Bonus Tip: Consider using a VPN-enabled router for enhanced privacy protection and encrypted data transfer.
👉 Learn how to secure your smart home network here
5️⃣ Label and Organize Your Devices 🏷️📋
As your smart home ecosystem grows, it’s easy to lose track of devices — especially if you have multiple lights or plugs in the same room.
To stay organized, always label your devices clearly both in your app and physically (if possible).
Best Practices for Organizing Devices
- Use simple names like “Bedroom Lamp” or “Front Door Camera.”
- Group devices by room or category (Lighting, Security, Appliances).
- Assign consistent icons and categories in your control app.
- For families, share device access so everyone can control common gadgets.
💡 Pro Tip: Use voice commands naturally — e.g., “Hey Google, turn off the living room lights” instead of “Turn off bulb #3.”
👉 Get smart home labeling templates here
6️⃣ Use Automations and Routines to Simplify Daily Life ⏰🤖
Once you’ve got your devices connected, it’s time to automate your lifestyle.
Smart automations save time, energy, and even money — and they make your home feel futuristic.
Easy Automation Ideas for Beginners
- Good Morning Routine: Turn on lights, start the coffee maker, and play news automatically.
- Good Night Routine: Turn off lights, lock doors, and lower thermostat before bed.
- Away Mode: Simulate occupancy with random lighting when you’re not home.
- Weather-Based Routine: Close blinds and reduce temperature when it gets too hot outside.
💡 Power Tip: Use motion sensors for automatic triggers — like turning on hallway lights when movement is detected at night.
👉 Discover beginner smart home automation ideas here
7️⃣ Keep It Budget-Friendly — Affordable Smart Gadgets That Deliver Value 💰✨
The beauty of a DIY smart home setup is that it doesn’t need to cost thousands.
With smart planning, you can build a highly functional system using affordable smart gadgets that perform just as well as premium ones.
Budget-Friendly Smart Device Recommendations
- Smart Bulbs: Wyze, TP-Link Kasa, Sengled.
- Smart Plugs: Amazon Smart Plug, Meross, Gosund.
- Smart Cameras: Blink Mini, Eufy, TP-Link Tapo.
- Smart Speakers: Echo Dot, Nest Mini.
- Smart Sensors: Aqara, Sonoff, SwitchBot.
💡 Pro Tip: Buy in bundles or during online sales to save up to 30–50%.
👉 Shop top-rated affordable smart home gadgets here
8️⃣ Troubleshooting Common Beginner Mistakes 🧩⚙️
Don’t worry — everyone hits a few snags when starting out.
Here’s how to handle the most common smart home challenges like a pro.
Common Issues and Quick Fixes
| Problem | Cause | Fix |
| Device not connecting | Wrong Wi-Fi band | Use 2.4GHz instead of 5GHz |
| Voice commands not working | Device not named clearly | Rename with simple words |
| Device keeps disconnecting | Weak signal | Move closer to router or use Wi-Fi extender |
| App not syncing | Outdated firmware | Update your device/app |
| Automation fails | Missing trigger | Recheck conditions or routines |
💥 Expert Tip: Keep your setup simple and test one automation at a time before expanding.
👉 See a full smart home troubleshooting guide here
9️⃣ Keep Expanding — Build Your Smart Ecosystem Gradually 🌍🚀
Once your basic system is running smoothly, you can expand to advanced devices like smart thermostats, security systems, or voice-controlled blinds.
Each addition enhances your home’s intelligence — and convenience.
What to Add Next
- Smart locks for better security.
- Smart thermostats for energy efficiency.
- Smart vacuum cleaners for hands-free cleaning.
- Smart curtains or blinds for automated comfort.
- Smart irrigation systems for garden automation.
💡 Pro Tip: Always check compatibility with your current hub or ecosystem before purchasing new devices.
👉 Explore advanced smart home devices here
🔚 Building a Smart Home You’ll Love ❤️🏡
Starting your own DIY smart home setup might seem complicated at first, but with patience and the right tools, it’s surprisingly easy and rewarding.
By following these smart home tips for beginners, you’ll create a connected home that enhances comfort, convenience, and security — without breaking the bank.
Remember, the smartest homes are built step by step.
So, start small.
Experiment.
Automate.
And most importantly — enjoy watching your home respond intelligently to your daily life.
👉 Start your smart home journey today with affordable smart gadgets that make life easier and smarter!
Step-by-Step Guide to Setting Up Your DIY Smart Home (Beginner Friendly) 🧠🔧
So, you’ve bought your first few affordable smart gadgets, and you’re ready to bring your home into the future.
But where do you start?
Don’t worry — setting up a DIY smart home setup is easier than you think.
With the right approach, you can have your lights, plugs, and cameras up and running in under an hour — even if you’re not tech-savvy.
This step-by-step guide will walk you through everything you need to know to build your smart home from scratch — no electrician or expert required.
🏠 Step 1: Choose Your Smart Home Ecosystem
Before you start connecting devices, it’s important to pick your smart home “ecosystem.”
This determines how your devices communicate and which apps or voice assistants they’ll use.
The three most popular ecosystems today are:
- Amazon Alexa – Great for budget setups and wide compatibility.
- Google Home / Google Assistant – Excellent for Android users and Google service integration.
- Apple HomeKit – Best for iPhone users who prefer privacy and seamless iOS connectivity.
💡 Pro Tip:
If you’re just starting your DIY smart home setup, go with either Amazon Alexa or Google Home — they support the largest range of devices and are beginner-friendly.
Once you pick an ecosystem, all your future devices should ideally be compatible with it for smoother integration.
📶 Step 2: Set Up a Strong Wi-Fi Network
Your smart home depends heavily on Wi-Fi.
A weak or unstable connection can cause devices to disconnect or lag.
To ensure your setup runs smoothly:
- Use a dual-band router (2.4GHz + 5GHz).
- Place your router in a central location for better coverage.
- Avoid overcrowding your network — too many devices can slow things down.
- If your home is large, consider adding Wi-Fi extenders or a mesh Wi-Fi system.
💬 Most smart gadgets work on 2.4GHz networks because it offers better range, even though it’s slower than 5GHz.
✅ Pro Tip: Name your 2.4GHz and 5GHz networks differently so your devices connect to the correct one during setup.
🔌 Step 3: Start Small — Install One Device at a Time
It’s tempting to unbox everything and start connecting all at once — but don’t.
Start with one smart gadget first to understand the process.
For example, begin with:
- A smart plug (to automate appliances).
- Or a smart bulb (to control lighting via phone or voice).
Installation Steps (for most smart devices):
- Plug in or install the device.
- Download its companion app (e.g., Kasa Smart, Wyze, Meross, etc.).
- Follow the app instructions to connect it to your Wi-Fi.
- Rename your device (e.g., “Bedroom Lamp” or “Living Room Light”).
Once connected, test it by turning it on/off through the app.
If it works — congratulations 🎉 You’ve officially started your smart home journey!
🗣️ Step 4: Connect to a Voice Assistant
Now comes the fun part — connecting your best smart home devices to your voice assistant.
This step allows you to control everything hands-free using Alexa, Google Assistant, or Siri.
Here’s how to do it:
For Amazon Alexa
- Open the Alexa app.
- Tap Devices > + > Add Device.
- Choose your device brand and follow the on-screen prompts.
- Once added, try commands like:
- “Alexa, turn on the living room lights.”
- “Alexa, switch off my bedroom fan.”
- “Alexa, turn on the living room lights.”
For Google Home
- Open the Google Home app.
- Tap + > Set up device > Works with Google.
- Select your device brand and log in to link accounts.
- Use voice commands such as:
- “Hey Google, dim the lights to 50%.”
- “Hey Google, lock the front door.”
- “Hey Google, dim the lights to 50%.”
For Apple HomeKit
- Open the Apple Home app.
- Tap Add Accessory and scan the HomeKit QR code.
- Assign your device to a room.
- Use Siri commands like:
- “Hey Siri, good night.”
- “Hey Siri, play music in the living room.”
- “Hey Siri, good night.”
💡 Pro Tip: Group devices into “Rooms” (e.g., Bedroom, Kitchen, Living Room) for easier control and automation.
🧠 Step 5: Create Smart Routines and Automations
Once your devices are connected, it’s time to make them work together.
Automations are the secret ingredient that turns your DIY smart home setup into a true smart ecosystem.
Here are some routine ideas to try:
- 🌅 Morning Routine:
“When I say ‘Good morning,’ turn on lights, start coffee, and play news.” - 🌙 Good Night Routine:
“When I say ‘Good night,’ turn off all lights, lock doors, and lower thermostat.” - 🚪 Arrival Routine:
“When my phone connects to home Wi-Fi, turn on hallway light and AC.” - 🕔 Energy-Saving Routine:
“Turn off appliances when no motion is detected for 10 minutes.”
These small automations save time, reduce electricity bills, and make daily living incredibly smooth.
💬 Most devices support automation through their apps or directly in Alexa, Google Home, or Apple Home.
🔒 Step 6: Secure Your Smart Home Network
Smart homes rely on data, so security is crucial.
Protect your setup from unwanted access by following these essential tips:
- Change all default passwords immediately.
- Use two-factor authentication (2FA) where possible.
- Regularly update device firmware.
- Avoid using public Wi-Fi to control devices remotely.
- Use a strong router password and enable WPA3 encryption if available.
🔐 Security should always be part of your smart home checklist.
⚙️ Step 7: Expand Your Smart Home Gradually
Once your first few gadgets are running smoothly, it’s time to expand.
You can add:
- Smart cameras for surveillance.
- Smart door locks for security.
- Smart thermostats for comfort.
- Motion sensors for automation.
Add devices slowly and test each one before connecting the next.
That way, you’ll build a reliable system that grows with your needs.
💡 Always check for compatibility with your existing voice assistant or app before buying new devices.
🧩 Step 8: Optimize for Efficiency and Energy Savings
The beauty of a DIY smart home setup is automation that works for you — not against you.
Use your system to reduce waste, save energy, and improve convenience.
Examples:
- Use smart thermostats to maintain temperature only when you’re home.
- Automate lights to turn off when no motion is detected.
- Schedule plugs to power off non-essential devices overnight.
🌱 Small changes can lead to major savings — both in energy and cost.
✅ Your Smart Home Journey Begins Now
Creating your DIY smart home setup is a journey, not a sprint.
Start simple, master the basics, and grow your system one gadget at a time.
You’ll be amazed at how much comfort, control, and convenience these affordable smart gadgets bring into your daily life.
So don’t wait for tomorrow — start building your smart home today.
👉 Explore the best smart home devices here and take the first step toward a connected, futuristic home you control from your fingertips!
Common Mistakes to Avoid When Building a DIY Smart Home Setup 🚫
Even though setting up a DIY smart home is easier than ever, many beginners still make simple mistakes that lead to frustration — like devices not connecting, apps not syncing, or automations failing.
To save you time and stress, here are the most common smart home setup mistakes (and how to fix them fast).
Avoiding these will make your smart home smoother, faster, and more reliable.
❌ Mistake #1 — Mixing Incompatible Devices
One of the biggest problems beginners face is buying smart gadgets that don’t work together.
Each brand may use its own app, platform, or voice assistant compatibility.
For example:
- Some devices only work with Google Home, but not Alexa.
- Others require a hub (like Philips Hue or SmartThings) to function properly.
💡 Solution:
Before buying, always check compatibility labels on the box or product listing.
Look for tags such as:
- “Works with Alexa”
- “Works with Google Assistant”
- “Works with Apple HomeKit”
If you’re on a tight budget, stick to one ecosystem (like Alexa or Google Home) to ensure seamless integration and fewer app logins.
📶 Mistake #2 — Weak or Unstable Wi-Fi Connection
Your entire smart home setup relies on Wi-Fi.
If your internet connection drops or your router’s signal is weak, you’ll constantly see “device offline” errors.
Common causes include:
- Router placed too far from devices.
- Too many gadgets connected at once.
- Using outdated routers that can’t handle smart traffic.
💡 Solution:
- Place your router in a central, open space.
- Use a mesh Wi-Fi system if your home is large.
- Ensure all smart gadgets connect to the 2.4GHz band, which provides better range.
👉 Bonus Tip: Give your devices short, simple names like “Kitchen Light” or “Bedroom Fan” to make them easier to control via voice commands.
🔌 Mistake #3 — Skipping Device Firmware Updates
Many people install their gadgets and never update them again — which is risky.
Outdated firmware can cause bugs, lag, or even security vulnerabilities.
💡 Solution:
- Check for updates in the device’s mobile app every few weeks.
- Enable automatic updates if available.
- Regular updates keep your devices stable, faster, and more secure.
🔑 Mistake #4 — Ignoring Smart Home Security
While smart devices add convenience, they also connect to the internet — meaning they can be hacked if not protected properly.
💡 Solution:
- Change default passwords immediately after setup.
- Use two-factor authentication (2FA) in your device apps.
- Create a separate Wi-Fi network just for smart devices.
- Avoid connecting devices to public Wi-Fi.
🔐 Remember: Security should be your top priority. A smart home should make life easier, not riskier.
⚙️ Mistake #5 — Setting Up Too Many Devices Too Quickly
It’s exciting to buy multiple gadgets — lights, plugs, cameras, and sensors — but setting them all up at once can get messy.
You might mix up device names or forget which app controls what.
💡 Solution:
Start with one or two devices, learn how they work, and then expand.
Once you’re confident, add more smart gadgets gradually.
Label your devices clearly and group them by room (e.g., Living Room, Kitchen, Bedroom).
🧠 Mistake #6 — Forgetting to Automate
Many users stop after connecting devices manually, missing the real magic of a smart home — automation.
Without automations, your smart gadgets behave like regular devices that just happen to be Wi-Fi enabled.
💡 Solution:
Set up routines and triggers such as:
- Turning lights on when you enter a room.
- Turning off plugs when you leave the house.
- Scheduling morning and bedtime scenes.
Automation makes your home truly smart and helps save time, money, and energy.
⚡ Mistake #7 — Not Measuring Power Outlets or Switch Sizes
Some smart plugs, switches, and adapters are bulkier than standard ones.
They might block other outlets or not fit your wall sockets properly — a common frustration for DIYers.
💡 Solution:
- Always measure your outlets before buying new gadgets.
- Check product dimensions online.
- Choose slim or mini smart plugs for tighter spaces.
🌐 Mistake #8 — Not Naming or Organizing Devices Properly
If all your devices are named “Light 1” or “Plug 2,” you’ll quickly get confused when controlling them by voice or app.
💡 Solution:
Use clear, descriptive names:
- “Living Room Lamp” instead of “Light 3.”
- “Coffee Maker Plug” instead of “Smart Plug 2.”
Also, group devices logically in your smart home app — by room or purpose — for cleaner control and automation.
🔋 Mistake #9 — Forgetting About Battery Maintenance
Some smart gadgets (like sensors or doorbells) run on batteries.
If you forget to replace or recharge them, they’ll stop working — disrupting automations or alerts.
💡 Solution:
- Schedule monthly reminders to check battery levels.
- Keep spare batteries nearby.
- Use rechargeable options where possible to save cost in the long run.
⚖️ Mistake #10 — Overcomplicating Your Setup
Many people try to install too many apps, integrations, and automations too soon — which can lead to confusion or slow performance.
💡 Solution:
Keep your setup simple and efficient.
Focus on practicality — not showing off.
Start small, make sure everything works smoothly, and expand only when needed.
✅ Key Takeaway: Keep It Simple, Secure, and Scalable
The best DIY smart home setup isn’t the one with the most gadgets — it’s the one that works reliably and makes your daily routine effortless.
By avoiding these mistakes, you’ll:
✔ Save hours of troubleshooting.
✔ Protect your privacy and data.
✔ Build a future-proof system that grows with your lifestyle.
✨ Remember: Start small, stay organized, and automate smartly — your perfect connected home will follow naturally.
🏠 Final Thoughts — Build a Smart Home That Fits Your Budget
Creating a DIY smart home setup doesn’t have to be complicated or expensive.
In fact, the beauty of today’s technology is that anyone — even on a tight budget — can transform their home into a connected, intelligent space with just a few affordable smart gadgets.
What once required a professional installer and costly systems can now be done entirely by yourself, often within an hour, using only your smartphone and Wi-Fi connection.
Whether you want smart lights that respond to your voice, a thermostat that saves energy automatically, or security cameras that protect your home 24/7 — there’s a budget-friendly solution for everyone.

🌟 Why Start Small — and Why It’s the Smart Way
The biggest mistake many homeowners make is thinking they must buy everything at once.
But in truth, the smartest strategy is to start small, master the setup, and then expand over time.
For example:
- Begin with a few smart plugs and lights.
- Add a smart speaker or display when you’re ready for voice control.
- Gradually integrate cameras, sensors, or thermostats as your confidence (and budget) grows.
This step-by-step approach ensures your smart home remains simple, stable, and scalable.
👉 Pro Tip: Always choose devices that work with your preferred ecosystem (like Alexa, Google Home, or Apple HomeKit).
This ensures seamless automation later when you expand your system.
💡 Making Every Dollar Count
You don’t need the most expensive tech to enjoy a truly smart lifestyle.
In fact, many of the best smart home devices today are highly affordable, energy-efficient, and packed with premium features.
For example:
- A smart plug can automate your coffee maker or fan for under $15.
- A Wi-Fi smart bulb can give your room mood lighting and voice control for just $10–$20.
- A budget smart camera like Wyze or Eufy can monitor your home without subscription costs.
By focusing on affordable smart gadgets, you’ll enjoy the same convenience and functionality that premium systems offer — at a fraction of the price.
✨ Remember: Smart living isn’t about spending more; it’s about making your home more efficient, secure, and comfortable.
🔄 Keep Your System Future-Ready
Technology evolves fast, and new smart home devices are released almost every month.
That’s why it’s important to build your setup with flexibility in mind.
💡 Choose products that:
- Support major voice assistants.
- Receive regular firmware updates.
- Offer backward compatibility with older devices.
Doing this ensures your investment lasts longer — and your DIY smart home setup stays up to date without needing costly upgrades.
🔐 Don’t Forget Security and Privacy
As you add more connected devices, security should remain a top priority.
Using strong passwords, enabling two-factor authentication, and keeping your apps updated will go a long way in protecting your network.
You’re not just building a smart home — you’re building a safe home.
A truly smart home is both convenient and secure.
🧠 The Smart Home Mindset — Simplicity Meets Comfort
Building a DIY smart home isn’t about chasing trends.
It’s about enhancing your lifestyle — saving energy, simplifying routines, and creating a space that works for you.
Imagine this:
You walk into your home after a long day, and your lights turn on automatically.
Your favorite playlist starts playing softly.
The temperature adjusts to your liking.
That’s the power of smart living — and it’s completely achievable with affordable smart gadgets you can install yourself.
🚀 Ready to Begin Your Smart Home Journey?
If you’ve been waiting for the right time to start — it’s now.
The tools, apps, and devices are more user-friendly and affordable than ever before.
✅ No need for technical expertise.
✅ No expensive installations.
✅ No confusing systems.
All you need is a smartphone, Wi-Fi, and a few reliable devices to get started.
🔥 Start building your DIY smart home setup today and take the first step toward a smarter, more efficient, and enjoyable lifestyle.
Remember — the smartest homes aren’t the ones with the most gadgets.
They’re the ones that make your life easier, safer, and happier — all while staying within your budget.
Your DIY smart home setup is a reflection of how you want to live — efficient, comfortable, and in control.
By investing in affordable smart gadgets and the best smart home devices that fit your needs, you’re not just upgrading your house — you’re upgrading your lifestyle.
So go ahead — start small, dream big, and create the connected home you deserve
👉 Click here to discover the best affordable smart home devices for your setup
and transform your home into a smarter, more convenient space — one device at a time.
You might also like :