
Introduction – Why Your Wi-Fi Feels Slower Than It Should (And How to Fix It Without Buying a New Router)
Slow Wi-Fi is one of the most frustrating problems in any modern home.
You wake up ready to stream a movie, start your online work, run a few smart devices, or scroll through social media, and suddenly everything takes forever to load.

Pages freeze.
Videos buffer.
Your phone keeps disconnecting.
And the worst part?
You feel like you’re paying for high-speed internet but not getting the performance you deserve.
If you’ve been wondering how to boost Wi-Fi speed, fix slow Wi-Fi, and improve home internet performance without immediately spending money on a new router, you’re in the right place.
In today’s hyper-connected world, nearly every device relies on wireless internet—smartphones, smart TVs, laptops, tablets, gaming consoles, doorbell cameras, and even smart light bulbs.
This means even a tiny interference or outdated setting can dramatically slow down your network.
Most people assume they need a brand-new router to solve the issue, but that’s not always true.
In fact, over 70% of slow Wi-Fi problems can be fixed using simple, no-cost adjustments that take only a few minutes.
You don’t need advanced technical skills.
You don’t need to open your router.
And you definitely don’t need to waste money on upgrades unless they’re truly necessary.
Wi-Fi slows down for many surprising reasons.
Your neighbors’ routers might be competing with yours.
Thick walls may be blocking your signal.
Your router may be stuck on a congested channel.
Your bandwidth may be overloaded with unnoticed devices.
You might even be using the wrong Wi-Fi band without realizing it.
The good news?
Every one of these issues has a simple, practical solution.
And you’ll discover all of them in this powerful guide.
This article is written to help you:
- Understand what’s slowing down your internet.
- Apply proven techniques to dramatically boost Wi-Fi performance.
- Optimize your network settings for maximum speed.
- Improve internet stability for gaming, streaming, and remote work.
- Fix slow Wi-Fi using easy, beginner-friendly methods.
- Avoid common mistakes that reduce your Wi-Fi signal strength.
- Choose when (and if) you truly need an upgrade.
You’ll also find real-world examples, step-by-step tips, expert insights, and friendly explanations to help you make smart decisions and get the fastest possible connection at home.
Whether you live in an apartment, a large house, or a room full of devices, this guide will empower you with practical knowledge you can use immediately.
Before you spend money on boosters, extenders, or a brand-new router, try these simple and high-impact methods first.
Many readers have achieved better speed, better range, and a more stable connection in less than 10 minutes—without spending a single cent.
If you’re ready to take control of your home network, eliminate annoying lag, and unlock the full potential of your internet plan, keep reading.
This guide will show you the exact steps you need to take to transform your connection from sluggish to lightning-fast.
🔥 PRO TIP:
If you ever decide to upgrade your setup later, I’ll include recommendations for the best value-for-money devices so you can avoid overpriced products.
I’ll also show you where to find trusted options like recommended Wi-Fi extenders or high-performance routers that are guaranteed to deliver consistent results.
⚡ Ready to boost your Wi-Fi speed?
Let’s begin.
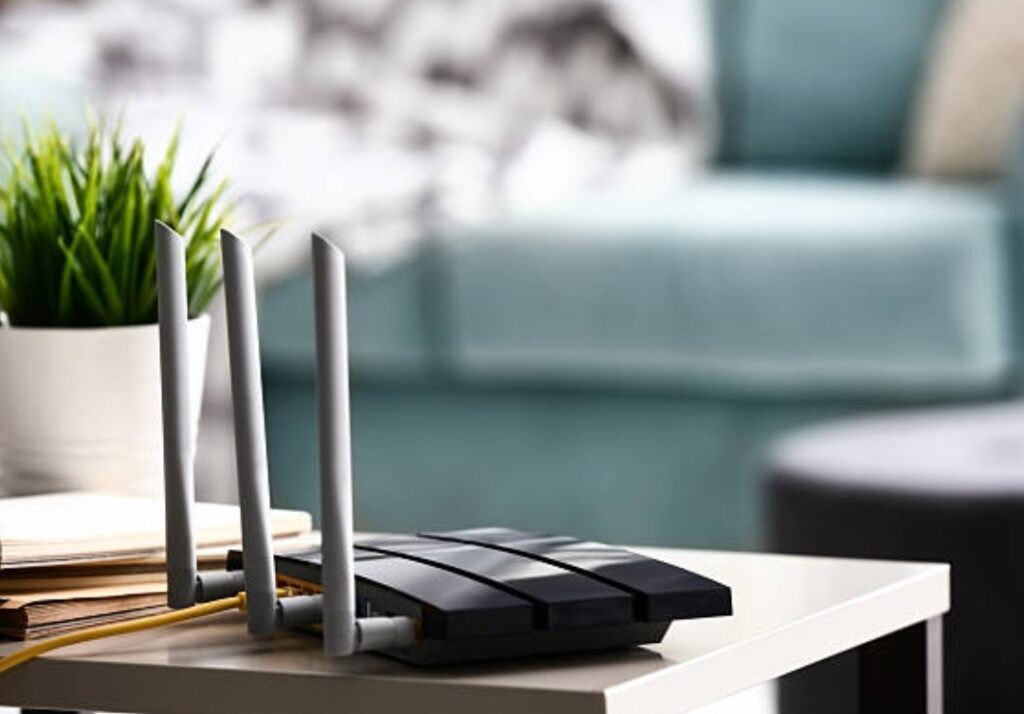
1. Reposition Your Router for Maximum Signal Strength
When it comes to ways you can boost Wi-Fi speed instantly without spending any money, the simplest and most powerful change you can make is repositioning your router.
You may not realize it, but your router behaves almost like a tiny radio station.
The signal it sends out spreads through your home in invisible waves.
And depending on where your router sits, those waves can either travel smoothly and cover your entire home—or crash into walls, furniture, and interference sources that dramatically weaken your internet connection.
If your goal is to fix slow Wi-Fi and improve home internet performance without buying new equipment, start with this step first.
Most people overlook this, yet router position alone can influence up to 50% of your actual Wi-Fi speed, especially in multi-floor homes or apartments filled with thick concrete walls.

Why Router Placement Matters More Than You Think
Your Wi-Fi router broadcasts signals in a circular or spherical pattern, not just in a straight line.
This means the location you place it dramatically affects how far the signal travels and how strong it remains when it reaches your devices.
A poorly positioned router can create “dead zones,” unstable signal areas, buffering issues, and constant disconnections.
Here’s what happens when your router is placed incorrectly:
- ⚠️ Signal gets absorbed by walls and ceilings.
- ⚠️ Metal appliances block transmission.
- ⚠️ Furniture reduces coverage radius.
- ⚠️ Electronic devices cause interference.
- ⚠️ Wi-Fi becomes weaker in rooms far from the router.
You might be surprised, but even something as simple as placing your router under a table or behind your TV can reduce your Wi-Fi performance by 30–60%.
The Best Places to Put Your Router for Stronger Wi-Fi
To maximize signal strength, you want your router to be in a location where the signal can spread out evenly and widely.
Use these proven placement tips:
✓ Place Your Router in the Center of Your Home
Wi-Fi signals spread outward like ripples.
If your router is stuck in a corner, one entire side of the signal is wasted.
Placing it in the center ensures equal coverage throughout your home.
✓ Elevate Your Router for Better Coverage
Always place your router above floor level.
Higher placement reduces interference and gives your signal a clearer path.
Bookshelves, wall mounts, or a high desk work perfectly.
✓ Keep It Away From Walls and Large Obstacles
Thick concrete walls, cabinets, and large blocks of furniture absorb Wi-Fi waves.
Try to maintain at least 1–2 feet of clearance around your router.
✓ Avoid Mirrors and Metal Surfaces
Metal drastically reflects and weakens Wi-Fi signals.
Avoid microwaves, refrigerators, metal tables, and big speakers.
✓ Keep It Away From Electronics
Bluetooth speakers, cordless phones, baby monitors, and microwave ovens emit signals that interfere with Wi-Fi.
Maintain distance when possible.
The Worst Places to Put Your Router (Avoid These at All Costs)
To fix slow Wi-Fi, never place your router in these high-interference zones:
- ❌ Kitchen (microwaves cause heavy signal interference)
- ❌ Hidden inside cabinets
- ❌ Behind the TV
- ❌ On the floor
- ❌ Inside closed rooms
- ❌ Basements
Your signal becomes trapped, absorbed, and weakened in these locations.
How to Test if You’ve Positioned Your Router Correctly
Here’s a quick and simple method to check signal strength:
➤ Step 1: Install a Wi-Fi Analyzer App
Apps like WiFi Analyzer (Android), AirPort Utility (Apple), or NetSpot (Mac/Windows) help you visualize signal strength room by room.
➤ Step 2: Walk Around Your Home
Check each room’s Wi-Fi strength.
Look for weak areas, slow speed regions, or unstable signals.
➤ Step 3: Adjust the Router
Move your router slightly and test again.
Even a 10 cm shift can increase signal performance.
Bonus Tip – Position Router Antennas Correctly
If your router has antennas, don’t ignore them.
They play a big role in signal direction.
Use this optimal orientation:
- One antenna vertical
- One antenna horizontal
This provides better coverage for both high-level and low-level devices like phones and laptops.
💡 Try this first before buying anything.
Many users report that simply repositioning their router gives them speeds that feel twice as fast—especially in bedrooms, living rooms, and offices.
If you eventually need additional range or improved coverage, consider upgrading to a high-performance router or a long-range mesh Wi-Fi system after testing your new setup.
⚡ Move your router now to instantly improve your Wi-Fi speed and experience smoother browsing, streaming, and gaming.
2. Change Your Wi-Fi Channel to Reduce Interference
One of the most powerful yet highly overlooked methods to boost Wi-Fi speed, fix slow Wi-Fi, and improve home internet performance is simply changing your Wi-Fi channel.
Most people don’t realize this, but your router broadcasts wireless signals over specific channels—similar to radio stations.
And when too many nearby routers are using the same channel, the signal becomes congested, overlapping, and unstable.
This leads to slower speeds, dropped connections, and weak signals in certain parts of your home.
Changing your Wi-Fi channel is completely free, takes only a few minutes, and can dramatically improve your Wi-Fi stability—especially if you live in an apartment, condo, or neighborhood where many routers operate in close proximity.
If you’ve been experiencing sudden speed drops, lag during gaming, buffering when streaming, or random disconnections, channel interference is likely one of the main causes.

What Wi-Fi Channel Interference Really Means
Wi-Fi channels are like invisible traffic lanes.
When too many routers near you are using the same lane, the traffic becomes jammed and your connection slows down significantly.
This issue is extremely common in urban areas, where dozens of routers may be fighting for the same few channels.
Here’s what happens when your channel is overcrowded:
- ⚠️ Your Wi-Fi signal becomes inconsistent.
- ⚠️ Devices take longer to connect.
- ⚠️ Speeds drop during peak hours (evenings).
- ⚠️ You experience more latency or lag spikes.
- ⚠️ Streaming video quality becomes unstable.
This is why changing your Wi-Fi channel can instantly improve your entire internet experience.
Understanding Wi-Fi Bands and Channels (2.4GHz vs 5GHz)
Before changing your Wi-Fi channel, it helps to understand the two main frequency bands your router probably uses:
✓ 2.4GHz Band — Crowded but Better for Longer Range
The 2.4GHz band only has 11 channels, and most houses use it by default.
Unfortunately, this band is also used by devices like Bluetooth speakers, microwaves, baby monitors, and cordless phones.
This makes the 2.4GHz band extremely prone to congestion and interference.
Best channels for 2.4GHz:
- 1
- 6
- 11
These channels do not overlap with one another, which makes them ideal for stability and speed.
✓ 5GHz Band — Faster and Less Crowded
The 5GHz band has many more channels and offers higher speeds with less interference.
If most of your devices support 5GHz, switching channels here can give you a massive performance boost.
Best channels for 5GHz depend on your location, but commonly recommended include:
- 36
- 40
- 44
- 48
These channels often experience less congestion and deliver smoother performance.
How to Check Which Wi-Fi Channel Is Crowded
Before switching, it’s smart to check which channels are overloaded.
This ensures you move to a cleaner, faster lane.
Use a Wi-Fi Analyzer tool:
- Android: WiFi Analyzer
- iPhone/iPad: AirPort Utility (enable Wi-Fi Scan)
- Windows: NetSpot
- Mac: Wireless Diagnostics (built-in)
These tools show:
- Nearby routers
- Their channels
- Signal strengths
- Which channels are overcrowded
- Which channel is best for your network
Look for a channel with the least number of overlapping signals.
That will be your best choice.
Step-by-Step Guide to Change Your Wi-Fi Channel
Changing your router’s Wi-Fi channel is simple and takes just a few minutes.
Here’s how to do it:
➤ Step 1: Log in to Your Router’s Admin Panel
- Connect your device to your Wi-Fi network.
- Open your browser and enter your router IP address:
- Common IPs: 192.168.0.1, 192.168.1.1, 192.168.100.1
- Common IPs: 192.168.0.1, 192.168.1.1, 192.168.100.1
- Enter your router’s login username and password.
- If you haven’t changed them, they might be on a sticker under your router.
- If you haven’t changed them, they might be on a sticker under your router.
➤ Step 2: Go to Wireless Settings
Look for one of the following labels:
- Wireless Settings
- Advanced Wireless
- Wi-Fi Settings
- Network Settings
➤ Step 3: Select Your Wi-Fi Band (2.4GHz or 5GHz)
Most routers list both bands separately.
You can set each one to a different channel for better optimization.
➤ Step 4: Change the Wi-Fi Channel
Select a channel recommended from your Wi-Fi scan.
Avoid Auto mode if your area is heavily congested.
Manually selecting a clean channel usually gives better performance.
➤ Step 5: Save the Settings and Restart Your Router
Restarting ensures the new channel activates properly across all devices.
After rebooting, your Wi-Fi should feel noticeably faster and more stable.
What to Expect After Changing Your Channel
Once you switch to a less crowded channel, you should experience:
- ✔ Faster browsing
- ✔ Reduced buffering
- ✔ More stable streaming
- ✔ Smoother online gaming
- ✔ Fewer disconnections
- ✔ Lower latency
- ✔ Better coverage in trouble areas
Many users experience an immediate speed increase, especially during busy hours when nearby routers compete for bandwidth.
Pro Tips to Maximize Your Wi-Fi Performance
Try these additional optimizations:
- ✓ Use 5GHz for high-speed devices like TVs and gaming consoles.
- ✓ Keep 2.4GHz for older devices or far-distance rooms.
- ✓ Combine channel change with good router placement for best results.
- ✓ Re-scan channels weekly if you live in a high-density area.
These small adjustments can significantly strengthen your network’s overall stability.
🔥 Want your Wi-Fi to feel instantly faster and more stable?
Switching your Wi-Fi channel is one of the quickest ways to unlock hidden speed in your network.
If your current channel is overcrowded, adjusting it can make your Wi-Fi perform like a premium high-speed plan—even without upgrading your router.
If you ever decide to upgrade later, tools like high-performance Wi-Fi mesh systems or advanced gaming routers can take your home internet to the next level.
3. Switch to 5GHz (or 6GHz if Available) for Faster Speeds
If you’re serious about wanting to boost Wi-Fi speed, fix slow Wi-Fi, and improve home internet performance, switching your devices from the older 2.4GHz band to the faster 5GHz—or the newest 6GHz band—is one of the easiest and most effective upgrades you can make.
This single adjustment can instantly deliver higher speeds, lower latency, stronger stability, and a much more reliable Wi-Fi experience, especially when you’re streaming movies, gaming online, or working remotely.
Most modern routers already support dual-band (2.4GHz + 5GHz), and many of the newest models now support tri-band Wi-Fi 6E (2.4GHz + 5GHz + 6GHz).
But here’s the problem—many people never bother switching bands, often because they don’t know the difference or their devices automatically connect to the slower band without asking.
This means you might already have access to ultra-fast wireless performance, but your devices are still stuck using the older, more congested 2.4GHz signal.

Understanding the Difference Between 2.4GHz, 5GHz, and the New 6GHz
Before switching bands, it’s important to understand what each frequency does and why it matters.
✓ 2.4GHz – Longer Range, But Slower and More Crowded
The 2.4GHz band is like an old highway that everyone uses.
It has better range and can travel through walls more easily, but it also suffers from heavy interference because almost every device uses it.
This includes:
- Bluetooth devices
- Baby monitors
- Microwaves
- Smart home devices
- Cordless phones
This makes 2.4GHz slow during peak hours and more unstable for high-speed tasks.
✓ 5GHz – Faster, Smoother, Better for High-Speed Activities
The 5GHz band offers:
- ⚡ Significantly faster speeds
- ⚡ Less traffic congestion
- ⚡ Improved stability
- ⚡ Lower latency
- ⚡ Better streaming and gaming performance
However, it has a shorter range than 2.4GHz, and it struggles a bit with thick concrete walls.
But if your devices are close enough to the router—or you’re in the same room—5GHz is the ideal choice.
✓ 6GHz (Wi-Fi 6E) – The New Ultra-Fast Lane
If your router supports Wi-Fi 6E, you gain access to the 6GHz band, which is the newest and most powerful frequency.
6GHz offers:
- 🚀 Blazing-fast speeds
- 🚀 Near-zero congestion
- 🚀 Ultra-low latency
- 🚀 Perfect for 4K/8K streaming, VR, and cloud gaming
The only downside is shorter range and the requirement for devices that support Wi-Fi 6E.
But if you have compatible hardware, switching to 6GHz can be a complete game changer.
How Switching to 5GHz or 6GHz Can Immediately Improve Your Internet
When you connect to a faster frequency band, you’ll experience:
- ✓ Higher download and upload speeds
- ✓ More stable video calls
- ✓ Reduced buffering
- ✓ Faster web browsing
- ✓ Smoother gaming sessions
- ✓ Improved performance on multiple devices
- ✓ Less interference from neighbors
This adjustment alone can make your home internet feel dramatically more responsive, especially during heavy usage.
How to Switch Your Devices to 5GHz or 6GHz
Switching bands is simple and can be done in a few steps.
➤ Step 1: Check If Your Router Supports 5GHz or 6GHz
Look for labels on your router or check its manual for:
- Dual-band
- 5GHz
- Wi-Fi 5 (802.11ac)
- Wi-Fi 6 (802.11ax)
- Wi-Fi 6E
If you see any of these, your router supports the faster band(s).
➤ Step 2: Rename the Wi-Fi Bands (If Necessary)
Some routers combine both bands under one network name (SSID), causing your device to switch automatically—but not always correctly.
To take full control, rename them as:
- HomeWiFi_2.4GHz
- HomeWiFi_5GHz
- HomeWiFi_6GHz (if available)
This allows you to choose the best connection manually.
➤ Step 3: Connect Your Devices to the Faster Band
Go to your device’s Wi-Fi settings and select the 5GHz or 6GHz network.
Devices like:
- Smart TVs
- Laptops
- Gaming consoles
- PCs
- Media boxes
- Tablets
- New smartphones
will perform significantly better on 5GHz or 6GHz.
➤ Step 4: Leave Low-Power Devices on 2.4GHz
Keep devices like:
- Smart bulbs
- Doorbell cameras
- Sensors
- Smart plugs
on 2.4GHz because they need more range, not speed.
When Should You Use 5GHz Instead of 2.4GHz?
Use 5GHz if:
- ✔ Your device is within 5–10 meters of the router.
- ✔ You want faster speeds for streaming or gaming.
- ✔ You want less interference.
- ✔ You want the most stable connection.
Use 2.4GHz if:
- ✔ Your device is far from the router.
- ✔ You have many walls or floors between rooms.
- ✔ The device doesn’t require high bandwidth.
What About 6GHz? Should You Switch?
Switch to 6GHz only if:
- Your router supports Wi-Fi 6E.
- Your device supports Wi-Fi 6E.
- You’re in the same room or a near-distance location.
If you meet these conditions, 6GHz will deliver the fastest wireless speeds available today.
Pro Tips for Maximum Speed on 5GHz and 6GHz
Use these powerful tips to achieve the best performance possible:
- ✓ Keep your router elevated for clearer signal.
- ✓ Use the 5GHz channel range 36–48 for best stability.
- ✓ Disable “Band Steering” if it forces devices back to 2.4GHz.
- ✓ Ensure your router firmware is updated.
- ✓ Use a mesh Wi-Fi system if you need better 5GHz coverage.
These optimizations help unlock the full potential of modern Wi-Fi frequencies.
🔥 Don’t let your devices stay stuck on slow, outdated 2.4GHz.
Switching to the faster 5GHz or 6GHz band is one of the quickest ways to experience a massive improvement in your home Wi-Fi speed—and it doesn’t cost anything at all.
If you eventually want even better coverage, you can always upgrade to a Wi-Fi 6E router or an advanced mesh Wi-Fi system to take your home network to the next level.
4. Disconnect Unused Devices Eating Up Your Bandwidth
One of the fastest ways to boost Wi-Fi speed without spending money is to remove devices that are silently using your bandwidth.
Many gadgets stay connected in the background—even when you’re not actively using them—causing slow downloads, lagging videos, and buffering issues.

Why This Happens
- Smart home devices sync automatically.
- Phones and tablets update apps in the background.
- Old devices with weak Wi-Fi radios slow down the entire network.
- Guest devices may remain connected long after visitors leave.
When too many devices share the same network, your router divides bandwidth among all of them, which leads to noticeably slower Wi-Fi for your main activities.
How to Fix It
Use these steps to instantly free up bandwidth:
- Disconnect unused phones, tablets, laptops, and smart TVs that aren’t in use.
- Check for unknown devices in your router’s admin panel (common under “Connected Devices”).
- Log out guests by changing your Wi-Fi password or disabling the guest network.
- Turn off auto-updates on devices you rarely use.
- Power off old smart home gadgets that keep reconnecting and slowing down your network.
Pro Tip
If you live with multiple people, educate everyone to disconnect devices when not in use.
This alone can significantly improve home internet performance—especially during peak evening hours.
5. Update Your Router Firmware for Better Performance
Keeping your router’s firmware up to date is one of the easiest ways to boost Wi-Fi speed and fix hidden performance issues.
Most people never update their router, but manufacturers regularly release improvements that enhance speed, security, and overall stability.
Why Updating Helps
Firmware updates can:
- Fix bugs that cause slow Wi-Fi
- Improve connection stability
- Enhance compatibility with newer devices
- Patch security vulnerabilities
- Optimize bandwidth handling
An outdated router often performs worse over time, even if the hardware is still good.
How to Update Your Router Firmware
Updating your firmware usually takes less than 5 minutes:
- Log in to your router’s admin panel (usually 192.168.0.1 or 192.168.1.1).
- Enter your username and password.
- Look for a section called Firmware Update, System, or Advanced Settings.
- Click Check for Updates.
- If an update is available, select Install.
Some modern routers even support automatic updates, which you can enable so you never miss future improvements.
Pro Tip
Always update firmware during a time when no one needs the internet, because your Wi-Fi will briefly disconnect during installation.
6. Use a Wi-Fi Analyzer App to Find Weak Spots 📡
One of the smartest and most effective ways to boost Wi-Fi speed, fix slow Wi-Fi, and improve home internet performance is by using a Wi-Fi analyzer app to identify weak spots and hidden signal problems inside your home.
A Wi-Fi analyzer gives you a real-time map of how your wireless signal behaves across every corner of your space.
It reveals where your signal is strongest, where it drops, and which areas are suffering from interference.
This powerful information helps you position your router, adjust your settings, or plan for upgrades confidently without guessing.
Why a Wi-Fi Analyzer App Is a Game-Changer 🔍
A Wi-Fi analyzer app doesn’t only show signal bars.
It uncovers important details that most users overlook.
Here are some insights these apps provide:
- Signal strength and coverage in all rooms
- Wi-Fi dead zones or weak zones
- Interference from appliances, walls, and neighbor networks
- Which Wi-Fi channels around you are overcrowded
- Real-time speed and latency fluctuations
- Best possible router placement for maximum performance
With this knowledge, you can finally understand what’s slowing your network down instead of relying on trial and error.
Best Wi-Fi Analyzer Apps You Can Use Today (Easy & Free) 📱
You don’t need to be a tech expert to use these apps.
They’re designed for everyday homeowners and can instantly reveal what’s wrong with your connection.
Recommended apps you can download now:
- WiFi Analyzer (Android)
- AirPort Utility Wi-Fi Scanner (iOS)
- NetSpot (Windows/Mac)
- WiFi Explorer Lite (Mac)
- Ubiquiti WiFiman (iOS/Android)
These apps come with heat maps, signal charts, channel ratings, and live diagnostics that make troubleshooting extremely simple.
You can place them in areas where you usually experience slow speeds to pinpoint problems instantly.
How to Use a Wi-Fi Analyzer to Fix Weak Wi-Fi Spots 🏠
Here’s a simple step-by-step process anyone can follow:
- Install a Wi-Fi analyzer app on your smartphone or laptop.
- Walk around your home slowly while watching the signal levels.
- Take notes of areas where signal strength drops below –70 dBm.
- Identify interference from microwaves, Bluetooth devices, or thick concrete walls.
- Use the app’s recommended channel suggestions to switch to a faster, less-crowded Wi-Fi channel.
- Reposition your router to reduce signal obstructions.
- If weak spots remain, consider adding a Wi-Fi extender, mesh Wi-Fi system, or powerline adapter.
Just doing this alone can dramatically improve your internet performance within minutes.
Pro Tips for Getting the Most Accurate Readings 💡
Use these expert tips to avoid inaccurate results:
- Test at different times of the day.
- Walk slowly and consistently while scanning.
- Restart your router before testing for the most accurate data.
- Compare 2.4 GHz and 5 GHz performance since each behaves differently.
- Check for neighboring network congestion especially during peak hours.
With these insights, you’ll understand exactly why your Wi-Fi struggles in certain areas and how to eliminate those problems permanently.
Take Control of Your Wi-Fi Performance 💥
A Wi-Fi analyzer app is one of the easiest yet most powerful tools you can use to reclaim your internet performance.
Instead of guessing why your Wi-Fi feels slow, these apps give you clear, actionable insights.
You’ll know exactly where weak spots are and how to fix them.
If you truly want to optimize your home network, boost Wi-Fi speed, and enjoy smoother streaming and gaming, start scanning your home today.
👉 Download a Wi-Fi analyzer app now and discover the hidden weaknesses slowing down your internet.
7. Change Your Wi-Fi Security Settings 🔐
One of the most overlooked ways to boost Wi-Fi speed, fix slow Wi-Fi, and improve home internet performance is by optimizing your Wi-Fi security settings to prevent bandwidth theft and reduce unnecessary network load.
Many people don’t realize that outdated or weak security settings can slow down their Wi-Fi dramatically because unauthorized users or nearby devices may be quietly tapping into your connection.
Even if they’re not streaming or downloading content, just being connected adds pressure to your network and weakens your signal quality.
Why Wi-Fi Security Settings Matter for Speed ⚡
Strong Wi-Fi security is not just about protecting your personal data.
It directly affects the performance of your network.
When your router uses old encryption standards, your connection becomes more vulnerable to intruders who can drain your bandwidth without your knowledge.
Outdated protocols can also limit your router’s maximum speed and efficiency.
Modern routers are designed to work best with the latest security technologies, which unlock faster and more stable connections.
Best Wi-Fi Security Settings to Use in 2025 🔒
To get the fastest and safest signal possible, make sure your router uses up-to-date standards.
Here are the security settings you should enable:
- Use WPA3 Personal (Recommended)
This is the newest and strongest Wi-Fi encryption available.
It keeps your network safe and ensures your router runs at full speed. - If WPA3 is not available, choose WPA2-AES
This is still very secure and supports fast speeds on older routers.
Avoid TKIP as it slows down performance. - Disable WEP completely
WEP is outdated, unsafe, and can severely limit your Wi-Fi bandwidth. - Use a strong password with symbols and numbers
A simple password can be easily cracked, giving unwanted users access to your Wi-Fi.
Updating these settings can instantly remove freeloaders and prevent speed throttling caused by unauthorized devices.
How to Change Your Wi-Fi Security Settings (Simple Steps) 🛠️
Here is a quick and easy guide to help you make the changes:
- Open your browser and type your router’s IP address (usually 192.168.0.1 or 192.168.1.1).
- Log in using your admin username and password.
- Navigate to the Wireless Settings or Security tab.
- Select WPA3 Personal or WPA2-AES from the list of security options.
- Update your Wi-Fi password to something strong and unique.
- Save your changes and restart your router for the new settings to take effect.
These adjustments usually take less than five minutes but can drastically improve performance.
Extra Tips to Strengthen Your Network Security and Speed 🚀
To further protect your connection and ensure smooth browsing:
- Turn off WPS (Wi-Fi Protected Setup)
WPS is vulnerable and can allow unauthorized access to your network. - Rename your SSID
Avoid using your name or home address.
A simple generic name increases privacy. - Hide your SSID (optional)
This prevents random devices from trying to connect, but keep in mind you’ll need to add new devices manually. - Check your connected devices regularly
If you see unfamiliar devices, this may indicate someone is using your Wi-Fi without permission.
These small steps help secure your network while maximizing overall performance.
How Security Settings Help Boost Wi-Fi Performance 📶
Once you tighten your security, you prevent bandwidth leeching that slows down your connection.
Every device connected—whether a neighbor’s smartphone or a smart TV—consumes part of your available speed.
Removing unauthorized access instantly gives you more bandwidth and reduces network congestion.
Modern encryption standards like WPA3 and WPA2-AES also allow routers to operate at higher speeds with better stability and reduced packet loss.
This translates into smoother streaming, faster downloads, and stronger connections in every room.
Final Thoughts and Action Step 💥
Changing your Wi-Fi security settings is a fast, powerful, and free way to boost your internet performance.
It strengthens your privacy while unlocking extra speed that you may not even know you were losing.
👉 Update your Wi-Fi security settings today to protect your network and experience faster, smoother internet instantly.
8. Clear Your DNS Cache & Switch to Faster DNS Servers 🌐
If you want to boost Wi-Fi speed, fix slow Wi-Fi, and improve home internet performance without buying new hardware, one of the most overlooked techniques is clearing your DNS cache and switching to a faster DNS server.
Many people don’t realize that slow DNS resolution—the process your device uses to translate website names into IP addresses—can make even a high-speed internet connection feel sluggish.
By optimizing this, you can reduce page load times, make streaming smoother, and improve overall responsiveness of your devices.
What DNS Is and Why It Matters ⚡
DNS stands for Domain Name System, and it’s essentially the “phonebook” of the internet.
Every time you type a URL or open an app, your device queries a DNS server to find the corresponding IP address.
If your DNS server is slow, overloaded, or unreliable, your connection feels laggy—even if your Wi-Fi speed is technically fast.
This can cause:
- ⚠️ Slow website loading
- ⚠️ Delayed app connections
- ⚠️ Streaming buffering issues
- ⚠️ Longer gaming latency
Switching to a faster DNS server or clearing your DNS cache can make a noticeable difference in speed and responsiveness.
How to Clear Your DNS Cache 🧹
Clearing your DNS cache forces your device to discard outdated entries and fetch fresh IP addresses, reducing delays.
Windows:
- Press Windows + R and type cmd.
- Open Command Prompt and type ipconfig /flushdns
- Press Enter. You’ll see a confirmation that the cache has been cleared.
Mac:
- Open Terminal.
- Type sudo killall -HUP mDNSResponder
- Enter your password and press Enter.
iPhone / iPad:
- Toggle Airplane Mode ON and OFF.
- Or restart your device to clear DNS cache.
Android:
- Toggle Airplane Mode ON and OFF.
- Or go to Wi-Fi settings → Forget network → Reconnect.
Switch to Faster DNS Servers for Better Speeds 🚀
Once your DNS cache is cleared, switching to a faster, more reliable DNS server can further improve your home internet performance.
Some of the fastest, most widely used DNS options include:
- Google DNS: 8.8.8.8 | 8.8.4.4
- Cloudflare DNS: 1.1.1.1 | 1.0.0.1
- OpenDNS: 208.67.222.222 | 208.67.220.220
How to Change DNS on Your Device
Windows:
- Go to Control Panel → Network and Internet → Network Connections
- Right-click your connection → Properties → Internet Protocol Version 4 (TCP/IPv4)
- Select “Use the following DNS server addresses” and enter the new DNS.
- Click OK and restart connection.
Mac:
- Go to System Preferences → Network → Advanced → DNS
- Click + to add a new DNS server.
- Drag the new DNS to the top of the list.
- Apply changes.
iPhone / iPad:
- Settings → Wi-Fi → Tap your network → Configure DNS → Manual
- Add your preferred DNS addresses
Android:
- Settings → Network & Internet → Wi-Fi → Tap your network → Advanced → IP settings → Static
- Add preferred DNS addresses
Benefits of Clearing DNS & Using Faster Servers
Once you implement these changes, you’ll notice:
- ✔ Faster website loading times
- ✔ Smoother video streaming
- ✔ Improved gaming latency
- ✔ More stable connections for apps and smart devices
- ✔ Overall snappier internet experience
This is one of the simplest yet most effective tweaks to fix slow Wi-Fi without upgrading your router or spending extra money.
Pro Tips to Maximize Results 💡
- Combine DNS changes with proper router placement and fewer connected devices.
- Regularly clear your DNS cache every few weeks for optimal performance.
- Consider using Cloudflare DNS for privacy-focused users, or Google DNS for global reliability.
- Test DNS speed using free tools like DNSPerf to find the fastest option for your location.
Optimizing your DNS is like giving your Wi-Fi a turbo boost without spending a dime.
By clearing your DNS cache and switching to faster servers, you can unlock faster load times, smoother streaming, and better gaming performance instantly.
👉 Clear your DNS cache and switch to a high-speed DNS server today to experience a noticeable boost in your home internet performance!
9. Give Priority to Important Devices (QoS Settings) ⚡
If you want to boost Wi-Fi speed, fix slow Wi-Fi, and improve home internet performance, one of the most effective strategies is to use Quality of Service (QoS) settings to prioritize devices and applications that matter most.
Many people don’t realize that routers treat all devices equally by default.
This means your streaming, gaming, or work laptop may compete for bandwidth with background devices like smart bulbs, downloads, or smartphones.
QoS allows you to take control of your network and ensure critical devices get the fastest, most reliable connection.
What Is QoS and Why It Matters? 🧐
QoS, or Quality of Service, is a router feature that manages bandwidth allocation.
It tells your router which devices or applications should get priority over others.
For example:
- Prioritizing your gaming console reduces lag during online matches.
- Giving your laptop priority improves video calls and remote work stability.
- Prioritizing streaming devices ensures 4K or HD video runs smoothly without buffering.
Without QoS, your network treats all traffic equally, which can result in slow Wi-Fi for the devices you care about most.
How to Identify Which Devices Need Priority ✅
Start by identifying the devices that require the fastest connection:
- Laptops used for work or online classes
- Smartphones for video calls or streaming
- Gaming consoles
- Smart TVs or media boxes for high-definition content
Next, identify devices that can tolerate slower speeds:
- Smart bulbs, smart plugs, or IoT sensors
- Background downloads or updates on tablets
- Guest devices
By prioritizing high-value devices, you ensure home internet runs efficiently during peak usage times.
How to Set Up QoS on Your Router 🛠️
Setting up QoS is simple and can be done via your router’s admin panel.
- Log in to your router using your browser (common IPs: 192.168.0.1, 192.168.1.1).
- Navigate to the QoS, Traffic Management, or Advanced Settings tab.
- Enable QoS if it’s not already activated.
- Select priority rules:
- By device (MAC address)
- By application (gaming, streaming, VoIP)
- By Ethernet vs. Wi-Fi
- By device (MAC address)
- Assign High Priority to devices you want to perform best.
- Assign Low Priority to background devices or less critical devices.
- Save changes and restart the router if necessary.
Some modern routers even offer automatic QoS that detects high-demand devices and prioritizes them in real-time.
Tips to Maximize QoS Benefits ⚡
- Combine QoS with 5GHz connections for faster devices.
- Avoid over-prioritizing too many devices; only the most important should get high priority.
- Check for firmware updates, as QoS features may improve performance after updates.
- Reassess priorities as your household usage changes—QoS settings are not permanent.
Benefits of Using QoS for Home Internet 🌟
Once QoS is properly configured, you’ll notice:
- Reduced lag during online gaming
- Stable video calls without freezes or drops
- Smooth 4K streaming even with multiple devices connected
- Faster response for work-related tasks
- Overall improved user experience across your home network
QoS gives you control over your Wi-Fi, making slow or congested networks feel faster and more reliable.
🔥 Take control of your home network today!
Activating QoS ensures your most important devices get priority bandwidth and experience lightning-fast Wi-Fi even when multiple devices are online.
👉 Set up QoS now and give your devices the speed they deserve!
10. Limit Bandwidth-Hungry Apps and Background Processes ⚡
One of the most effective ways to boost Wi-Fi speed, fix slow Wi-Fi, and improve home internet performance is to identify and limit apps and background processes that consume excessive bandwidth.
Even if your router and connection are top-notch, hidden apps can quietly eat up your internet speed, causing lag, buffering, and slow downloads for the devices that really matter.
By controlling these apps, you can reclaim bandwidth and ensure smoother performance for work, streaming, and gaming.
Why Background Apps Slow Down Wi-Fi 🧐
Many modern devices run apps and services automatically in the background.
These processes may include:
- Automatic cloud backups (Google Drive, iCloud, OneDrive)
- Software updates and app downloads
- Streaming apps pre-loading content
- Peer-to-peer apps or torrent clients
- Smart home device communications
Even when you’re not actively using these apps, they can consume large chunks of bandwidth, leaving less available for other devices and slowing down your network for everyone in the household.
How to Identify Bandwidth-Hungry Apps 🛠️
Start by figuring out which apps are hogging your internet:
On Windows:
- Press Ctrl + Shift + Esc to open Task Manager.
- Go to the Performance tab → Network to see real-time usage.
- Look for apps showing high network activity.
On Mac:
- Open Activity Monitor → Network tab.
- Identify apps with high data usage.
On Smartphones:
- iOS: Settings → Cellular → Check apps using mobile data.
- Android: Settings → Network & Internet → Data Usage → Mobile/Wi-Fi data usage.
This will give you a clear picture of which apps are consuming bandwidth unnecessarily.
How to Limit Bandwidth-Hungry Apps 🔒
Once identified, you can limit these apps to free up your Wi-Fi:
- Pause or schedule automatic updates during non-peak hours.
- Restrict cloud backups to specific times or Wi-Fi only.
- Close unused apps and background processes on your PC or smartphone.
- Disable auto-syncing features for apps that don’t need real-time updates.
- Use built-in bandwidth limits in apps like Steam, Dropbox, or torrent clients.
These small adjustments can dramatically improve home internet performance and reduce frustration during peak usage times.
Pro Tips to Maximize Bandwidth Efficiency 💡
- Prioritize your work, streaming, or gaming apps over background tasks.
- Enable Wi-Fi scheduling for devices that frequently auto-update.
- Use router-based traffic monitoring (if supported) to block or limit high-usage apps.
- Educate family members about limiting video streaming, large downloads, or gaming during peak hours.
Combining these strategies with proper router placement, QoS settings, and faster channels ensures every device gets the bandwidth it needs.
Benefits of Limiting Bandwidth-Hungry Apps ✅
After controlling these apps, you’ll notice:
- Faster downloads and uploads
- Reduced video buffering
- Stable online gaming
- Smoother video calls and conference streaming
- Better overall Wi-Fi coverage in your home
This method is free, effective, and works immediately without purchasing new equipment.
🔥 Take control of your Wi-Fi today!
By limiting bandwidth-hungry apps and background processes, you can maximize your network speed and ensure that important devices always get the fastest connection possible.
👉 Identify and limit background apps now to unlock faster, more reliable home internet instantly!
11. Use an Ethernet Cable for Devices That Need High Speed ⚡
If you want to boost Wi-Fi speed, fix slow Wi-Fi, and improve home internet performance, one of the simplest and most effective solutions is to connect devices directly to your router using an Ethernet cable.
While Wi-Fi is convenient, it is inherently slower and more prone to interference from walls, other devices, and neighboring networks.
Ethernet connections provide a stable, high-speed, low-latency connection that Wi-Fi often cannot match, making it perfect for critical devices like gaming consoles, PCs, or smart TVs.
Why Ethernet Beats Wi-Fi for Speed and Stability ⚡
Ethernet offers several advantages over wireless connections:
- Faster Speeds: Wired connections often reach your ISP’s maximum speed, whereas Wi-Fi may be limited by distance or interference.
- Lower Latency: Ideal for gaming, video calls, or stock trading where milliseconds matter.
- Stable Connection: No drops or fluctuations caused by walls, microwaves, or other Wi-Fi networks.
- Better Performance with Multiple Devices: Ethernet doesn’t share bandwidth with nearby devices like Wi-Fi does.
In short, if you want a reliable, lightning-fast connection, Ethernet is unbeatable.
Which Devices Benefit Most from Ethernet? ✅
Prioritize Ethernet connections for devices that require high speed and low latency:
- Gaming consoles (PlayStation, Xbox, Nintendo Switch)
- Desktop PCs or laptops used for work or streaming
- Smart TVs or media streaming boxes (4K/8K streaming)
- Network-attached storage (NAS) devices for large file transfers
- Video conferencing setups
Connecting these devices via Ethernet ensures your most important tasks run smoothly without Wi-Fi interruptions.
How to Set Up an Ethernet Connection 🛠️
Setting up an Ethernet connection is straightforward:
- Check your device for an Ethernet port (RJ-45).
- Use a Cat5e, Cat6, or higher cable for optimal speeds.
- Plug one end into your device and the other end into an available LAN port on your router or switch.
- Verify the connection on your device’s network settings—most modern devices detect Ethernet automatically.
- Optional: Disable Wi-Fi on that device to ensure it uses only the wired connection for maximum stability.
Using quality cables ensures full-speed performance and avoids signal degradation over long distances.
Pro Tips to Maximize Ethernet Performance 💡
- Use Cat6 or Cat6a cables for speeds up to 10Gbps.
- Keep cables away from power lines to reduce interference.
- For long distances, consider Ethernet switches to extend connections without losing speed.
- Combine Ethernet for high-demand devices with optimized Wi-Fi for mobile devices to get the best overall home network.
- For hidden cabling, run Ethernet along walls, baseboards, or through walls with proper cable management.
Benefits of Using Ethernet for Critical Devices ✅
Once connected via Ethernet, you’ll notice:
- Ultra-stable internet with no drops
- Maximum speeds from your ISP
- Smooth online gaming and live streaming
- Reduced buffering on video calls or media streaming
- Reliable performance even when multiple devices are connected to Wi-Fi
Ethernet is the ultimate way to ensure your most important devices always get top-speed internet without compromise.
🔥 Want lightning-fast and reliable internet for your key devices?
Using an Ethernet cable guarantees your gaming, streaming, and work devices perform at their best—without relying solely on Wi-Fi.
👉 Plug in an Ethernet cable today and unlock the full speed of your home internet instantly!
Bonus: Quick Troubleshooting Steps to Fix Slow Wi-Fi 🛠️
Even after applying all the previous tips, sometimes your Wi-Fi may still act slow due to unexpected issues.
These quick troubleshooting steps will help you boost Wi-Fi speed, fix slow Wi-Fi, and improve home internet performance immediately.
They are easy, effective, and don’t require advanced technical knowledge.
1. Restart Your Router and Modem 🔄
Restarting your router clears temporary glitches and refreshes your network connection.
Simply power off your router and modem for 30–60 seconds, then power them back on.
This step often resolves slowdowns caused by network congestion or software errors.
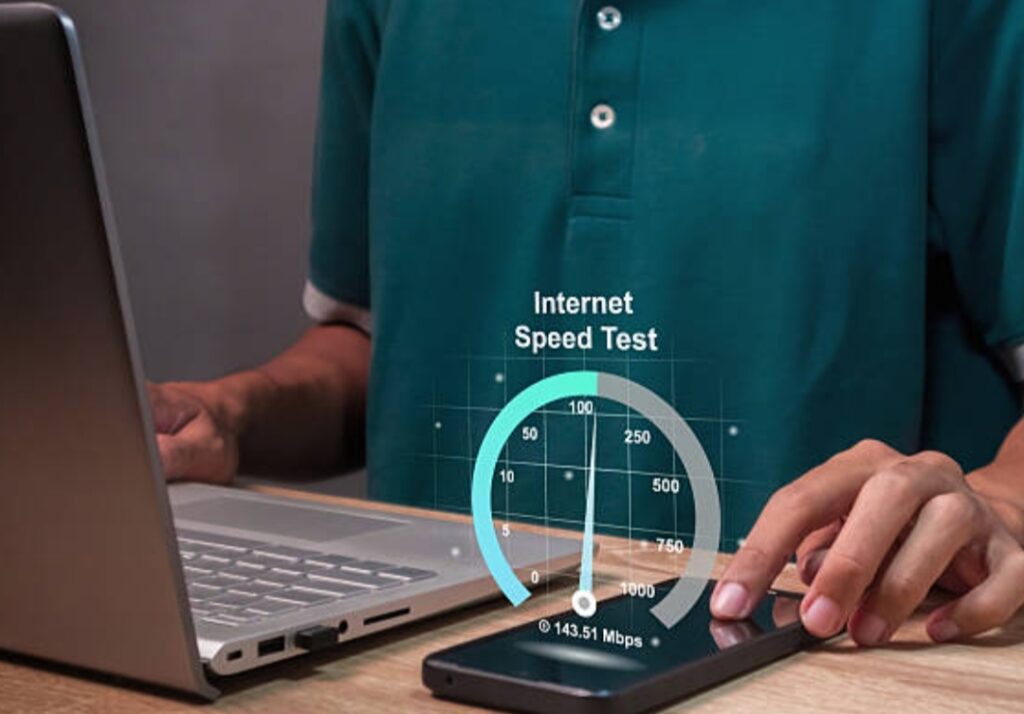
2. Check Your Internet Speed ⚡
Use a speed testing tool like Speedtest.net or Fast.com to see if your connection matches your ISP’s plan.
If speeds are consistently lower than expected, contact your ISP to check for outages or service issues.
Testing at different times of day can also reveal peak-hour slowdowns caused by network congestion.
3. Move Your Device Closer to the Router 📶
Distance and obstacles like walls or floors can drastically reduce Wi-Fi speed.
Move closer to the router or switch to 5GHz or 6GHz bands for better performance.
Even a small repositioning can improve signal strength and reduce buffering or latency.
4. Disconnect Unnecessary Devices ❌
Too many devices connected simultaneously can divide your bandwidth.
Turn off or disconnect devices not currently in use to free up bandwidth for critical tasks.
This simple step often improves speeds for streaming, gaming, or working from home.
5. Update Device Software and Drivers 💻
Outdated software or network drivers can affect your connection quality.
Ensure your operating system, Wi-Fi drivers, and apps are all updated to the latest versions.
Modern updates often include performance improvements and bug fixes that can enhance Wi-Fi reliability.
6. Check for Interference from Other Electronics ⚠️
Microwaves, cordless phones, baby monitors, and Bluetooth devices can interfere with Wi-Fi signals.
Keep your router away from these electronics to reduce congestion and improve speed.
Switching to a less crowded Wi-Fi channel can also mitigate interference.
7. Reset Network Settings (If Necessary) 🔧
If problems persist, consider resetting your device’s network settings to default.
This can resolve persistent connectivity issues caused by misconfigured IPs or DNS settings.
Remember to reconnect to your Wi-Fi afterward and re-enter passwords as needed.
Pro Tip for Fast Troubleshooting 💡
Combine multiple steps for the best results:
- Restart your router
- Disconnect unused devices
- Move closer to the router
- Test speeds before and after each change
Following these steps systematically ensures you can quickly identify and fix the cause of slow Wi-Fi.
🔥 Don’t let slow Wi-Fi ruin your day!
Use these quick troubleshooting steps to regain high-speed, stable internet instantly.
👉 Follow these steps now and enjoy faster, smoother Wi-Fi throughout your home!
When to Consider Upgrading Your Router or Plan 🚀
Even after trying all the tips to boost Wi-Fi speed, fix slow Wi-Fi, and improve home internet, there are times when your equipment or internet plan may simply be the limiting factor.
Understanding when it’s time to upgrade ensures you get consistent high-speed performance without wasting money on temporary fixes.

Signs You Might Need a New Router ⚠️
Your current router may not be capable of handling modern demands if you notice any of these signs:
- Your Wi-Fi struggles to cover your entire home despite optimal placement.
- Multiple devices experience lag or slowdowns during high-demand activities like gaming or streaming.
- Your router does not support 5GHz, 6GHz, or Wi-Fi 6/6E standards.
- Firmware updates are no longer available, leaving your network vulnerable and slower.
- You frequently need to restart the router to restore speed.
If any of these issues persist, it may be time to invest in a new, more capable router that supports modern Wi-Fi technology and higher speeds.
Signs You Might Need a Faster Internet Plan ⚡
Sometimes, the bottleneck isn’t your router—it’s your internet plan. Consider upgrading your plan if:
- Speed tests consistently show results below your subscription level.
- Multiple household members stream 4K/8K video, game online, or work from home simultaneously.
- Your current plan cannot handle simultaneous device usage without buffering or lag.
- You’ve recently added smart home devices that demand more bandwidth.
- Your ISP cannot resolve ongoing speed issues or congestion.
Upgrading your plan ensures your high-speed router is fully utilized and all devices get the bandwidth they need.
Choosing the Right Router for Maximum Performance 🏆
When selecting a new router, look for:
- Dual-band or tri-band support (2.4GHz, 5GHz, and optionally 6GHz)
- Wi-Fi 6 or Wi-Fi 6E compatibility for higher speeds and efficiency
- Quality of Service (QoS) features to prioritize important devices
- Advanced security options like WPA3
- Sufficient LAN ports for wired connections
- Mesh Wi-Fi capability if your home is large or has dead zones
Choosing the right router ensures you maximize your internet speed and maintain stable connectivity throughout your home.
Tips for Upgrading Your Internet Plan 💡
- Compare your current usage with your ISP’s available plans.
- Consider fiber-optic or high-speed cable plans if available in your area.
- Ensure your plan matches your household needs (streaming, gaming, remote work).
- Check if your router is compatible with higher-speed plans to fully benefit from the upgrade.
Upgrading your plan and router together often provides the most significant boost in overall home internet performance.
🔥 Don’t settle for slow or unreliable Wi-Fi!
If you’ve optimized your network and still experience issues, it’s time to consider a new router or higher-speed internet plan.
👉 Upgrade your router or internet plan today to experience lightning-fast, stable Wi-Fi in every corner of your home!
Final Thoughts 💡
Optimizing your home Wi-Fi doesn’t always require buying a new router or upgrading your internet plan.
By following the 11 proven strategies and bonus troubleshooting steps, you can boost Wi-Fi speed, fix slow Wi-Fi, and improve home internet performance immediately.
From repositioning your router, disconnecting unused devices, and updating firmware, to using QoS settings, limiting bandwidth-hungry apps, and even connecting key devices via Ethernet, every tip plays a critical role in maximizing your network speed and stability.
The small changes—like clearing your DNS cache, switching to faster DNS servers, or using a Wi-Fi analyzer app to find weak spots—can produce significant improvements without spending a dime.
Prioritizing important devices, securing your Wi-Fi, and regularly maintaining your router ensure a smoother online experience for everyone in your household.
However, if you’ve implemented all these strategies and still notice slowdowns or connectivity issues, it may be time to consider upgrading your router or internet plan.
A modern router with Wi-Fi 6 or 6E support, combined with a high-speed plan, can dramatically enhance performance, especially in larger homes or households with multiple high-demand devices.
✅ Key Takeaways:
- Proper router placement and channel selection make a big difference.
- Disconnecting unused devices and limiting background apps frees up bandwidth.
- Firmware updates, security optimization, and QoS settings improve stability and speed.
- Ethernet connections provide unmatched performance for critical devices.
- Regular maintenance and monitoring help you stay ahead of Wi-Fi problems.
🔥 Don’t settle for slow or inconsistent Wi-Fi anymore!
Implement these tips today to unlock the full potential of your home internet and enjoy lightning-fast browsing, streaming, gaming, and remote work.
👉 Start applying these Wi-Fi optimization strategies now and experience faster, more reliable internet in every corner of your home!
You might also like :